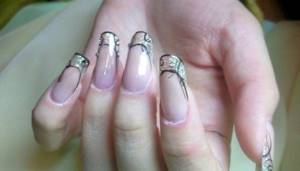
Every girl wants to have neat, well-groomed nails. And besides, hands are the calling card of any person. During an important meeting, you place your hands on the table, and first of all, everyone pays attention to your hands. How arched gel nail extensions will help a girl transform her hands, read further in this article.
Arched nail modeling done by specialists is much more resistant to chips and cracks. And you can make absolutely any design on your nails after that. Your nails will look soft and cute. If you are not used to walking with long nails, the master will extend your nails as small as possible so that their length does not bother you. At the same time, changes will immediately be noticeable.
About all the advantages of arched gel nail extensions
Girls who have previously done arched extensions have noticed a number of advantages of this procedure. Although the cost was significantly different from other types of extensions, the result was worth it.
The following advantages of such extension can be highlighted:
- Resistant to chips and cracks;
- Correction of your own nail growth;
- Resistance to different types of stress on nails;
- Formation of an ideal C-bend;
- Hard edges of nails.
This type of extension makes nails stronger
Arched extensions give a completely different look to the nail. She models it, hiding minor flaws. The correct shape of the arch (this is where the name of this extension comes from) makes the edges of the nail more rigid, and therefore more resistant to chips and breaks. Nails extended in this way are much stronger, and most importantly, they stay in good shape for a much longer period of time compared to other types of extensions. No procedure gives such an effect.

There are also several disadvantages
At first glance, the ideal shape is easy to achieve. But only a master knows all the complexities of modeling. Arched extension, unfortunately, is not just a name; it is a labor-intensive process involving many tools and materials. Plus, the execution procedure is quite lengthy. On average it takes 2 hours per hand.
Apart from the patience that the client must have, the pricing policy is also different. On average, extensions cannot be called an expensive service, but the arched type destroys all existing assumptions. The cost is indeed higher, but in fact the same materials are used.
About all the disadvantages of arched gel nail extensions
With all the advantages of arched nail extensions with gel, there are also quite significant disadvantages. Namely, some contraindications and tips that are best to follow to get the perfect manicure.
If you have already decided on such extensions, you know exactly how long you want your nails, their shade, and so on, you must approach the choice of a specialist very responsibly. At this stage, you can’t rush and trust just anyone. It is also impossible to entrust such a task to students or novice specialists. To get the ideal shape of extended nails, it is better to contact a master who has been in this business for a long time and knows all its pros and cons, subtleties of work and nuances. Only with such a specialist will you be confident of a successful procedure without any damage and avoid possible incorrect extension techniques.
Arched manicure has disadvantages
Regarding contraindications, such extensions are not recommended for pregnant women, as well as people undergoing chemotherapy. This list also includes those who undergo procedures such as hormonal ones. While taking any pills other than probiotics, it is not recommended to do the gel arch extension procedure. Also, nail fungus or any other similar disease is an obstacle to this type of extension.
Video tutorial on gel extensions:
https://youtube.com/watch?v=videoseries
Of course, you may not succeed the first time, but gradually, by getting better at it, you can become an excellent nail extension artist and make your wildest nail design decisions come true, while making money!
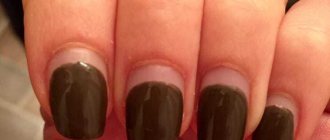
Creating a nail shape using gel forms does not always work out the way you want. Especially for beginners. Don't worry, everything can be fixed with a file!
A file can be used to trim and remove unevenness, giving the nail the desired look.
It is best to start with short square nails, since this shape is easier to do than the rest. As a beginner, you first need to get your hand used to applying the gel and filing it.
To ensure that the gel sticks well to the nail, file off the top layer of the nail plate well and degrease thoroughly!
Also carefully remove the sticky layer from the gel before applying the next layer.
For a French manicure, it is better to use a stencil, since not everyone can do a French manicure evenly right away.
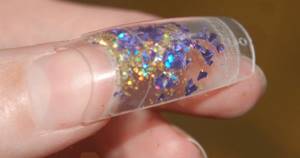
After you get the hang of creating the shape, you can start designing your nails. For a beginner, it is better to apply all kinds of patterns with a special tool, rather than with a thin brush.
You can first practice on an ordinary tip so that you can apply a neat design to your nail.
In order to build up well, it will take a little time and skill. Practice your skills, watch the video, learn and don’t be afraid!
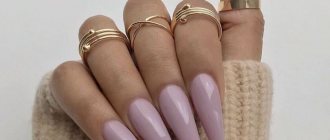
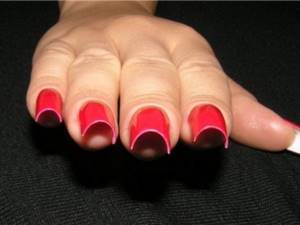
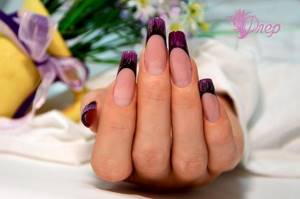
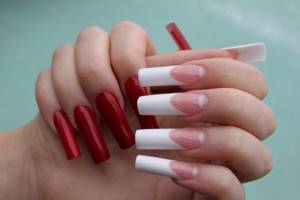
Shapes of extended nails in the photo:
Video tutorials on nail extensions for beginners:
https://youtube.com/watch?v=HYH0EdzTbs8
https://youtube.com/watch?v=hxrgwAM3s38
About the types of arched nail modeling with gel
The price of arched gel nail extensions is quite high, but due to its advantages, most girls choose it. For each girl, the type of arch extension is different, individual. For some it is more convenient to build up with tips, for others with plates.
There are three types of such extension:
- Arched nail extension with gel on a plate;
- Arched nail extensions with gel on tips;
- Durable gel nail extensions on forms.
Choose your type of arched manicure
When you visit the salon, specialists will offer you absolutely all services related to this extension, and will also offer several techniques for such extension. At your request, the length of the nail will also change. After all, many girls are uncomfortable walking with very long nails. And after such extensions, you will be able to admire your flawless manicure for a long time.
Advantages
Arched extension technology is used most often, since only one allows you to achieve the most natural result after attaching additional length of the nail.
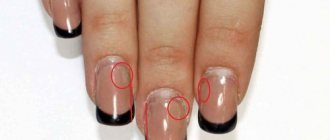
The essence of the technology is that after performing the basic extension, the cut of the plate will be in the shape of an arch, and not flat, which makes the extended nails natural and neat. This corrects the main problem that all women used to face when they wanted to build up the plate, because it usually turned out sloppy.
Arched modeling is almost always used now, because it has many positive aspects:
- The ability to correct the natural deformation of the nail bed by covering it with an artificial, even coating.
- The bend always turns out smooth and perfect.
- The lateral edges of the nails are strong, which prevents the occurrence of detachments and chips on the sides.
- The manicure turns out dense, which is why it does not come off prematurely and remains in its original form until subsequent correction.
- Implementing an additional protective function for a girl’s fingers by preventing exposure to aggressive external factors.
In addition, the visual state of the manicure turns out to be more natural, feminine, and elegant, because due to the shape of the arch, the plate lengthens and becomes narrow.
It is most convenient to use arched modeling when making French or complex designs, the coating for which should be even and smooth.
However, keep in mind that you can get an effective and accurate result only by visiting a competent specialist. Despite the prevalence of the technique, not all specialists are able to create an even arch, which spoils the condition of the final manicure.
How to do arched nail extensions with gel
Only a specialist can know how to properly grow nails and create that perfect artificial plate. That is why it is better to contact only specialists. Nails after arched extensions do not complicate your usual life in any way. If with other extension techniques it is impossible to do anything around the house, then the arched extension procedure does not affect performance in any way. This is one of the most compelling reasons why girls choose this procedure.
Only a specialist will do everything right
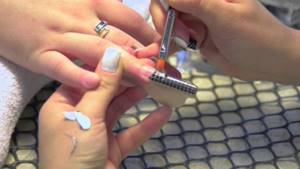
So how does the build-up happen?
- The process begins by polishing the edge of the nail. Using a nail file, the natural shine is removed;
- Fatty shine is removed from the nail. Wait for it to dry;
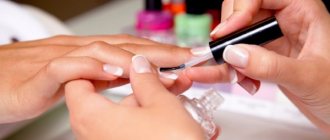
- Primer is applied;
- Gel intended for manicure is applied to the nails at a distance of about one millimeter from the cuticle;
- At this stage, the masters are especially attentive. If you allow the product to go beyond the boundaries of the nail, the nail may be rejected and everything will have to start again;
- The shape of the plate is cut out. This is where the length and experience of a specialist comes into play. If the master extends nails in this way, then he cuts out the ideal and geometrically correct shape of the plate;
- The work is almost complete. All that remains is to attach the plate to the nail as accurately as possible, without allowing any empty spaces, gaps, cracks, and so on. If gel gets into such gaps, the entire manicure can be ruined.
Progress of build-up
Not all masters work using this technology. Most of them use older techniques of extensions using tips or forms. They can be used to create new wafers easier and faster, but this often comes at the expense of their quality. The video tutorial below will tell you how arched nail modeling is performed. This technology will be described step by step below.
- The free edge is filed. One and a half or two millimeters of the own nail length is left;
- The nail is polished until the natural shine disappears;
- The plates are degreased. This can be done using acetone-containing nail polish remover or alcohol;
- A primer is applied to nails that are dry from degreaser. After this, you also need to wait for the liquid to dry completely;
- The thinnest first layer of gel is applied and dried under a UV lamp for the time specified in the instructions. Typically this period is about 180 seconds. It is very important that when applying the material does not get on the cuticle, skin, etc., since in this case it is from these places that the gel will begin to peel off. In addition, allergy sufferers are more likely to experience a reaction;
- The shape is cut so that it fits perfectly with the nail;
- The arch of the shape should exactly follow the line of the smile. The form should fit as tightly as possible to the nail, otherwise the gel will clog into the gaps. This will upset the balance and make the nail less resistant to breaking and cracking;
- A thin gel base is applied to the stressed area of the nail and dried in a lamp. After which the sticky dispersion layer is removed;
- Arched modeling, as in the photo, involves increasing the resistance of nails to breaking with the help of camouflage gel. They lay out the plate in such a way that the largest amount of gel falls on the stress zone of the nail. Droplets of material spread from this zone to the edges;
- The gel is dried in a lamp for 8 – 10 minutes;
- The dispersion residue is removed. The smile line is filed down and the base material is laid out on the free edge in the thinnest possible layer. It polymerizes in a lamp for 60 seconds. The sticky residue is also removed from it;
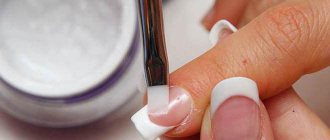
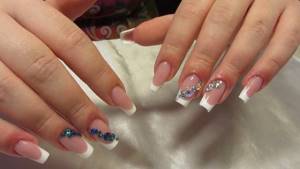
- On the free edge, covered with the base, a French coat is formed with white gel. If the plate is being painted, then this step can be skipped;
- French manicure, if performed, polymerizes for two minutes under a lamp;
- Forms are deleted;
- The plates are fixed with a special vice, with the help of which the necessary silhouette of the nail is formed;
- Drying under a lamp for 4 – 6 minutes;
- Sawing and giving the plate proper and suitable outlines;
- Applying the finishing layer of modeling material;
- Drying in a UV lamp for 100 - 120 seconds.
Although such nails are considered very strong, the first few days after extensions should not be subjected to heavy loads.
It is better to reduce the amount of work at the computer (in particular, typing, which puts a lot of pressure on the nails), and it is also better to fasten zippers and buttons carefully. To better preserve the gel coating and prevent it from becoming cloudy and dull, it is better to do all housework with rubber gloves, avoiding getting chemicals from household chemicals on your nails. [yandex3] [google3]
Who is prohibited from arched nail modeling?
Arched gel nail extensions are prohibited for pregnant women. Dust from cutting a nail can irritate the mucous membrane and cause allergies. Also at this time, nails may be brittle, which is associated with calcium deficiency, and therefore extensions can only be harmful.
Not everyone can do this type of extension.
Also, such extensions should not be done by people who have various infectious diseases on the nails, for example fungus. Taking antibiotics, serious damage to the cuticle or the entire nail, as well as the presence of benign or malignant tumors are an obstacle to such arch extensions. This procedure cannot be done while undergoing chemotherapy.
Sawdust
As can be seen from the video showing nail modeling with gel, filing the finished nail is a very important procedure with this technology. Its correct implementation can not only reduce work time, but also have a positive effect on the result of the extension. It is very important to do it correctly.
It is best to carry out sawing in three stages. The first stage is filing along the outline of the free edge. At this stage, the plates are given their future shape. Thus, they should be the same and of equal length.
At the next stage, filing and shaping of the nail arch occurs in three directions. The first area for sawdust is the area near the lunula and preungual fold. Then we file the arch of the nail bed, making movements with the file from the edges of the plate to the center. In this case, you need to move from top to bottom. Then it is important to file the end of the nail.
At the third stage, you file the lower walls of the nail along the sides. Monitor the parallelism of the sides and symmetry of the nail. Pay attention to the height of the arch.
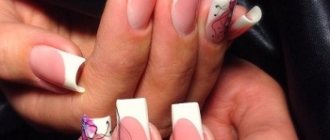
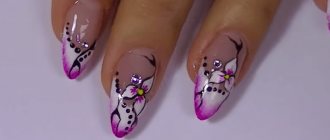
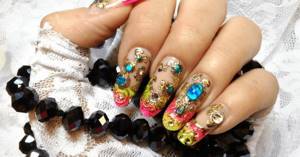
In conclusion, we say that arched nails allow you to create almost any design, as seen in the photo. Due to the fact that they look natural, any design will look appropriate and not vulgar. There is a wide variety of free edge shapes that owners of arched nails can afford.
About nail care after arch modeling: important rules
Immediately after the procedure, you should try to protect your nails from sunlight and excessive heat that are harmful to them in this case. The cuticle must be moisturized in order to avoid drying out. If the cuticle is dry, it can be immediately noticeable. It is also necessary to regularly use a nail file to treat your nails. Various chemicals can destroy the nail plate, especially those containing acetone. Therefore, you need to avoid getting them on your nails too.
Follow some small rules when doing this extension.
In the first days, it is recommended to avoid performing any actions that could put stress on the nails. In the following days, you can merge into your normal daily routine.
Contraindications
The method is used in many salons, but almost no one thinks about health restrictions for carrying out the technique. Failure to comply with contraindications can lead to rapid spontaneous peeling of the work or damage to the natural plate when detachments, chips or other defects appear on it.
The restrictions are relative, so the girl herself must take them into account:
- Pregnancy;
- Hormonal disbalance;
- Long-term use of potent medications, antibiotics;
- Fungal infection;
- Conducting chemical therapy;
- Recent finger surgery.
Also keep in mind that the procedure is not performed if the nail is affected. For example, when growing into the side ridges, it is impossible to properly fasten the arched structure, since the risk of severe damage to the fingers and the plate itself increases.
To make the procedure as safe as possible for you, first consult with a specialist. He will examine your nails and tell you whether the technology can be performed.
Necessary accessories
While doing manicures, girls ask themselves the question: does arched nail modeling cause pressure? The question is easy to answer by watching the courses. This is exactly why there are special clamps.
Reusable Arched Nail Forms
To perform extensions at home, you will need to prepare:
- Brushes of various thicknesses.
- Special arched shapes for modeling nails or tips with glue.
- Files with different coatings.
- Manicure scissors and nippers.
- A special stick.
- Clamps.
- Primer.
- Acrylic gel.
- UV lamp.
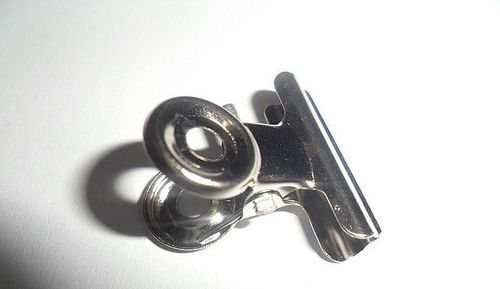
Arch clamp
All accessories must be prepared in advance and conveniently placed on the table.