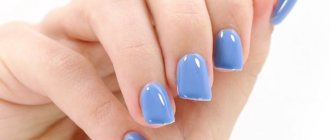
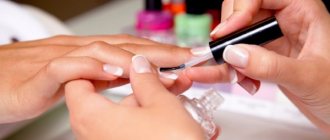
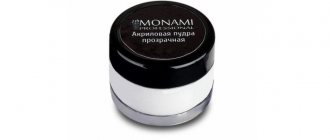
Gel polish has been one of the most popular ways to cover the nail plate for many years. It has a huge number of advantages that attract girls all over the world. But the main disadvantage of this manicure is that over time the gel polish grows out, and the appearance of the nails becomes less attractive. In this case, it is necessary to make a correction and disguise the regrown part. This procedure can be performed both in a beauty salon and at home.
Why is correction needed?
This procedure helps restore the attractive appearance of your manicure and maintain the healthy state of the plate. The required frequency of correction depends on how quickly your fingernails grow. The speed can be affected by various external and internal factors - nutrition, vitamins, time of year, stimulation of blood flow and genetic characteristics. On average, correction needs to be done once every 3-5 weeks.
Before visiting a specialist, you need to understand how quickly your fingernails grow, and, based on this, select a design that will maximize their attractive appearance. During correction, professional craftsmen remove the old coating, which allows the plate to rest, since a fairly long exposure to gel polish can lead to dryness, brittleness and damage. But there are times when it is necessary to mask only a certain part, if it is not possible to completely update the manicure. Experts do not recommend regularly resorting to hiding overgrown nails after gel polish. This can lead to thinning, dryness, damage, brittleness and dullness of the plate, as well as some fungal and infectious diseases. Gel polish does not allow oxygen to circulate, which creates a steam effect, and when the old coating is removed, the necessary air penetrates deep into the cells.
Why is this necessary?
Correction of gel polish is possible not only when the coating has retained its color brightness and shine, but also when you need to correct some details in the design: various chips, peeling and minor damage. If the gel polish is already about 2 weeks old, then the nail grows noticeably, and a gap forms between the coating and the cuticle. It is this part of the plate that needs to be adjusted to make the manicure look like new.
Correction with gel polish: advantages
- fixing a damaged nail;
- removal of overgrown cuticle;
- creating a new nail architecture (or filing);
- significant time savings;
- the ability to grow nails to the desired length;
- protection of the plate from harmful liquids for removing gel polish.
But there is a small nuance here. If you remove gel polish by soaking, you can save a little time (20-30 minutes). But, if you remove the coating with a device, then you do not save anything in the process. Because the time it takes for hardware removal is approximately equal to the minutes it takes to prepare nails and correct them.
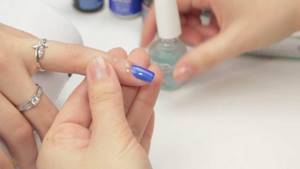
Types of correction
Nail art masters share several types of correction:
- minor (correction of minor nail damage);
- medium (carried out after 2-4 weeks of wear);
- complex (done in case of breakage, peeling and other damage).
Correction methods
As gel polish grows out, an empty space appears at the base of the nail plate that needs to be filled. At this moment, the manicure looks absolutely unattractive and sloppy. Therefore, professional masters identify several methods that will help disguise overgrown nails with gel polish:
- correction of the entire surface;
- a certain area of the plate without removing the old coating;
- use of various means for decoration.
This way you can improve the appearance of your manicure when your nails have grown out. Gel polish can be used both at home and in professional beauty salons. The procedure for applying and correcting the coating is quite simple if you follow all the recommendations and have the necessary equipment available.
Materials needed for manicure
Correction of an artificial nail most often involves restoring the original appearance of the manicure, which allows you to maintain a well-groomed appearance of your hands. This procedure is quite complex and requires not only some skills, but also special tools. Today, correction can be performed using:
- primer. A special liquid that allows you to prepare the surface for further actions and reduces the risk of rapid damage to the result;
- special brush. Necessary for applying various compositions to surfaces;
- products for treating cuticles and nails. At home, you can use orange sticks, files and abrasive blocks;
- varnish For touching up peeling parts and restoring patterns;
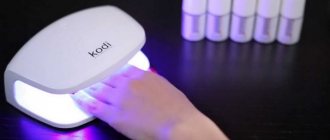
- UV lamps. The varnish used hardens quickly under the influence of ultraviolet rays;
- manicure correction products. A special composition that can be applied around the nail. Allows you to eliminate possible contact of varnish, acrylic and other substances on the cuticle and prevent further peeling of the manicure;
- other materials intended for correction. In case of restoration, other types of tools can be used, for example, nail scissors.
Having collected all the necessary tools, you need to remember about preparing for the process. So, you should not wash your hands or lubricate them with cream two hours before the procedure. In addition, you need to read the detailed step-by-step instructions in advance.
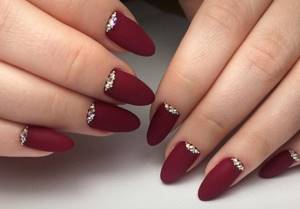
The essence of gel polish
This product is a long-term decorative coating that must be dried in a special ultraviolet lamp. Many girls wonder: what is the difference between gel polish and shellac? In fact, professional manicurists claim that they are the same thing. The company's long-lasting decorative varnish called Shellac became incredibly popular and was one of the first to be released onto the cosmetic market. Therefore, this option for coating the nail plate began to be called shellac. Professionals, answering the question of what is the difference between gel polish and shellac, claim that they are synonyms.
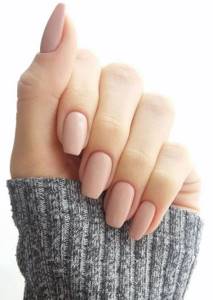
Covering natural nails has become incredibly popular among millions of girls around the world. Today, this option is more popular than plate extension with gel or acrylic. Determining the pros and cons of gel polish helps to facilitate the process of choosing a coating. The positive aspects include:
- safety;
- longevity;
- wide selection of shades;
- speed of complete drying;
- possibility of strengthening the plate;
- durability;
- suitable for any length and shape of nails;
- Quite budget price;
- wide selection of shades;
- possibility of applying any design.
Flaws:
- correction frequency;
- the need to purchase a set of special tools;
- It is not recommended to wear the covering for quite a long time;
- possible occurrence of allergic reactions.
Also, after a few weeks, girls are faced with the fact that the gel polish grows back. Recommendations from professional masters will help you correct this and return your manicure to an attractive appearance.
The optimal solution to many nail problems
Using the gel, you can strengthen the nail, hide all sorts of defects, create the desired length and shape, decorate it with a variety of designs, and much more. After polymerization, the gel has a fairly plastic structure, which allows you to create artificial nails that are as similar as possible to natural ones. However, as the nail continually grows, the material also shifts. To restore your nails to their original beautiful appearance, it is necessary to carry out regular corrections.
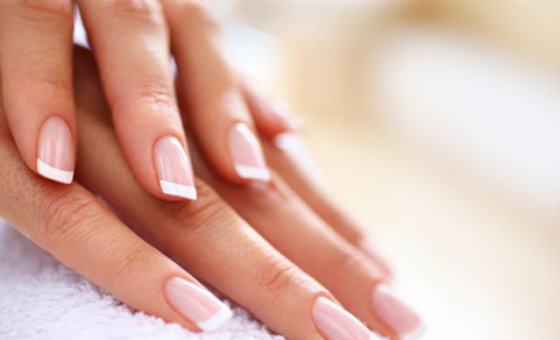
A procedure such as correction of gel nails in a beauty salon is one of the most popular services. Usually, after 3-4 weeks, the nails grow by several millimeters, the architecture of the artificial nail is disrupted, and the highest point, the apex, shifts. All this contributes to fragility. It is also possible for the material to peel off.
Required Tools
Decorative coating of the nail plate can be done both in a beauty salon and at home. To do this, you need to purchase a number of special tools that make this procedure easier. Many girls claim that it is quite easy to do it yourself; the main thing is to follow the advice of professionals on how to hide overgrown nails after gel polish.
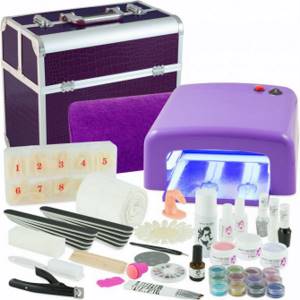
Necessary tools for covering the nail plate:
- UV lamp. There is a huge variety of devices on the market that make the selection process easier. For home use, you should pay attention to small units with good power. It allows you to quickly dry a coating of any consistency and extend the durability of your manicure.
- Degreaser. This product is necessary to prepare the plate for coating. Many professionals, in their recommendations on how often corrections should be done, claim that some masters neglect this stage, and the manicure quickly loses its attractive appearance.
- Lint-free wipes. They are necessary to ensure that the coating is as beautiful and neat as possible. For example, ordinary napkins and cotton pads leave a small amount of lint that is difficult to notice when applying varnish.
- Primer. This product ensures reliable adhesion of the nail to the decorative coating, which prolongs the durability of the manicure.
- Base. It is designed to protect the surface from staining with a layer of color, protection from harmful effects and holds the polish and nail together even more reliably.
- Decorative coating. A wide palette of shades for each brand allows you to quickly select the right number of desired colors. However, for beginners, it is not recommended to buy many different shades, since the varnish has a certain shelf life and is prone to hardening.
- Top coating. This product is created to fix the decorative layer, giving it a glossy shine or matte finish, depending on the desired result. The top also protects against chipping and destruction of the coating.
- Liquid for removing the sticky layer of gel polish. Some products need to be treated with this product after drying. The sticky layer is not suitable for wearing as it collects dirt and dust.
- Disinfectant or medical alcohol to treat instruments and protect against fungal diseases.
- Files, tweezers, orange sticks and cuticle softener. Before applying the decorative coating, it is necessary to do a hygienic manicure.
Using these products, you can do a manicure and restore an attractive look when your nails are broken. Gel polish is quite easy to apply at home if you follow all the recommendations. Correction can be done in two main ways: removing the old coating and masking the regrown part. Professionals recommend sticking to the first option, but if you don’t have free time, you can resort to decorating a certain part.
Step-by-step gel nail correction
Step 1: the hands of the master and client are treated with a disinfectant solution.
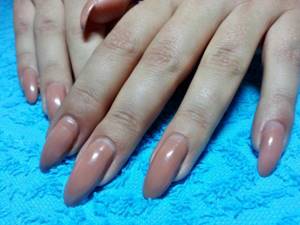
Step 2: If necessary, a European manicure procedure is performed.
Step 3: at the client’s request, the length of the nail is shortened and the free edge is given the desired shape.
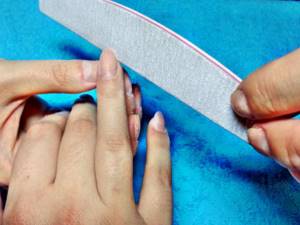
Step 4: those places are processed using a router or file where the material has peeled off. The entire surface of the nail is also smoothed. The highest point is cut down because the symmetry is broken. The gloss is removed from an overgrown nail using a softer file with an abrasiveness of 240 grit. You need to work with files very carefully so as not to saw through or injure the natural nail. After washing down, use a brush to remove all dust well.
Step 5: The nail plate is degreased. The regrown part of the nail is treated with a primer. It is applied in a very thin layer. Too much of it can be one of the reasons for the material to peel off.
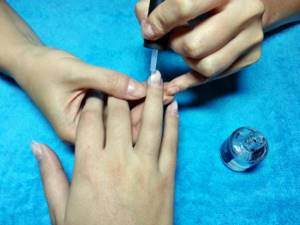
Step 6: if the master uses a 3-phase gel system in his work, then he applies a base layer of gel to the entire surface of the nail. This layer is polymerized in a UV lamp for 2 minutes. Sometimes during the polymerization of the gel, the client may experience discomfort and burning on the surface of the nail plate. In this case, it is recommended to remove your hand from the lamp for a few seconds and place it again as soon as the reaction stops.
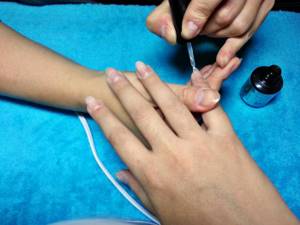
Step 7: Without removing the dispersed layer, apply a small amount of gel to the regrown part of the nail and distribute evenly. Do not allow the gel to come into contact with the cuticle or flow onto the skin of the client’s hands. The distance from the gel to the cuticle should be approximately ½ millimeter. This layer is also polymerized in a UV lamp for 2 minutes.
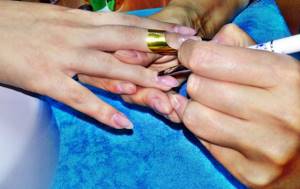
Step 8: The second layer of gel restores the nail architecture and creates the highest point - the apex. This layer is polymerized in a UV lamp for 2 minutes.
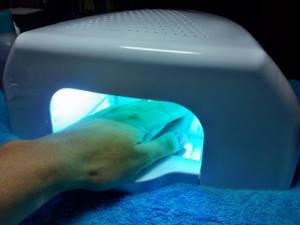
Step 9: Once the new nail is created, it is filed to even out the surface of the gel and give the nail its final shape. The cuticle area is cut very carefully.
Step 10: the entire surface of the nail is covered with finishing gel and polymerized in a UV lamp for 1-3 minutes. If a gel with a dispersed layer is used, then after polymerization it is removed with a special liquid.
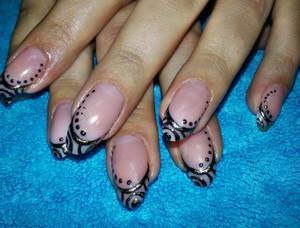
After the new nails are ready, you can offer the client to cover them with decorative varnish or decorate them with a design. Finally, nourishing oil is rubbed into the cuticle.
Instructions for correcting the entire surface
This option is more acceptable, since gel polish prevents the penetration of necessary oxygen, and pathogenic bacteria can form. In beauty salons, specialists perform corrections exclusively by removing the old coating. For an independent procedure, you need to prepare all the tools that are necessary for the procedure when the gel polish has grown back. How to fix a sloppy and unattractive appearance:
- Hands and all materials must be treated with a disinfectant solution or medical alcohol.
- Lint-free wipes are soaked in gel polish remover and applied to the nails for 10-15 minutes, after which the coating easily comes off the surface. Remains can be carefully removed with a nail file or orange stick.
- It is necessary to perform a hygienic manicure to ensure a neat appearance and prepare the plate for applying gel polish. Be sure to polish the nail with a special buff and remove dust.
- Apply primer to the surface and let it dry on its own. After a few minutes, coat your nails with the base product and put it in an ultraviolet lamp for 60 seconds.
- After the base has dried, you can use a decorative coating. You should apply one thin layer and place your fingers in the lamp for a minute, and then apply a second layer, which will help avoid the formation of drips and bubbles. The shade will be uniform.
- The next step is to apply a top coat to fix the decorative one and give it the desired shine. Experts in their recommendations on how to disguise overgrown gel polish say that after using the base, main shade and top, you should place each hand in the lamp for a minute to prolong the durability of the result.
- If there is a sticky layer, it must be removed with a special liquid and a lint-free cloth.
- Apply a small amount of nail oil to moisturize cuticles and create a neater appearance.
Thus, the procedure at home takes about an hour, and the manicure will look beautiful, fresh and neat.
Advantages and disadvantages
It is always recommended for girls to carry out corrections in order to prevent damage to the nail bed, however, masters always prescribe different periods during which they should return to the salon.
Differences in the rules associated with wearing pigment are associated with the individual knowledge and preferences of the master. Keep in mind that all specialists want clients to visit them more often, and the optimal time for correcting the previous gel polish is 3.5-4 weeks.
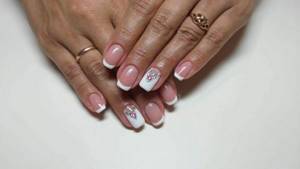
The main advantages of different types of correction:
- Preventing nail damage. If you want the gel polish to grow back spontaneously without visiting a nail technician, keep in mind that you are putting your natural manicure in danger, since over time the risk zone in which the nail can break increases. In addition, some compounds have a negative effect on the plate;
- Possibility of unusual design of nails. If you perform a complete change of coating, you can show your imagination and constantly decorate your nails in an unusual way;
- You won’t have to pay attention to the condition of your natural manicure for a month before your next salon session;
- Saving time when performing partial correction, since the specialist does not waste time removing the design and applying a new one, but only adds a little gel to the cuticle.
The main disadvantages of the complete renewal procedure are the risk of damage to the nail bed when working with the device or overexposing the remover to the nail plate.
Also keep in mind that correcting old gel polish takes a lot of time, especially if the girl is used to getting her nails done. To do this, you need to remove the coating, process the nail, apply a new design, which takes on average up to 3 hours, and since this must be done in the salon, the client has to adapt to the master’s schedule, which is not always convenient.
Disguising the regrown part
Sometimes, when the required amount of time is missing, you can resort to this method of correction. Gel polish grows around the base of the nail, and this spoils the appearance of the manicure. Professional masters give several recommendations; correction can be done in several ways:
- First you need to remove the cuticle using a special product and an orange stick. If the length of your nails differs, you can carefully adjust it.
- When applying the same shade to the regrown part, you need to use a nail file to slightly remove the transition from the old coating to the natural plate. Treat with degreaser and primer. Next, use the base, apply the necessary gel polish and fix it with a top coat. Some artists use a darker shade and cover the entire surface with it. But it is not recommended to use this method at home, since choosing a similar color can be problematic.
- When masking overgrown gel polish, you can use special decorative elements, for example, rhinestones, and cover the required area with them. A primer and base coat are applied to the nail plate, onto which glitter or beads are glued in the desired order. After this, you can leave your nails to dry, and then apply a small amount of top to extend their durability. This option is suitable for those girls who do not have enough free time, and a neat manicure is simply necessary.
Recommendations from experts on how to fix overgrown gel polish show that this procedure can be easily performed at home. It is very important not to violate the coating technology.
Is it possible to refinish the coating with regular varnish?
You can also renew the coating with regular varnish; you can choose the exact color or, conversely, use a different shade to create an original design. It will be easier, cheaper and faster.
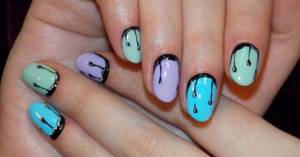
To ensure that the thickness of the layer at the base of the nails matches the rest of the space, apply a base for regular polish, then a flower bed and a top coat. It is necessary to strive to ensure that these products are applied only to the regrown part of the plates. Otherwise, regular varnish will quickly chip.
But when updating your manicure this way, you need to consider two points:
- a product that dries in air will still differ in texture and appearance from gel polish, sometimes this is very noticeable;
- it does not last as long as a polymerizing coating, a maximum of a week.
Advantages and disadvantages of correction
When visiting a beauty salon, this procedure will take a certain amount of time and will cost money, since not every master will agree to a correction without removing the old coating. Therefore, the best option is to disguise an overgrown manicure with gel polish at home if you have the necessary material.
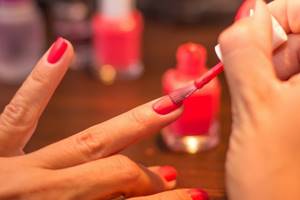
This procedure is quite easy and does not take much time. Allows you to create a beautiful and neat appearance, as well as perform any desired design. Each female representative can easily combine several shades and decorate the regrown part with rhinestones or beads, which will extend the period of wearing the covering.
Description of the procedure
Gel polish is a consumable material that combines the properties of gel and varnish. It is resistant to external influences and does not wear off due to frequent contact with water. It has a dense and uniform consistency; with proper application and “use,” the manicure retains its original appearance for four weeks. Gel polish must be dried under a UV or LED lamp.
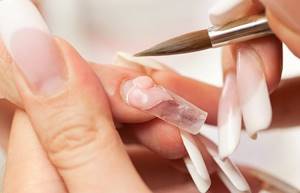
Partial restoration of the coating
Manicure correction with gel polish involves partial or complete restoration of the coating, as well as nail treatment.
It is important! How quickly your nails grow will determine how often you'll need touch-ups. Typically, the first “retouching” is carried out two weeks after application of the coating.
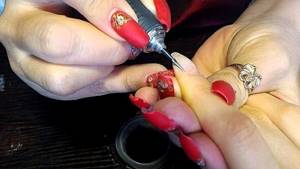
Cuticle treatment before nail correction
Aftercare
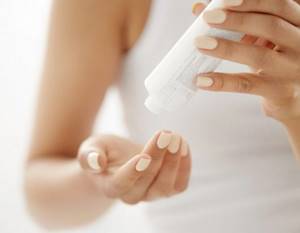
After correcting overgrown gel polish, as well as each time a new coating is applied, you must follow some rules. They will help extend the durability of your manicure and prevent chipping:
- For two days, do not visit the bathhouse, sauna, or take a very hot bath.
- Apply oil or intensely nourishing cream daily not only to the skin around the nail, but also to the cuticle.
- Do not tap your nails on the surface, as this will deform the coating and may cause chips or cracks as the gel polish grows out.
- Protect your hands with rubber gloves from exposure to various chemical compounds.
- Avoid contact with acetone and alcohol on your nails, as they cause dulling and the glossy shine will disappear instantly.
- The coating must not be attempted to be torn off or removed using any tools. This will damage the surface of the nail. It is necessary to use special solutions; they easily remove any coating.
How often should I correct gel polish? Professional craftsmen claim that if these simple rules are followed, the durability of the coating will last for several weeks.
Types of correction
Based on the considered reasons that force the fair sex to visit a manicurist again and again, there are 3 main types of gel nail correction:
- mini-correction - most often it has to be done in the first week after applying the gel coating. The reason for this may be small cracks, chips or scratches that need to be removed and gel polish reapplied in their place;
- simple or medium - this can be a regular planned correction of gel nails, consisting of filing and varnishing the regrown part of the nail plate;
- complex or large - such a correction can be performed at any time, the cause may be serious damage to the coating (chips, large cracks, peeling, as well as nail breakage).
The latter type also includes correction of French gel nails, a more detailed description of the technique for performing which is given below.
Recommendations from experts
To make the correction procedure at home easy and quick, the experts give some tips to beginners. They are related both to the choice of the necessary tools and to the coating procedure:
- the base, top and decorative shades must be of the same brand to extend the durability of the manicure;
- each layer must be applied very thinly to obtain a beautiful and neat result without drips or bubbles;
- To correct errors, you do not need to wait for the gel polish to dry completely; it is better to do this during application using an orange stick;
- in order for the regrown gel polish to be less noticeable, you should give preference to natural light shades;
- Before and after each manicure procedure, all tools must be disinfected.
Gel polish correction at home: what tools are needed
Correction of gel polish at home is performed using:
- manicure files with abrasiveness 100-180 and 240 grit;
- pusher and orange stick;
- scissors or cuticle nippers;
- remover;
- buff and brushes;
- degreaser and primer;
- base, gel polish of the desired shade and top;
- lamps for coating polymerization;
- lint-free wipes.
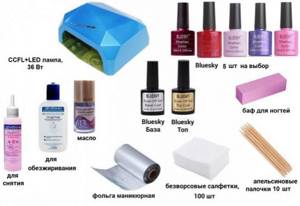
Design options
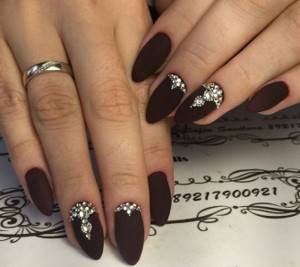
Each girl's nails grow at different rates, and the need for correction arises with different frequencies. But the darker the shade of the varnish, the more noticeable the regrown part of the plate will be. Therefore, there are many different design options to disguise it:
- When coated with decorative varnish, a hole of the natural nail is left at the base, and such a manicure will less often need correction.
- Decoration with decorative elements (rhinestones, sparkles, beads), as well as design with monograms or other lines.
- French manicure is one of the most successful and long-lasting options, since the regrown part is absolutely invisible to the people around you.
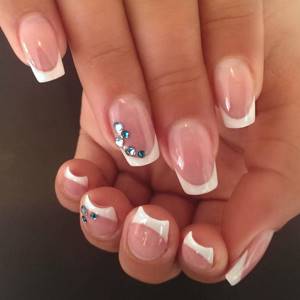
French manicure correction with gel
It should be noted that the correction of the French manicure itself is somewhat different from the usual correction. You can restore the jacket using complex correction and cutting, or you can use the method of removing the free edge. In this case, the free edge is completely cut off with a router or file. It is given a correct and symmetrical smile shape. The filing of the nail surface and general preparation follow the same steps as for a simple correction. Then a special paper form is placed under the natural nail. This will serve as a working surface for creating a new free edge. White gel is laid end to end with the processed edge. After its polymerization, the nail is filed in accordance with the rules, and the free edge is given the desired shape and length. At the end, the French manicure is covered with a topcoat.
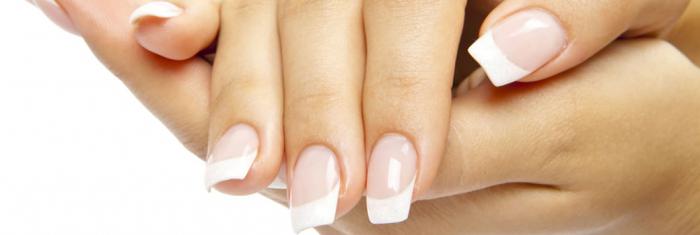
Typically, the time for a complex correction or jacket is 1.5-2 hours, depending on the chosen design.
Price for services in the salon
The cost of a pedicure in a salon ranges from 800-1000 rubles. up to 5000 rub. This depends on many factors:
- establishment level;
- the chosen design, the more complex it is, the higher the price;
- Is it necessary to remove the old coating from another master;
- Is there a need to correct the shape of the nails by extending the corners?
In any case, this is usually a more expensive procedure than a manicure, unless the latter is accompanied by complex actions (increasing length, strengthening with gel, etc.).
A pedicure adds completeness and well-groomedness to your look. And you don’t have to do it to match your manicure. On the contrary, on the legs the gel polish can be brighter and the design more explosive.
Main mistakes
Beginning masters often violate pedicure technology. Because of this, the gel polish quickly begins to peel off. Most often, people forget to treat the nail plate with a buff or apply a degreaser. Another common mistake is using a thick layer of gel polish. It must be distributed evenly. A thick layer does not dry well and often forms uneven surfaces.
Important! Do not shake the bottle of cosmetic product, otherwise the risk of small bubbles will increase. Sometimes beginners do not seal the nail from the end. This threatens the formation of chips. It is also prohibited to remove the sticky layer from the colored coating.
To properly do a pedicure at home, we recommend watching a training video.
Laser correction of ingrown toenails
A separate topic for many girls is the correction of ingrown nails with a laser device. This technique appeared relatively recently, but quickly became the most effective in solving this problem.
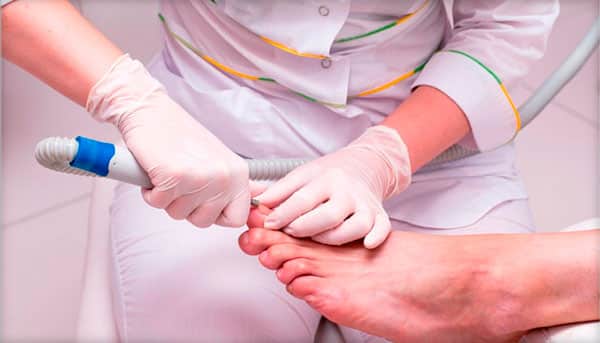
Laser nail correction
An ingrown toenail is an unpleasant and dangerous phenomenon. For example, if it grows into the leg, it can cause gait distortion or injury. For some time, a pedicure on the foot can save you from it, but often the effect lasts for less than 2 weeks.
How to perform laser correction of a toenail step by step:
- The technology includes exclusively medical intervention. You shouldn’t expect them to give you a pedicure or file a plate – this is what beauty salons do. First, you will need to fill out some paperwork and choose a suitable painkiller, then, together with your doctor, decide on the type and strength of the laser beam;
- Pain relief can be carried out with lidocaine subcutaneously or using special creams (ointments);
- The skin ridge is removed first. It is this that is the main cause of improper growth of the plate. The doctor simply burns it out with a carbon laser;
- Under the ridge there is almost always a process, which is the main cause of ingrowth. It is adjusted using tweezers and supported with gauze turunda for fixation;
- The treated area will require special care for several days. If it’s summer outside, it’s important to avoid dust and dirt, and also avoid swimming in open water; if it’s winter or autumn, it’s recommended to wear loose shoes.
The average price of laser correction is $10 per session. To find out exactly how much a procedure costs, you need to consult with a doctor personally, demonstrate the scope of work and choose the optimal treatment option.
French gel nail correction
How to correct gel nails if they have a French design applied on them? This can be done either manually or using hardware. In any case, this procedure is the most labor-intensive and, as a result, the most expensive. This is due to the need to maintain a smile, especially if the natural nail is visible under the gel.
Correction of French gel nails is done in this order:
- Disinfectant is used.
- All defective areas of the gel coating are removed, after which the dust is removed with a brush.
- Nails are degreased and covered with primer.
- Using a transparent modeling gel, the edge of the nail is raised, which must then be dried in a UV lamp and the sticky layer removed.
- The camouflage gel is used to form the area of the nails, which are polymerized again (2 minutes).
- Stress zones are crimped, secured with a clothespin, and the hands are again sent to dry (1 minute).
- After the sticky layer is removed, the edges and surface of the nails are processed with a nail file. Again, the dust is removed with a brush.
- This step is the most important - a smile is formed with white gel, after which polymerization is required for 4 minutes.
- Now the nails are given their final shape, after which unnecessary dust is removed, and the surface is degreased and coated with primer again.
- A fixing agent is applied (from the outside and inside) and polymerization is carried out for two minutes.
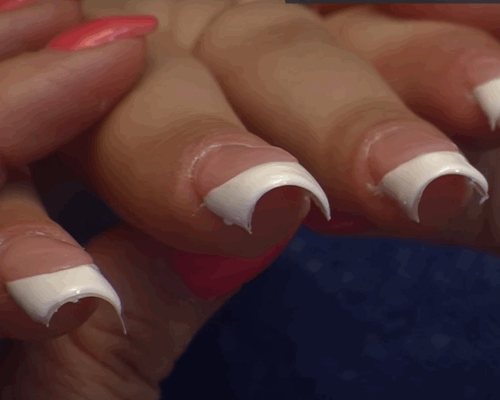
Necessary tools for correction
- abrasive files of varying degrees of hardness;
- buff;
- base coat;
- gel polish;
- top;
- foil;
- gel polish remover;
- pusher;
- orange sticks;
- lint-free wipes;
- UV or Led lamp;
- cuticle oil;
- brush for removing dust.
When is it necessary to correct gel nails?
No matter how professional the master who applied gel polish on nails is, the client very soon has to visit him again. There may be several reasons for this, we will highlight the most important ones:
- The nail has grown. Ideally, correction of gel nails is done once every 3-4 weeks. Of course, the procedure can be postponed for a long time, because the drawing is beautiful or there is no time. But to be honest, these pens are becoming less and less beautiful every day. You can see the untreated nail plate, which at first girls can try to cover with regular polish. In addition, the longer the nail, the more likely it is to become a victim of chips or cracks.
- Physical pressure or blows. Gradually, girls get used to the new state of their nails and stop being careful with them. Sometimes it happens that the hand touches a hard object, or even worse, the client can get her finger pinched by the door. In any of these cases, the appearance of the nails deteriorates and correction of gel nails is necessary.
- Cracks. Inadequate quality of the applied gel polish or its incorrect application sometimes lead to the appearance of small or large cracks. The situation can also be corrected by correction, which becomes more complicated only if your own nail is also cracked.
- The coating is peeling off. The reasons may be the same as when cracks appear, but if this is not the first time, it is worth understanding the problem. Peeling manifests itself in the form of lifting of the coating on the sides and can reach one or one and a half millimeters.
Sometimes the problem of peeling occurs after treating nails with a worn-out file, which does not fully perform its function.
