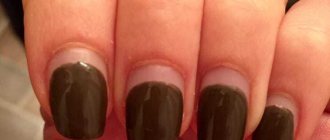
Every woman dreams of having long, strong nails with an artful design on her fingers? However, the reality is that only every fifth woman can boast of naturally strong nails. The rest are content with “short” ones, and even this minimalistic size, given the rhythm of life of a modern woman, is extremely difficult to maintain. Those same fashionistas who have in their “combat arsenal” long and strong nails, like stilettos, cannot always boast of their ideal shape.
Photo from the site: womansecrets.club
Fortunately, the nail industry does not stand still. For decades now, manicurists have been using the procedure of gel nail extensions on forms, which allows you to create nails of any length and shape, no different from real ones, except... they are stronger. The technique and sequence of gel nail extensions on forms, as well as the essence of the procedure itself - all this is under the spotlight of the “Ideal Manicure”.
Technique for gel nail extensions on forms
First, let's figure out what forms for nail extensions are. As you know, there are two options for nail extensions:
- On forms
- On tips
Tips are ready-made plastic blanks for future nail tips. They are fixed with an adhesive base and modeled using gel.
Photo from the site: nailart-sho.ru
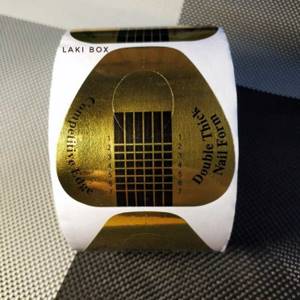
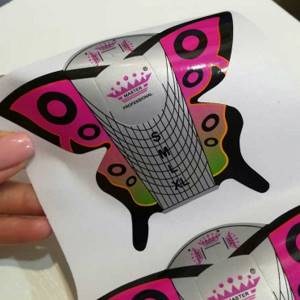
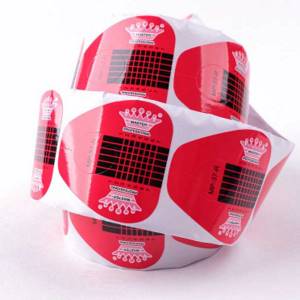
Forms for creating nails are a kind of substrate with a small window for the nail plate. During the work, a modeling gel is applied to the substrate and natural keratin, which after polymerization will represent an artificial free edge of the nail. For the convenience of forming this very free edge, the forms have a drawing in the form of graph paper, which allows you to calculate the approximate width and length of the nail being formed. The very basis - the form - is removed after the procedure is completed. Therefore, nails created on the basis of forms look thinner than nails formed on tips.
Photo from the site: onlinepeek.ru
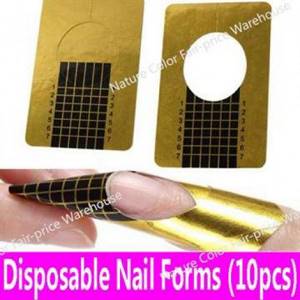
There are two types of forms:
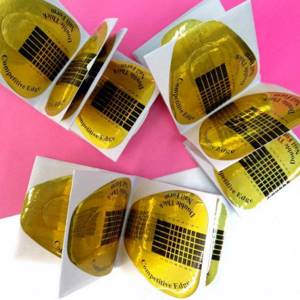
- Disposable, they are also called soft. They are made from paper or flexible plastic and are used only once. Due to the fact that they have a pliable structure, they can be easily adjusted to any contour of the natural nail. However, they can wrinkle during the extension process and require precise “fitting”.
Photo from the site: allfornails.ru
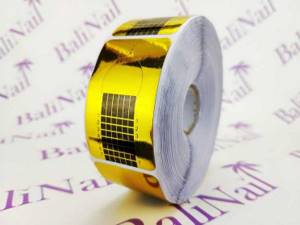
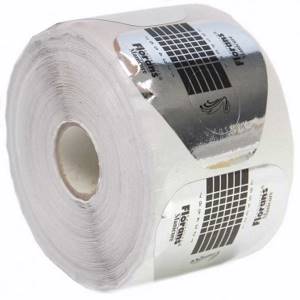
- Reusable molds are made of hard plastic or metal. Their price is much higher than that of disposable forms, but due to repeated use they will quickly recoup their cost. In addition, in the process of working with them, such troubles as deformation, the formation of gaps and the flow of gel through them are excluded. The main thing is to choose forms that perfectly match the shape of the natural nail bed, and then you will never have problems with the formation of an artificial nail.
Photo from website: nazya.com
It is believed that extensions on forms require more filigree work and experience from the master, while tips are easier to use. However, nails formed on forms look more natural, and this determines their popularity. Fortunately, the Internet is replete with all sorts of video tutorials on how to extend gel nails onto forms, which show the entire procedure with extreme accuracy. With a little practice and diligence, even this procedure can be done at home.
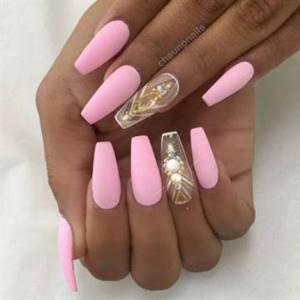
Square shape
Those with long fingers should choose a square nail shape. A square will make the brush visually softer and neater. The tips of square nails can be either sharp or rounded. The second option is preferable in terms of comfort. The sharp edge often catches on surrounding objects, which leads to its fragility and the need for frequent correction.
Girls who have a short nail bed should not choose a square shape. Also, it is better to avoid a square nail plate for those with wide hands or short fingers.
What is needed for nail extensions on forms?
To apply nail extensions to forms, you should stock up on a special kit, which should include the following tools and components:
Photo from the site: stood.ru
- Antiseptic.
- Express cuticle remover. You can get by with a regular bath to soften the cuticle.
- Pusher or orange stick for pushing back cuticles and pterygium.
- Manicure scissors and tweezers for cutting cuticles and side ridges.
- Files and buffs of varying degrees of abrasiveness for creating, designing and polishing nail plates, both natural and artificial.
- Brush for removing nail dust.
Important
You can't go anywhere without antiseptic! Never miss this important moment. Nails, hands and tools not treated with an antiseptic are a risk of fungal infection. Medical alcohol, chlorhexidine solution, or special disinfectant sprays for manicure are suitable as an antiseptic.
- Dehydrator for degreasing natural keratin and removing the sticky layer from gel polish.
- Primer for adhesion of natural nails to artificial material.
- Base and top gel coatings.
- Modeling gel for creating artificial nails.
- Brushes for applying gel.
- Colored or camouflage gel polish for creating a design, decorative elements, if this item is provided.
- Lint-free wipes for removing the sticky layer and degreasing the nail plate.
- UF lamp (gel for nail modeling polymerizes only under the influence of UF radiation, the LED lamp is not suitable for extensions. But the LED lamp can be used when designing nails with gel polishes).
- Forms for nail extensions.
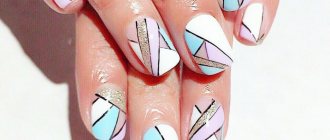
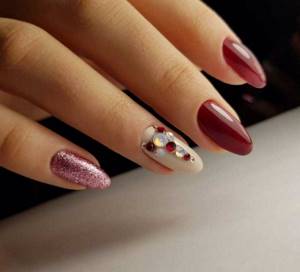
Gallery of photos of extended nails
By contacting a good specialist, you can be sure that he will equally perform the extension procedure using various materials and templates. With the help of special overlays for modeling, all kinds of shapes of extended nails are created: from classic almond-shaped and square, to extravagant stilettos and other designer options. Looking through our collection of photos, enjoy the beauty of a variety of artificial nail shapes.
To conclude our article, watch another video lesson about express extensions using top forms and acrylic. Today, any original manicure can be embodied on your hands. Therefore, if you see nail art in a photo in a fashion magazine that you like, don’t deny yourself the pleasure!
Stages of gel nail extension on forms
In order to better understand the technology of the process, let’s consider the procedure for gel nail extensions on forms step by step:
Stage 1. Treating fingers and nails with an antiseptic.
Photo from website: gribokgplus.r
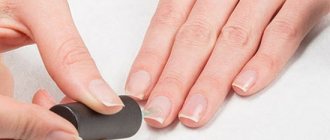
Stage 2. Hygienic manicure. Cuticle trimming and pterygium removal.
Photo from the site: krasotkapro.ru
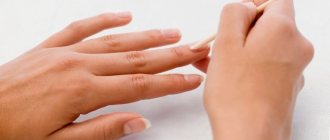
Stage 3. Filing the free edge of the nail plate. Removing gloss from the surface of the nail using a buff.
Photo from the site: yanail.ru
Important!
It is necessary to leave a free edge of the nail of 0.5 mm in order to pry it under and fix the shape.
Stage 4. Removing nail dust with a brush.
Photo from the site: yanail.ru
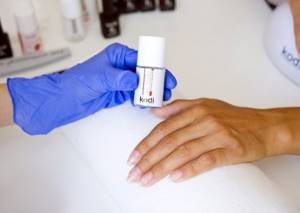
Stage 5. Applying a dehydrator to degrease the nail plate.
Photo from the site: yanail.ru
Stage 6. Applying an adhesive base (primer).
Photo from the site: yanail.ru
Stage 7. Coating the natural plate with base gel (the layer should be very thin). Dry your nails in a UF lamp for at least 2 - 3 minutes (depending on the power of the lamp.)
Photo from the site: yanail.ru
Stage 8. Installing the mold using a metal plate and tubes to press the “arch”.
Photo from the site: bpwomen.ru
This is one of the most difficult stages, requiring a certain skill. After all, the entire result depends on how correctly the nail extension uniform is worn.
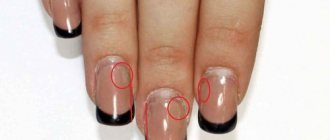
How to use forms for nail extensions? If the forms have a solid base, then there should be no problems, the main thing is to choose the right size and carefully fit it to the nail. If the shape is soft, then first, using nail scissors, you should adjust the window to the size of the subungual arch. It is important that there are no gaps, otherwise the gel will leak into the holes formed and as it grows, this defect will be noticeable.
After fixing the form, you should make sure that it has beautiful side and end bends. A shape without a bend will look like a trampoline, and a slope that is too steep will create beak-shaped nails.
Remember that the step-by-step instructions for nail extensions on forms require that the work be carried out according to the scheme - 4 nails of one hand, then 4 nails of the other hand and the nails of the thumbs of both hands. This is necessary so that during work the gel does not flow from the nails of the thumbs, which, as a rule, are always at an angle in relation to the other fingers. Beginners should even work on each finger separately.
On a note!
How to extend nails on forms if they are very soft? It's very simple - glue two forms together. This way they will be stronger and more stable.
Stage 9. Formation of an artificial nail using modeling gel.
Photo from website: delodom.com
At this stage, you should strictly adhere to the rules of how to extend nails with gel onto forms. The nail is conventionally divided into 3 zones:
- Cuticle area (1/3 of the natural nail closer to its base).
- Stress zone (the remaining 2/3 of the natural nail plate is the junction of the nail with the form and 1/3 of the form. This area bears the greatest load and hence its name).
- The free edge of the nail, or more precisely the remaining part of the form.
The technology for gel nail extensions on forms at the modeling stage is as follows. A thin layer of gel is applied to the cuticle area with a brush, which thickens slightly as it approaches the stress area. The stress area should be “reinforced” with a small gel thickening, especially at the junction of the natural nail and the form - here the modeling gel is applied very thickly. The future free edge of the nail is formed in a thin layer.
After applying the modeling gel, the nails are dried in a UF lamp for at least 2 - 3 minutes.
Stage 10. Removing the sticky layer from the artificial nail and removing the form. The resulting nail should be sanded to give it a smooth surface. At the same stage, the shape of the free edge of the nail is adjusted.
Photo from the site: studio-helena.ru
On a note!
Don’t be surprised by the removal of the sticky layer from the nail, while the color coating has not yet been applied. If with a regular gel manicure this is contraindicated, since the dispersion is removed, which ensures the adhesion of the layers, then when extending nails on forms, as a rule, the dispersion is removed in order to decorate the artificial plate with a nail file. It’s just that the dispersion will interfere with adjustments due to sticking to the nail file. There is no need to worry about the adhesion of subsequent layers to the artificial nail. A well sanded surface will provide the necessary adhesion.
Stage 11. Applying camouflage gel or colored gel polish. Camouflage or colored gel is applied in 2 – 3 layers depending on the density of the pigment. Each layer is dried in a UF lamp.
Photo from the site: dekornogtei.ru
Stage 12. Design and decoration of nails, if required by the design. If it is not provided, then this step is skipped.
Stage 13. Apply topcoat and dry in a UF lamp. It is better to dry the top coat in a lamp twice as long as the previous layers for better polymerization.
Photo from the site: mirlady.com
Stage 14. Removing the sticky layer.
Stage 15. Moisturizing the cuticle with oil or cream, massage the hands, cuticles and periungual ridges.
Photo from the site: chelnyblog.ru
These are step-by-step instructions for gel nail extensions on forms. You may come across slightly different variations with more or fewer steps (everything will depend on the details of the process), but in any case the basis will be the same.
Material for making molds
Depending on the material, forms are usually divided into disposable and reusable. Most craftsmen prefer to use disposable forms in their work. They are made of a more flexible and pliable material, so they are easy to adjust to the shape of natural nails. In addition to being more pliable, disposable forms are more convenient from a hygienic point of view. To make disposable forms, paper and foil are used, and for reusable forms, plastic and metal are used.
Editor's choice: Stamping manicure ideas: how to decorate your nails quickly and in an original way
Gel nail extensions on forms: video instructions
No matter how detailed the instructions are, the best way to highlight the essence of the process will be a video on how to extend nails onto forms. Naturally, each master uses his own technology and his own secrets, we bring to your attention two video tutorials on how to extend nails onto forms with gel, which, in our opinion, shows in the most accessible form a process that is understandable even for a beginner. Lesson #1.
Lesson #2.
As you can see, each master uses his own skills and tricks in gel nail extensions on forms. Step-by-step technology is slightly different, but only in a few ways. The main basic “steps” - preparing the nail, setting the form, applying modeling gel - are unshakable. Perhaps in the future, as you gain experience and skill, you will find your ideal solution, more effective and convenient. In any case, try, learn and you will succeed.
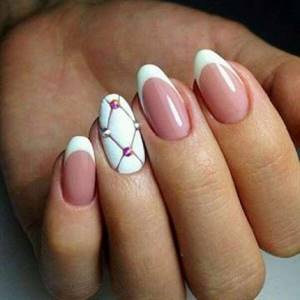
Oval shape
The oval shape of nails is universal and will decorate the hands of every woman. In order to give the free edge of the nail plate an oval shape, you need to make it look like an arc. A manicure with oval nails looks very elegant and feminine. Smooth lines give the hands a special softness of movement and grace.
The best companies
Now we will look at several of the most reputable companies in the nail products market. Their products are trusted by professionals. So, the best acid primers are produced by the following brands:
- Runail Professional Primer Acrylic System. A good product for acrylic extensions. Raises the nail scales and provides reliable adhesion to the artificial material;
- IBD Stick Primer. Helps prevent air pockets from appearing between the natural nail and the extensions. Used for all types of nail modeling;
- Yoko APR 15. Also suitable for both gel and acrylic extension technologies. Provides very strong grip;
- TNL Professional Primer. An excellent product for uneven nail plates. Fills depressions, leveling the surface and preventing the appearance of voids under artificial turf. Used in tandem with gel extensions and strengthening of nails using biogel;
- Kodi Professional Primer. An amazing all-rounder. Suitable for all types of manicure and any type of nail plate. Has excellent adhesive properties.

Best acid-free primers:
- CND Acid-free Primer. This brand has a unique product in its arsenal: Primer Nail Prime, which can be used for any type of extension, as well as for applying gel polish and regular nail polish. Perfectly dries the nail plate, prevents its delamination, brittleness and thinning. Provides high-quality adhesion;
- Bluesky Nail Systems Primer. The product is intended for decorating nails with gel polish and gel extensions. Solves problems such as peeling of artificial nails, cracking of the surface, chipping. The product does not irritate the skin in case of accidental contact with it;
- Runail Primer Non-Acid. Provides high-quality adhesion and extends the service life of artificial nails or gel polish;
- EzFlow Non Acid Primer. Created for people with sensitive, thin nail plates. Has no smell. Has good adhesive properties;
- Kodi Professional Ultrabond. Suitable for any nail modeling technology. Safe for skin. Performs excellent adhesive function;
- IBD Natural Primer. Used for gel extensions. Well prepares the nail plate for the application of artificial material;
- Masura Basic. Designed for manicure using gel polish and biogel;
- Lechat Fix it. Smoothes the lumpy surface of the nail, preventing the appearance of air “pockets” that lead to peeling of the artificial material. Can be used for acrylic and gel extensions, as well as when covering nails with gel polish.
And finally, the best bonders:
- Red Carpet, PREP max adhesion sanitizer. Perfectly degreases and cleans the nail plate, removing excess moisture. Provides protection and reliable adhesion of the nail surface to artificial material;
- In'Garden Nail Prep System. Dries and prepares nails for adhesion with the base coat;
- Runail Nail Prep. Apply under an acid-free primer, suitable only for gel extensions. Has good adhesive properties;
- E.Mi Ultrabond. Used for all types of nail modeling. It has a liquid consistency, thanks to which it spreads well over the surface of the nail plate. Safe for skin;
- Naomi Dehydrator. Effectively copes with tasks such as dehydration and degreasing of marigolds. Protects the surface and provides better adhesion to artificial material. Suitable for acrylic and gel extensions, as well as when using gel polish and even simple nail polish;
- Kodi Nail Fresher. A delicate product that prepares nails for any modeling procedure. Dries the surface well and removes excess fat.
Minimum required set of tools and materials for gel extensions
Today, manufacturers of nail care products regularly supply products to the market, which makes it easier for you to find the necessary materials and tools for extensions. Among them are the following:
- UV lamp. Used to dry the gel. If possible, choose a lamp with a built-in timer so that you can adjust the time for the gel to cure.
- Gel. Most often, extensions are made with transparent or camouflage gel, but if necessary, you can purchase colored ones.
- Application brush made of artificial bristles. As a rule, it should be flat.
- Sticky layer remover. Must be used after irradiation in a UV lamp.
- Primer (degreaser). With its help, the nail plate adheres to the gel.
- Forms for laying out the gel. Used as a substrate.
- Tips. Glue over natural nails. Recommended for use in extensions by beginning craftswomen.
- Glue. Used for gluing tips or any decorative details on extended nails.
- Tip cutter. Allows you to get rid of unwanted length.
- Gel coating (finish or top coat). A transparent coating that is applied at the end of the extension. Adds shine and ensures design fixation.
- A set of files of different hardness.
- Polishing file (buff).
- Disinfectant.
Materials and tools in the photo.
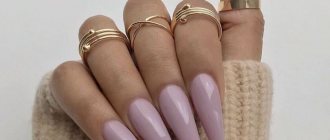
Almond shape
Almond-shaped nails are at the peak of popularity. In order for such a manicure to look neat and stylish, you need to put in a lot of effort. The almond shape is rightfully considered the most difficult to execute. It is important to get the proportions right and give the tip the perfect pointed look. When done correctly, this shape will suit every girl and will look appropriate with any outfit.
Editor's choice: Shell nail design: necessary materials and how to decorate your nails

How to use the bottom form
Examine the template carefully. If the plates are curved down or their shape is close to a trapezoid, trim them a little to create a tight joint with the natural nail plate.
Contraindications
Although the procedure has a large number of advantages, do not forget that it also has a number of contraindications. These include:
Fungal infections. This is an absolute contraindication to the procedure. Extensions can be performed only after the fungal infection has been completely cured. Damage to the nail plate or cuticle. Even minor damage to nails can become an obstacle to extensions. Therefore, experts advise performing a trim manicure three days before the procedure. Chronic diseases and antibiotic use. Diseases include problems with the thyroid gland and endocrine system, as well as ailments of the digestive tract. Taking antibacterial agents means that the artificial material will not adhere well to the natural plate. Increased sensitivity
It is very important to avoid contact with the gel if a woman is hypersensitive to the components in the composition or has already had an allergic reaction to the material. Pregnancy and menstruation. Hormonal changes lead to the fact that the artificial material will quickly begin to peel off.
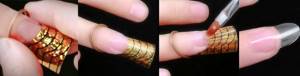
Non-standard forms
For those who do not want to see an ordinary and ubiquitous manicure on their hands, nail art masters have created bold, unusual and extravagant forms: stilettos and pipes. Long and pointed stilettos look fashionable and bright, but at the same time feminine. Fingers with them seem thin and long. The pipe shape is distinguished by an edge running through the center of the nail plate. It looks original, impressive and is guaranteed to attract everyone's interest.

Video selection:
What to choose
Both materials have their pros and cons, and it is up to you to decide which one is better.
Acrylic can dry in a few seconds, saving valuable time. It is very easy to lay out in a thin layer, making it look more natural.
Another nice plus for acrylic is its price, and for full extensions you will need a little less than gel.
But the gel also has its own very significant advantages - it can satisfy the most creative projects for your nails.
With the help of colored material and the skillful hands of a craftsman, you can make a French jacket. The most serious disadvantage is the mandatory presence of a special lamp.
Instructions
The method of working with the upper forms involves preliminary preparation of the nails, and then the use of modeling agents.
We will show you step by step how to work on the forms so that it turns out correctly and accurately.