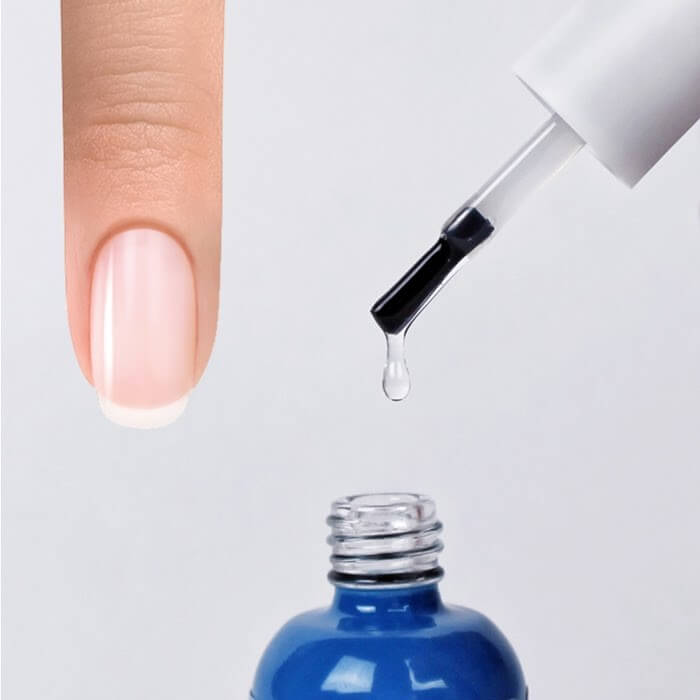
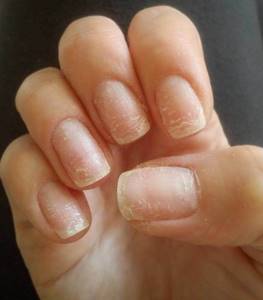
Gel polish spreads when applied, what should I do?
Covering your nails with gel polish is rapidly replacing classic nail polishes. This is due to the many advantages of this technique. Properly applied gel polish does not chip off the nails, lasts up to four weeks, has a beautiful glossy shine, and provides a lot of room for creativity. Naturally, many girls want to learn how to apply gel polish on their nails on their own. And at the same time they face various problems. More and more often you hear the question: why does gel polish flow down to the cuticle or fingertip?
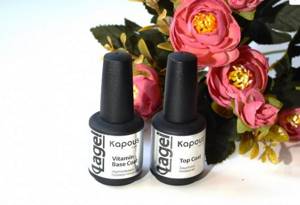
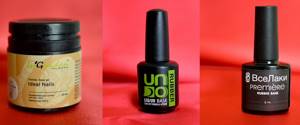
Popular manufacturers
Today, new brands producing nail products appear on the market every day. Manufacturers, by the way, are from different countries. There is a group of European brands; there are also Russian brands on the list that produce gel polish, which are not inferior in quality to famous companies.

However, if you look at the gel polish and bases sold, then the company CND, which was the very first to introduce the polymer to the market in 2000, falls into this category. The company has a huge range of colored varnishes. In addition, they produce all kinds of fixatives with a matte and glossy surface. The best product is a base that both strengthens and protects the plate.
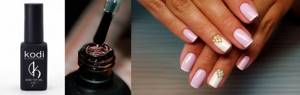
When asked what is the best brand among other manufacturers, nail art masters answer - the Kodi company, which produces a thick base, glossy and matte texture for nails.
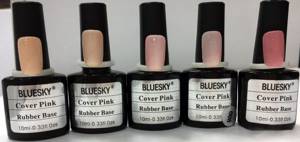
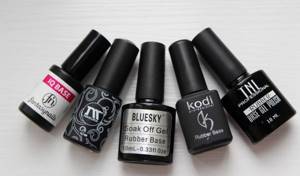
We decided not to limit ourselves to two companies, but to present a list of manufacturers who, in the opinion of nail specialists, are worthy of attention. These brands are: Bluesky, CND, Kodi, TNL, RuNail, Masura.
The bottle size varies from manufacturer to manufacturer. The texture and appearance of the bubble are also different, but this is a secondary issue, since the composition itself may be modified. This may be a two or three stage system.
In addition to the brands presented, there are also good manufacturers that produce quality products. Today they are either too young or less known on the Russian market.
Base for Gel Polish PRICE-QUALITY Choosing the Best/ STYLISH Nail Design
Application errors
Gel polish often runs off the base not because it is bad, but because the artist made a mistake. As practice shows, even Chinese “flower beds” will fit well on the nail and last for a couple of weeks if everything is done correctly and a good base and top are used. The most common technology violations are the following:
Errors in applying gel polish
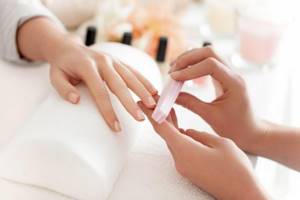
Applying varnish to the end of the nail plate
Thus, to avoid gel polish flowing to the end, middle or cuticle, it is enough to follow the rules and instructions. You can preview training videos on how to properly apply the coating.
Source
Best lists
In addition to the above bases, one cannot fail to mention a couple of other wonderful tools:
- Rubber – Kodi Rubber Base.
- Camouflage – Klio Professional Base.
- Leveling – Nano professional Nanlac Gum.
Read about them below.
Rubber – Kodi Rubber Base
A long-lasting foundation with a unique hypoallergenic composition is easy to apply using a convenient brush. Dries quickly - only 2 minutes. The base stays on the nails for a long time – up to 3 weeks. In addition, Kodi Rubber Base is compatible with gel polishes from other manufacturers. Among the disadvantages is the difficulty of removing the product; you cannot do without washing it down.
Price: from 500 to 550 rub.
base for gel polish Kodi Rubber Base
Camouflage – Klio Professional Base
Klio Professional Base is not only a foundation, but also an excellent concealer. Perfectly levels the nail plate and also has a pronounced strengthening effect. With regular use, there is a significant improvement in the condition of your nails - as a result, you get healthy, long and strong nails. Compatible with products from other brands.
Price: from 650 to 700 rub.
base for gel polish Klio Professional Base
Leveling – Nano professional Nanlac Gum
Nano professional Nanlac Gum is the case when domestic products are not inferior in quality to foreign ones. The base is suitable for owners of problem nails, as it perfectly levels the surface, hiding minor imperfections on the nail plate. Included with the jar you receive a special, comfortable brush with short bristles. Does not leave detachments.
Price: from 1050 to 1100 rub.
base for gel polish Nano professional Nanlac Gum
Problems when applying gel polish
A relatively new trend in manicure—coating nails with gel polish—has become one of the most popular services in nail salons. Despite the many nuances when applying gel polish, more and more women are trying to master the procedure at home. To make applying gel polish a fun experience, we’ll try to talk about the problems that may arise when creating a manicure and how to eliminate them.
Heterogeneity of the applied layer
To make the color apply more uniformly, do not forget to stir the gel polish before applying. The layers of applied gel polish should be as thin as possible. There is no need to be afraid of leaks in the first layer of colored gel polish after polymerization; this is acceptable. The following layers of varnish will correct the situation.
Bubbles of gel polish during application
Bubbles of gel polish during application occur when the layer is too thick, so try to apply the gel polish in even thin strokes. It is better to put 3 thin layers than two thick ones. Another cause of bubbles in varnish is agitation. The bottle of varnish can only be gently rolled in a vertical position between your palms. If the bottle has recently been transported, let the varnish settle.
Rolling out gel polish
It happens that when applied, gel polish rolls off or collects in the center of the nail plate. The cause of this phenomenon may be moisture on the nail plate or skin around the nail, as well as improper storage of varnish. When ultraviolet rays come into contact with gel polish, a polymerization process occurs and the varnish loses its properties. Buy only high-quality professional products from a trusted manufacturer. Such a manufacturer, for example, is the MASURA company, one of the leaders in the production of gel polishes.
Doesn't dry well
The main reason that gel polish does not cure well is applying too thick layers. The cause may also be wear and tear on the UV lamps. It is necessary to change lamps depending on the intensity of use, no later. It happens that gel polish requires more time to polymerize.
Liquid gel polish
Sometimes gel polish seems too liquid. This often happens with light-colored varnishes. It is believed that this is a trick of the manufacturers themselves. The fact is that pastel, light colors require the application of more layers - for a more spectacular look. Thin layers are known to be easier to apply, so the consistency of light gel polishes is more liquid.
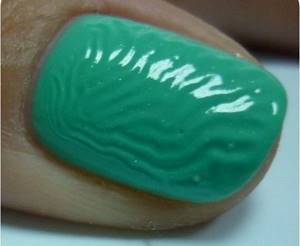
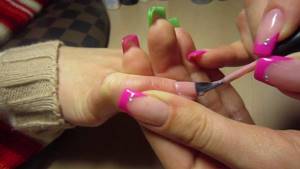
Gel polish spreading
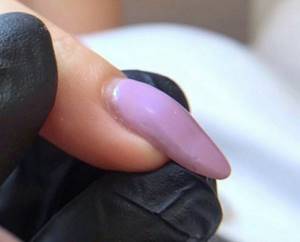
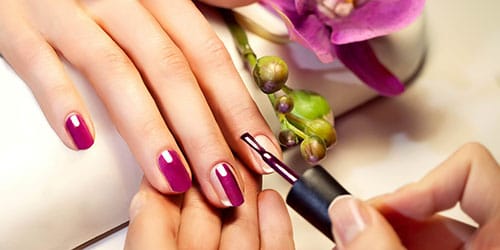
It often happens that gel polish spreads when applied and gets on the cuticle. This situation often arises among beginners who neglect the rules of applying gel polish. Polymer varnish expands when exposed to intense ultraviolet radiation from a lamp. When applying gel polish, you need to retreat a little less than a millimeter from the edge of the nail plate, and the manicure will look like it came from a salon.
Basic rules for high-quality application of gel polish
Given the obvious advantages of gel polishes for a beautiful, long-lasting manicure, three basic rules must be strictly followed:
Source
Types of databases
The main difference between one gel polish base and another is the structure, which changes depending on the direction of the product. There are different materials that have a system with one, two or three phases. Regardless of the type, the composition contains a component that creates a glossy or matte film on the surface.
In addition, gel or acrylic is added to the bottle, which directly affect the natural nail. In most cases, all the components in the base product are not harmful to the nail plate, but only extend or reduce the period of wearing a manicure.
Leveling
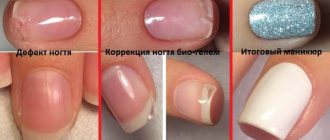
As already mentioned, the main task of the base is to level the plate so that the next layer lays smoothly. However, it is the composition that determines whether the product will work correctly and whether it will be able to cope with the task. First of all, it must be dense, not spread and not flow into the side rollers. A good compacted base for nails, keeps the manicure for a long time. Even after two weeks, the nail art looks the same as on the day of application, with the exception of the grown nail.
A leveling base helps avoid problematic nails because it strengthens and eliminates new splits. It is especially important to use a dense, leveling base for fragile, thin, brittle nails.
An additional layer is formed on the nail surface, which makes the nail bed denser, serves as good protection, nourishes the nail and heals it.
There are many worthy products for leveling the plate, but few have medicinal properties or contain vitamins A and E. There are even those that contain silk and protein necessary for natural nails.
Colored
The color single phase system is a relatively new product that has appeared on the market and was first introduced by the Kodi brand. However, this is a controversial issue, since camouflage bases have been on the market for a long time, but they were first produced as extension gel.
Color coating can be single-phase, two-phase, three-phase. The product requires further application of a finish, or vice versa, it already contains a base, color and top.
Single-phase color coating is an excellent option that can reduce procedure time. After all, a manicure with color takes less time than modeling with a three-phase system.
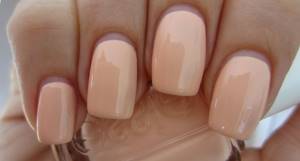
A single-phase product with pigment is characterized by delicate colors, for example, camouflage pink, peach, beige. However, if this is a single-phase system that contains a foundation, pigment and top, then the shade of the varnish can be completely different.
Mistakes when applying gel polish at home
Have you learned how to apply gel polish at home, spent money buying a lamp, tools and a bunch of gel polishes, but the artificial coating does not last for the promised 2-3 weeks and chips after a few days? Don't be upset.
Perhaps, when applying the coating, you simply make mistakes, correcting which you can enjoy a lasting result!
What to replace
You can strengthen and thicken your nails with a base, use a product that was produced in the early days, when a three-stage coloring system appeared. It doesn’t have to be a super rubbery component; use the look you like as the first layer of gel polish.
Moreover, an innovative 3-in-1 product appeared on the market, which already combines all the elements. You can generally use a single-phase system and paint the surface perfectly with it. The only thing is that you cannot design with such a product, since it is applied in two layers and already has pigment.
Manicure stages and possible mistakes
Today there are 3 main types of manicure:
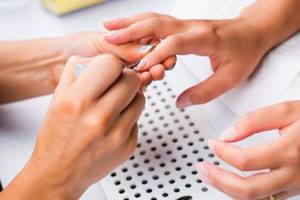
Combined and hardware manicure must be done using a special manicure apparatus, but before using it, it is better to undergo training, since improper operation of the apparatus can lead to damage to the nail plate, for example, cuts. For beginners, it is better to do a classic manicure at home.
Stage 1. Shape filing, cuticle processing
Before applying gel polish, you need to put your nails in order: treat the cuticle, file the shape.
What do we do at this stage?
Stage 2. Preparing the nail plate for coating
What do we do at this stage?
Mistakes at the nail plate preparation stage
Mistake #1:
Typically, people with oily skin or those prone to excessive sweating have a moist and oily nail structure. When preparing such nails for coating, it is necessary to use a dehydrator (nail prep) to deeply dry the nail plate, remove excess moisture from it and improve the adhesion of the natural nail to the artificial coating.
Mistake #2:
The free edge of the nail is one of the most vulnerable places: if you do not pay proper attention to it, chips and detachments may appear. To improve the adhesion between the nail plate and the artificial material, it is necessary to use a primer. Primer is translated as “primer”. There are acid-free and acidic primers.
The acid-free primer acts as double-sided tape and ensures strong adhesion of the natural nail to the artificial nail.
The acid primer lifts the keratin scales of the nail plate for better adhesion to the artificial material. Since the acid primer contains aggressive components, you must be careful not to get it on the skin and cause a burn. It is recommended to use it before extensions for girls with wet or oily nail texture.
Stage 3. Covering the nail plate
What do we do at this stage?
Errors at the stage of covering the nail plate
Mistake #1:
You used the wrong base for your nails.
The condition of the nail plate is different for everyone: for some it is strong, while for others it is thin, soft and plastic. You cannot use the same base for all nails. It is necessary to analyze the condition of the nail plate and pay special attention to the choice of base coat.
Today there are 3 main types of base coatings: hard, elastic and camouflage. What are their fundamental differences? Which one to choose? Let's figure it out.
Hard bases
Elastic bases
Elastic bases are great for beginners: they are easy to work with, as they do not spread, and the alignment is perfect. Using elastic bases you can extend your nails. Elastic bases are great for soft, highly flexible nails. But on long nails they sag over time, that is, after a while a “dip” appears across the nail.
Why is this happening?
Bases are soft gels, and they, in turn, as we said above, can be elastic or not.
Elastic bases perfectly strengthen the nail plate when leveling, because they are flexible, tenacious, and when the free edge moves, they, like an elastic band, move with it. But this is precisely why shrinkage occurs.
There are bases that contain solid plasticizers. Solid materials do not move with the nail and, accordingly, do not shrink. But keep in mind, UNDER HEAVY LOAD, almost any base will give minimal shrinkage.
What to do?
Strengthening with acrylic or hard gel, but this is a completely different procedure. In addition, the harder the material, the worse it soaks and the more difficult it is to cut.
ADVICE! Sometimes it is not very clear from the name of the base whether it is hard or elastic. To determine the type of base, you can do the following: apply a small drop or strip of base to the surface of a transparent plastic bag and put it in a lamp to polymerize. If after polymerization the drop (strip) bends, it means you have an elastic base in your hands. If you can’t bend the drop and it cracks, then the base is solid.
Mistake #2:
You held your hand in the lamp incorrectly and the coating did not dry well.

How to hold your hand in the lamp correctly?
Mistake #3:
You stored and transported the gel polish incorrectly, it has thickened or air bubbles have formed in it, which is why the coating does not adhere well and is difficult to work with.
How should you store and transport gel polish?
NOTE! The application of color coating most often occurs in close proximity to the polymerization lamp. Place the bottle of gel polish so that the light from the lamp does not fall on it, otherwise the gel polish may thicken.
ADVICE! If bubbles still appear in your gel polish, you need to do the following. Open the bottle, but do not remove the brush. Let the material stand in this state in a dark place so that it is not exposed to daylight for a couple of hours. After this, mix the composition with a brush, close the bottle and twirl it between your hands.
Mistake #4:
During polymerization in the lamp, the gel polish shrunk.
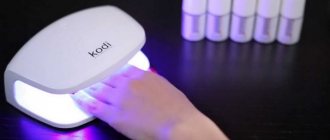
One of the reasons may be the insufficient power of the lamp you are using. Perhaps your gel polish is well pigmented and the lamp power is simply not enough to dry it. It is advisable to use a lamp with a power of at least 48 W. For information on how to choose a lamp, read the article “How to choose a lamp for drying gel polish?”.
Also, the gel polish could shrink due to the fact that you applied it in too thick a layer.
Mistake #5:
The brush turned out to be defective, making it inconvenient to work with or making it impossible to make a coating at all.
Sometimes the brush hairs may stick out in different directions or be completely absent, so before purchasing gel polish, ALWAYS check the brush for defects!
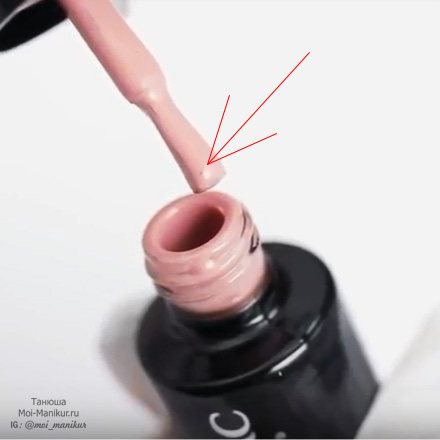
TIP: in order not to buy a “pig in a poke,” buy gel polishes in professional stores that are official representatives of brands and give you the opportunity to test gel polish for free before purchasing. In such stores you can apply gel polish to the tip and see if you like its thickness, density, and brush shape.
You can take advantage of this opportunity in our “ParisNail” stores!
What is it and what is it for?
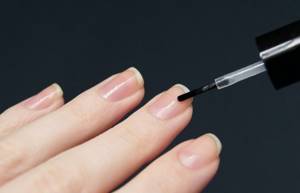
The base coat for nails has a functional meaning, firstly, it serves as the adhesive link on which the subsequent layer is applied. The initial layer adheres to the plate, so the surface of the nail depends directly on this unique product.
Secondly, it is excellent protection against aggressive factors or liquid components found in colored varnish. We all know that pigment can leave an unwanted yellowish tint if applied directly to the nail. But in order for the first layer to be of high quality, you need to know how to properly use and choose the fundamental layer.
Why do you need a gel base? Just as in construction the stability of the building depends on the foundation, so in nail art the subsequent appearance of the nail depends on the quality of the first layer.
No product will eliminate defects that form during the first applications. With the help of a topcoat, imperfections are masked, but it is better to create the correct foundation on the plate at the very beginning, which will have a fruitful effect on further design.
You can and should straighten and strengthen your nails with a base! Many manufacturers add a special component to the composition that will strengthen the plate, protect it, prevent the formation of chips and cracks in the manicure, and make the design perfect.
I would also like to note an important element - it is the protection of the surface, which is laid down in a dense layer, so even when performing routine household work with cleaning products, the manicure is not damaged and remains protected.
What else can cause problems when applying artificial turf?
Have you tried all kinds of bases, but your nails still appear chipped and peeling? There are several explanations for this, for example:
What to do? Do you want to part with your long-lasting, flawless manicure forever?
Of course not! You can take the webinar “Complicated cases in base coating of nails” from the teacher of the ParisNail school Velmitina Zaitseva.
You will receive a detailed algorithm for applying and fixing the material, learn all the secrets of the teacher and be able to avoid material detachments!
Dazzling shine, long wear, but again BUT. What to do to prevent TOP from leaving bald spots
Hello, Beauties Oh, this manicure. An activity that forces gel polish maniacs to spend a lot of money on materials, glitter, tools, and other new items in the nail industry. And it seems like you have everything. and you seem to be satisfied with your supply of necessary materials, but curiosity and excitement make you buy something new again and again))))))))))
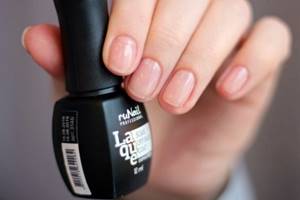
So I, starting small (having purchased a starter kit on Ali), realized that I wanted MORE, MORE, MORE. )))) The soul rushed to heaven (namely, to the “beauty pro” store). There I saw the TOP for Lianail gel polish for French manicure. The manufacturer assured on the label that this top is durable when worn, does not turn yellow over time and does not lose its shine. Well, I couldn’t pass it up, especially since the price was delicious, something like 350 rubles.
The bottle for the top (as well as for the base and gel polishes) is nice, smooth, black with a laconic brand inscription. The smell is quite decent (it doesn’t irritate the eyes, it doesn’t sting the nose)))))). The content is completely transparent. The consistency is closer to liquid.
My first experience with TOP Lianeil was, to put it mildly, not very good. I was really impatient to try it out and I broke my rule of testing everything on myself first and immediately applied it to my client’s nails (good thing it was a girl I knew). The coating was done and it was time to remove the stickiness from the top coat. And then I got hooked. All the nails had large and small bald spots! I had to top my nails again. but even after the second layer the bald spots didn’t go away! Having tortured both myself and the client, I took out my old top and finished this ill-fated manicure.
Since I encountered SUCH a surprise for the first time (nothing like this ever happened to me, not even with the Chinese TOP), I immediately went to study this issue (as they say, “Google to the rescue”))))) Having turned to the “beauty pro” site for advice , I was advised to try to remove the stickiness from the gel polish before applying topcoat. So I did.
The TOP lay down perfectly, evenly and smoothly. BUT . here it is BUT. I just got tired of getting the bubbles out when applying it. You may not notice them on dark tones of gel polish, but on light ones you can. this is some kind of nightmare. I have been using this top for almost a year (exclusively on myself because of this feature) and every time I struggle with blisters. Sometimes more, sometimes less, but they appear and make you nervous.
The advantages of this TOP include everything that the manufacturer promised. TOP does not turn yellow over time. The shine is simply amazing after 2 and 3 and after 4-5 weeks. Well, wear it before taking it off, of course))) You can’t take that away from him)) It dries great in both LED and Hybrid. I remove the stickiness with different means and none of them made the coating cloudy.
So overall I’m happy, although I love thicker TOPs. Later I will definitely write about my favorite
Here are some works using Lianail TOP
How to remove artificial material correctly and why is it important?
You've probably heard that gel polish spoils your nails, making them thin and brittle. It is a myth! It's not the material that ruins your nails! One of the reasons for damage to the nail plate is improper removal of the artificial coating, so this procedure must be approached with special responsibility!
Is it possible to remove gel polish yourself at home without damaging your nails? What materials and tools are needed for this? Let's figure it out.
How long can you wear gel polish?
First, let's figure out what period of wearing the coating is optimal. Often girls wear gel polish for a month, or even longer. However, they do not understand that they can damage the nail plate.
Technologists advise walking with the coating for no more than 2-3 weeks. Prolonged wear puts stress on the tip of the nail plate, its root suffers from the weight of the coating. All this can lead not only to breakage, but also to deformation of the nail plate.
How can you not remove gel polish?
RULE 1: Under no circumstances should you pick at the gel polish or tear it off the surface of the nail plate, because this can cause serious injury! If you are careless, you can remove the top layer of the nail along with the material, and this can lead to thinning and, at a minimum, painful sensations when in contact with water and various surfaces.
RULE 2: do not file away partially peeled off gel polish. In this case, you also risk cutting off the top layer of the nail and ruining it.
What other consequences might arise?
We hope these reasons are enough to convince you not to peel off the coating from the nail plate and do the gel polish removal according to the rules!
By the way, the peeling process itself is quite painful, it’s hardly worth it!
Why does nail base roll off?
Any external defects that appear after drying the manicure indicate that the product is of terrible quality. If somehow the polish spreads, pulls or rolls, then the consistency of the nail base is poor.
You may notice this feature in a product that has expired or has been opened and received an unwanted dose of sunlight. During contact with air and light, the texture of the product changed, an incomprehensible stickiness appeared, or small lumps formed in the tube.
Gel polish removal methods
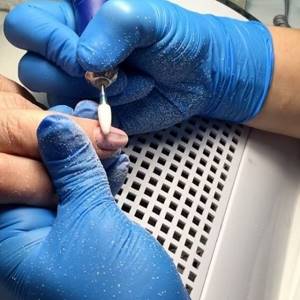
There are two ways to remove artificial turf: using sawdust and by soaking it with a special liquid or napkins.
To remove the coating using sawdust, a special apparatus and removal cutters are required. Therefore, this option is suitable only for those girls who are familiar with hardware manicure.
Perhaps someone will have the thought: “Why not try to remove it with a rough file?” But we’ll immediately answer that this method is quite problematic, takes too much time and can damage the natural nail. It is necessary to try very hard to treat the area near the cuticle, and there is a risk of rubbing the skin. Therefore, at home, the easiest way to remove it is by soaking.
If you want to master sawdust removal, then sign up for basic courses at our licensed school “ParisNail”! After training, you will not only do a flawless manicure for yourself, but will become a real professional in the nail industry and will be able to work as a manicurist!
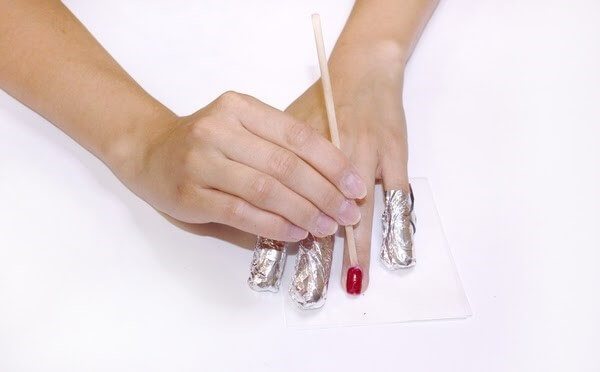
Maceration
This method involves soaking the gel polish with a special acetone-containing liquid. You will find a list of materials required for this procedure and detailed technology for removing gel polish in the article “How to remove gel polish (shellac) at home?”
NOTE! Not all base coats can be soaked, so ask the seller to select the base that is suitable for this type of removal.
Composition of the product
Any gel polish applied to the nail contains substances that interact with UV rays. For a perfectly even coating, you need a film with a photoinitiator, which, when exposed to ultraviolet rays, turns into a uniform, durable coating. This allows the coating to dry quickly and harden in the process, firmly adhering to the surface.
This is not the entire list of included elements; there are various additives: active thinner, acrylic acids, colored, shimmering components that make the surface matte or shiny.
Rubber
One of the most common types is a rubber base, which also adheres to the nail plate. It is used for both extensions and shellac. Rubber materials are slightly denser in structure. They simplify the process because they act as a leveler for the plate.
To strengthen your nails with a rubber base, it is enough to apply the composition once and send it to dry in a lamp. The most important thing is not to leave the product open, because it hardens quickly when in contact with the rays and unwanted lumps appear in the bottle.
Silicone
Silicone compounds are a good medicine for weakened and thin nails. The texture fits perfectly on the plate, plugging all delaminations and microcracks. However, the product has different types, it can be like a silicon sticker that is placed on a wafer, produced as a thick mixture of hardener for decorative manicure, or intended for shellac.
Acrylic
This is the most durable element because it forms a very strong adhesion to the natural nail. If the polymer contains acrylic, then for leveling it is not necessary to apply two layers, one is more than enough. It is enough to coat once and enjoy a completely smooth surface.

But the opinions of manicurists differ: some prefer to use gel to level the plate, others prefer acrylic and also use acrylic powder.
Gel based
Using a nail base with a gel component ensures that the structure of the epidermis becomes very strong.
However, by its nature, gel is more fragile than acrylic. To strengthen the plate, a product with a gel component is quite enough.
With vitamins
Among the varieties of the product there is a vitamin complex, which forms a film on the surface with beneficial microelements. Throughout the entire wearing of the polish, the vitamin base strengthens brittle and dry nails, makes them strong, and changes the structure of the nail. In the process of cells, regeneration begins, the same restoration that the epidermis needs. The plate receives proper care and moisture even after removing the polymer.

Water based
All water-based products, unfortunately, are not polymers; they are used only when painting nails with decorative varnish. According to experts, only acid-free primers and ordinary pigmented paints can be used on water. Applying such a base layer to your nails will not create the correct layer for gel polish. In general, it can only be used under decorative varnishes.
How to apply gel polish evenly and without bald spots
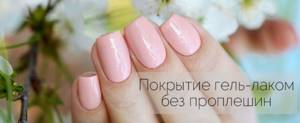
I know that for many people the problem is APPLYING colored gel polish. After all, it may lie unevenly, with bald spots or gaps, as well as streaks, and may streak. Therefore, here I want to share my life hacks on this matter, developed over many years of using different gel polishes, and also analyze the reasons for such capricious behavior of materials.
Is it possible not to apply under gel?
In the classic version, the surface is decorated with gel polish; the first layer is the foundation and must be applied. This is an important element, since the strong adhesion of all subsequent layers depends on it. However, it happens that in a hurry, beginners forget about the foundation and immediately move on to applying colored varnish and then note that the manicure lasted a long time without chips or cracks.
Yes, at its core, the color pigment also has a similar system as the base. It is the foundation that helps when modeling a manicure. Moreover, there are a lot of single-phase varnishes that already contain all the necessary elements.
Another life hack
The reasons have been decided. But what should you do if the gel polish just doesn’t want to lie flat? Here I will suggest one life hack:
– try applying the color to a white or black base, depending on which one your problem shade is closer to. Of course, this may change the color a little, but sometimes it’s even beneficial!
That's all, my friends! I hope the article was useful to you and will solve all your problems with varnishes :)
If you found this page useful, please recommend it to your friends:
Source
How to apply gel polish evenly: tips for a quality manicure for beginners
Looking at the precise movements of the master in the salon, everything seems simple. We remove the cuticles, file the nails, consistently apply the required coatings and dry it all in a lamp. Gel polish manicure is ready!
The utopian perception leads to the decision to take care of their nails themselves, and women buy everything they need for a shellac manicure.
Disappointment sets in almost immediately: the compositions refuse to go on smoothly, the nails remain bald, and the designs don’t turn out well.
It's too early to get upset! There are many nuances in a gel polish manicure, but knowing about them, you can create the perfect finish. Where does the path to perfection begin?
Mistakes when applying gel polish
Making gel polish at home is not very difficult, so many people choose this option as it is less time-consuming and financially expensive compared to regular visits to a specialist.
If this is about you, and you have already purchased a starter kit with gel polish, studied information on the technology of creating a long-term coating using gel polish, then I think it will be useful for you to study the common mistakes of beginners that lead to such common problems as chipping , bubbles, flow onto the cuticle, shrinkage of the material, etc.
Mistake #1 – poor cuticle treatment
This point is especially important if you want to apply the coating as close to the cuticle as possible. When cutting it, it is important to try not to leave any protruding burrs. They are what cause the gel polish to flow onto the cuticle. Well, the space around the cuticle itself should also be cleared of excess skin (pterygium). You can read about what to do if the gel polish does leak onto the cuticle here.
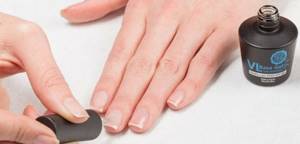
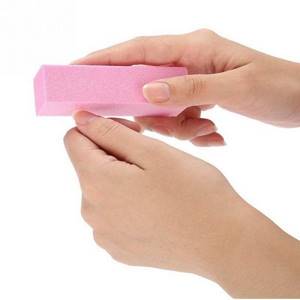
Mistake #2 – skipping the preparatory steps (degreasing and de-glossing)
The next thing we do after treating the cuticle is remove the gloss with a buff (not polisher), and then degrease it with a special product for this purpose. And exactly in that order. You can't skip any of these steps, otherwise your coating won't last even a couple of days on your nails.
Mistake #3 – applying the material too thickly
All materials: base, colored gel polish and top coat should be applied in a layer that is not too thin, but not too thick. And there are several reasons for this. Thickly applied gel polish:
In general, this causes so many problems that it is better to apply one extra layer than to redo it all later, believe me!
Mistake #4: Applying cuticle oil after removing it
If you are used to moisturizing the cuticle with oil after cutting it, then you should not do this before applying gel polish. It is better to move this stage to the end of the procedure, when the coating has already been completed.
What does this mean? Oil is additional fat on the nails, which, as you remember, we must get rid of with a special product. If you degrease your nails poorly, you will notice this already at the stage of applying the base: it will roll off the cuticle, not allowing you to get close to it.
Mistake #5 – shaking the gel polish bottle before application
If you are just switching from regular polish to gel polish, you can habitually shake the bottle of gel polish to mix its contents. You shouldn't do that. These actions create bubbles in the gel polish, which will then be noticeable on your nails. To make the contents of a stale bottle of gel polish homogeneous, just roll it in your palms. Bubbles can also appear from frequent immersion of the brush into the bottle, especially if the bristles cling to the edges and become fluffy.
Mistake #6 – removing the sticky layer between layers
The stickiness or dispersion layer is present at all stages of gel polish coating. It is found in bases, colored gel polishes, and most often in top coats. The dispersion helps additional adhesion of the layers of gel polish, so you should not remove it with a product on each layer; this should only be done with the finishing layer, when the coating and design are already ready.
It is recommended to remove stickiness only if there are foreign particles attached to it that are preventing you from creating a perfectly even coating.
Mistake #7 – removing your hand from the lamp while drying
If you suddenly have a very itchy nose or need to answer a call, do it with your other hand, do not remove the hand on which the material is currently drying. This can simply cause the gel polish to shrink. The exception is when you bake in a lamp - you shouldn’t tolerate it here. Most likely, you applied the gel polish in too thick a layer, which can also cause it to wrinkle easily.
Mistake #8 – polymerizing all 5 nails at once
Don't try to gain time by first applying the material to all the nails on your hand and then drying it. Although the gel polish will not dry during this time, it is still viscous and can smear onto the side rollers and cuticles.
During the first couples, do one finger at a time: paint it and dry it. When this is automated, you can switch to the 4+1 scheme: the nail on the thumb is painted and dried separately, and then all the other four nails together. The big one still has to go separately, since it cannot lie in the same plane as the others, it is tilted. This means that during the drying process the material on it will shift.
Error No. 9 – did not remove dust from sawdust or lint
If you decide to file a nail somewhere, or if lint accidentally sticks to the sticky layer, it all needs to be removed, preferably with lint-free wipes, which leave nothing behind, unlike cosmetic sponges. There should be no foreign particles on the nails.
Mistake #10 – applying material to an uneven surface
If there are bumps on the nails, or the layer of the old coating has not been completely removed, this can lead to the fact that the material will flow and the surface will not be smooth. Such a nail will not be additionally strengthened in the stress zone, and this is very important, especially if it is long.
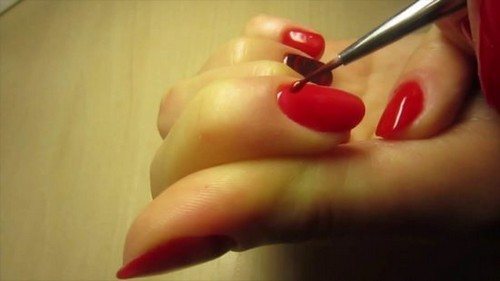
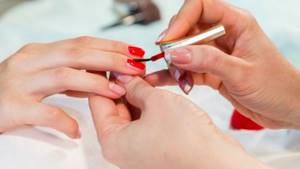
Mistake #11 – short sweeping movements when applying color
With such frequent short strokes, you apply the color unevenly, with bald spots. Movements should be smooth, uninterrupted, long: one stroke from the cuticle to the free edge. Then it’s easy to cover the nail with color in just three strokes.
Of course, even if you did everything correctly, without making all the above mistakes, this does not mean that no problems can arise with gel polish. There are other factors that can influence its wearability, ranging from the quality of the gel polish to the characteristics of your body. However, this is the exception rather than the rule, otherwise gel polish would not have become everyone’s favorite among girls!
Why is gel polish soft on nails? Why gel polish does not stick to nails, reasons and their solutions
Poor quality processing
When processing the nail plate, sometimes the cuticle is not completely removed.
Remains of skin prevent the gel polish from bonding to the nail and the coating is likely to peel off.
It is not for nothing that the edges of the nail and the perimeter of the cuticle are called the “stress zone”; this is where cracks occur.
For thin and flexible nails, it is recommended to strengthen these places with gel or acrylic to avoid cracks.
Important: the cuticle should be removed at least 24 hours before applying gel polish.
Poor cleaning and degreasing
The presence of foreign substances on the nails - dust, dirt, etc. will not allow the procedure to be carried out successfully.
The same applies to fat: if even the slightest layer of fat remains on the nails, the coating will not stick.
It is necessary to wipe the nail plates with alcohol or a product containing acetone; wiping should be done with a soft, lint-free cloth.
Uneven nail surface
Nail plates with ribbed irregularities must be carefully sanded with a special tool - a buff, especially the tips and cuticle area.
A similar treatment should be carried out even if various varnishes were previously applied to the nails - particles of the varnish polymer may remain.
"Wet" nails
Soaking too long before applying will cause your nails to become overly wet.
The use of a dehydrator is required. A similar problem can arise with increased sweating, as well as when performing spa treatments (wraps, applying masks) shortly before applying gel polish.
In this case, the nails become oily and moisturized, and the coating will not be able to adhere.
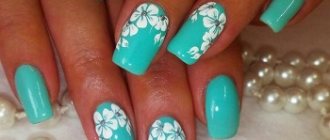
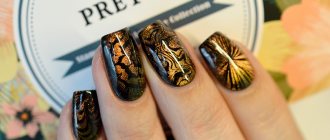
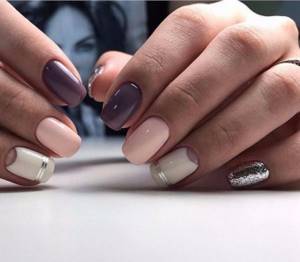
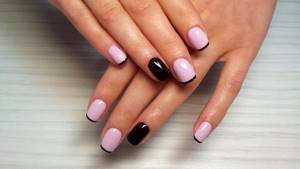
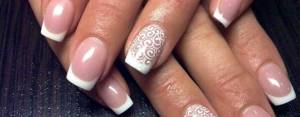
Several interesting options for stains on nails with gel polish
The most popular pattern today is marble pattern. It’s very simple to create, just take contrasting shades, such as black and white. Black looks great with emerald green or light blue.
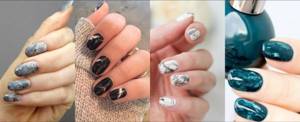
Also, with the help of stains, you can create abstract drawings in which everyone sees their own picture. Flowers come out well using this technique, decorating women’s hands with bright petals.