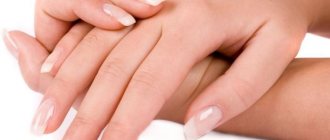
Long, well-groomed nails are a wonderful attribute of a beautiful and feminine look. Unfortunately, not every girl can grow her natural nails to the desired length, but sometimes you want it that way! It's good that there are nail extensions. This procedure requires accuracy, but at the same time anyone can learn how to do extensions. You can create a gorgeous manicure with long, flawlessly shaped nails at home. Are you ready to gain new knowledge and save on trips to the salon? In this article we will tell you how to make your nails longer at home and what materials you will need.
There are several ways to build up. You can lengthen your nails using acrylic, fiberglass in combination with other materials, or extend them onto forms or tips; in this case, gel is usually used. The last method is one of the simplest and most popular. This is what we will talk about today.
The choice of material depends on your individual characteristics and preferences. Both forms and types have their own advantages and disadvantages. Let's take a closer look at them.
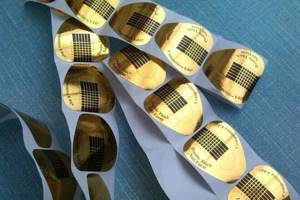
Form extensions
Extension forms are stencils with markings and a window. The markings allow you to calculate the appropriate length and width of the nail. The templates are applied to natural nails, covered with gel and hardened. Unlike tips, the forms are removed at the end of the procedure, so the nails are less thick.
Forms are disposable and reusable. Disposable forms are also called soft forms and are made from paper or flexible plastic. The advantage of these forms is that they are very pliable and easily take the desired shape. On the other hand, they may become wrinkled during the procedure.
Reusable molds are made of metal or hard plastic. They are more expensive, but quickly recoup their cost. The convenience of these forms is that they do not deform during operation, gel does not leak through them, and they eliminate gaps. If you choose the most suitable shapes for each nail, you will not have any problems. It is important to remember that reusable forms must be disinfected before each use.
What is needed, besides shapes, to create a chic length?
Materials for extension onto forms
To apply nail extensions to forms, we will need the following set:
- Antiseptic is an indispensable item for any beauty procedures.
- Remover or other product to soften/remove the cuticle. You can also simply make a hand bath.
- Pusher or orange stick to push back the cuticle and pterygium.
- Nail scissors and tweezers to cut cuticles and side ridges.
- Files and buffs with varying degrees of abrasiveness for shaping and polishing nail plates, both natural and artificial.
- Brush for removing nail dust.
- Dehydrator for degreasing natural keratin and removing the sticky layer from gel polish.
- Primer to improve the adhesion of natural nails to artificial material.
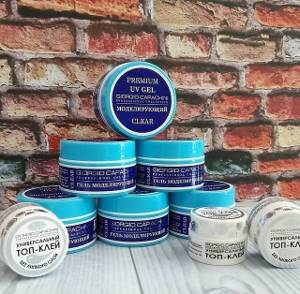
- Gel coatings - base and top.
- Modeling gel for creating artificial nails.
- Brushes for applying gel.
- Colored or camouflage gel polish for creating a design, optional decorative elements.
- Lint-free wipes for removing the sticky layer and degreasing the nail plate.
- UF lamp.
Attention!
Nail modeling gel polymerizes only under the influence of UF radiation; an LED lamp is not suitable for extensions. You can use an LED lamp to design your nails with gel polishes.
At first glance, it seems that you need a lot of materials, but most of them are universal and, if you love manicure and do it yourself, they will be useful for other purposes.
Important!
You can't do without antiseptic! Remember to disinfect. Untreated nails, hands and tools are a risk for fungal infections. Medical alcohol, chlorhexidine or lotion with an antibacterial effect are suitable as an antiseptic.
So, we have everything you need for nail extensions on forms. It's time to figure out how to do this.
Extension on forms. Step-by-step instruction
Stage 1
Any beauty procedure begins with disinfection. We treat our hands and nails with an antiseptic.
Stage 2
We perform a manicure, trim the cuticle and remove the pterygium. We file the free edge, then use a buff to remove the gloss from the surface of the nail plate. Using a brush, remove nail dust.
Stage 3
Degrease your nails using a dehydrator. We apply a primer for better adhesion of the material to the plate.
Stage 4
Cover the nail with a very thin layer of base coat. Dry in a UF lamp for at least 2-3 minutes (depending on power).
Stage 5
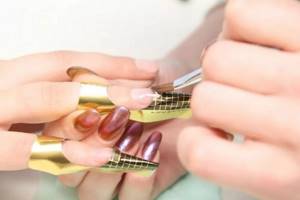
This is the most important step, where you need to show skill and maximum accuracy. The final result depends on the installation of the forms. We install the forms using a metal plate and tubes to press the “arch”.
If you are completely new to extensions, we recommend using solid forms. When working with them, you just need to choose the right size and carefully adjust them to each nail.
If you are working with soft forms, first adjust the window to the size of the subungual arch. Make sure there are no gaps, otherwise the gel will leak into the holes, and this will be noticeable during regrowth.
What if you get very soft shapes? In this case, we recommend gluing the two forms together so that they are denser and do not wrinkle.
Important!
Extend your nails into shapes using the following pattern: 4 nails on one hand, then 4 nails on the other hand, then thumbs. If this is your first time doing this, the best option would be to work on each finger individually.
Stage 6
We form an artificial nail using modeling gel.
How to apply the gel? To do everything correctly, we divide the nail into 3 zones:
- cuticle zone (⅓ of the natural nail from its base);
- stress zone (if you press on the tip of the nail, part of the plate will turn white - this is the stress zone, it bears the main load);
- free edge (this is the remaining part of the form).
Next, we proceed to the direct application of the gel:
- Base layer .
Apply a thin layer of gel to the cuticle area, thickening it slightly where it approaches the stress area. Dry for 30 seconds. - Base layer. In the stress zone, we thicken the layer of gel, especially in the place of transition from natural to artificial nails - here we apply the gel very thickly. Dry for 3 minutes, if necessary, adjust with a buff and nail file.
- Final layer .
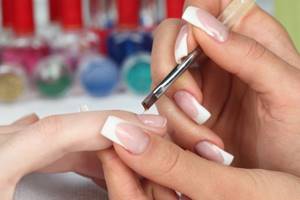
We form the future free edge of the nail with a thin layer. Dry in a UF lamp for at least 2-3 minutes. If stickiness remains after drying, you can remove the top film using a remover that does not contain acetone.
Stage 7
Now we remove the sticky layer so that the dispersion does not prevent us from adjusting the surface of the plate and the free edge. Next we remove the forms. We grind the resulting nail so that the surface is as smooth as possible, and correct the shape of the free edge. Usually, dispersion is needed for materials to adhere, but in our case, the materials will be fixed by grinding the surface.
Stage 8
Apply camouflage gel or colored gel polish in 2-3 layers (depending on the density of the pigment). Dry each layer in a UF lamp.
Stage 9
We decorate the nails in accordance with the chosen design, adding decorative elements if desired.
Stage 10
Apply top coat and cure. Preferably twice as long as in the previous stages.
Stage 11
Remove the sticky layer. We treat the cuticle and periungual ridges with oil.
How to strengthen your nails from the inside
The authoritative medical resource Healthline has listed the Top 8 Vitamins and Nutrients for Healthy, Strong Nails, the essential vitamins and minerals that make nails stronger and healthier. Make sure they are all included in your daily diet.
Biotin
The elasticity and strength of not only nails, but also hair and skin depend on this B vitamin (B7). For biotin to do its job effectively, the WHO recommends Dietary Reference Intakes (DRIs): Recommended Dietary Allowances and Adequate Intakes, Vitamins to eat about 30 mcg per day. But it may take a little more.
In one small study, Brittle nails: response to daily biotin supplementation, volunteers complaining of brittle nails were given a daily supplement containing 2.5 mg of biotin. After a few weeks, two-thirds of participants (63%) noted that their nails were significantly stronger. This is not the only similar studyTreatment of brittle fingernails with biotin with similar results, so biotin can be trusted.
Where can I get it?
Here are a few foods that contain biotin in decent amounts:
- offal, especially liver;
- egg yolk (boiled);
- fermented milk products - yogurt, cottage cheese, sour cream;
- salmon;
- almond.
You can also take pharmaceutical supplements with biotin. Just be sure to consult a therapist: he will help you choose the most effective concentration of B7.
Other B vitamins
In this case we are talking about folic acid (B9) and vitamin B12. They play a critical role in the production of erythrocytes - red blood cells, which deliver oxygen to all organs and tissues, including the nail plates. Sufficient oxygen is necessary for nails to grow at a normal rate and be strong.
Where can I get it?
The best natural sources of folic acid:
- leafy greens, especially spinach;
- strawberries, black currants, citrus fruits - oranges, lemons, grapefruits;
- legumes - peas, beans, lentils;
- nuts - almonds, hazelnuts, walnuts, cashews;
- seafood - oysters, clams, mussels;
- avocado.
The best natural sources of vitamin B12:
- liver, especially beef;
- fatty fish - salmon, trout;
- beef;
- chicken eggs.
Just like biotin, these vitamins can be found in pharmacy supplements. But there is an important nuance here. While the benefits of biotin supplements for nail health have been scientifically proven, dietary supplements with other vitamins and microelements have not been so studied. So it may not be worth spending money on buying them. A healthy diet rich in nutrients is enough.
Iron
This trace element is critical for the production of hemoglobin, a blood protein that is responsible for transporting oxygen from the lungs to tissues, including nails. If you don't have enough iron in your diet, your body won't be able to produce enough hemoglobin. With obvious consequences for nails (and not only).
Where can I get it?
Here is a list of foods especially rich in iron:
- meat and fish;
- liver and other offal - kidneys, hearts, cow's udder;
- spinach, kale and other green leafy vegetables;
- broccoli;
- beans and lentils;
- chicken eggs;
- nuts and seeds;
- dried fruits.
We also keep pharmaceutical supplements with iron in mind. But we remember the need to consult a therapist.
Magnesium
Participates in more than 300 biochemical reactions, on which the condition of the body as a whole depends. Including protein synthesis, critically necessary Magnesium basics for nail growth.
Magnesium is readily available and can be easily included in your diet. Despite this, for example, in the United States, less than 60% of the population receives the recommended daily dose of magnesium (400–420 mg per day for men and 310–320 mg for women).
Where can I get it?
There is a lot of magnesium in the following foods:
- whole grain breads and cereals;
- spinach, kale and other green leafy vegetables;
- nuts - almonds, cashews, peanuts;
- quinoa.
Omega-3 fatty acids
It is known that their deficiency can lead to dry and brittle nails.
Where can I get it?
Rich in omega-3 fatty acids:
- fatty fish - salmon, trout, mackerel, tuna, sardine;
- walnuts;
- eggs;
- chia seeds;
- linseed oil.
Vitamin C
The Roles of Vitamin C in Skin Health is essential for the production of collagen, a protein that provides elasticity and strength to all body tissues. And nails too.
It has been established by Vitamins and minerals: their role in nail health and disease that vitamin C deficiency leads to brittle nails and slower growth.
Where can I get it?
Foods richest in vitamin C:
- kiwi;
- citrus fruits - oranges, tangerines;
- strawberry;
- black currant;
- sweet red pepper;
- green vegetables - cabbage, spinach, cucumbers;
- greens - parsley and dill;
- tomatoes.
Zinc
Nail growth is ensured by cell division. And zinc is one of the key elements that are necessary for this division. In order for nails to grow at a normal speed and at the same time be strong and healthy, the body needs Vitamins and minerals: their role in nail health and disease a supply of zinc.
Where can I get it?
Sources of zinc are:
- animal proteins - meat (especially beef), poultry, fish, eggs;
- legumes - soybeans, chickpeas, black beans;
- nuts - in particular almonds and cashews.
Types of gels for nail extensions
Before considering the types of gels, we note that the extension can be single-phase, two-phase or three-phase.
- Single-phase thin coating. Contains three layers and has a liquid consistency. Great for beginners.
- Three-phase material. On the contrary, it is used by professionals. Includes base, sculpting and protective layers.
- Camouflage polymer. Used to hide imperfections of the nail plate.
- Gel chewing gum. Similar to plasticine, it is used to lengthen its own plate, as well as to create a colored stained glass manicure.
The result depends on the quality of the material, so approach this issue responsibly. The choice of extension gels is very wide.
Features of choice
When choosing which of the above gels to use for extensions, be based on your own selection criteria.
If you have sufficient experience in modeling extended nails, a three-phase gel that includes all three stages of modeling would be preferable. This manicure will be the most reliable and durable.
Beginners should opt for a single-phase extension gel, because this product allows you to create a beautiful manicure without any experience at all.
Choose a two-phase gel if you already have an idea of how both coatings work and you can create a fairly even and symmetrical camouflage.
The choice depends on your experience, the quality of the composition, and the availability of the necessary materials to create beautiful nail extensions.
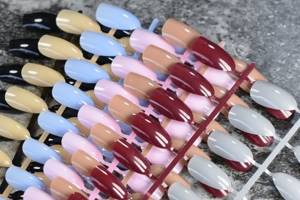
Various gels for nail extensions (@luckylaki21)
Extensions with tips
Tips are plastic false nails that are glued onto natural nails. They can be transparent, white or colored and are selected individually for each nail.
Tips are ideal for short, narrow or irregularly shaped nails. Tip extensions can also be performed in one, two or three phases.
To make your manicure look truly natural and aesthetically pleasing, you need to choose the right tips.
How to choose suitable tips?
Here are some recommendations for wisely choosing tips:
• The plastic from which the tips are made must be elastic and thin. • The size should correspond as much as possible to the size of natural nails. • For convex and flat nails you need to choose special tips. • For uneven, wavy nails, it is recommended to use a gel adhesive that fills in the unevenness.
You can buy tips using our website with delivery throughout Russia.
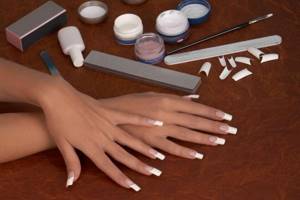
Materials for extensions onto tips.
For extensions using this technique you will need the following materials:
- cuticle softener;
- orange stick or pusher;
- nail file or buff;
- the tips themselves;
- type cutter;
- glue for tips;
- lint-free wipes;
- UF lamp;
- modeling gel;
- brush for treating nails after filing;
- tassels;
- liquid to remove sticky layer;
- primer;
- degreaser;
- cuticle oil.
Extension with tips. Step-by-step instruction
Stage 1
We prepare the workplace, disinfect hands, tools, materials and surfaces. To make it more convenient to work, you can select tips and immediately arrange them in the order of gluing on each nail. Tips should not exceed 2/3 of the natural nail. The excess must be carefully cut off. You cannot glue tips that are narrower than the nail. It is better to choose the one that is wider and carefully file it to the size of the nail.
Stage 2
We perform a manicure, trim the cuticle and carefully remove the pterygium. If pieces of skin remain, this may cause the gel to peel off. We cut off the free part of the nail to 0.5 millimeters and process it with a file. Use a buff or file to remove the glossy surface from the nail plate. Clean it with a brush.
Stage 3
Apply glue to the tip up to the step line, which is applied to the edge of the nail. To improve adhesion, you can apply glue to the area where it joins the tip. Apply the tip to the middle of the nail at a slight angle and press the rest of the nail. The line of the step should coincide with the edge of the nail. For gluing, hold for 15 seconds. If you find bubbles between the tip and the nail, try to squeeze them out or re-glue the tips.
Stage 4
Using a tip cutter, we remove the excess length, giving the nail the desired shape. Using files with large cells, we file the tips for leveling. Using a buff or the same file, we treat the surface of the tips for better adhesion to the gel. We pay special attention to the junction of the tip and your nail. Using a file, we clean this place as thinly as possible so that the transition is invisible. Remove dust from nails and finger skin with a brush. We treat the nails with a degreasing solution, apply a primer and polymerize.
Stage 5
Let's start working with the gel. Apply the first thin layer. Be sure to retreat about a millimeter from the cuticle and side ridges. Dry in a UF lamp for 2-3 minutes. Apply a thicker layer to the middle of the nail, gradually reducing it towards the sides. Dry at this stage for at least 3 minutes! If you experience discomfort from heating your nail, you can take a break and then continue drying. When interrupting drying, turn the nail down so that the unformed layer of gel does not spread. After drying, remove the sticky layer.
Stage 6
Now we give our nails the final shape. Using a file or buff, we process the surface of the nail, removing any unevenness in the arch. We clean the sides and the area of the nail near the cuticle, reducing the coating to nothing as much as possible. We file the tips of the nails so that they are as thin as natural nails. We process irregularities on the free edge. We wipe off the dust with a brush.
Stage 7
We're almost done! Apply the final coat so that it lays on the nail in a thin, even layer. This time we also cover the places left earlier along the side ridges and cuticle. Dry in a UF lamp. Some manufacturers produce a topcoat that does not have a sticky layer. If there is such a layer, then it must be removed.
Nails are ready! We treat the cuticle with special oil.
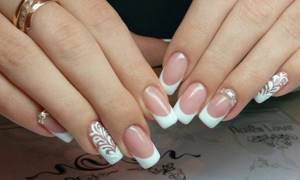
Tip extensions are also used to create a beautiful French manicure. A tip is attached to the base of the nail with glue, then gel is applied to the artificial material. The gel nail is dried in a UF lamp. Depending on your wishes, a smile is painted on top of the gel, or between layers. Beauty!
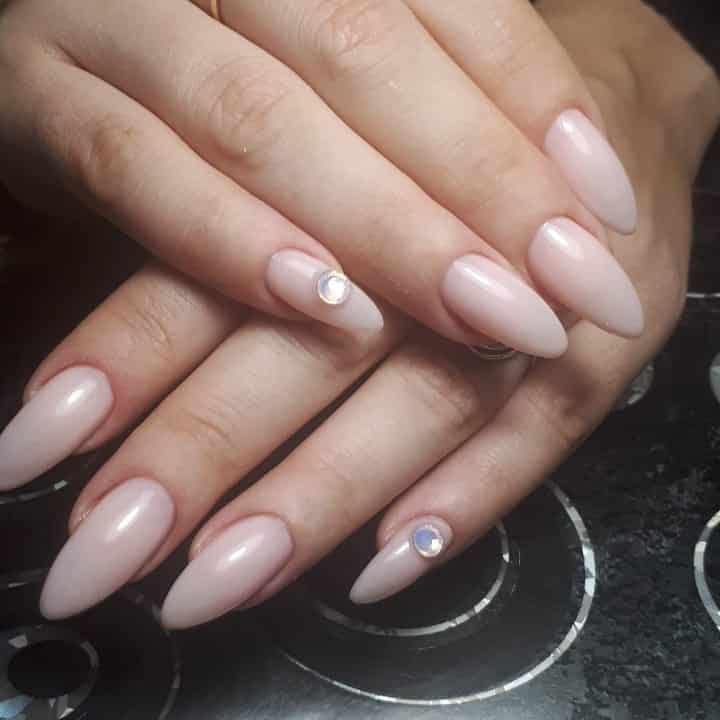
Forms or tips – which is better?
Both types and forms have their advantages and disadvantages. First of all, it is worth taking into account individual characteristics. Tips are recommended for those who have short, narrow or irregularly shaped nails. And for nails that grow downwards and bend, shapes are more suitable.
Tips are easier to use and easier to handle at home. But the shapes look thinner and more natural.
In addition, forms have several other advantages:
- they do not cover the main part of the plate, so the natural nail has access to oxygen;
- extensions on forms strengthen brittle tips on short nails;
- with this method of extension, correction can be performed without the need to completely remove the extended layer;
- The cured gel polish perfectly complements the natural nail without any obvious transition.
Whatever you choose, in any case, when adding extensions, you need to take care of your nails and make corrections regularly.
What is a base?
The base layer is usually used as the basis for a decorative manicure or before starting nail extensions. It is a thick coating, usually transparent. There are also bases with light flesh tones.
Some manicurists use this base as a material for extensions, as it has distinctive properties:
- well used for smoothing the nail surface and eliminating external defects;
- helps strengthen nails during extensions, as an additional layer is created, making the nails thicker;
- ideal for correction after modeling;
- makes a strong connection of natural plates with artificial turf, as well as decorative elements;
- easy to use, as it does not require additional application of base before performing a decorative manicure;
- protects natural nails from aggressive colored varnishes and other chemical materials;
- a base with a natural shade replaces colored gel coatings.
@oks.nails_brn
The base layer has its disadvantages. So, when building up, it can sag significantly or become damaged during operation. The reason may be the wrong choice of product or excessive stress on the nails after the material has hardened.