Many girls, instead of visiting a salon, now prefer to get a natural manicure themselves in order to save time or money. In addition to the classic decorative coating, some even resort to nail extensions.
Keep in mind that extensions are a complex multi-stage procedure, so before performing it you need to pay attention to the features and subtleties, and also choose the material - acrylic powder or gel. Acrylic nail extensions at home are done less frequently, but some girls prefer to use it.
Features of acrylic extensions
Nail plate extensions are a common cosmetic procedure today.
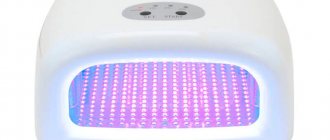
One option is to use acrylic, which is very similar to gel, but is able to dry naturally without exposure to ultraviolet lamps. Despite the fact that the use of this material was the very first of all extension methods, this method has not yet lost its relevance and demand, this is largely due to the ease of implementation of the procedure and its affordable price. The acrylic used for this procedure is in powder form, but when mixed with certain components it creates a mass with a thick structure, which is applied to the nail plates to build them up.
It is important to remember that this procedure is contraindicated for patients with diabetes, herpes, or those with lesions of various fungal formations.
Price
Do you want to have a beautiful manicure, but don’t know how to apply acrylic nail extensions? Contact a specialist or one of the salons in your city. Find out reviews about the artist, work experience, quality of materials, view photos of finished works. The price of extensions depends on its complexity and the prestige of the salon. In the Moscow region, the pricing policy for this service is as follows:
| Beauty Studio "Salisun" | 2600 rub. |
| Beauty salon "Solnechny" | 3000 rub. |
| Image laboratory "Persona" | 3000 rub. |
| Beauty salon "Evgeniya" | 2000 rub. |
| Beauty salon "Style" | 2100 rub. |
Technicians
If the decision was made in favor of acrylic rather than gel extensions, then you will also need to decide on the technique used, since there are different ways to work with this material. It must be taken into account that acrylic hardens very quickly, therefore, when carrying out the procedure at home, all actions must be distinguished by their efficiency.
All options for such extensions are discussed in more detail below:
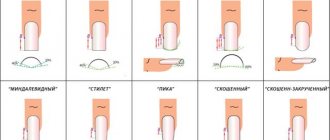
- Extension of nail plates using tips is the fastest option for the procedure, since it will take no more than an hour. This technique is ideal for those with square or fairly wide nails. The only drawback is the impossibility of creating a thin and pointed manicure, since the process of cutting out the desired shape will take too much time and take a significant amount of effort.

- Extension of nail plates on top forms. This technique involves laying out the working material in a special recess, which is located inside the mold, after which it is applied and pressed directly to the nail, ensuring uniformity and reliability of fixation.
- Extension of nail plates on lower forms. To carry out this procedure, you will need to use a brush, using it to lay out small acrylic balls. Using them as the main blank, you can make a whole nail of absolutely any shape and length.
Acrylic masterpieces
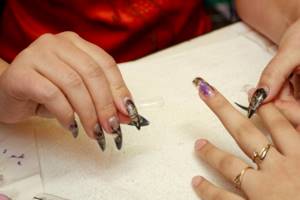
Many masters often travel to various competitions where they present their work. Basically, such masterpieces are made of acrylic, because it is easier to remove later. This selection is purely for exhibition purposes, because in real life it would be very, very difficult with such nails.
Required materials and tools
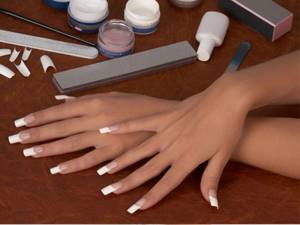
The implementation of the procedure is preceded by preparatory work, which includes the preparation of all necessary materials and tools.
To carry out the extension, you will need to prepare the following minimum set of devices:
- Acrylic powder intended for the production of working mass.
- Monomer in liquid state , which is required to dilute the base material; without it it will not acquire the required consistency.
- Any product intended for disinfection activities.
- Primer.
- A cosmetic type of glue.
- A means for applying a fixing finishing coat.
- A special brush for working with the material, as well as means for cleaning it.
- A set of various files for surface treatment.
- Forms or tips depending on the chosen technique.
- Orange sticks.
You can also purchase ready-made kits, which include everything you need for extensions. People carrying out the procedure for the first time are recommended to use this option to eliminate the risk of purchasing products that are incompatible with each other or an unsuitable instrument.
Step-by-step description of extensions using tips
The specifics of the extension directly depend on the chosen technique, so it makes sense to consider all methods separately.
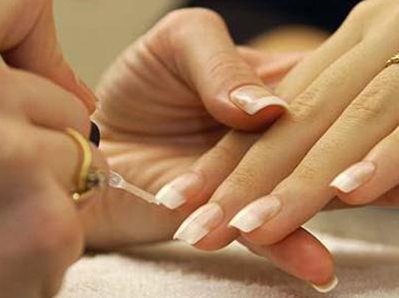
The first will describe in detail the method used to carry out the procedure using tips:
- Initially, hand disinfection is carried out, as before any other manicure procedures.
- is removed, and the thin film underneath it is also removed. For these purposes, orange sticks or a pusher are usually used.
- Light file movementsdirected in one direction, the glossy coating is removed
nail plate. - Tips of the appropriate size are selected depending on the individual characteristics of the nails.
- The inside of the tips is covered with glue, after which they are glued to the nails. It is important to use only a special cosmetic type of adhesive, since household or household options are toxic and can cause serious harm to health.
- remaining in a free position are corrected
- The type prosthesis is processed with files until it acquires a matte structure. After this, the resulting dust must be carefully removed using brush movements.
- The nail plates are treated with degreasers and primers.
- Mixing the working materials is done by dipping the brush into the working monomer and then dipping it into acrylic powder.
- The resulting mass should have a spherical shape and be laid out in the center of the plate, after which a nail of the required size will be created from it using a brush.
- The surface filing begins : first the side parts are subject to processing, and then the upper and lower areas. Such manipulations should continue until the required bends are obtained.
- Small scratches , if they have formed, can be removed using a buff. The polishing process should be carried out until
- To treat the cuticle , oil is applied to it and rubbed in with your fingers.
Step-by-step description of extensions to lower forms
The implementation of this technique requires much more dexterity and the presence of certain skills; its main advantage is the opportunity to express your own imagination and experiment with artificial manicure. Detailed instructions are given below:
- The process of disinfection, removal of the cuticle, removal of the top layer from the plate and treatment with a primer is carried out in the same order as when applying extensions using tips.
- After completing these steps, you need to put a special form on the tip of your finger, and then give it the shape and the desired bend.
- After the action has been completed, the surface must be treated again with a primer.
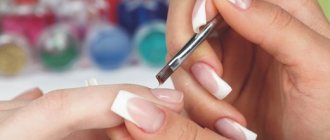
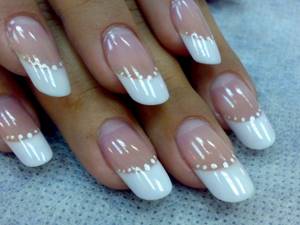
- Acrylic material is prepared in the same way by mixing powder and monomer. The blank can be of several colors, for example, if the artificial plates are to imitate a French manicure.
- It is necessary to wait until the mass dries completely naturally, after which the form is removed from the finger.
- Using files, the created nails need to be sharpened, removing excess along the edges and giving the end of the plate the desired shape.
- The procedure is completed by sanding the surface and applying oil.
Step-by-step description of extensions to upper forms
This technique is more suitable for people who do not have significant experience in DIY extensions, since the procedure is simpler than in the previous version, and the created surface will have an even structure and smoothness. Detailed instructions for carrying out are given below:
- The preparatory process is identical to the previous two extension options.
- Forms of suitable size are selected, after which acrylic balls are placed in them. The quantity depends on the desired length of the nail being created.
- The form is fixed on the nail and pressed firmly, allowing excess material to come out.
- You need to hold the form in this position for about 7 seconds; after the specified period, you can set the shape of the future plate from the inside, for this you will need to use a brush.
- It is necessary to wait for the material to dry naturally, after which the used form can be removed.
- The edges of the created nail are corrected using a file, after which the final treatment can be carried out with oil.
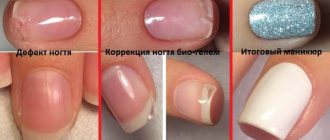
Correction
Artificial nail plates require certain care, including periodic correction. The procedure is virtually identical to extensions, but the use of thrips or forms is no longer required.
A step-by-step description of the correction process is given below:
- Initially, standard disinfection actions are carried out. In this case, it is necessary to refrain from using acetone-based products, since it will negatively affect the condition of the artificial layer.
- The usual hygienic manicure is carried out, which consists of removing cuticles and hangnails, as well as treating the skin around the nail.
- The overgrown part of the nail, which stands out against its general background, is removed using a file with a fine structure of the working surface.
- At this stage, disinfection is carried out again , after which you can use a napkin with no lint to sand the cut ends.
- The surface to be treated is moistened with a primer , after which acrylic balls can be prepared using the already described method, which are stretched over the entire area that needs adjustment.
- After the material has hardened, you can use files and a buffer to give the required shape and polish.
Removal
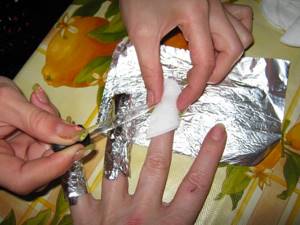
Removing artificial turf can also be done at home, but you must first take care of the safety of your eyes, since during this process small and sharp particles of acrylic can fly in different directions. You can then use the following instructions:
- Initially, use a nail file to remove the free edge of the acrylic plate; only then can you proceed to removing the outer layer. At the same time, you should not apply force or try to tear it off, as this can lead to injury to the natural nail. To carry out this step, it is recommended to use a tool with a fairly coarse coating.
- Cotton pads are moistened with a special acrylic remover and then wrapped around the nails. The fingers should be additionally wrapped on top with regular aluminum foil to prevent evaporation of the drug and loss of its basic properties.
- After 40-50 minutes, the cotton pads and foil can be removed. The acrylic will acquire a liquid structure; it can be removed with any suitable tool, but this must be done promptly, before it has time to harden again.
- If there are residues of material after the procedure, they can be removed with a swab soaked in a regular acetone-based nail polish remover.
- To complete the removal process, you need to wash your hands thoroughly; it is also recommended to lubricate them with some nourishing or moisturizing cream.
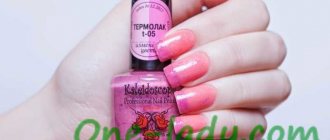
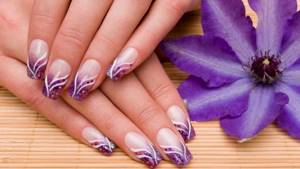
Acrylic ombre nails
Acrylic, due to its finely dispersed composition, fits perfectly on the nail in different colors. The master can easily give you ombre extensions. When two colors smoothly flow into each other without having a clear merging point.
Advantages and disadvantages
Many experts consider acrylic extensions to be an outdated procedure and advise using gel materials.
However, using acrylic has its positive aspects, which are as follows:
- High level of elasticity, making artificial coatings similar to natural nails.
- Resistant to temperature changes.
- Significant strength with low plate thickness.
- Providing protection from aggressive external factors.
- Ease of carrying out the procedure for removing the artificial layer.
- Preservation of the natural shape of the growing nail.
At the same time, acrylic coatings also have certain disadvantages that they are endowed with in contrast to gel extensions. The main similar features are given below:
- The presence of a persistent odor, which is not pleasant to all people.
- Disorders of the respiratory processes of the nail plate.
- When painting, it is necessary to first use a colorless base varnish.
- There is a risk of an allergic reaction.
- Loss of natural shine of the nail.
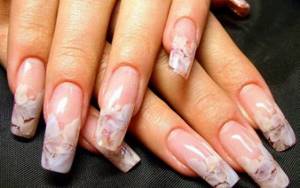
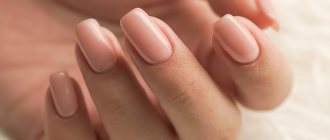
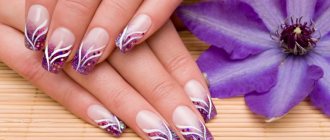
Glossy acrylic nails
In fact, acrylic nails are very difficult to distinguish from gel nails. After all, there is no significant difference between them, except in some moments during the build-up process.
Reviews
Elizabeth : “I read a lot of negative opinions about acrylic extensions on the Internet, but after doing it myself, I did not encounter any of the negative manifestations. I have been wearing this type of artificial nails for quite a long time, I make corrections as they grow, usually it is required every 3-4 weeks. Convenient and beautiful!”
Julia : “I really liked acrylic nails, but because of this procedure, the natural plates deteriorated: they became very thin and weak, and natural growth was disrupted. I don’t know, maybe the technology was broken, but a lot of time has passed and their condition has not recovered. Now I’m planning to do extensions again, because without it the manicure doesn’t look attractive.”
Elena : “I wore acrylic nails for a long time, but the specialist recommended removing them after pregnancy, since it could be harmful to me and my baby. My nails don’t look particularly good right now, so I’m really looking forward to getting them done again.”