The ideal glare effect on the coating of natural nail plates is one of the main trends in modern nail design. Most nail artists post photos of their best work on social networks, because beautiful highlights are an absolute indicator of skill.
In essence, ideal highlights on gel polish are obtained by reflecting light rays from the smooth surface of the manicure. Also, the shape of the lamp will determine what kind of glare you get in the end. Under the rays of a straight-shaped light source there are straight highlights, and under the rays of a round lamp there are rounded highlights. To create perfect oval highlights with clear symmetry, use a round-shaped lamp and the lens of any photographic device located at the level of the light source.
Important! A perfect glossy surface is the key to how highlights will be made on gel polish. Therefore, after creating a manicure, there is no need to rush to remove the dispersion layer, since first a beautiful photo is taken. After all, after removing the dispersion, the glossy coating may fade a little.
For a good photograph, it is important to ensure that the highlights caught by the camera are evenly rounded. You should not take a photo if you were unable to achieve a perfectly smooth surface of the nail or if there are minor imperfections in the manicure. Because the camera is able to “expose” all existing errors and irregularities in the coating that are invisible under normal lighting.
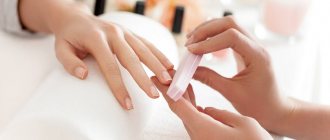
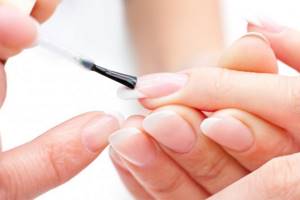
Before applying highlights on your nails with gel polish, it is important to first do a hardware manicure and properly level the surface of the nail.
Why do irregularities appear?
Ribbed, wavy and thin nails are always a problem. With such nails, any manicure does not look very neat. Most often we do not think about the true cause of our deplorable condition.
It is worth paying special attention to this issue, because nails are an indicator of our health. For example, if your nails are covered with a groove near the cuticle, then you should take a course of vitamins to saturate your body with useful microelements. Ribbed plates appear as a result of microtraumas, and also cause fungus, psoriasis or other problems in the body.
How to make perfect highlights: option 1
Each of the methods is very similar to each other and has a common component due to which such strengthening is carried out. In this option, a base will be used, which is used together with gel polish, only its consistency should be liquid.
- A degreaser and primer are applied to prepared nails. Typically, an acid-free primer will leave a slight tacky layer.
- Place a few drops of liquid base on the palette and add acrylic powder to it. The color of the powder can be used either transparent or camouflage. Both components are mixed, but you should not make the mixture very thick, because it will not be very convenient to work with. It needs to level out on its own and not stand in lumps.
- A thin layer of base gel is applied to the surface of the nail, sealing the ends, and dried in a lamp.
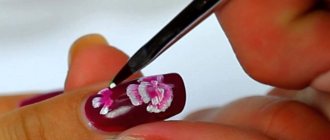
- To apply the resulting mixture, use a tweed brush. Take a small amount of this material and distribute it over the nail. The bulk should remain in the central part. The edges are coated lightly. There shouldn't be any volume there. The cuticle area is smoothed so that there are no steps or sagging there. There is also no need to apply too much material at the end. Everything at the tip should be neat and elegant. The cuticle area can be smoothed using slapping movements. The resulting result is dried in a lamp.
- With subsequent fingers, do everything in the same way.
- After drying, repeat the same thing.
- The next step is to apply a thin layer of clean base to finally smooth everything out.
Precaution
When sanding your nails, be careful not to sand off too much. Otherwise, when drying the biogel under a lamp, you will experience hellish pain from heating the material and increased sensitivity of the exposed nail bed.
In general, in professional stores, a sales consultant will always ask what experience you have in working with similar materials. And if you are a beginner, most likely, he will offer softer products and explain how to use. Therefore, look for such a store and do not refuse a free consultation before purchasing. It’s better to find out once again than to walk around with sore nails for a week and a half. Still, the bed area has many nerve endings. This is a very sensitive place. It’s not for nothing that during torture, needles were driven into these very places, knocking out the necessary information from spies during the Second World War. Don't torture yourself because of some glare. It's not worth it.
In general, if you are not very competent in working with the listed materials, use regular varnishes. Keep simple instructions for use:
So, clean your nails of cuticle growths and everything around it. Take a multi-sided file and sand your nails with the softest side, without large abrasive particles. If you have smooth plates, you don't need to grind anything. They usually treat vertical stripes on the nails, which make the plates uneven. Sometimes heterogeneity is caused by dissection of areas or old injuries.
After sanding your nails, apply any high-quality colored polish that dries quickly. Repeat layer.
Types of glitter
For nail design, manicurists use different types of glitter. They differ from each other by the following criteria:
- color (blue, gold, silver, etc.);
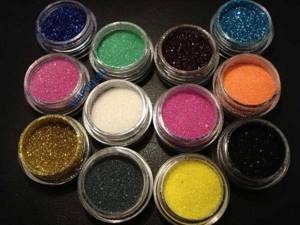
- size (small, large, medium size);
- shape (hexagonal, square, round, star, etc.)
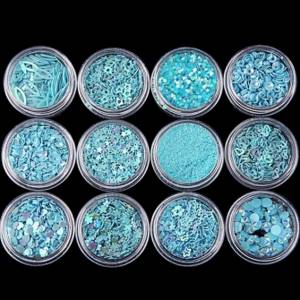
- transparency (there are transparent glosses and non-transparent ones).
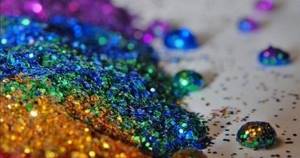
With such sparkles you can achieve different effects in manicure: from light shimmer to complex applications and compositions.
Small sparkles
Small sequins can have different release forms:
- dry:
- powder (ultra-fine glitter - with pearl effect, holographic, etc., sold in jars);
- powder (small crumbly glitter or dry glitter, sold in zip bags or jars, bottles, etc.);
- wet:
- as part of a transparent varnish;
- glitter.
Wet small glitter
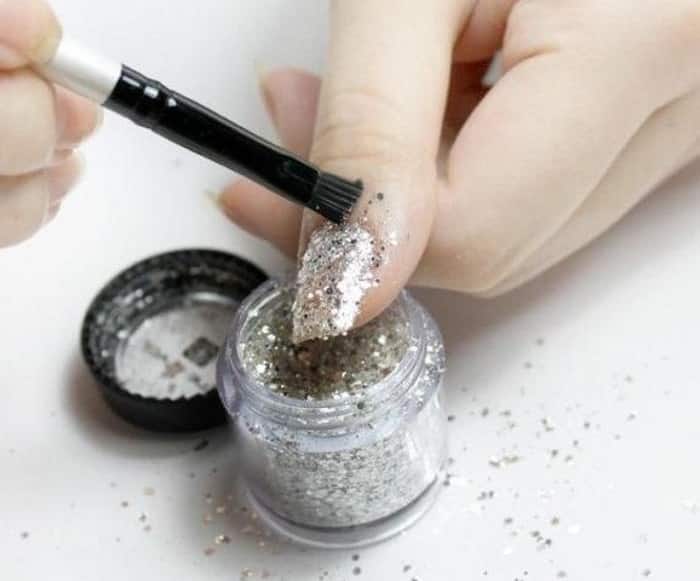
Dry glitter is easy to apply to a non-dried coating and they “stick” as intended by design. You can apply dry glitter from a jar with a dry brush or simply by dipping your nail into the glitter. After finishing decorating your nails with dry glitter, you need to fix them with a transparent varnish (gel polish or fixative).
Wet glosses can be applied to any coating and subsequent sealing with a clear coat is not required.
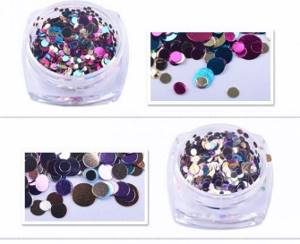
Large sparkles
Such shiny elements immediately catch the eye if they are present in a manicure. Despite their size, they can be found both dry and wet.
Dry large glitters (or glitter, kamifubuki) are produced in jars or cones; it is convenient to apply them to the nail with small tweezers on a wet coating or on a sticky layer of gel polish. After completing the design, it requires covering with a transparent fixative or topcoat.
Wet large glosses are found only in the form of varnish with a transparent base. They are not produced as wet glitter. After applying varnish with large shiny particles, it is better to cover the nail with a layer of transparent coating, since they have a high density and do not completely follow the curves of the nail plate.
Rub method
- We do not wash off the dried colored layer of varnish so that a sticky coating remains.
- Pick up small glitter with a dry brush and apply it to the nail, patting it gently. It is necessary to cover the entire surface of the plate.
- Once the entire nail is covered, rub in the glitter and at the same time remove any excess residue.
- Brush off unnecessary particles with a dry brush.
- Dry in the lamp for a few seconds, and then apply the finish and dry thoroughly.
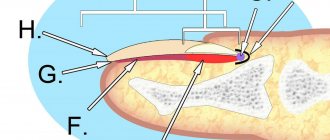
What is nail plate alignment?
Each of us has a different nail structure. Lucky are those girls whose hair is perfectly even and smooth. But some young ladies have a hypersensitive plate (irregularities, detachments, tubercles). In addition to everything, during manicure, nails are often subjected to various treatments: filing, polishing, removing gel polish with a machine, etc., which also has a bad effect on the condition of the nails.
Alignment and strengthening are necessary in order to give the nail the correct architecture. It will also get rid of varnish runs, waves at the end, various bumps and dents. The first layer is a primer, it hides all the irregularities. The second layer is evenly distributed over the nail, smoothly disappearing in the area of the side ridges and cuticle, forming an ideal surface.
This procedure is simply necessary and has a number of advantages:
- Leveling strengthens the nails, and the coating lasts for several weeks before correction.
- The ability to create the correct nail architecture. When adjusted, the nail will grow in the right direction.
- Simplicity and accessibility. In order to make strengthening, you do not need to buy additional products. A simple procedure takes about 10 minutes.
- It is important to do leveling when removing the coating with a device, so that when cutting, a base layer remains. A thin layer of the product will cover and protect the nail from mechanical stress.
- Static and beautiful. The smooth surface gives beautiful and even highlights from different light sources.
Nail surface modeling
High-quality alignment of the nail plate before applying highlights of gel polish on the nails is the main task of this design, so that the gel polish lays evenly without spreading around the edges. A thick rubber-based gel base will best cope with this.
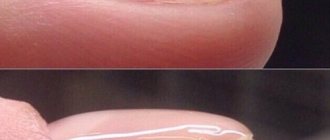
- A sufficient amount of gel is collected on the brush. Positioning it parallel to the nail, apply a drop of base slightly above the middle. Then, moving the brush in the opposite direction, the base is pushed towards the cuticle. When painting the end of the nail, the base layer is pulled towards the free edge with the utmost care.
Important! The base gel should not come into contact with the skin of your hands or cuticles. Otherwise, rapid delamination of the material in these places cannot be avoided.
- When creating the architecture of the nail, after applying the gel base layer, the hand is placed under a round lamp with a bright glow, so that the glare is reflected on the coating. If it is not entirely clear whether the required volume and thin perimeter of the layer have been achieved in the right places, the reflection of the light bulb on the coating is viewed through the phone screen. When moving the nails up and down, or left and right, the highlight should not be interrupted. If the surface is uneven, then add a little more base to the brush, which is collected at the highest point of the nail (apex). Having received a beautiful, uninterrupted highlight, the base layer is polymerized.
- The second base layer is applied in the center of the plate, without sealing the end, and then dried.
To make highlights on nails with gel polish as in beautiful photos, the material with the main color is applied only after the gel base has completely dried. The number of layers depends on the color and chosen coating. For example, a bright color when dyeing is applied in two layers, and for a dark palette of gel polishes it may be necessary to apply three layers. Polymerization of each color layer occurs sequentially.
A fixing layer of material applied to the correct nail architecture will create ideal highlights on the gel polish, both under a round light source and under a lamp of any other shape.
You can visually lengthen short fingers by photographing highlights along the growth of your fingers. When using a macro camera on your phone, the photos will come out of higher quality than those taken with a regular camera.
Content
- Methods for straightening nails under gel polish
- Method 1 – base alignment
- Method 2 – leveling with acrylic powder
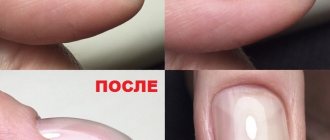
- How to check that the coating is perfectly smooth?
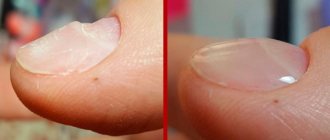
Using gel polish, you can level nails with grooves and depressions, curvatures and waves, and edges. In addition, gel polish is also well suited for correcting the shape of the nail: with its help, springboard-shaped and flat nails can acquire a beautiful shape with the correct bend in the right place. And we’ll talk about how this can be done below.
Will there be gloss?
Now about the gloss. It should appear on your nails if you did everything correctly, dried it completely, took all the pauses, and did not rush when applying the materials. If there is no glossy effect, but, on the contrary, everything is very matte, perhaps you wiped your nails on your T-shirt, accidentally, without even noticing. Or there is a lot of dust, wool and other microscopic particles flying around the apartment, which have landed in the materials on the nails that have not yet dried. That is why it is worth repeating that you need to be able to work with biogels and gel polishes and gain experience. All the first pancakes may come out lumpy for you.
The same applies to ultraviolet lamps. Professional equipment quickly copes with the task. But all this cheap Chinese junk sometimes only serves as a beautiful blue lamp, but it does not dry out the biogel at all. And the situation is the same with biogels. Very cheap biogels, even under the ultraviolet light of professional lamps, may not harden or, on the contrary, begin to dry out instantly after application, when you do not have time to stretch it over the nail. At least some kind of competence is needed here. It’s one thing to buy one biogel, and another thing when several materials and devices are involved in a manicure.

White manicure in the most fashionable techniques
Negative space . For a fashionable white manicure in the negative space style, there are no specific rules about which part of the nail to leave unpainted. It could be a hole at the base, a longitudinal stripe, or even a pattern - in any case, a white manicure with negative space will look stylish and non-trivial.
Lunar . In this technique, fashionable white manicure 2021-2022 is more often found with brightly highlighted holes of a different color or shine. The shape of the hole does not matter, which is why a white moon manicure will be so varied and unpredictable.
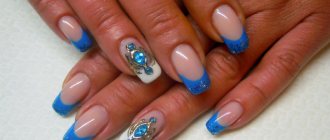
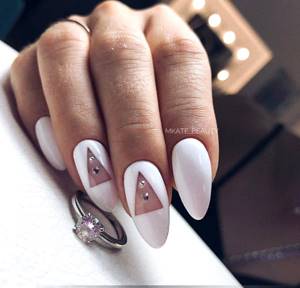
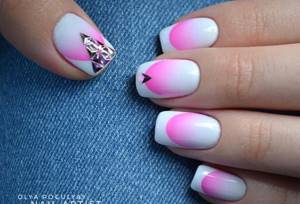
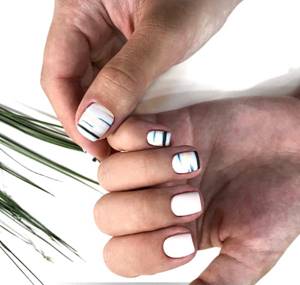
French . In addition to the traditional version with a white stripe and a nude base, a white French manicure can be done in reverse - a white base and a contrasting thin colored stripe. A good option for a white manicure would be a silver stripe and a gradient.
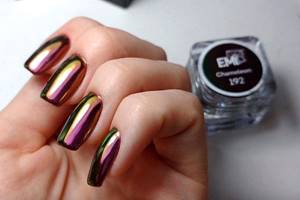
Rubbing . Fashionable pearl and metallic polishes with the effect of chrome-plated nails are simply created for a white manicure. Alternate white nails with rubbed nails, complement the pattern with stamping or rhinestones and surprise the surrounding fashionistas with a flawless white manicure.
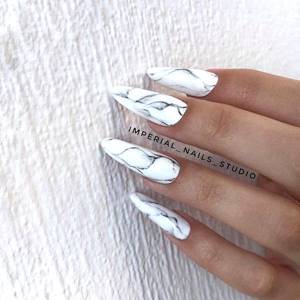
Marble . Such a discreet and chic white manicure with a marble effect could not help but fall into the most fashionable nail design ideas with white polish 2021-2022. It is enough to highlight one or two marbled nails so that the white manicure sparkles with a new mood and look.
Matte effect. White matte nails once again prove that a fashionable white manicure is suitable for everyone and for any mission. The matte finish makes light nail art with colorful designs very good.
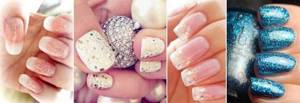
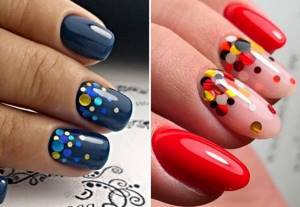
Holiday manicure ideas with glitter
Glitter will help give your nails brightness and a unique shine. Large kamifubuki imitate festive confetti, and a small scattering of sparkles allows you to create the effect of fireworks. Sequins of various sizes allow you to create a festive and bright look, ideal for a noisy party.
Depending on the holiday, you can create a wide variety of manicure designs:
Manicure for the New Year with sparkles
Manicure for Valentine's Day
Manicure on March 8
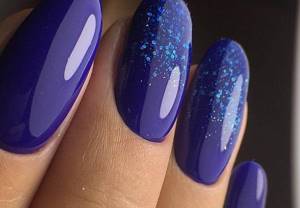
Fashionable manicure with loose transparent glitter
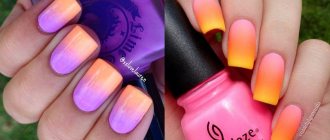
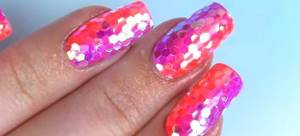
Today, shimmering nail designs and a combination of several manicure techniques are in fashion. A novelty in nail design is a coating made in the popular ombre (amber) technique and decorated with “dry” transparent glitter in the shape of a hexagon. Performing such a “brilliant” manicure is quite labor-intensive and can take more than one hour. However, the result is worth it! Typically, this glitter manicure involves covering all the nails, but if time is limited, use glitter partially.
A gradient on your nails can be done in two ways: apply transparent glitter to a colored coating or use colored glitter. For manicure options with glitter, see the photo .
Manicure with glitter: technique (photo step by step)
The process of performing a manicure with glitter takes a long time, but is quite simple in technique. What will you need?
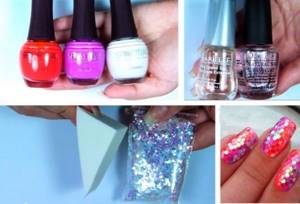
- transparent base;
- white nail polish;
- colored varnishes;
- colorless finish varnish;
- wooden stick for manicure;
- transparent glue;
- sparkles/glitter on a transparent basis;
- sponge/sponge;
- scotch;
- nail polish remover.
So, a photo with step-by-step instructions for performing a manicure with glitter .
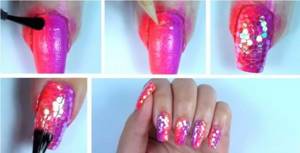
- Apply the first layer of colorless coating.
- We take white varnish as a base and carefully cover all the nails with it.
- Carefully cover the skin around the nails with tape so as not to get dirty when applying the gradient coating.
- Apply colored varnishes in the form of stripes to the sponge, then print the coating on one or two nails. For subsequent application, the varnish must be renewed. The coating must dry.
- Apply glitter/spangles one at a time. To do this, apply transparent varnish to the part of the nail (where we will attach the first particles of glitter). Then we dip the edge of a wooden stick in transparent glue, pry up the glitter and attach it to the transparent varnish until it dries. Next, repeat the procedure until the entire nail is covered with glitter.
- We fix the glitter with a transparent finishing varnish.
- We remove the tape and carefully remove the remaining coating from the skin with a brush dipped in nail polish remover.
[pro_ad_display_adzone id=”9403"]
Stylish manicure with glitter is ready!
How to make perfect highlights: option 2
In this case, use a base with a denser consistency.
- Apply a thin layer of base of a dense consistency to the prepared nail, covering all parts of the nail. Do not push material under the cuticle. Sent to dry in a lamp.
- With the second layer, take a drop of the dense base and distribute it in the middle of the nail, and paint the sides with the material that remains on the brush. The tip of the brush begins to distribute the main drop. But the main part should remain in the middle of the nail. The drop size and volume must be adjusted independently. It depends on the length, curvature of the nail, and whether there are any unevenness on the nail plate. If the bend of the nail is large and directed downward, then you should not emphasize this with additional volume. If your nails are long, then a drop is needed over a larger area. The main thing is that all the material is smoothly distributed. All this is sent to dry in the lamp.
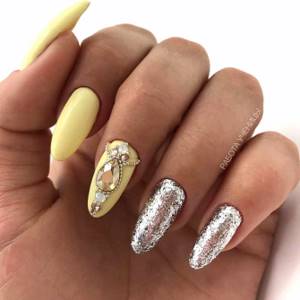
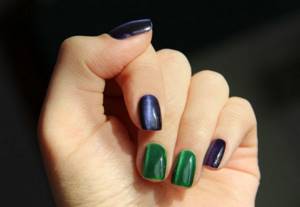
Bright monochromatic manicure 202
Monochromatic nail art is a popular trend in recent seasons. The design does not require a special approach to its implementation. In a single-color manicure, you can use all the bright colors that are presented in your manicure set. The design in lemon, orange, burgundy, and soft pink colors looks interesting.
For shiny decoration, use silver glitter, sequins, rubbing, dry glitter, melange and other materials. For formal looks, use gold gel polish with glitter. For shiny decor, select 1-2 nails on your hand, for example, the middle and ring fingers, the little and ring fingers.