If you want to learn the technique of drawing roses on your nails yourself, then read the article. Here you will learn how to create a manicure with a rose using simple methods and how it is painted in nail salons.
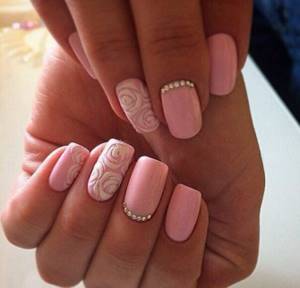
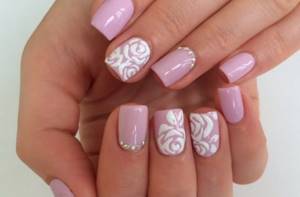
Roses on nails reflect new fashion trends; this design is called “shabby chic”. Flowers look romantic and impressive. Roses made from bed colors will add additional charm.
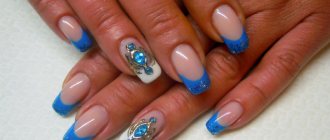
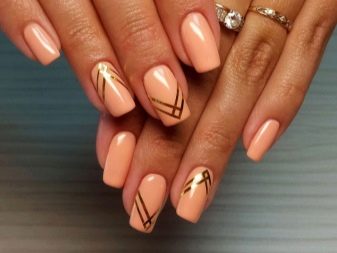
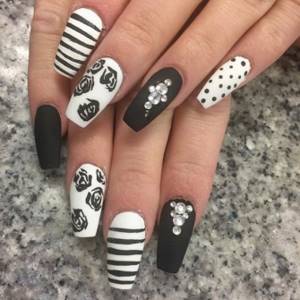
There is a wide variety of nail designs, with all kinds of elements. You can add stripes, make a voluminous manicure, add rhinestones, patterns, and much more. It all depends on your imagination.
How to paint a rose step by step on nails with acrylic paint, photo
There are several techniques for creating a manicure with roses using acrylic paint.:
- Apply floral nail art to the base using lacquer-soluble paints
- Draw stylish rose patterns using water-soluble materials
The process of creating a design with roses
IMPORTANT : Experienced cosmetologists welcome the creation of manicures with floral designs using soluble paints. After all, it turns out to be more accurate - it spreads less. However, doing such nail art is not an easy task, because mistakes cannot be made when applying roses. Hand movements must be clear. And for beginners, it is better to use water-soluble materials, because they can be easily removed with a napkin from the surface of the nail plate when smeared.
Simple “Roses” manicure design step by step
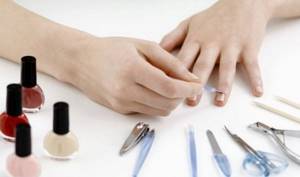
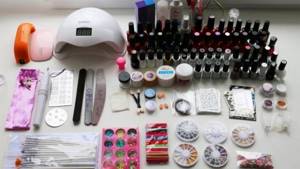
Required tools and materials
To create an unusual design on wet gel polish, you will need some professional tools and materials.
- Curing lamp for drying varnish: can be used with an ultraviolet or LED lamp. The latter speeds up the drying time several times.
- The thinnest brush or wooden stick with a sharp end. Professionals usually choose a brush size of zero. Beginners can do without an expensive tool and make a custom brush from a regular bottle of used varnish.
- Basic transparent coating to protect the nail and better apply the gel to the surface of the nail plate.
- Top protective layer in glossy or matte format.
- The main color of the gel polish and one or two shades of your choice to create a pattern. It is worth choosing varnish without skimping on quality. The type of drawing will depend on its structure, and the work itself will be easier.
- Cotton swabs, coverage correction products, napkins.
- Additionally, you can use shimmer, rhinestones, and foil to create a design.
How to paint roses on nails with gel polish?
In order to draw beautiful roses on your nails, we first prepare the nail plate in the standard way. If your nails are thin or damaged, it is recommended to apply a primer for better adhesion of the coating.
Beautiful design of purple roses with gel polish
- Next, cover the nails with a base coat.
- An important step is the selection of varnish colors. Roses will look beautiful on dark gel polish. This combination will look stylish and contrasting
- The next step will be to apply a thin layer of gel polish of the background color.
- Then remove the sticky layer
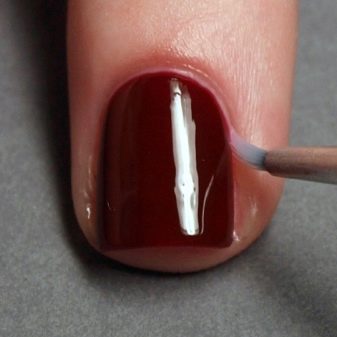
- Drawing roses is not a complicated process; to do this, dip the tip of a thin brush into gel polish, put a dot on the nail, and draw an arched line. The result should be a comma
- Then twist the rose petal in a circle in the next direction. All lines should be slightly curled to make the flower look realistic.
- To make the line narrow at the end of the petal, gradually raise the brush, without lifting it, from the nail plate
Combination of cat eye gel polish with roses
IMPORTANT: To prevent the picture from spreading, dry each petal and each design element in a lamp. This will make your work much easier.
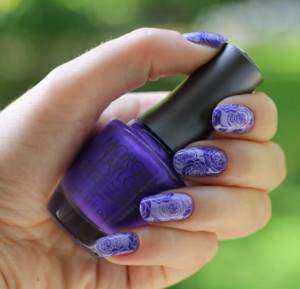
Acrylic roses on nails, photo
Using acrylic coating, you can come up with many designs, give freedom to your imagination, mix different colors, make the design voluminous, and create original masterpieces.
Delicate roses made from acrylic
For example, you can cover your nails with two or three layers of acrylic and paint a white rose. Place the petals from the center of the bud, gradually increasing their size and diameter. To do this, with light, smooth movements, draw our petals all over the nail.
Similar popular design using acrylic paints
This way you will get roses on your nails. They will look gentle and will also highlight your femininity. The final touch will be adding rhinestones. The result will be a stunning nail design, as in the photo above.
Stamping
Drawing a rose on your nails, as in the photo, using this method allows you to get a fairly small and detailed image using nail polish, but still quite schematic. Choosing a stamping kit is quite difficult, since each of its components has many requirements.
In addition, it is important that the coatings are sufficiently dense and capable of giving a clear and rich color even when applied in one layer. The disadvantage of this method is that the choice of images is somewhat limited, as well as its one-color nature, however, some craftsmen can obtain multi-color prints, and the variety of stencils is very large
The advantage is the accuracy, accuracy and speed of drawing.
Stamping is applied to nails prepared using a method similar to the previous ones. The base is applied, then the background, then apply two layers of varnish intended for making the pattern onto the selected pattern on the plate. Quickly remove excess varnish with a scraper so that it remains only in the recesses of the stencil. Press the stamp onto it and transfer the polish from the stamp to the nail. Cover the entire manicure with clear polish.
Stencil roses on nails, photo
The design of a rose on the nails can be done using the stencil method ; it is painted with a simple brush. These roses look stylish and beautiful. Especially in contrasting colors.
Quick manicure with roses made using a stencil
No special skills are required to create the design. It is not difficult to do, according to the scheme. The drawing can be done “in a hurry.” The main rule is the contrast of the color that was chosen for the flower and the background.
Spectacular stencil manicure design in blue shades
The brush needs to be dipped into the puddle of paint and dragged across the palette to soak it. Then we put a drop on the tip of the brush and draw rose petals on the nails in the form of commas.
IMPORTANT : The key to creating this design is brush pressure. First, press lightly with the brush to get a thin line, then harder to make the line thicker, then reduce the pressure again. This way you get an excellent stencil rose design.
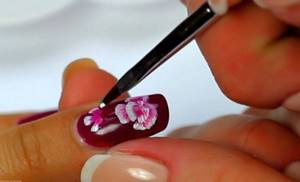
Acrylic painting
Painting with acrylic paints is usually only possible for professionals. Working with them requires a certain skill, as well as a fairly large number of tools and brushes. This pattern is called Chinese painting and it looks very gentle and unusual. However, before applying it, it is better for a non-professional to practice on false nails and understand exactly the steps of how to draw roses on nails.
Painting with acrylics is done in much the same way as with watercolors. These paints are easily diluted with water, mixed with each other and washed away. They can create a beautiful stretch of color within one element, which can depict, for example, a shadow, and allows you to get a complex and voluminous pattern. Mixing colors and the transition itself must be done on the palette in order to dip the brush into the ready-made stretch. It is very difficult, due to the small area, to stretch directly on the nail.
You can learn how to paint Chinese painting on your nails from the video, among which there is an image of a rose.
How to make wet roses on nails, photo
Wet manicure is a technique in which you need to create a nail design using an undried layer of gel polish. This technique is similar to painting with a needle on a simple varnish; however, you should not rush, since gel polish does not dry out like regular varnish.
Usually, various tools are used to create this design - these could be the following items:
- toothpick
- needle
- thin brush
- pencil
Drawing roses when wet
There is a similar technique that tends to spread on the gel polish coating. This technique is often used to design roses. Let's take a closer look at how the process of creating original nail art occurs.
Step by step wet painting process:
- We prepare the nails for gel polish coating: we do a trim manicure, bring the nails into the desired shape, degrease
- Apply the base to the nail plate, dry for the specified time (30 seconds)
- We make a background coating of gel polish, if necessary in two layers, dry it in a special UV lamp
- We cover the nails with an additional layer of background varnish , on which we draw without drying it. Because of this, this design is nicknamed wet.
- On a wet layer we draw roses , and first we make a semicircle in the middle of the bud, then we open the petals
- After application, you need to wait 15-20 seconds for the design to spread, only after that we carry out polymerization, half a minute or a minute longer than usual
- Upon completion, we cover the design with a top coat , not pressing too hard with a brush so that there are no streaks. Dry the finished manicure in a lamp
- If desired, remove the sticky layer
Charming manicure with roses on wet
IMPORTANT: You should not draw the contours of the petals, as spreading will already create a delicate, natural border. Also, there is no need to remove the sticky layer before applying the topcoat, as the design may be damaged.
Secrets and tricks
Don’t be upset if you weren’t able to accurately implement your chosen nail design right away. You will need to practice a couple of times to feel confident and get creative nails. The entire procedure should be done slowly and carefully. If you are a beginner, then just preparing your hands can take a long time. There's no need to rush. Speed itself comes with experience. It’s better to initially do everything slower, but better.
Don't neglect the preparatory procedures. Nails and fingers need to be perfectly groomed before creative designs are applied to them. Sloppy nail plates look not only unfashionable, but also vulgar, even if they have the most stylish designs. Be sure to organize your workspace. The quality of the procedure also depends on this. The table should be spacious enough to accommodate all the necessary accessories for a manicure. It must be light, otherwise you simply will not notice the small nuances of the design.
The nail plate should only be filed in one direction. This will avoid cracks and brittleness. At first, it may be unusual, because we are all used to filing our nails in both directions. But if you practice, you will quickly be able to perform such actions. A positive result will not be long in coming.
Do not shake the gel polish before use. This may cause bubbles to appear, which will create obstacles to creating an even coating. Apply the coating in a thin layer. It would be better to make several thin layers and dry each one in a lamp, than one thick one, which will spread and cause a sloppy manicure.
Experts strongly recommend capturing the edges of the nails when painting. This way you can avoid chipping, and a stylish manicure will delight you for a long time. Be sure to use a sealer. It gives the coating not only a glossy shine, but also guarantees durability and durability (of course, if all the rules of manicure are followed exactly).
All layers should be dried well in a lamp. The clarity of the design and the durability of the entire composition will depend on this. To remove excess gel polish, you need to use a special nail art brush. It will help gently clean the skin and keep your hands looking attractive.
It is better to remove gel polish using professional products. You should not use a file. In inept hands (and often in skillful ones!) it can injure the nail covering. It is better to protect yourself to avoid negative consequences.
If you want to create a unique decor, but do not have the proper experience, you should start with simple drawings. You can also use available tools: stencils, stamping, decorative elements. They will help you create a creative manicure.
An important point is also high-quality materials and tools. You should not purchase expired gel polish. It will not lead to the desired result. High-quality products are more durable
When painting decor, you should pay attention to the surface of the nail. Do not put multiple designs on the nail plates
It will look ridiculous.
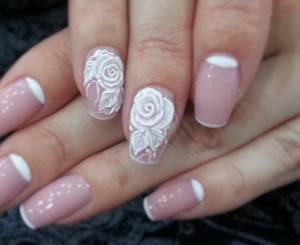
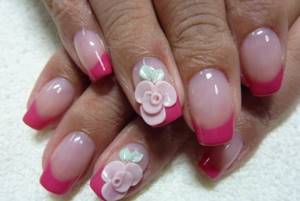
Volumetric roses on nails
Volumetric floristry on nails looks amazing. This design, made using acrylic, is an additional decoration for the manicure.
The name of the technique is acrylic modeling . This decoration is most often done on the ring finger so that the nail art is not “overloaded”.
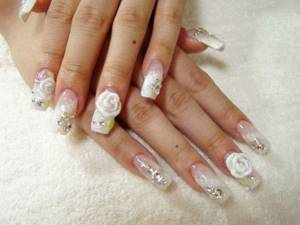
Cute voluminous roses on nails
For convenience, some create voluminous blanks on foil, then attach them to the nail plate with special glue. If you are not able to make such decorative elements yourself, you can purchase ready-made acrylic designs for every taste in manicure stores.
Design with white voluminous roses
Step-by-step creation of volumetric nail art with roses on the surface of the nails:
- Acrylic moldings are applied to prepared and well-polished nails, or to glued tips
- First, the nail plate is covered with a thin layer of colorless acrylic.
- Stucco design elements are placed on top of it
- Then the entire design is covered with colorless gel.
- If necessary, at the end, correct the shape of the nail plate
Cute design with white voluminous roses
Coating materials
The list of materials can be no less wide, but we will list the main ones.
- Degreaser. At home, you can use nail polish remover or alcohol.
- Base. This transparent coating is necessary to strengthen and smooth the nail plate. Also, the latest new products contain various vitamin complexes.
- Gel polishes of different shades.
- Finish top. A transparent product consolidates the result, making it complete.
- Decorative details: sparkles, rhinestones, foil, beads, acrylic powder.
- Stencils make the job of creating a manicure much easier. Not only special purchased ones are suitable as a template, but also made and available ones. For example, for geometric patterns you can use narrow masking tape, and for an openwork pattern - a piece of lace or tulle.
- Glue for attaching decor.
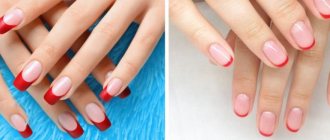
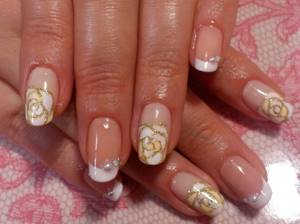
French with roses on nails, photo
French is a wonderful decoration for your nails. A white jacket with white roses and patterns is perfect for summer and spring. This manicure is easy to do.
French manicure with voluminous rose effect
- We perform standard procedures for preparing nails for manicure
- We draw a French jacket in any way convenient for you
- Then everything depends on your imagination. You can add voluminous roses to your design or draw a beautiful rosebud with various design elements
- You can decorate with rhinestones
The variety of modern materials allows you to realize your most unusual fantasies.
Pink jacket with voluminous roses
White roses on nails, photo
If you have the perfect shape of your nails, white roses will look chic on them. Because this color attracts the eye and looks contrasting against bright, dark tones of varnish coatings. Design flaws cannot be hidden.
Beautiful nail design with white roses
White roses need to be drawn carefully, drawing all the lines clearly. Trembling in the hands and fuzzy, blurry, crooked lines are not allowed.
A wonderful combination of white roses and red
To diversify our rose, you can add white lines in small strokes, perpendicular to the petals to the center of the bud. Such roses will look realistic and delicate.
Golden roses on nails, photo
On long nail plates, ready-made rose stickers look very stylish, interesting, and festive. They are easy to use.
Golden rose nail design using stickers
When using stickers, follow the rules below:
- Dry the base coat thoroughly before applying the roses.
- Use tweezers to remove the sticker and carefully place it on the nail plate.
- Smooth the stickers well so that they lie flat on the surface without any wrinkles.
- After pasting the pictures, you can add decorations to your nails in the form of sparkles, rhinestones, etc.
- Apply fixative at the end
Festive manicure with golden roses
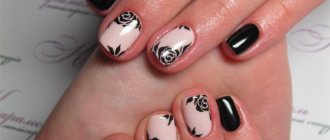
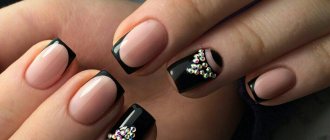
Black roses on nails, photo
Nail art with black roses will look stylish and playful. This manicure is practical, will fit perfectly into your everyday look and at the same time can be suitable for various celebrations.
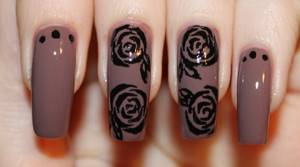
Spectacular manicure with black roses
This design can be done without difficulty at home. To do this, you can use a needle, brush or toothpick, whichever is more convenient for you.
- Using black varnish we draw petals to our future roses from the center of the bud
- We gradually open our rose bud to the desired size and shape
- Afterwards, if desired, add some elements such as dots, curls, petals
Design option with black roses
- If you design the design closer to the “retro” style, then you will have to add dots. To do this, place them symmetrically over the entire background of the nail plate. You will get a polka dot manicure.
- Adding stripes on one nail will also look elegant. At the end of this combination manicure, cover your designs with a matte finish.
Cute black roses on nails
Drawing workshops
Drawing at home can be done naturally and easily. The main thing is to be patient and have good tools. First, you should use simple options to implement personal nail art. Gradually you will expand the boundaries of your skill and move on to more ornate patterns. You can find a variety of lessons and master classes on detailed drawing of objects. Follow them clearly and you will get positive results.
Hearts. Created using toothpicks. This design is all about precise movements and good light. Initially, a base is applied to the fingers, which is polymerized in a lamp. Then the nails are covered with a suitable shade. We take foil and put droplets of the selected gel polish there, which will be used to create hearts. Use a toothpick to place dots next to each other on the nail. From each mark downwards, draw a strip at an angle so that they connect. This way you can get a beautiful heart.
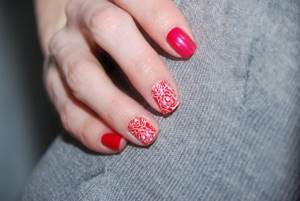
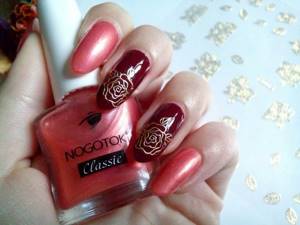
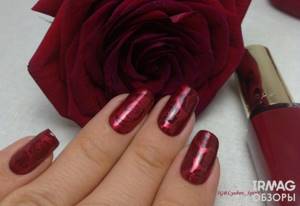
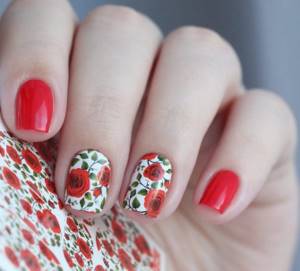
Red roses on nails
When creating nail art with red varnish, you need to take into account that roses of this color look bright on any surface. The design needs to be neat and not too flashy.
Delicate red roses on marigolds
The following option is also possible - draw a red rose on a white surface, and draw a black outline of the petals for contrast. To make the picture more realistic, add green leaves. The result will be quite an interesting design.
Bright colorful manicure with roses
You can play with different shades of red. This manicure will look sophisticated and give you an extraordinary charm. A lighter shade of red is suitable for the base, and make the design a rich dark shade.
Combination of red shades in manicure
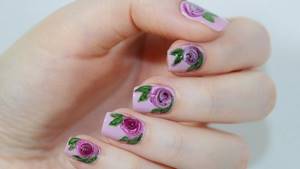
Stickers
This method is also one of the easiest to obtain high-quality and detailed images. Stickers are usually a small design (an image of a flower) that is transferred to one place or another on the nail. They can be of two main types:
- Translators;
- Stickers.

The first type is images made on paper. They are applied to the dried varnish and topped with a fixative. They are applied as follows: first, the transfer is wetted in water, then it is turned over with the pattern down and pressed. After a few seconds, you need to remove the paper base of the transfer, and the design will remain on the coating. Simple stickers are made on such a thin base that they can be glued directly to the nail on a wet coating.
https://youtu.be/Zl-8nMzfXlQ
[yandex3] [google3]
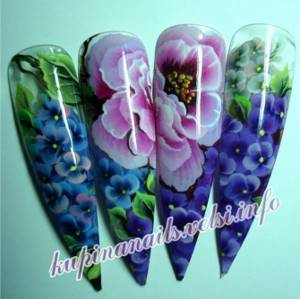
Chinese roses on nails, photo
Open flower drawing skills are required to create a Chinese rose design. The manicure should be contrasting and harmonize well in color, so you need to carefully select a color palette.
Chinese blue roses on marigolds
The process of creating a Chinese rose manicure:
- We put two drops of varnish of different colors next to each other; for the petals we will need a contrasting color of the flower itself, a more delicate shade. For the base - white
- Dip the brush into these two droplets so that two colors are on the brush
- We draw the lower background of the petals so that there are beautiful veins. At the same time, make wavy movements of the brush
- It should be noted that draw the number of petals - at least five
- Next, make shorter petals, their number should be less than in the previous tier
- It should be taken into account that it is better to draw the edges of flowers lighter than the middle.
- Then we add arched strokes on the sides and below - this is how our rose will look luxurious
- The leaves are drawn in two movements, again we put two drops of dark green and yellow varnish. Dip the brush, shade it, start painting from most of the petal
- Using arcuate movements we create one part of the leaf, then another. We do this perpendicular to the nail plate, and then turn the brush at a right angle. So the roses will shrink towards the edge
- You can draw leaves with one stroke; to do this, outline the light edges of the petals and collect them into a branch.
Chinese rose design option
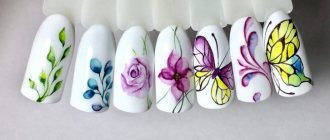
Rose design on nails
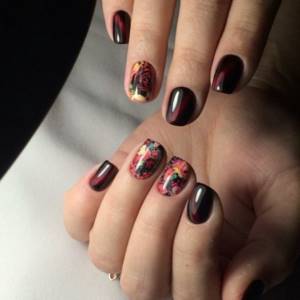
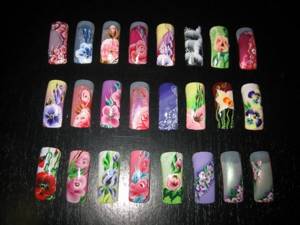
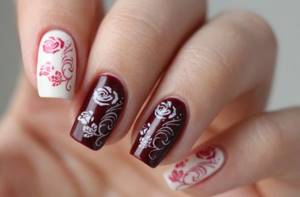
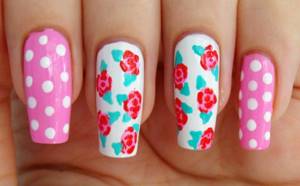
Roses on nails are quite a popular manicure. Based on this, there is a wide variety of executions of such pictures. Starting from delicate bed colors to contrasting, bright nail art.
Original manicure with roses
Below you will see four nail design options. Such a cute, bright manicure is suitable for spring and summer, under juicy, colorful outfits of girls. A beautifully chosen color scheme is the key to a successful design. In this case, a wonderful combination of heavenly, pink, purple, mint, and green shades has been selected.
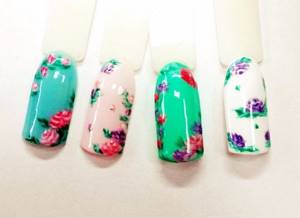
Four manicure options with roses