Rating: No rating
A very long time ago, manicure ceased to be just a hygienic procedure, with the help of which nails acquired a neat and tidy appearance. Currently, manicure is more of an art, thanks to which the fair sex has the opportunity to turn their nails into a real masterpiece . Fashion does not stand still, and stylistic designers never tire of surprising us with unconventional ideas and presenting pleasant surprises.
Today I would like to talk about a true classic manicure, which since its inception has never gone out of fashion and has become popular due to its beauty and elegance - I’m talking about French manicure or, in other words, French manicure. This manicure is unique in that it looks great on the fingers of both young girls and respectable ladies, regardless of social status, occasion and chosen outfit. In addition, it can be easily done at home, and it will be no worse than the salon one.
I propose to jointly consider all the pros and cons of French manicure and step by step analyze the process of how to properly apply French nails using gel polish , providing photo and video training materials.
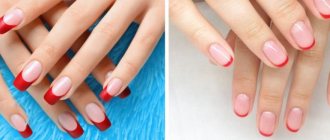
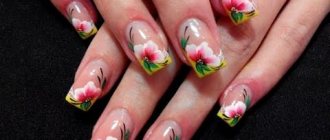
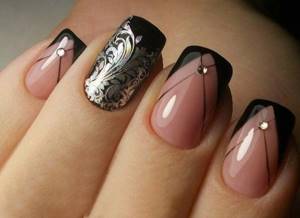
Initially, white was considered the classic color in which French was made. However, over time, more and more shades have come into fashion, allowing you to create an original manicure that looks no less impressive. For example, silver, black, red, blue and other rich shades are also considered classic colors. A French jacket made with multi-colored varnishes that are in harmony with each other also looks amazing.
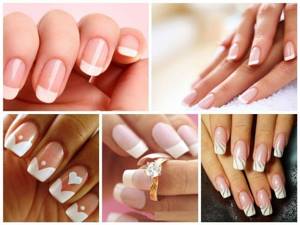
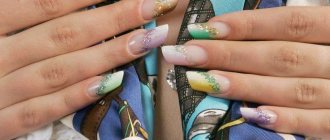
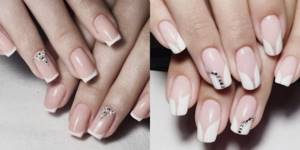
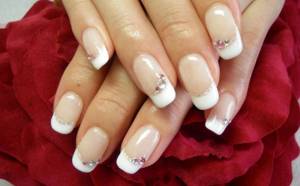
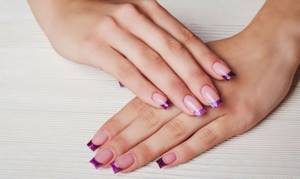
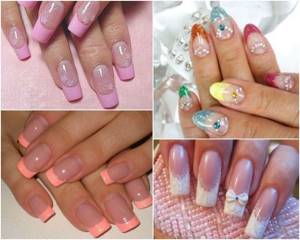
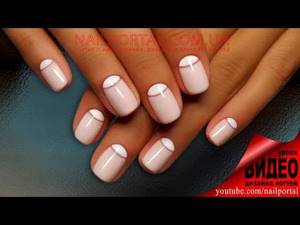
Photo of French manicure design
Advantages
- amazing durability and preservation of original beauty;
- fight against fragility and delamination, and in the future – prevention of such ailments;
- strengthening and compacting the nail plate due to a dense gel coating;
- giving your fingers a neat and tidy appearance;
- the ability to refresh the entire image;
- the appearance and preservation of incredible shine for several weeks ;
- the ease of implementation will surprise even the ignorant and inexperienced.
Preparing nails for manicure
Before applying polish, your nails should be well prepared. The durability and appearance of the manicure depends on this stage.
To soften the cuticle, the skin needs to be steamed by immersing your hands in warm water for 10-15 minutes. You can add various essential oils and natural herbal infusions. Afterwards, pushing back the cuticle with an orange stick, remove it with a special cutting manicure device. This should be done gently so as not to damage the skin.
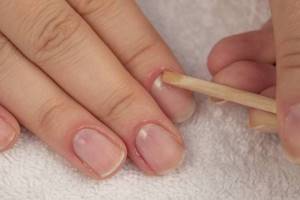
Using a soft file, you need to slightly grind off the top layer of the nail, make it rough, for better adhesion to the base coat. Use a regular nail file to give your nails any desired shape. Then degrease the surface of the nail, and you can proceed to the next stage.
Flaws
- high price for really high-quality cosmetic products;
- nails lose their own protective functions due to the thick film created by gel polish;
- cannot be used on the nail surface, which has a weak and thin structure;
- a complicated procedure when removing a French coat made with gel polish.
Before directly applying gel polish to your nails, it is important to thoroughly clean the nail surface to perfect condition. If you want to get an impeccable French manicure that doesn’t catch the eye, but also doesn’t go unnoticed, you need to take a responsible approach to choosing the shape of your nails and carefully removing the cuticle and hangnails. If you take these tips carelessly, your efforts will turn against you, and the French coat will look sloppy and untidy.
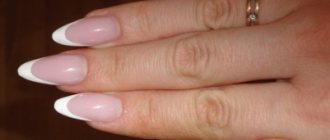
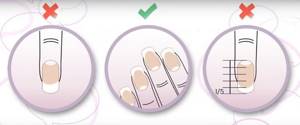
French tips
French manicure with tips step by step:
- Nail preparation – file, sand, degrease, push back cuticles.
- Using a brush, carefully spread the special glue along the inside of the tip. Now press the tip to half of the nail and hold for 10 seconds.
- Adjust the shape of your nails with clippers (if necessary) and a file.
- Apply gel polish to your nails. After each layer, dry your nails in a lamp.
- Draw a smile line with white varnish and decorate it if desired. Don't forget to put your nails in the lamp.
- Remove uneven surfaces and excess layers of gel with a file.
- Apply a finishing layer of transparent gel and dry again in the lamp.
Instructions for performing French tips
Selecting an “emoticon”
It is the smile that is the calling card of a French manicure - it covers the regrown edge of the nail. The smile comes in three shapes: arched, flat and slightly curved.
- When choosing the "smiley" shape focus on naturalness: To make your manicure look as natural as possible, pay special attention to the shape of the nail plate and fingers.
- The shape of a smile also has a lot to do with it depends on the texture of the camouflage. When using opaque camouflage that covers the fully grown edge of the nail, it doesn't matter which smile shape you choose. However, when using translucent camouflage, you need to make sure that there is no regrowth showing through under your smile.
Camouflage is a base corrector coating made on the basis of gel or acrylic, which allows you to visually align the nail plates and, without the slightest damage to the durability of the natural nail, make the transition less noticeable, as well as lengthen the nail bed for a French manicure, hiding all imperfections under its coating. In addition, when using gel polish to create a French coat, camouflage, in addition to everything listed above, saturates the color of the top coat, so there is no need to apply several layers of the main gel polish.
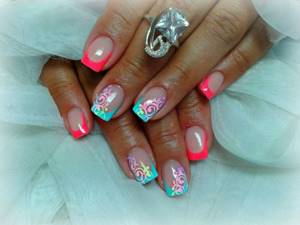
The best French manicure ideas
With rhinestones and sparkles
Rhinestones and sparkles are a universal addition to a French jacket. Several use cases:
Attach the crystals under the white rims.
Decorate the tips of your nails with glitter instead of white polish.
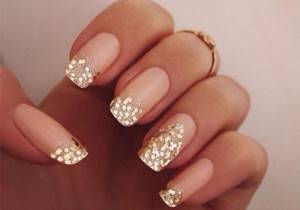
Emphasize the hole with crystals.

although in fact, accessories on one finger will be enough so that the manicure does not lose its zest. The ring finger is usually chosen for this.
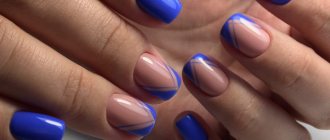
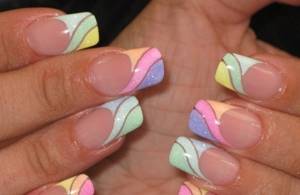
Color
According to manicure fashion 2018-2019, white headbands for this season can be replaced with blue, lilac, pink and orange stripes. And in the cold season, nail stylists recommend purple, red and even black for nails.
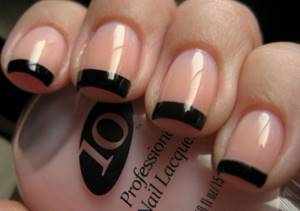
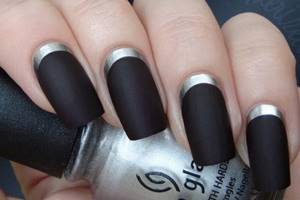
Black
Black is generally a universal color - a bold decision and easily combined with any shade. One of the most advantageous types of French is a nail plate painted matte black and rims of the same color, only glossy.
I suggest watching a video of how a nail art master does a manicure with gel polish in the camouflage style and explains all the steps step by step.
What types of French do you like? Leave comments, share with friends on social networks and subscribe to updates. See you!
How to paint a smile for a French man with gel polish
- By using special brush draw a smiley face by hand.
- Use adhesive-based stencils (to draw a smile evenly for a classic French jacket, it is important to remove the stencil immediately after applying the gel polish, since after drying it will be very difficult for you to remove the stencil without causing damage to your drawing).
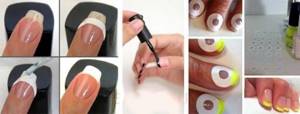
- the tips of the nails liberally with white or other varnish and, without waiting for it to dry, use a hard brush, previously moistened with nail polish remover, to trim the smile line.
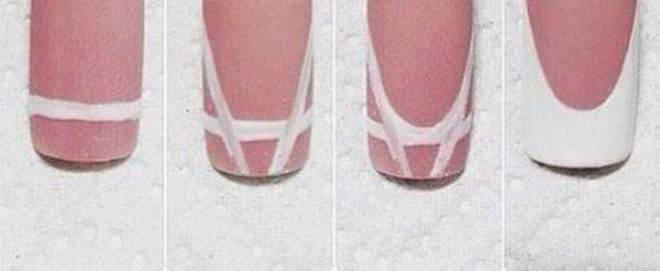
Smile options
Depending on preferences and the shape of the nail, the smile line may be different. The deeper it is, the more elegant the design looks . For myself, I choose a French manicure with a medium-depth smile. In the figure below it is designated as elegant.
Smile line options for French manicure

Fashionable ideas for French gel polish
Black French gel polish
Thanks to its rigor and brevity, this type of manicure has become especially popular among brave, uncomplicated girls and women . The classic rich black color fits perfectly with fashion standards. A black French jacket will look great both on a transparent basis and in combination with almost all colors. For special occasions, you can decorate it with shiny decorative elements.
Colored French gel polish
With the help of colored and contrasting shades, the colored jacket is distinguished by its splendor and richness . To give expressiveness to a colored jacket, you can decorate the nail surface with decorative designs. This is just a great option for women of any age category, it suits any occasion. Colored French has two varieties: art French and millennium French.
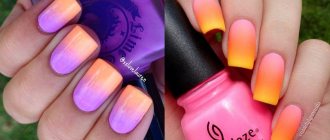
French gradient gel polish
The “gradient” technique is loved by many for its extraordinary attractiveness. To perform a French gradient, you will need to be very careful in the selection of color shades - basically they should be in the same color scheme and applied in increasing order: from dark to lightest or vice versa. The essence of this design is a smooth transition of one color to a darker another.

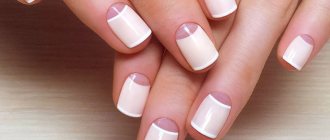
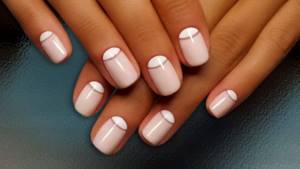
Lunar French
It is often also called “reverse French”. To create it, the base of the nail is coated with white, silver, gold or another contrasting color. Using gel polish, a thin crescent-shaped line is drawn. You will definitely appreciate the convenience of this design as your natural nails grow out, since this French style involves tinting the overgrown part, which visually increases the “smile.”
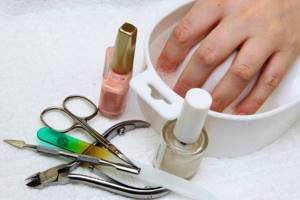
Tools and materials for DIY French manicure
No exclusive or prohibitively expensive means are required, with the exception, perhaps, of stencils - this is the only device that is intended exclusively for creating a neat French jacket. Everything else is probably in your home cosmetics bag, and if not, you can easily find it in a specialized store. There are even separate sets for French manicure, which already include several shades of varnish and stencils. The price range for them is very different, so you can choose any one to suit your taste and budget.
Before work you need to prepare the following:
for a caring bath: warm water with the addition of sea salt, lemon juice, essential oils or herbal decoction
Any manicure draws attention to the hands, so the skin on them cannot be dry and rough. The procedure will give your palms a more well-groomed appearance and also soften the cuticle.
However, if your hands are in good condition, you can do without a bath, but girls for whom creating a manicure is akin to a spa ritual do not refuse the extra opportunity to take care of themselves; to soften and remove the cuticle: remover, wax or special oil, orange stick or manicure hoof. You can use wire cutters, a trimmer and a pusher, but these tools require appropriate experience, and if handled improperly they can be traumatic; for nail treatment: manicure scissors, a file (preferably glass), polishing buff; tools for more convenient painting of the tip of the nail: a thin brush, stencil strips or a special felt-tip pen; coloring agents: base varnish and color. The main one is applied to the entire nail. It can be completely transparent or translucent in a pastel shade. Colored varnish is usually white or milky. With white manicure it turns out bright and contrasting, and with milky it turns out muted and more natural. If desired, you can add a protective base for nails to the varnishes, as well as a topcoat; auxiliary tools: cotton swabs, thin brush with short bristles, toothpick, nail polish remover.
French manicure can also be done with gel polishes. This will take a little more time, but will allow you to enjoy all the benefits of gel coating: durability, safety and color that does not lose intensity.
Those who prefer gel polishes will need a special lamp, a primer, a base product, colored coatings for the nail and its tip, a finishing gel and a liquid that removes the sticky layer. The rest of the tools are the same as in the list above.
To perform a French manicure at home, you will need a set of ordinary manicure tools and varnishes of white and pastel shades.
Reverse French gel polish with a transparent smile at home
Nail designers have provided us with an amazing and unique product called gel polish. Now it has become much easier to care for your nails, and thanks to the amazing unique strength of the gel polish, the French nail polish will last on your fingers, maintaining its freshness and original beauty, for up to four weeks, and with proper care, up to five weeks. In addition, gel polish boasts its multifaceted color palette - this allows us to completely forget about ordinary standard varnishes. Also, transparent gel polish is very good at the final stage as a fixative. And last but not least, any jewelry and decorative elements stick firmly and permanently to the gel polish.
We will need:
- UV lamp;
- degreaser or boric alcohol;
- main color of gel polish;
- manicure set;
- white gel polish;
- stencil;
- fixative
The process of creating a reverse French jacket:
- We thoroughly process and clean the nails : remove cuticles and hangnails.
- Using a file, we adjust the length of the nails and give them the desired shape.
- Degrease the nail plate.
- Apply a layer of base coat and dry it under a lamp.
- We paste the stencil at the base of the nail and cover the main part of the nail with a thin layer of the top color.
- With a quick and precise movement, remove the stencil and dry the layer in the lamp for a couple of minutes. To achieve a more saturated shade, repeat the procedure until the desired result is obtained, but remember that each layer after application must be dried under a lamp.
- We apply transparent gel polish to the nails to consolidate the result and extend the life and fresh appearance of our manicure for up to five weeks.
- Dry the resulting masterpiece under the lamp for about two minutes.
- Now, with a napkin previously moistened with boric alcohol or a degreaser, remove the sticky layer that forms as a result of drying .
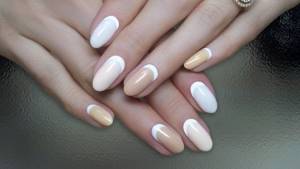
Photo of a reverse jacket made with gel polish yourself
Technology for creating a classic French manicure with shellac: photos and videos
We will not stop at performing the most hygienic manicure, here the technology is standard
The only thing that is worth repeating once again is that you need to pay attention to the cuticle: it should be cut off as much as possible. The shape of the free edge of the nail is any, but almond-shaped, oval or softened square will look preferable.
The length also varies depending on your choice, but remember that the classics still look preferable on medium-long or short nails, which, by the way, are especially relevant this season.
Now let’s proceed to a direct examination of the procedure for performing a French manicure with shellac, with a photo description.
First, you should thoroughly degrease the nail plates.
Pay special attention to the area near the cuticle and around the side ridges. If you neglect this procedure, the varnish will quickly come away from the nail plate, and along with it, the service life of your manicure will be reduced.
There is no need to file the nail surface - shellac has excellent adhesive properties and does not require additional fastening. It is enough to use a primer that will ensure maximum adhesion of the nail to the shellac.
We also carefully apply the primer to areas near the cuticle and side ridges, as well as near the tip of the nail. Nails are ready to be coated.
Important
All layers must be applied as thinly as possible, especially this rule applies to the smile line, otherwise your manicure will look bulky. The topcoat may be slightly thicker in order to hide the border of the smile line transition.
The coating itself occurs in several stages:
At the first stage, a transparent shellac base is applied in one layer. Then the nails are sent to a UF lamp. In the second stage, color is applied. Many people neglect these stages, believing that the base is enough. But this is a big mistake. As the nail grows, the area of the overgrown nail will be exposed, and the manicure will look sloppy. It is enough to apply the color in one layer. If the tone is not dense enough, you should apply it again. Each layer is dried in turn in a lamp. The third stage is the most important and most difficult - drawing a smile. Forget about stencils. In the case of shellac, and indeed with all types of polymerizing varnishes, stencils are contraindicated. The thing is that shellac does not harden without exposure to ultraviolet radiation. As a result, shellac or gel polish may penetrate into the formed cavities of the stickers, or it will drain when tearing off the stencil. Drying with stencils will also not work; they will simply remain under the frozen layer of shellac. We draw a smile in two stages. First, apply thin strokes along the free edge of the nail. If necessary, we correct errors. The resulting result is fixed in the lamp. At the second stage, we draw the brush again along the previously outlined contour, trying to completely saturate the smile with color. Dry it again in the lamp. Over time, as you gain skills, you will learn to perform this procedure in one stroke. For beginners, we recommend using special sliders that imitate a smile. A few more words should be given to the boundary of the smile
It is important that the drawn smile follows the natural contours of the free edge. At the same time, of course, we adjust its shape
Interesting: There are many options to make it easier to perform a French manicure with shellac at home. The most accessible and simplest is the use of sliders. They can be either applicative, imitating a smile, or with full filling of the nail plate.
The fourth stage is applying the finishing coat. Apply the top alternately in two layers. This will even out the edge of the smile. Dry each layer in a lamp. Don’t forget to seal the ends with topcoat. If you do not apply the finishing coat to the end parts of the free edge of the nail, then over time the shellac will come away from the nail.
To consolidate the material, we suggest you watch a video on how to make French shellac.
Video tutorials on how to apply French gel polish
French manicure itself is self-sufficient and does not particularly require any additional decorations. However, if you want to make an unusual and original design, as well as a manicure for a holiday or wedding, do not hesitate to add decor. Rhinestones, velvet powder, glitter, and voluminous decorative elements look most impressive with French. Thanks to the competent and harmonious selection of contrasting colors, you are free to create masterpieces to suit every taste.
For those who like to perceive information visually, I would like to offer several videos that helped me understand the possibilities offered by a French coat made with gel polish.
Video for beginners on creating a French manicure with gel polish
Video tutorial No. 1: Three ways to make French gel polish
Video tutorial No. 2: An easy way to do a reverse French stitch
Video tutorial No. 3: Eight ways to draw a smile for a French manicure
Video master class for the more experienced and determined
Master class No. 1: Secrets of nail service - French gel polish
Master class No. 2: Reverse French
Master class No. 3: How to correctly draw a smile for a French jacket
#4 With rhinestones and sparkles
The brightest and most interesting photos and ideas are obtained on nails, where French manicure is combined with rhinestones and sparkles. This is a design for all times and holidays. It’s very easy to do, because you won’t need to draw anything, except for the white edge.
- A gel base is applied, then a smile is drawn;
- There is no need to dry your nails at this stage. First you need to sprinkle them with sparkles or rhinestones. There are several options. You can apply rhinestones only along the contour, decorate the entire nail with sparkles, or gradually increase their concentration towards the end of the nail;
- When the glitter is placed, you need to dry the nail under the lamp. Afterwards, a layer of fixative is applied and dried again;
- All that remains is to process the plate to remove the sticky effect.
What does the French jacket go with?
- Use contrasting shades that match the color of your clothes or accompanying items (handbags, jewelry, makeup) - your manicure will not go unnoticed.
- Bolder complement the jacket with various decorative elements: Rhinestones, sparkles, beads and so on are a great way to stand out from others at holidays and parties.
- People who do not want to draw attention to themselves may use pastel colors with a white border, and those who like to be in the spotlight will choose a combination of bright, catchy contrasting colors.
This is where we will end our conversation. Use the information for your health and feel free to experiment! If you have any additional questions about the topic of the article, ask them, I will certainly answer you. In addition, if you are not lazy and want to share your French jacket design, show photos, share information, I have been very curious since childhood and try everything on myself. Thanks in advance and good luck to you!
Moon manicure – inverted French
This type of French manicure became popular thanks to Dita Von Teese and Lady Gaga. For the first time, lunar manicure was presented to the public in 2007. To demonstrate the new collection, the designers of the House of Christian Dior “invented” an unusual version of the French manicure, which was successfully demonstrated by models on the catwalk. This interesting technique was picked up by well-known personalities in show business, and their fans spread the new idea around the world with great enthusiasm.
In this case, the lower part of the nail plate is highlighted in a contrasting color - dark or, on the contrary, light. Sometimes the lunula is indicated by a silver or gold tone, glitter or embellishment.
The shape can be semicircular, similar to a sunset. This option prevailed for about ten years. Today, stylists prefer a new design, designating the nail hole and the area around the cuticle in the form of an inverted “smile.” This method allows you to visually lengthen your nails, make them more graceful, beautifully outline them and give them an interesting shape. This manicure is performed on both short and long nails.
Watch this video on YouTube
Gel brushes
This category of brushes is very different from all others and most often it is labeled as such. They are intended for modeling the nail, giving it a bend, forming an arch, as well as the final coating. These are flat brushes in shape, which can be either square or rectangular, sometimes curved, which simplifies the process of operation.
The pile should be natural or artificial, but quite hard. The gel is liquid and viscous, and therefore it will simply pull with a soft brush. But even if the brush is very stiff, it should still be flexible enough to keep the nail lines smooth and the material placed evenly.
Shape of brushes
The shape of the brushes refers to the cross-sectional outline of the tuft of bristles. Round brushes can be very diverse - pointed, beveled, rounded, straight and others. They are used to create one or two color backgrounds, ribbon backgrounds or designs for large elements.
Rectangular brushes are used in Chinese painting and other acrylic works. In addition, they are convenient for shading the background and large elements that require a broad stroke. They are not as versatile as round ones, but with an angled flat rectangular brush you can draw commas and simple curls that are very difficult to create with a round brush.