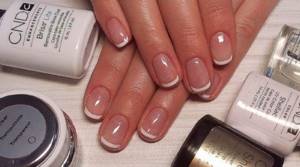
The most popular manicure option these days is shellac nail polish. This material is very strong and quite durable. Shellac lasts about 15-20 days. After this, it is necessary to make a correction or remove the coating, followed by applying a new layer. The technology is still relatively new, but many fashionistas have already managed to study it very well, having learned how to do such a manicure at home. If you thoroughly delve into all the nuances, then it is really not difficult, but beginners at the first stage often do not know what materials and tools are needed for working at home. List of materials required for shellac
It is best to buy medium-priced, but still certified products.
The use of cheap and low-quality drugs can lead to allergies and other disastrous results. Let's figure out what you need to cover your nails with gel polish at home for beginners.
What is shellac, its advantages
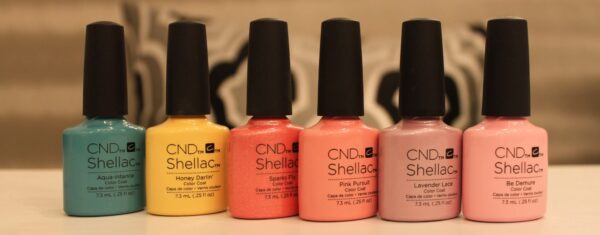
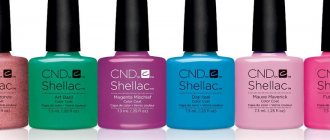
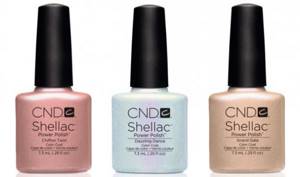
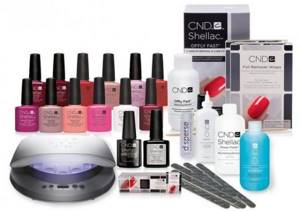
Shellac is the name of the most popular product from CND. It was this brand that was the first to invent a semi-liquid but durable coating for manicure. It combines regular polish and gel. The composition was kept secret for a long time; the company mentioned only natural resins. Later, different gel polishes appeared on the market; the name of a specific product became a household name.
Shellac is often called ordinary gel polishes or the manicure itself in which they were used. Some brands, for example BLUESKY, even put the “Shellac” mark on the packaging, but the composition does not match the original CND.
The main advantage is that for strength, you do not need to cut off the nail plate or replace it with another material. Even without this, the material merges with the natural nail. The manicure looks natural, without thick and high bumps.
Durability
The durability of shellac is on average two weeks, but often it increases to 20-25 days. If you follow the technology, carefully apply it, and use high-quality materials, no cracks, chips, or peelings should appear during this time. By the end of wearing, the top layer may fade only slightly, and small scratches will appear on it over time.
Advantages and disadvantages
Shellac has many advantages; the material is comfortable to apply and wear.
pros:
- suitable for nails of different lengths and thicknesses;
- you can give any shape to the tips;
- gives scope for designs;
- coating does not require much time, 2 - 3 hours is enough;
- convenient to use;
- worn 14 - 20 days;
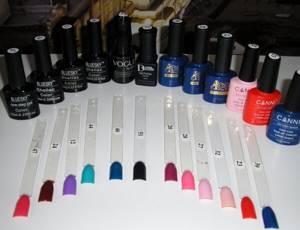
- rich palette of shades;
- makes thin nails thicker, increases strength;
- The product in the bottle does not dry out and does not deteriorate.
The disadvantages include the cost. This type of coating cannot be called budget; shellac is much more expensive than gel polish. In recent years, many alternatives have appeared from domestic, American, and Chinese manufacturers at prices 3 to 5 times lower.
Differences between shellac and other coatings
Gel polish, shellac, gel - all these are nail coatings that allow you to get a durable manicure for several weeks without changing color or needing correction.
The main difference between shellac and other materials is the natural resin in its composition, mixed with regular varnish. Similar products from other companies may contain toluenes, formaldehydes and other harmful substances.
There are not many differences between gel polish and shellac. They are very similar in appearance, the technique is identical, but in rare cases a primer is not used under shellac. He should hold up well without it. These materials have more differences with gel. They have different consistencies, application technologies, the gel is not so pliable and requires skill and filing.
Coating properties comparison table
| Shellac | Gel polish | Gel | |
| Package | Bottle with brush | Bottle with brush | Jar with screw cap |
| Consistency | Liquid | Liquid | Thick |
| Application | Brush | Brush | Spatula and brush |
| Nail after drying | Elastic | Elastic | Solid |
| Palette | Rich | Rich | Rich |
| Design | Available | Available | Available |
| Removal | Soaking, filing | Soaking, filing | Mostly sawing |
Shellac or gel
The best thing is that it lasts longer and is more comfortable to wear. Some girls are completely satisfied with shellac; the manicure wears well, looks natural, and the coating allows it to grow to any length. But some nails don’t like it and reject it. Even the masters can’t explain it, they just say “it’s not suitable for everyone.” No matter who makes the coating, the material begins to chip and peel off. In this case, it is better to choose a gel. It will also be a salvation for very thin, bendable nails, since after polymerization it becomes hard.
Shellac or gel polish
They are very similar in appearance and properties. These materials have virtually no differences in technology. If you learn how to use shellac, you can easily try gel polish. It's difficult to determine which is better. In terms of price, prevalence, and availability, they are ahead of gel polishes. Durability depends on various factors. In terms of composition, shellac has the advantage; it contains less chemicals and dangerous compounds.
Which is more harmful?
For natural nails, incorrect technique, cuts, and sloppy removal are more harmful. With careful work and following all the rules, natural nails become thicker, grow well, and do not require rest, which is talked about so much. Good masters have clients who have beautiful manicures for several years without interruption.
If you approach manicure correctly, the worst thing that can happen is an allergy. If she only uses shellac, then it is better to choose gel or gel polish and vice versa.
Health hazards of gel polish and its components
Allergy to manicure: how to determine the cause, remove symptoms and how to replace gel polish
The most common myth about long-term coating is that it prevents your nails from breathing. But nails don't need oxygen.
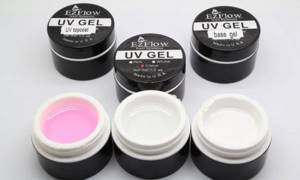
Materials for work
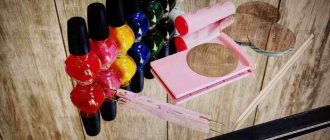
For a manicure you need to have a minimum set:
- base;
- top;
- colored gel polishes.
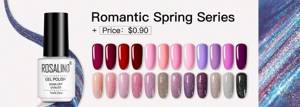
It is best to use a rubber base as it is more durable. Tops also come in different types, the choice depends on your preference. There are simply a huge number of shades of gel polish.
ORDER AND BUY NOW for 70 rubles.
Performing a manicure with shellac
Unlike thick gels, shellac is easy to make yourself at home. If a girl knows how to paint her nails with regular polish, then there will be no problems with long-term coatings. On the contrary, sometimes they are easier to work with. The main thing is to master the technique and acquire everything you need.
Materials, means
The starter kit for coating consists of several products, they will be used every time, only the colored shellac is changed.
What do you need:
- Klinser, degreasing agent. A liquid that will remove moisture and grease.
- Primer. Provides durability and prevents detachment. Sometimes they do it without it, but it is advisable to use it for wet nails and sweaty hands.
- Base. A layer between the nail and the color coating. Ideally, the original from CND is used. A less expensive version of the Kodi base, but you can also use TNL, InGarden.
- Colored shellac. He sets the shades, participates in the design, you can choose to your taste.
- Top or topcoat. The finishing touch, which provides shine, adhesion of layers, protects nails from deformation. We use a brand of base coat (TNL, InGarden, CND).
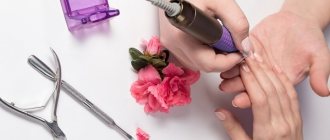
You will also need consumables: nail files, buff, lint-free napkins, possibly additional brushes for decoration and drawing cuticle lines. You can't do a manicure without a lamp.
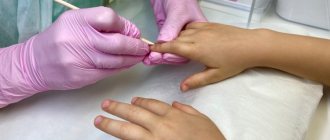
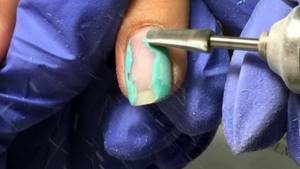
Treatment of the nail plate
Shellac requires nail preparation, everything depends on it: durability, accuracy, perception. The plate needs to be cleaned not only of old varnish, but also to remove as much as possible the entire cuticle, thin films of pterygium, and clean out the holes. It is not recommended to do a wet manicure by soaking the cuticle in water; wet nails are less durable.
Step-by-step nail preparation:
- We clean the nails of old varnish or coating.
- We file the ends and shape the free edge. If necessary, remove the length.
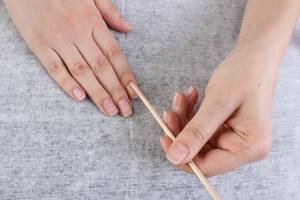
- Apply a softening agent to the cuticle, wait a few minutes, remove the skin with an orange stick or pusher, or trim with tweezers.
- We clean the nail from the pterygium at the base, paying attention to the holes, otherwise the varnish will peel off.
After preparation, hands should be washed with soap and dried. If wounds appear when removing the cuticle, immediately treat with chlorhexidine.
No cream or oil can be used before coating with shellac; fatty compounds will cause detachments.
Step-by-step execution technique
You can do a trim manicure, remove the remnants of the previous polish in one day, and start shellac later, but usually masters do everything at once.
How to make shellac:
- We polish the cleaned nails with a buff. Unlike other coatings, this does not require cutting. Just slightly remove the top shiny layer to a matte state, do not overdo it.
- We wet the napkin in the cleanser, wipe all the nails, do it carefully, especially at the cuticle.
- Now open the primer, process all the tips, ends, edges so that the material adheres firmly to them.
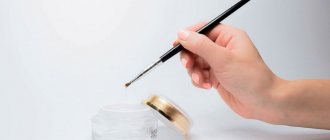
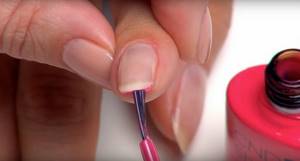
- Apply the base coat. The first layer is the most important. Lubricate thinly, using rubbing movements. We don’t put too much on the brush so that streaks don’t form; we work on the ends, ends, and seal. Dry in the lamp for a minute.
- The second layer of base can be made a little thicker. It is used to level the plate and hide defects. Dry it.
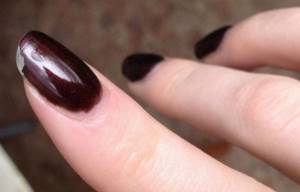
- Now we apply colored shellac, also in thin layers, seal it for the first time, then you don’t have to do this. Usually two layers are done, each time drying in a lamp, but sometimes the color does not overlap well, in which case additional layers can be applied.
- After drying the colored shellac and applying the design, it’s time for the topcoat. It can be applied thicker, there will be one layer. You need to carefully cover the entire surface, leaving nothing behind. With top coat, dry your nails a little longer.
- We wet the napkin in the cleaner and remove the sticky layer that forms on the surface after drying.
If you have a small lamp, then you should not do a manicure on 5 fingers at once, it is better to cover 4 on one hand, 4 on the other, and then work on the remaining thumbs.
Bath
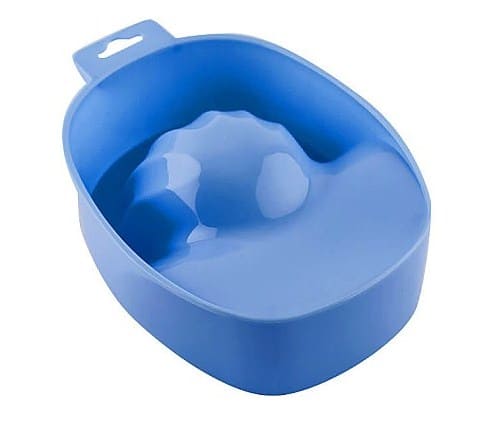
We recommend at first not to spend money on a professional bath, but to buy sea salt.
The bath is necessary for preliminary preparation of nails and cuticles, which will become soft after the procedure. Before a manicure, it is recommended to soak your hands in a hot salt bath for up to 10 minutes. Then apply moisturizer to the brushes and prepare the nails for treatment.
Chips and detachments
Most of all, women are interested in how long shellac lasts and whether it lasts longer than other gel polish. It is durability that influences the choice of material. And here’s the absurdity: once a manicure lasts for three weeks, but with another shellac it’s impossible to last more than 5-10 days. Sometimes chips and detachments begin to appear earlier. In rare cases, the reason is the quality of the material itself, more often it is a violation of technology.
Why there are chips on the tips:
- A clinser or primer was not used, or it was done incorrectly, leaving untreated areas.
- Thick layers are applied that simply do not have time to dry properly, or a weak lamp is used. There is no need to take 12-24 W, although, according to sellers, it is ideal.
- The ends of the nail are not sealed, it is important to do this. If you can’t work on all the corners and edges, you can use a separate thin brush for the base and shellac.
- The ends were sealed too much. You only need to apply one layer of base, color coating and top coat. If you cover the edge with each layer, a thick roller will form on it, which will definitely chip.
- Thin nails. Even under the coating, the ends bend strongly, small cracks appear, and the free edge breaks off.
Sometimes chips at the very tips occur under heavy load. For example, a girl types a lot on the keyboard and does it with her nails. As a result, the top coating wears off, small cracks appear, and the coating chips.
Why detachments happen:
- The cuticle is poorly processed; pterygium remains along the edges of the nail, which does not provide a strong grip.
- The plate is not prepared. The surface needs to be sanded thoroughly to remove all gloss. Pay attention to your buffs and files, maybe it's time to update?
- The materials do not dry out. Here the problem can be found in the thickness of the layers or in the operation of the lamp.
- Sloppy application with streaks. As a result, after 2-3 days, the filled areas lag behind the skin, rise, peel off, and pull the rest of the nail area with them.
No matter how durable and expensive the coating material is, it is important to take care of it. You should not open jars with your nails, scrape or scratch anything. Housework, especially when coming into contact with household chemicals, should be done with gloves.
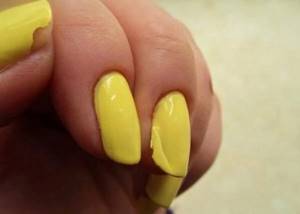
How to remove shellac
The most common myth is that durable coatings spoil natural nails. In fact, it is not the materials themselves that are harmful to manicure, but the lack of professionalism and non-compliance with technique. Most often, nails deteriorate after improper removal. Do not scrape, pull, rip off or bite off your manicure. Along with the shellac, a layer of the natural nail may “go away.” Lumps and pits will appear on it, rough scales will rise, and the plate will become thinner.
Removing the coating by soaking
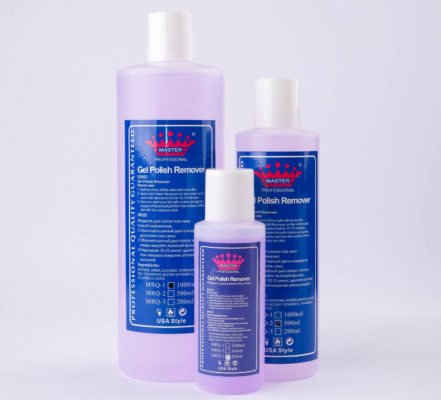
The easiest way that even a beginner can handle. To facilitate the procedure, you can use special caps or clothespins. Additionally, you will need cotton pads, cut into pieces slightly larger than the nail plate. For soaking we use a special solvent, also known as a remover. The brand TNL, Severina and others are suitable.
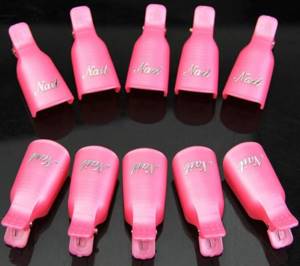
Soaking caps
How to remove shellac correctly:
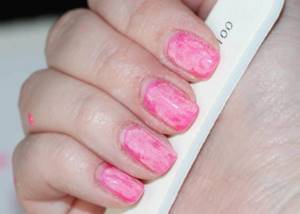
- Take a coarse file and lightly go over all the nails, removing the top top coat. You don’t have to do this, but the soaking will take longer, so it’s better to take a minute.
- Lubricate the area around the nail with oil or cream. This is an optional step, many instructions don’t even have it, but this way we will protect the skin of our fingers and the solvent will not sting.
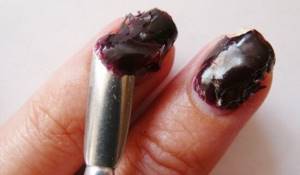
- We wet pieces of cotton pads in a special product. We soak it well, but the drops should not flow off. Apply to the nail.
- We put on a cap or clothespin to secure it. If there is nothing, then you can wrap the tip of your finger in foil. We wait until the shellac becomes limp. It will crack and swell.
- Take a pusher or an orange stick and scrape off the coating. We move from the base of the nail to the edge.
If not all of the coating is removed the first time, you can reapply the cotton wool and soak it a little more. It is more convenient to simply go through small pieces with a file.
On sale you can find special bags of solvent into which you stick your fingertips. Judging by numerous reviews, they are not very comfortable, the substance spoils the skin, flows under the cuticle, and stings. It is better to apply the cut-out napkins directly to the nail plate.
Coating remover - how to choose and use
Removing the coating by cutting
The soaking agent is chemical, it often stings the skin, has an unpleasant odor, and with prolonged contact it thins the nail plate. Therefore, more and more craftsmen prefer sawing. It can also be practiced at home.
What can you cut down with:
- machine with a cutter;
- ordinary files.
Filing with a device requires skill and caution; it is easy to file through your nail.
What is hardware manicure, features of its implementation
Working with regular saws takes a lot of time. Therefore, it is recommended to use several pieces, first with a coarse abrasive for artificial nails, then switch to soft files for a natural plate, and finish the job with a buffer.
Subtleties and secrets of shellac manicure
The technique of applying shellac, unlike gel or extensions, is much easier. But the polished nails just give themselves away. A home manicure can often be seen a mile away, and it does not decorate your fingers. There are secrets that can not only improve the appearance of your nails, but also increase the durability of the coating.
Main nuances:
- All basic materials must be from the same manufacturer to avoid detachments.
- The plate must not only be carefully processed, freed from the cuticle and pterygium, but also leveled.
- You should not touch your nails with your fingers from the moment the plate is degreased. Our skin has a lot of oil on it, which will affect its staying power.
- You should not choose a cheap low-power lamp; it is wiser to immediately purchase a device from 36 W.
- It is better to apply more thin layers, but let them dry normally.
- There is no need to skimp on napkins; it is advisable to purchase special lint-free consumables. Otherwise, small fluffs and threads will ruin the entire manicure, and you won’t get perfect highlights.
- If the nails are initially crooked or lumpy, then you need to level them out; usually a base is used for this, but you can also use acrylic powder.
Since the coating is done for several weeks, there is no need to rush, you need to allocate 2-3 hours for the procedure, choose a suitable place, light, remove distractions that often walk by, run, make noise and ask something. It’s better to do one thorough manicure in three hours than to do it in an hour and then have to redo it.
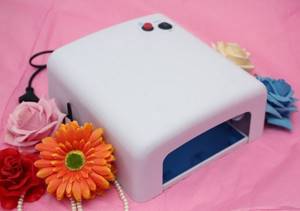
Lamp for drying gel polish
The range of LED lamps is quite large, but the purchase must be approached responsibly. The drying time and durability of the manicure depend on the power of the lamp. It is best to choose hybrid lamps with a power of 24-52 W, which have sufficient surface area to dry not just one nail, but the entire palm. TOP led lamps for home manicure 2020.
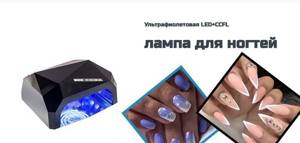
VIEW LED LAMP NOW
Popular types of nail decoration
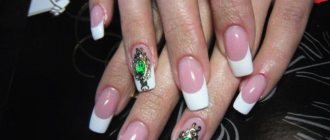
It’s already clear what a shellac manicure is, but not every girl is satisfied with plain-colored nails. It is the durable coatings that allow you to create a wide variety of designs. To feel like a nail artist, you don’t even need to know how to draw.
Popular types of decoration:
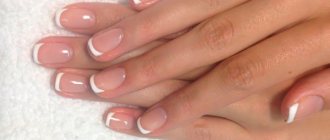
- Lunar manicure, French. It’s convenient to do it using stencils, but you can paint over the smile line with a thin brush.
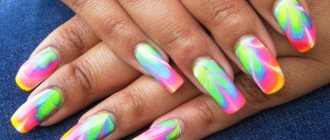
- Gradients. They give enormous scope for imagination; you can come up with a variety of shade combinations.
- Stickers. A simple, convenient, cheap way to decorate your nails with flowers, animals, hieroglyphs and any other pictures.
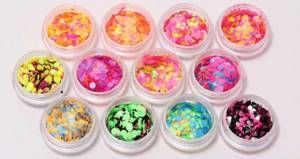
- Rhinestones, broths, stones. They are used for convex decor, do not require any glue, and are “settled” on the top coat, sometimes on the base.
- Stamping. It is a plate with patterns applied; you can choose your own shades and shapes.
Overview of stamping technology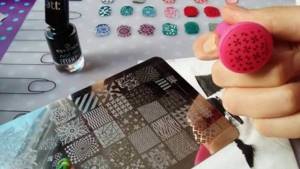
What is manicure, its types and popular nail design options
There are many options, the main thing is not to go to great lengths, the abundance of rhinestones, bouillons, kamifubuki and stickers looks cheap. You need to know when to stop and don’t forget about the appropriateness of such a manicure at work or in an educational institution.
Cuticle remover
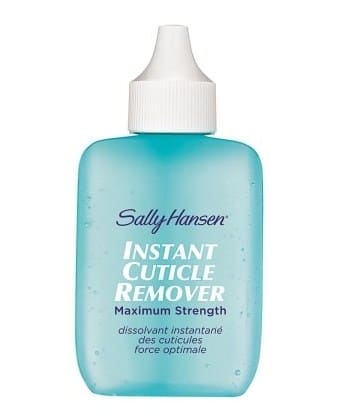
Before treating the cuticle, it should be further softened using a special product - a remover. You need to buy remover only in a specialized store. Which brands deserve attention:
Sally Hansen Instant Cuticle Remover
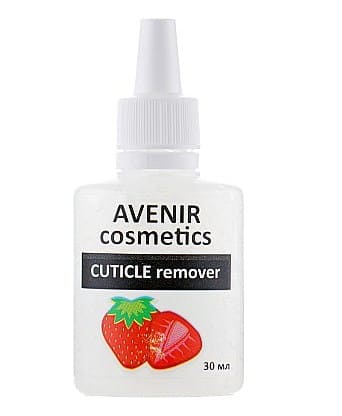
Avenir Cosmetics Cuticle Remover
KODI PROFESSIONAL