Step-by-step nail casting technique
The name “casting”, although it sounds intimidating, does not represent any difficulty. In essence, casting is the application of an additional layer of gel polish in the form of a designed pattern. The only thing that can be difficult for beginners who love home nail art is mastering patterns progressively, from simple to complex. Not everyone will be able to make the perfect monogram or flower the first time.
If you have experience covering your nails with gel polish and there is a standard set for this (degreaser, primer, gel polish, top coat, etc.), then in addition you only need to purchase foil.
It can be selected by transfer type or standard type of manicure foil. The difference between them is colossal: it is enough to lean the transfer against the sticky layer of gel polish and after that a foil mark will remain in this place. Before use, regular foil must be cut to the shape of the poured pattern, which is much more difficult.
There is nothing supernatural in the casting technique, but to be sure of a successful result, it is better to follow the step-by-step instructions:
Step 1. Prepare your nails according to the classic scheme (do the required type of manicure, remove the shiny layer of the nail with a buff).
Step 2. Degrease the nail plate, apply a primer, and, if desired, apply a layer of protective gel. Polymerize it. This can be done under the radiation of a UV lamp, but as an alternative, you can dry the coating in open sunlight (if available and the time of year allows).
Step 3. Paint your nails with a layer of colored gel polish (if the design calls for it, clear polish can also be used). Polymerize. If the gel polish is of insufficient color density, you can re-apply another layer and polymerize. Remove the sticky layer.
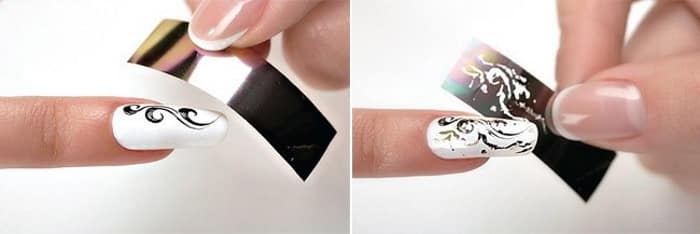
Step 4. Using gel polish of a different shade (to make the applied pattern easier to see, ideally black gel polish) make the intended three-dimensional pattern. This can be done with a special gel paint and a thin brush. Polymerize and do not remove the dispersion after this. In principle, the casting process is complete; then you just need to highlight the design using a special transfer foil (or regular one).
Step 5. Place a piece of transfer foil against the created pattern, pat it lightly with your finger so that the spraying is transferred well to the casting, then remove it. A shiny mark will remain on the surface of the nail where the casting pattern is located. If you use regular manicure foil, then you should cut out the desired pattern in advance and place it against the sticky layer of the casting.
Step 6. Secure the resulting nail design with topcoat and polymerize. If you need to get a matte result, then select a special topcoat. You can also initially use matte foil.
Upon completion of casting on one nail, you can begin decorating on other nails, if this is provided for by the planned design. In addition, you can decorate your nails with painting and decor.
The presented step-by-step casting can be used after nail extensions, on natural nails after coating with gel polish. If you use regular varnish, then the technology for decorating nails with casting is slightly different and the effect may not be as expected.
Casting materials
Ideal casting is obtained on artificial nails or on other durable coating if gel polish or other gel-containing material was used to create the manicure. But inventive girls who are fond of nail art have long mastered other ways to create such an effect on their nails.
Foil casting
A luxurious design can be made without applying a pattern, but simply using the left sticky layer. It is important to use both traditional gold foil and material with a pearl effect, holographic, mother-of-pearl or shimmer.
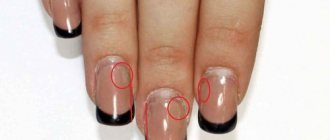
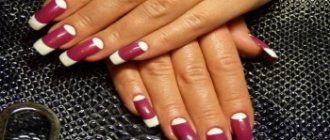
A beautiful manicure is obtained if you use foil to designate elements in popular manicure techniques: French, moon.
For example, the trend is to decorate a white jacket with foil with minor effects: mother-of-pearl, shimmer. This is done like this:
- After painting the tip of the nail white, the gel polish is polymerized and the dispersion is not removed;
- Then you should take a piece of foil and lean it against the white tip. The selected effect will remain on the nail;
- Secure the design with topcoat and dry. Remove dispersion.
By analogy, you can make another spectacular design, leaving a sticky gel mark on the nails in the right places: in the middle of the nail in the form of a strip, a hole, horizontal stripes, etc. For filigree cleaning of stickiness with a clinser, you can use ear sticks or small twisted cotton swabs.
Painting nails with gel polish
There are incredibly many options for beautiful painting on extended nails or covered with gel polish. Popular design options include the following:
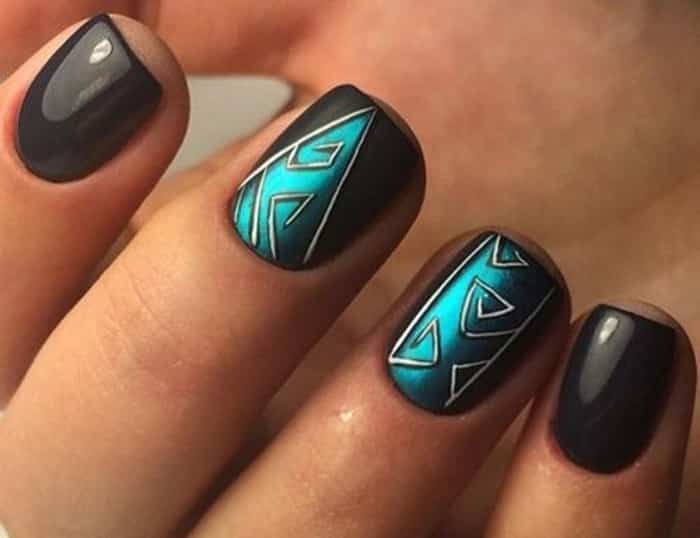
- geometric patterns and other thematic elements;
- monograms and stylistically similar patterns, ornaments;
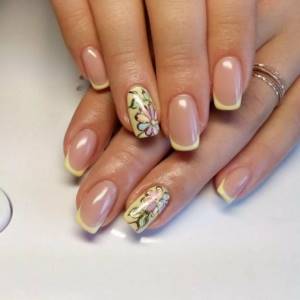
- floral theme;
- marble effect;
- “drops”, “reptile”, “scales”, etc.
Painting can be done with gel polish, but in some cases it is important to use a top coat, which will serve as the basis for a three-dimensional image.
Simply painting with gel polish on a natural nail will not work; you need an artificial coating in the form of a gel base or colored gel polish.
Special paint
Gel-based paint is convenient for painting due to its consistency, because it is a little thinner than a similar varnish. It often happens that it is impossible to create an impressive volume the first time. therefore, several drying layers are required to create the intended design.
The paint is convenient to use for a French manicure in any color scheme to paint the tip of the nail. Due to its minimal density but high pigment content, the paint lays flat and does not bulge, and the sticky layer left after drying allows you to create your favorite effects with transfer foil.
Casting with glue
You can get a chance to make casting on regular varnish with a special glue for foil. It can be applied to any surface: natural nails, extensions, coated with regular varnish, gel polish, gel, etc. This glue is analogous to casting in the traditional way with gel polish.
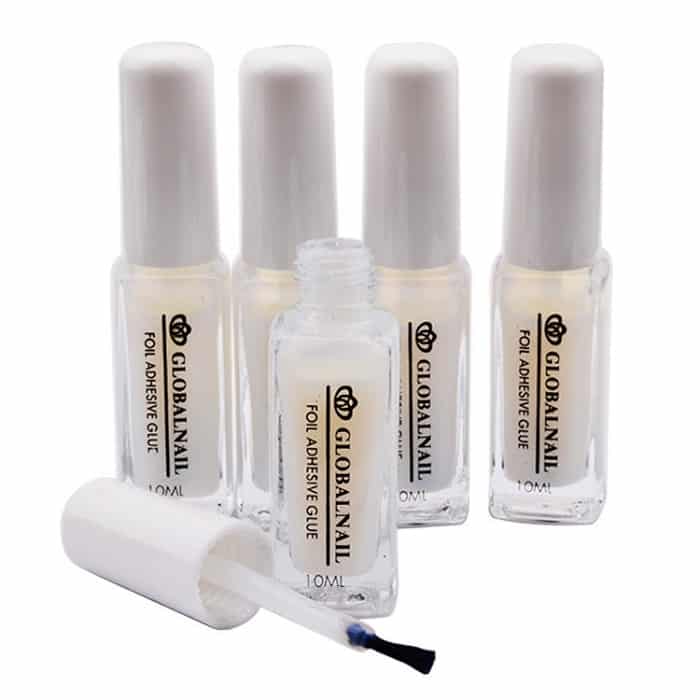
Casting adhesive
For ease of application, this glue is equipped with a brush; it does not need to be dried in a lamp, and the fact that the glue is ready for use is indicated by a change in color - from white to transparent. Then you can safely use the foil, pressing it tightly against the surface of the nail. If necessary, it can be straightened using a silicone or rubber pusher. After completing the design, a top coat (if gel polish was used for the base) or a fixer for regular varnish is applied over the foil print.
Casting with glue Option of casting on nails with glue
Adhesive casting cannot replace the volume effect that is obtained with the use of gel coatings. But with its help it is convenient to make different designs, clearly controlling the location of the future print.
Types of foil
The casting technique directly depends on the type of foil; it comes in three types:
- translated;
- tear-off;
- based on glue.
When using any of these types, there are small features that should be taken into account to achieve the desired result.
When using transfer foil, material is applied to the design and once peeled off, it is transferred onto it like a sticker.
When tear-off foil is used, the required pattern is cut out of it and attached to a gel with an adhesive layer.
Foil with an adhesive backing is also easy to apply. To do this, you need to remove the bottom protective layer and press the foil onto the nail plate with the adhesive side. After which the foil is smoothed so that there are no bubbles left under it.
Foil comes in a variety of colors, from standard silver to gold, matte, hologram and mirror textures. Plus, foil comes in a variety of patterns, so any kind can be used to create a masterpiece.
Using shiny elements
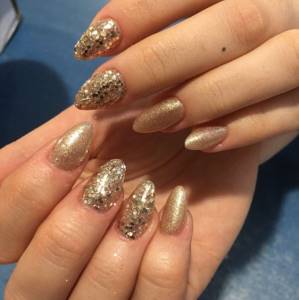
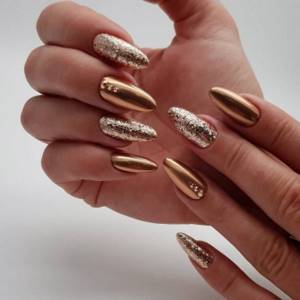
The use of glitter is one of the popular types of gold manicure, which can be used both for festive occasions and in everyday life. It looks equally elegant on any nail plate. Shiny elements can be of different geometric shapes, but the most popular is the use of a rhombus shape.
The simplest type of such manicure is the use of varnish, which includes glitter. When applied, the glitter independently spreads evenly over the surface of the nail plate, leaving it smooth.
For an evening dress with rhinestones, you can use varnish with large glitter. For short nails that have the shape of an oval or a soft square, use the technique of highlighting one or two fingers with gold painting.
Unusual designs
Today's materials for nail art make it possible to create not only various designs, but also incredible color schemes.
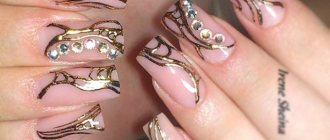
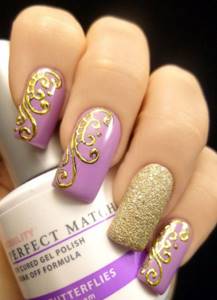
Casting allows you to cover the nail plate either completely or partially, recreating any patterns.
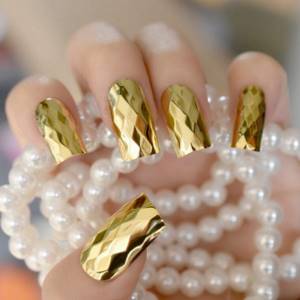
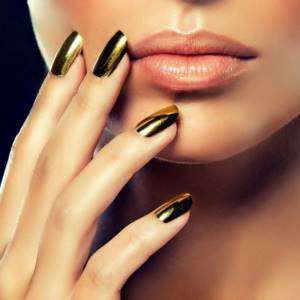
Metallic shine gives the manicure a special look. In addition, it can be pastel shades, exquisite gold and silver colors, and any others at your discretion.
The mirror-like shine adds glamor, and if it is complemented with intricate curls or an entire composition, you will get a dizzying and unique manicure.
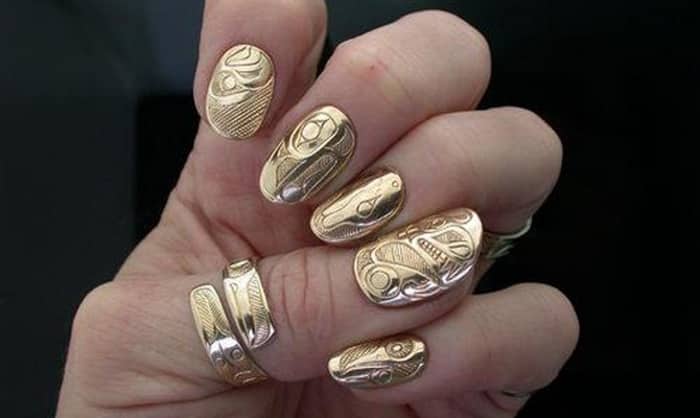
Using the casting technique, you can create not just a manicure, but a real jewelry masterpiece. With its addition, even an uncomplicated and simple design becomes sophisticated in appearance. And if you add other decorations, such as liquid stones, you will get a three-dimensional design that is perfectly suited for the celebration.
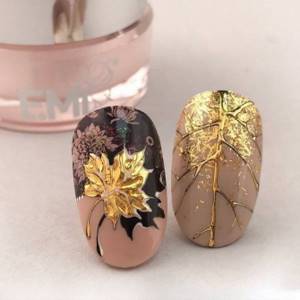
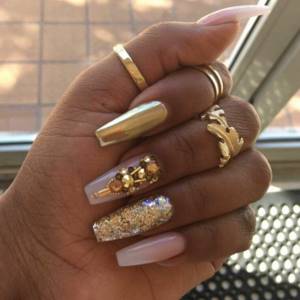
Manicure with gold and liquid stones
Very often, cast nail designs are decorated with liquid stones. They create a very delicate, rich, luxurious nail look. The stones seem to sparkle like real ones on the nails, turn into real jewelry, and act as a key design element, for example, owl eyes, turtle shell, etc.
It is not difficult to make casting with liquid stones; the technique is as follows:
- The nails are covered with a base - gel polish of the selected color, and dried. Then the sticky layer is removed from them.
- A substrate of any shape for liquid stone is made using gel paint of the selected color. The background is painted with a thin brush.
- Take a gold or silver colored manicure transfer sheet and press it onto the backing.
- A pattern is made around the substrate, the intended design.
- The matte side of the sheet is adjusted to the pattern and removed with a sharp movement of the hand. Can be repeated several times. In place of the applied pattern there should be a casting.
- To create voluminous nails, a transparent gel is used. The gel is mixed with colored shellac on the foil in order to create the effect of natural stone: turquoise, malachite, onyx, amber, amethyst, agate, etc. Take a small ball of mixed gel paint with a brush and place it on the substrate. Dried in a lamp.
- The nails are covered with a topcoat and dried in a lamp for 2 minutes. The sticky layer is removed.
To create liquid stones, you can use a special polymer coating or sculpting gel. With these materials the stones will look naturalistic and more convex.
Popular ideas
The casting technique includes thousands of different designs. You can not only create a unique pattern, but also make mosaic ornaments.
Top molded designs include the following combinations.
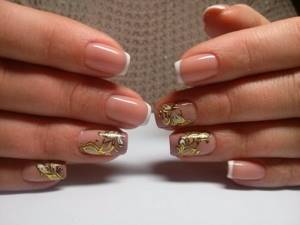
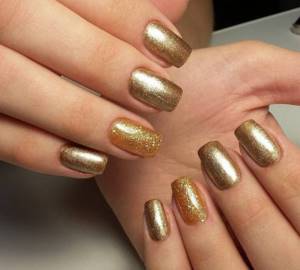
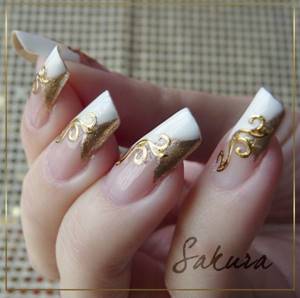
- Gold is the most popular of all, and if you combine it with a French manicure, this manicure will definitely outshine all the others.
- Metallic or silver color is suitable for lovers of discreet design. It is not as luxurious as gold glitter, but it adds its own sophistication and nobility.
- Gold and silver are always in fashion, and therefore casting with such shades has become a real breakthrough in spectacular manicure design. You can safely use these shades either alone or in combination.
- A rather original solution for nail art is a combination of precious stones and foil . This manicure design creates a complete composition that stands out due to the imitation of jewelry. By combining two directions: casting and liquid stone, you can get a unique decoration in the form of a stone framed in a gold frame.
The meaning of this design lies in the application of a polymer to the nail, which creates an imitation of stones such as emerald or sapphire. Their advantage is their light weight, unlike real stones. Liquid elements do not create discomfort.
After complete drying, the special polymer takes on the appearance of a true gemstone. It becomes more voluminous and sparkling after coating with gel. To create a complete imitation, it is better to cover the nail with a special gel for sculptures.
This way the convexity effect increases significantly, creating the illusion of a natural mineral.
Adviсe
Manicure casting is a fairly broad topic. There are a huge number of options and ideas. And there are even more subtleties in this matter. There is much more theory here than practical part. A number of tips to help make your design even more perfect.
- It is desirable that the shade of the gel polish on which the film will be printed is as close as possible to the color of the foil itself. If the tone is not imprinted somewhere, the color of the substrate will be visible. And if they fit together, the effect will be hidden as much as possible.
- The choice of foil itself is also important. There are some that print well, and some that don’t. The important thing here is to try.
- Try to make do with a minimum number of movements when printing. There is no need to press hard, the foil will be printed without titanic efforts.
- It is advisable that there is no foil at the end of the nail so that the nail can be sealed well on all sides.
- Do not paint those places with gel polish where the foil obviously will not be imprinted (side rollers and near the cuticle).
- Sometimes, when covering with top, pieces of the coating come off and slide down along with the top. It is worth polymerizing the foil a little before applying the top, and this problem will be solved.
Choosing foil
Foil for manicure is produced in two types: transferable and non-transferable.
- Transfer foil is sold in sheets or strips and is often covered with a protective film. Her assortment is extensive, there is plenty of room for your imagination to run wild. It is used both for regular manicure and for extensions. With this foil you can create almost any design, from delicate to bold.
- Non-transfer foil is much more difficult to handle. This foil is denser than transfer foil and is sold in small rolls. When creating a manicure with its help, the design must first be cut out and then “planted” on a layer of varnish.
If you are striving for the highest quality manicure, then it is better to use E.Mi foil, which can leave imprints even on sticky skin. This foil is quite thin and flexible, and therefore is simply ideal for nail art in the art casting style.
Color solution
To create a complete look, special importance is attached to the color of the varnish. It is important to remember that bright, saturated colors look more solemn. If you want to highlight the beauty of your hands, you should choose rich colors.
A red and gold manicure looks ideal, but the most popular shades in manicure are shades of pastel colors. The use of a combination of black, red and white tones helps the golden color to reveal itself against its background and emphasizes its beauty.
Neutral manicure colors complement a woman's sophisticated look. New trends in the development of gold manicure give preference to delicate light tones with an abundance of decorated elements. The matte finish makes the nail plate smooth, giving it a neat look.
A correctly selected combination of colors creates a new shade and contributes to a beautiful transition from one color to another, thereby emphasizing the depth of both the pattern and the background.
Smooth transitions from one color to another are created with the help of sparkles, which can be applied with different intensities and densities, creating a complete style solution.
Golden manicure 2022 is a fashion trend considered the most popular in evening design. The important thing is that combinations of golden shades go amazingly with any outfit. Regardless of the time of year, such a manicure emphasizes the elegance of the suit.
Design Features
We have already mentioned that casting is performed only on extended nails and it is advisable to use transfer-type foil for this.
The process of performing such a manicure is as follows. Extended nail plates are covered with gel and baked in a lamp. Then we glue the foil to the drawing and polymerize the nails again. At the final stage, tear off the foil with a sharp movement. As a result, the top layer of foil “gives” your drawing.
The baking time for manicure in a lamp can vary and depends, first of all, on the materials used.
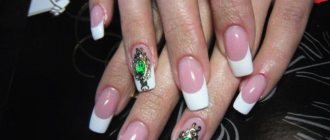
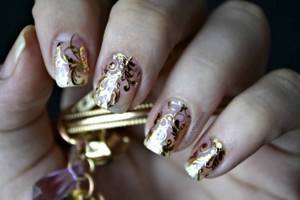
Nail design with foil and web
The combination of foil and spider web is also very popular. Thanks to this new product, even beginners can create creative decor. What is a cobweb? This is a very thick gel polish that lays on the plate in thick layers and is very reminiscent of a cobweb. It is applied with a special stick and placed on the nail again.
You can also use a regular glove. We put it on our hand, drop a drop on our finger and rub it with our fingers. As a result, you will have many thin threads between your fingers that can be applied to the nail.
The ideal base for a web is a foil manicure. Such cobwebs need to be dried for about 2-3 minutes, depending on their thickness.
@manikuredby_angela
Photo: @iza__nails
What to do if the foil does not fit well on the gel?
This problem occurs quite often, especially among beginners. There may be several reasons for this state of affairs.
First of all, pay attention to the quality of the materials you purchased. Perhaps the foil isn't good enough and just isn't sticking as well as it should. Maybe the reason is in the gel itself. After baking in the lamp, a sticky layer should form on it. If this does not happen, then there is simply nothing for the golden layer of foil to stick to. In this case, you can use special glue for foil.

It is also necessary to pay attention to the baking time of each layer in a UV lamp. Each gel has its own individual polymerization time. Take this into account when creating a manicure.
A manicure made using the artistic casting technique lasts about two weeks. It is not afraid of harmful environmental factors, so nothing can stop you from enjoying the beauty of your hands in the near future.
We are preparing for the new year
On the eve of winter celebrations, when thinking about your festive attire and hairstyle, you should not forget about the New Year's golden manicure. Silver and gold colors look especially good on such evenings.
Due to the fact that the coming year according to the eastern calendar will be the year of the Metal Ox, their use is especially relevant. You can use different color shades:
- a combination of red, burgundy and gold;
- black marigolds with gold floral painting or rhinestones;
- the combination of blue and gold will give the festive suit a finished look, highlighting its elegance;
- applying white, beige and gold shades will dim the brightness of the festive outfit;
- the combination of greenery and gold with the use of rhinestones and stones is especially relevant for New Year's celebrations. Decorations are used both for all nails and for one nail;
- muted colors from milk cocoa to dark chocolate, symbolizing calm, go perfectly with any outfit.
A New Year's manicure with gold will subtly highlight the excellent and stylish look of its owner.
If previously a golden manicure was an elegant evening decor, now it perfectly complements a modest everyday outfit. Women's hands deserve attention not only on holidays.
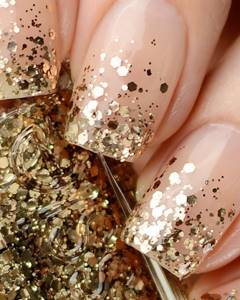
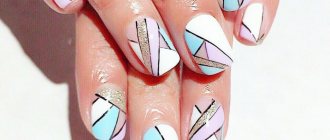
Casting on nails step by step
Photo step by step describing the process of creating gold casting on nails using transfer foil.
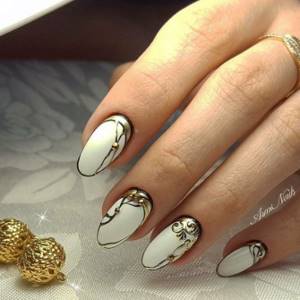
Although, of course, in the video this technology is described in much more detail and better. White French on long almond-shaped nails with gold casting. Typically, gold and silver are the most popular colors for this type of design.
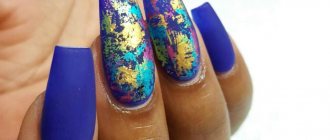
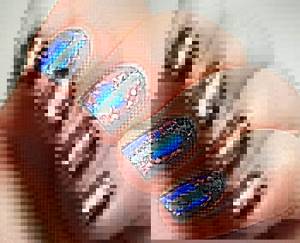
To be honest, what interested me in this photo was not so much the casting as this blue and gold design with a cracking effect.
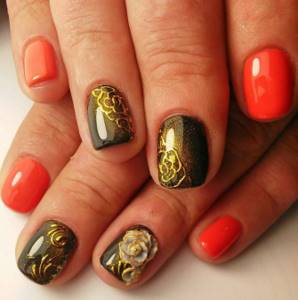
Very beautiful manicure. I note that very often casting on nails is done simultaneously with Liquid Stone. These are related designs and are often seen together.
Gold casting on the nails plus an ombre effect in the transition from soft pink to soft blue.
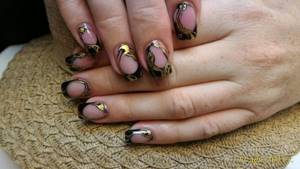
Tips with red varnish and gold casting.
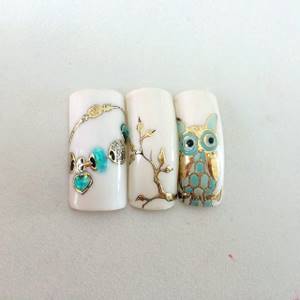
A very impressive slider design with gel paints with an owl design on the nails.
New trend in manicure
A golden manicure becomes every girl's dream. Now many beauty salons offer advertising for it. However, it should be remembered that such a bright and attractive nail design is suitable only for those bold beauties who want to demonstrate their chic, brilliant image and want to attract everyone's attention.
Step-by-step golden manicure
Before you start doing a manicure, you should prepare your hands:
- they are thoroughly washed in hot soapy water and the remnants of old varnish are removed;
- in a warm bath, soften the cuticle, slightly pushing it back or removing it;
- nails are slightly filed and their shape is determined;
- perform polishing of the nail plates, removing all breaks and irregularities;
- nails are degreased by wiping with a special liquid;
- apply the base coat and dry under an ultraviolet lamp;
- alternately apply 2 layers of varnish, drying with ultraviolet light;
- carry out the final treatment of the nails, giving them the necessary color and shine.
For modest women, there is a design using partial gold elements, which are placed in various combinations.