- August 16, 2018
- Nail care
- Olya Bodrova
Today every girl can have a beautiful and high-quality manicure. Even if you don’t have the money or time to visit a professional craftsman, the materials for the work are freely available in specialized stores and you just have to get used to them. You can make a bright and unusual design by gluing foil onto gel polish. How to apply this material depending on its type? In what styles can it be used? The answers to these questions are given in the article.
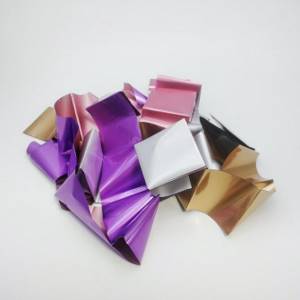
Foil selection
In order for the manicure to turn out exactly as intended, you should purchase special foil - for nail design. It is easy to work with, and the choice of colors and shapes is very rich.
Regular household foil is denser because it is intended for other purposes, so it is more difficult to work with and design choices will be limited. So, before using foil for nail design, you need to decide on the option for your future manicure. The choice of style and further appearance of the nail determines which material is best to choose for the job.
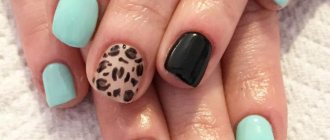
Photos with seasonal design ideas
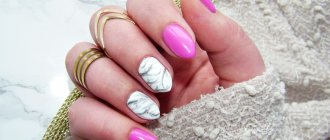
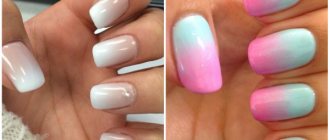
Winter, spring, summer and autumn are not only seasons, but also great ideas for creating original nail designs. Fashion trends are changeable, so it is not surprising that every season nail art masters offer more and more new options. For example, in the warm season it is better to choose a delicate beige design, and with the onset of cold weather you should pay attention to a dark nail design - blue, purple, green, burgundy, or blue shades of varnish can be used.
Winter
Spring
Summer
Autumn
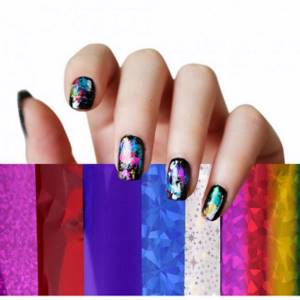
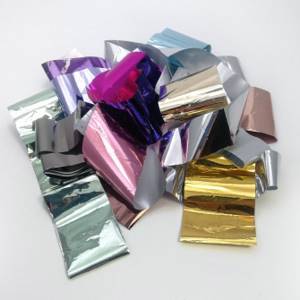
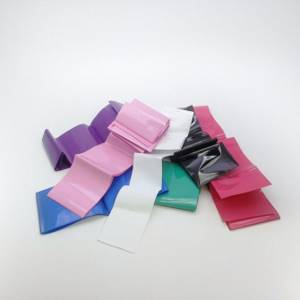
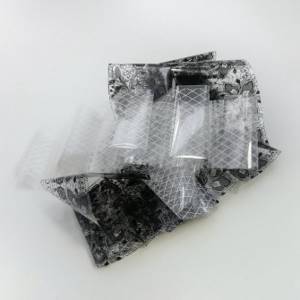
Transfer foil
Making a beautiful manicure with foil on gel polish in this case is the easiest and most convenient, which is why this type of material is used most often in work. In addition, the advantage is a huge selection of colors and patterns. Such foil can be sold in rolls, packaged in small jars, or in the form of small notebooks, packaged in polyethylene.
The material allows you to cover the entire nail plate with color, only part of it, or create any patterns. Features of the application are that the foil is transferred only to specially prepared areas of the nail, and the remaining material remains on the protective film until the next use. It is very easy to control the area of coating; the main thing is to apply the material to the nail with the matte side.
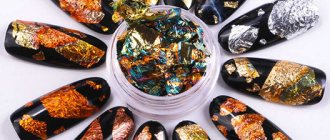
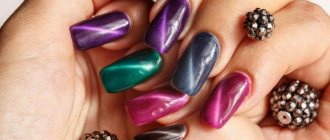
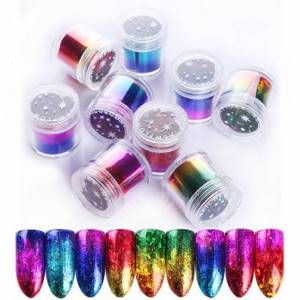
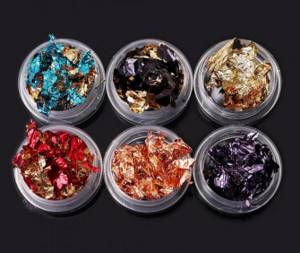
What types of foil for nail design are there?
Metallic
Silver, gold or any shade with a bright metallic sheen.
Satin
It can also be of any shade and has a soft shine.
Matte
Colored foil without metallic sheen. Produces dense, colorful matte prints.
Holographic
It shimmers very brightly with all the colors of the rainbow. Also comes in different colors.
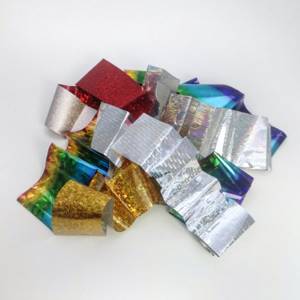
Mother of pearl
Translucent, shimmers only at a certain angle. Essentially also holographic, but without a metal backing, so it looks much less catchy.
Transparent with a pattern
The whole thing consists of repeating patterns. The designs can be colored or holographic, with or without glitter. The layer of paint on the reverse side is thicker, so special glue for transfer foil is required to print the design evenly.
Opaque with a pattern
It has a rather thick layer of paint and a denser film, making it more difficult to work with. You can’t do without special glue or base.
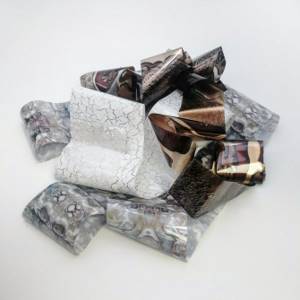
Non-transfer foil
Before applying tear-off type foil to the gel polish, you will need to cut out the required pattern from it. Tear-off foil is sold in gold leaf. It can be torn off in a chaotic manner and create a mosaic-like pattern on the nail. To cover the entire nail plate with this material, you will need to trim off the excess foil or file it off along the entire perimeter at the end of the manicure.
Potal is sold in the form of notebooks in sheets or small pieces in jars.
How to do casting at home
You can perform nail design using the casting technique at home.
To begin with, you should worry about purchasing the following devices and materials:
- silver, gold and other foil;
- thin brushes;
- acrylic gels of different colors;
- stained glass gel designed to imitate natural precious stones;
- sculpture, protective gel and varnish;
- ultraviolet lamp.
When the necessary materials and devices have been purchased, you should first make a simple abstract pattern using any color or completely cover the nail plate with this material, following the sequence of actions.
The order of casting techniques for any design decisions should be as follows:
- A base gel is applied to the surface of the nail plate If a specific color is not provided as a base, a protective colorless gel coating is created on the nail plate.
- The helium layer is fixed by exposing it to a UV lamp for two minutes.
- Using a contrast gel, the planned pattern is applied to the surface, which will later be covered with foil. To do this, use thin brushes. The application of the helium outline of the pattern is repeated several times to give the pattern volume.
- The helium pattern is again cured using a UV lamp for two minutes.
- The foil is pressed with the wrong side to the surface of the nail and after a few seconds it is sharply pulled away from it. In place of the applied helium pattern, a shiny foil pattern is imprinted. It looks voluminous because it completely covers the surface of the previously applied helium pattern.
This technique is focused on the use of transfer foil and is most convenient for beginners.
You can also make a drawing yourself, including imitation of precious stones. First you need to create the outline of the stone. To do this, select a gel of the appropriate color. The gel outline can be outlined using different colors to create a sun flare effect.
After fixing the contour with a UV lamp using stained glass gel, the volume of the stone itself is created, which is also fixed with a UV lamp. You need to apply a sculpting gel on top of the stone. You should start creating a design with liquid stones at home once you have gained experience in nail art using casting.
When making such a design, it should be taken into account that it does not last long. Therefore, a protective coating is used to secure it. Transparent varnish is sometimes used as such a coating. But this causes the foil to significantly change its attractiveness: its shine is lost and cracks and folds appear. In order not to harm the applied pattern, it is better to use a special gel as a protective coating. It should not be applied immediately after completing the drawing, but after several hours.
Materials for work
If you apply gel polish yourself at home, then you will definitely find everything you need for the job and will already be familiar. The list looks like this:
- lamp for drying varnish LED or UV;
- orange sticks;
- buff (a file for creating a rough surface on the nail);
- degreaser;
- primer;
- base coat;
- the gel polish itself is the desired color;
- finishing coat - top;
- foil;
- cotton buds;
- lint-free wipes.
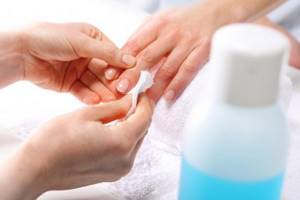
In addition to all of the above, before work you need to prepare your nails - shape, clean, file and remove the cuticles.
If casting fails
For some reason, the manicure may not work out. This happens in several cases:
- The foil was loosely attached to the gel. As a result, we will get a blurry picture. The gel base must be sticky enough, otherwise the pattern will not transfer well and ruin the manicure. If something doesn’t work out during the work, we remove the damaged foil with a special liquid and do the coating again. It is advisable to choose high-quality foil.
- Some gels need to dry longer than usual - from seven minutes. In addition, it is advisable to select a powerful lamp. A weak lamp will not give such a good effect; the gel simply will not dry. It is necessary to timely replace the bulbs in the lamp.
- If done well, the manicure will last about two weeks.
Sources
- https://vashi-nogti.ru/dizajn/lite-na-nogtyah/
- https://www.pilka.su/lite-na-nogtyah-s-zhidkimi-kamnyami-v-domashnih-usloviyah/
- https://VseProKley.ru/raznoe/kak-kleit-folgu-dlya-nogtej
- https://prostonail.com/nail-foil/
- https://vplate.ru/manikyur/dizajn/lite/
- https://www.pilka.su/lite-na-nogtyah-s-zhidkimi-kamnyami-v-domashnih-usloviyah/
- https://krasota.guru/nogti/manikyur/lityo-na-nogtyax.html
- https://modnail.ru/photocat/po-stilyam/manikyur-lite/
[collapse]
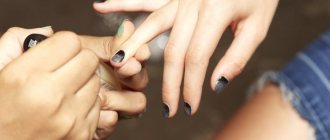
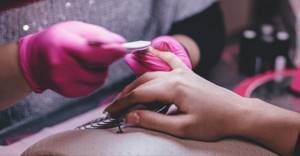
Working with translation material
Before applying foil to gel polish, you need to do several standard procedures for such a manicure, since shiny tape is applied only to the colored coating. So:
- The prepared nail is lightly sanded with a buff to remove the natural shine.
- A degreaser is applied to the nail.
- After the latter has dried, the plate is treated with a primer. If this material is not available, you can skip this step, but you should remember that the longevity of the manicure in the future depends on the quality of nail preparation.
- Now the base coat is applied. Depending on its consistency, manufacturer and quality of the lamp, the drying time of the base will depend. This can be a period of 30-240 seconds, but usually 1-2 minutes is enough.
- The required color is applied in a thin layer to the dry base. If the shade turns out to be too pale, you need to apply a second layer, after drying the first. Applying a large amount of varnish at one time will lead to “flooding” of the nail and the manicure will be ruined.
- For better adhesion to the foil, the last layer of color can be left a little dry.
- Now foil is applied to the entire nail plate, carefully straightened along the edges with an orange stick and pressed against the nail over the entire surface with a cotton swab. When the material is well straightened and pressed over the entire surface, the protective film should be removed with a sharp movement. If there are gaps left on the nail, the procedure should be repeated in a certain place.
- A topcoat is applied to the transferred foil and dried. For better fixation, the time under the lamp can be increased 2-3 times or several layers of the finishing coat can be applied, each one being dried beforehand.
- At the end of the work, the sticky layer is removed with a degreaser and the manicure is ready.
It is important to remember that this option is easier to implement, but achieving a perfectly smooth foil coating will be difficult.
Design Features
We have already mentioned that casting is performed only on extended nails and it is advisable to use transfer-type foil for this.
The process of performing such a manicure is as follows. Extended nail plates are covered with gel and baked in a lamp. Then we glue the foil to the drawing and polymerize the nails again. At the final stage, tear off the foil with a sharp movement. As a result, the top layer of foil “gives” your drawing.
The baking time for manicure in a lamp can vary and depends, first of all, on the materials used.
Another option
There is another technology for applying foil to gel polish and making the coating smoother. For this you will also need transfer material; only the method of its application changes. Nail preparation is carried out in a similar way until the color is applied. Each layer is dried completely, after which the finishing coat is applied. The foil is glued to the “wet” top, straightened out and sent under the lamp. Only after drying is the protective film removed and the transfer coating remains on the nail. It should be secured with a topcoat and dried well, after which the stickiness should be removed.
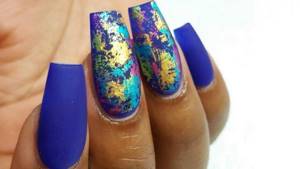
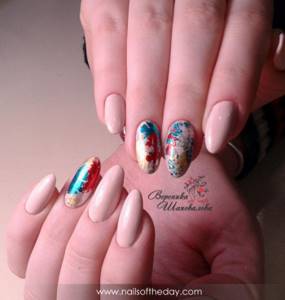
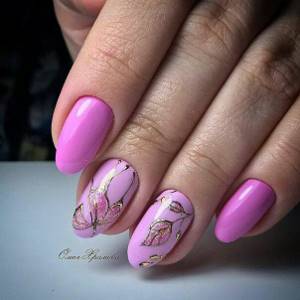
Photo ideas for applying patterns
Using transfer foil in manicure is not only about cute wavy lines and flowers. There are enough ideas to decorate the surface of the nail with this material to choose the appropriate option for your luxurious design.
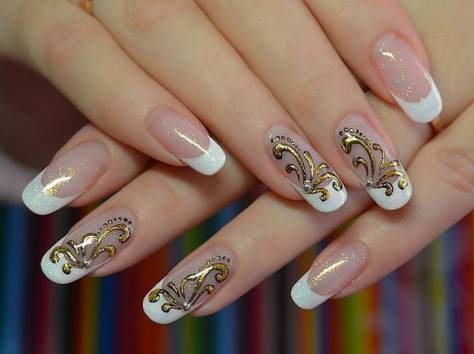
Gold casting
To apply gold casting on nails you will need high-quality foil. To achieve the effect of the presence of gold on nails, the foil should have a bright golden hue without darkening, and you should not use material with a holographic coating. It will not make your manicure “expensive”.
To make your manicure as realistic as possible and to feel the presence of natural gold on your nails, you should not ignore these tips:
- It is better to use black gel polish for the casting base; it is against this background that gold foil looks especially advantageous. You can use a black background not only on dark coatings, but also on transparent, bright, light ones;
- To enhance the precious effect, the trend is to combine gold casting with the liquid stone technique;
- In order not to lose the relief of the pattern, you should not overfill the design with top, then the casting effect will be more noticeable.
Gold casting is important to use in manicure if a woman wears precious jewelry in golden tones (for example, gold rings, a gold bracelet, etc.). This design looks great on different backgrounds, so there is no fundamental difference in choosing the main shade of the manicure.
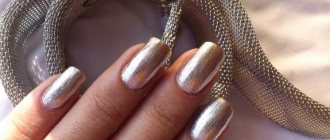
Silver casting
Similar to gold casting, silver matches any basic shade of manicure. But it is still worth considering a woman’s preferences in jewelry: you should not cast silver if the jewelry on your hands is gilded or made of gold. If there are no decorations at all, then any shade of foil will do.
For a beautiful and delicate manifestation of a silvery coating on the pattern, it is better to do it in white. Silver foil on a white background appears with a gentle reflection; this effect is best used for dark shades of the manicure background. If you take black as a basis, then silver casting will look bolder and stand out well against a light background.
Liquid stone casting technique
To perform a design when you need to imitate natural stone, you must have a gel polish or gel coating on the nail plate. Application of liquid stones does not take place in one layer. For high-quality design, you need to have stained glass gel. But if it’s not there, then you can make a “hamburger”:
- Apply a flat drop of colored gel polish to the gel coating and dry;
- then do foil stamping (best with an overflow, the base is translucent);
- cover with topcoat and dry.

Option for creating liquid stone on nails
Depending on the real stone chosen, various color combinations and shapes are used. Along the edges of such a stone, you can use casting, as an option - golden broths. Photo examples are attached:
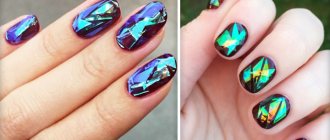
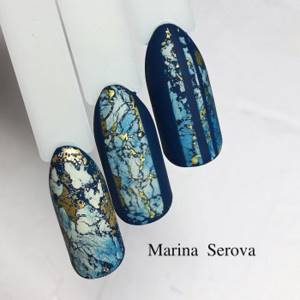
Stained glass patterns and mosaics
To create such a design, it is better to purchase stained glass gel, which differs from its counterparts in its transparent base, but has a shade of the desired color. Other options for design are pieces of multi-colored foil, mica, colored gel polishes with a “cat” effect.
The effect of stained glass using stained glass gel can be created between partitions made using the casting technique. To use pieces of foil, it is better to use the “aquarium” technique and draw the borders with black gel polish or acrylic or gel paint.
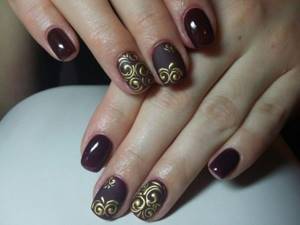
Volumetric lines and monograms
This design is suitable for adding uniqueness to traditional types of manicure: French, moonlit, plain glossy or matte finish. You can create volume using the classic method of layering gel polish and a foil print.
To simplify the drawing, it is worth using a thin brush made of artificial material (nylon, for example).
Mirror effect
In order to get a mirror-like shine effect on your nails, you need to choose the appropriate foil with the ability to transfer. Mirror foil sticks in the same way as regular foil - to the sticky layer of gel polish. You can also use pieces of mirror-coated foil and make an applique out of them. Upon completion of the design, the resulting mirror effect is fixed with a top coat.
Hollywood casting
Making a Hollywood nail is quite easy if you have foil and gel polish. This technique involves smoothly applying foil to the nail to create the effect of a gold bar. This design is not used to decorate every nail, but is limited to a few selected ones. The background for other nails can be varied, but for Hollywood casting, classic solutions are preferred: black, red, white. As an option - fashionable shades that are constantly changing: marsala, burgundy, champagne, etc.
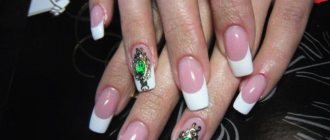
French casting
You can get an exquisite foil nail if you use French casting. To do this, you just need to leave the stickiness on the tip of the nail and make an imprint using foil embossing. Any foil color can be chosen, it all depends on imagination and the desire to stand out. French casting is suitable for short and long nails.
Partial coverage
In order for a design with foil on gel polish to be made in the form of a specific pattern or French manicure, it is necessary to clearly define the boundaries of the coating. For this purpose, the nail preparation technology remains unchanged until the application of colored varnish. After it dries, the nail should be treated with a buff so that the foil does not stick to the rough surface. The required pattern on the nail is drawn with a colored coating using a brush and dried a little. After this, you can press the foil onto the entire surface of the nail; it will only transfer to the drawn pattern. The protective film is removed and the gel polish with foil is covered with a top coat, dried and degreased.
If, after careful pressing, the pattern is not imprinted on the nail, the varnish may not provide the required stickiness and the pattern should be applied with a base coat.
What is nail casting?
This is one of the types of nail designs that is performed exclusively on artificial nails. Such designs are created on a strip of gel using manicure foil.
To perform such a manicure at home, you will need some skill, so it is advisable to take the first steps in this direction on false nails. After trying your hand, you can start training on your own hands. Be patient and don't be discouraged if the drawing turns out uneven at first. This is quite normal for beginners.
On our page you can find a sufficient amount of information about performing nail casting and traditional photo and video materials.
Working with permanent foil
Since such material must first be cut to shape before being applied to the nail, in addition to the materials and tools listed above, you will need to prepare nail scissors and tweezers. How to apply foil to gel polish in this case? The technology changes slightly:
- You need to cut out the desired shapes from the foil in advance.
- After this, treat the nails with a buff, apply a degreaser and other base coat.
- Apply several layers of colored varnish and dry them one by one.
- Apply top coat to the nail and place foil on the wet layer in the required order using tweezers.
- Prepared nails should be dried under a lamp and secured with a layer of topcoat.
How to apply liquid foil
The process of applying nail polish that creates a foil effect is no different from the usual:
- The length of the nail plate is adjusted, the cuticle layer and pterygium are removed.
- Using a buff, small irregularities are removed and the surface is polished. Use a brush or brush to brush off the resulting dust.
- It is important to degrease your nails well using a cleanser. You can use formic alcohol.
- It is advisable to use a primer. It will allow the coating to adhere better and help prevent detachments.
- Base coat + lamp drying.
- After drying, a varnish is applied that looks like foil.
- The coating is dried in a UV lamp for 2 minutes, in an LED lamp for 30 seconds.
- Top coat + lamp drying.
- The last step is to remove the sticky layer, if required.
Important! When applying liquid foil, do not press too hard on the brush, otherwise the layer may turn out uneven.
Useful tips
The article describes in detail how to make foil on gel polish, but in order for each of them to delight you with its durability and special beauty, you should remember:
- You can also attach the foil to the base coat layer if it provides sufficient stickiness and is not too thick in consistency.
- It is recommended to dry the coating with foil 2-3 times longer than usual.
- It’s better not to remove the sticky layer from your nails right away at the end of the job. It is recommended to wait 30 seconds, then the shine will be more pronounced.
- The quality of a manicure directly depends on the quality of the materials chosen for the job, so saving is not always the right idea.
comparison table
| Name | Can be used for casting | Price, rubles | Glue | Surface |
| Leafy | Yes | 70–150 | Needed | Smooth |
| Transferable | Yes | 70 | Depends on the type | smooth |
| Embossed | No | 60–80 | Needed | Textured |
| Thermofoil | No | 100–450 | Not needed | Mostly smooth |
| Ribbons | No | 50–100 | Not needed | Smooth |
| Zhataya | No | 40–55 | Needed | rough |