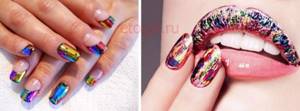
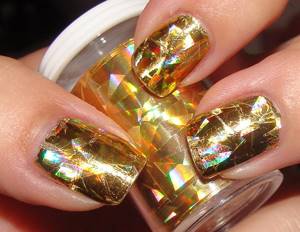
Modern women use bright, shiny nail designs in their everyday life. There are no restrictions on decoration even within the office style, which dictates its own requirements for clothing and shoes.
To create a brilliant design yourself, just stick bright colored foil on your nails. For the durability of such a manicure, you need to know the rules for applying and fixing the material.
Foil for nail design
Today we’ll look at everything about nail design with foil.
This design is considered basic, does not require additional sealing like sliders and always looks impressive. Let's look at 5 ways to print foil:
As you probably already understood, you don’t need to have any special skills to make a design with foil. Just print the foil on the stickiness of one of the proposed coating options. But all these coatings have varying degrees of stickiness and, accordingly, the ability to seal foil. There is also no need to secure the foil on top, you just need to cover it with any type.
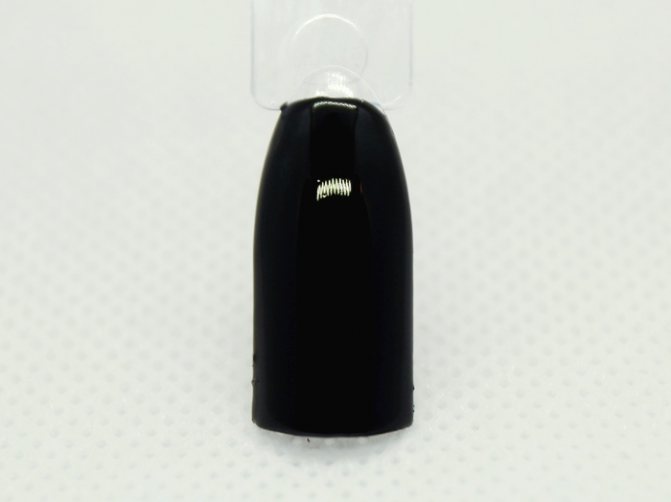
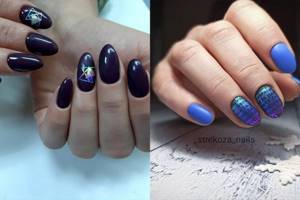
The first method: print foil onto a sticky layer of gel polish. To do this, prepare the nail as usual. Cover with colored gel polish and dry. On white gel polish we use black matte foil.
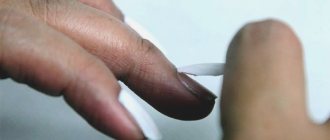
You need to print with the matte side facing the nail, and the glossy side of the foil will be on top. Take a piece of foil and transfer it to gel polish.
A mark remains in the place where the foil was imprinted. There is no need to print the foil a second time in a place where there is already a mark - it simply will not print. The more tightly you press the foil to the nail, the brighter and more distinct the mark will be. This way you can make a less noticeable design if you barely touch the nail with the foil.
But what to do if, after all, you have stained the drawing a little or you just don’t like a piece of this drawing? Simply wipe with a cloth moistened with liquid to remove the sticky layer.
Just do it carefully so as not to destroy part of the drawing. This way you can adjust while the design is not covered with a top coat.
Second method: on a sticky base layer. Dried color, cover with any base, in a thin layer without adding excess volume. We dry the base, then take matte foil. The system is the same: glossy side up, matte side towards the nail, and print the foil.
When using this method, in order to get a clearer and larger piece of the design, you need to press the foil harder against the nail and keep it pressed longer. The next layer is to cover the tips with black foil with a glossy topcoat, and the tips with white foil with a matte topcoat.
This is what matte foil looks like under glossy and matte topcoats. Both options are worth considering.
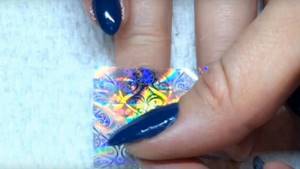
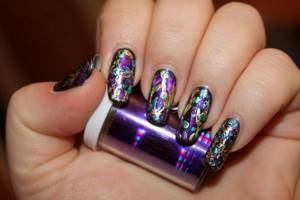
Third method: on a sticky layer of top. On black gel polish, cover it with a top coat with a sticky layer. There are three colors of glossy foil for this design. After we have dried the top, we print foil onto this top.
The foil is very easy to catch, prints without much effort, and you can easily alternate different colors of foil in different orders. Let's cover this tip with a glossy top coat. This design does not add volume and additional leveling when covering with topcoat is not necessary, so cover as usual.
After drying, we wipe off the sticky layer and we have such a bright design.
Fourth method: use an acid-free primer. As we know very well, an acid-free primer is double-sided tape and it leaves a sticky layer on the nail. Accordingly, we can print foil onto this sticky layer. Let's also take three colors of glossy foil. Apply primer to the dried color, brushing it once over one place with a semi-dry brush. There should be no layering of the primer on top of each other and literally 10-15 seconds after applying the primer we print the foil onto it.
The foil also prints very well. This method is superior to others in terms of time, because nothing additional needs to be dried, and the primer will be an additional factor for better wear of the foil. We will cover this design with a matte top coat, dry it, remove the sticky layer and here is the finished design.
This is what glossy foil looks like under a matte top.
Fifth method: using a special glue-gel. Cover the colored gel polish with glue gel and dry it. We print glossy foil.
Then we cover it with a glossy topcoat without a sticky layer and dry it.
This is what glossy foil looks like under a matte and glossy topcoat.
In this article we tried to make different versions of foil under different tops so that you can see how it looks.
Source
Acid-free primer double-sided tape
Some types of foil are successfully attached to a wet layer from an acid-free primer. But a high-quality result is not always achieved; it depends on the properties of the foil and the materials from which it is made.
In terms of its properties, an acid-free primer, which is applied to a polymer material (in the case of a design with foil, to a colored gel polish coating) exhibits the characteristics of double-sided tape. It glues the shiny part from the foil tape to the nail, but requires that it be secured on top with a top coat.
To ensure the durability of the manicure, masters recommend fixing this design with 2 thin layers of topcoat, drying each one in an LED lamp for at least 30 seconds.
It is not difficult to glue any type of foil to your nails, but you should follow the rules for applying it for each type of material. When creating different designs, depending on the complexity and stages of its implementation, different fastening methods are used and with experience comes an understanding of which option for fixing the foil is the most convenient.
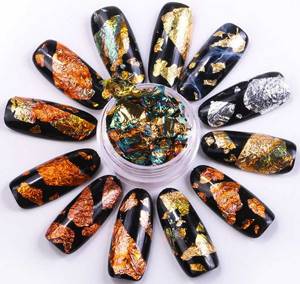
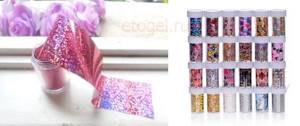
Foil selection
In order for the manicure to turn out exactly as intended, you should purchase special foil - for nail design. It is easy to work with, and the choice of colors and shapes is very rich.
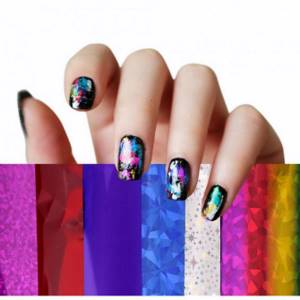
Regular household foil is denser because it is intended for other purposes, so it is more difficult to work with and design choices will be limited. So, before using foil for nail design, you need to decide on the option for your future manicure. The choice of style and further appearance of the nail determines which material is best to choose for the job.
Errors when applying material
Very often you can hear that it is impossible to do such a manicure at home or that it is just a hassle. Let's look at the most common mistakes that are made when creating such an interesting nail design:
A poor result may be due to the low quality of the materials used.
The glue was not applied to the entire surface or simply did not have time to dry before the film was torn off.
Thanks to such an interesting design material as foil, you can change a lot in your manicure without even leaving home. Show a little imagination and experiment, the main thing is not to give up if something doesn’t work out the first time. Beautiful nail designs require patience and some experience, so don't hesitate to get started.
Transfer foil
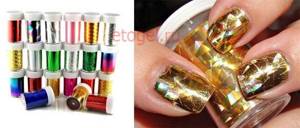
Making a beautiful manicure with foil on gel polish in this case is the easiest and most convenient, which is why this type of material is used most often in work. In addition, the advantage is a huge selection of colors and patterns. Such foil can be sold in rolls, packaged in small jars, or in the form of small notebooks, packaged in polyethylene.
The material allows you to cover the entire nail plate with color, only part of it, or create any patterns. Features of the application are that the foil is transferred only to specially prepared areas of the nail, and the remaining material remains on the protective film until the next use. It is very easy to control the area of coating; the main thing is to apply the material to the nail with the matte side.
On the sticky layer
The easiest way to create a design with foil is to print it onto a sticky layer of colored gel polish. It will not be possible to completely cover the entire nail plate in this way, but creating a stylish design with chaotic prints in the form of brush strokes or an abstract shiny design is quite possible.
Masters in nail salons use this method of foil imprinting to create bright, shiny backgrounds in aquarium design. A layer of transparent construction gel placed on top in the form of a lens will qualitatively secure the design. For this method of printing, it is better to choose plain foil strips without a pattern.
Non-transfer foil
Before applying tear-off type foil to the gel polish, you will need to cut out the required pattern from it. Tear-off foil is sold in gold leaf. It can be torn off in a chaotic manner and create a mosaic-like pattern on the nail. To cover the entire nail plate with this material, you will need to trim off the excess foil or file it off along the entire perimeter at the end of the manicure.

Potal is sold in the form of notebooks in sheets or small pieces in jars.
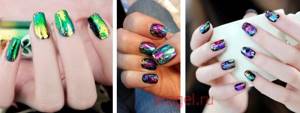
Lesson 4 – Foil manicure using fashionable casting technique
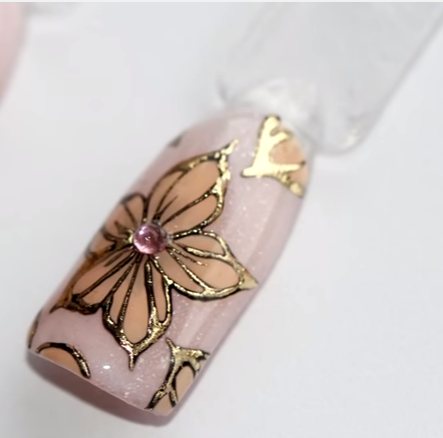
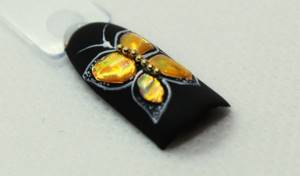
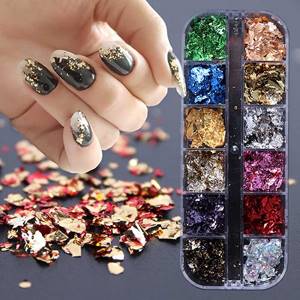
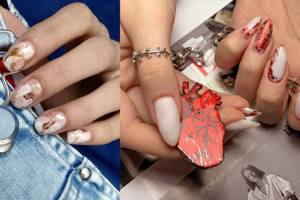
This new nail design for 2022 is called liquid metal. But in this version we will add golden drops into the drawing. There are also ideas on the Internet for similar manicures in the form of a flower and a Christmas tree toy.
Design materials:
- Base, glossy top, dark gel polish;
- Black gel paint;
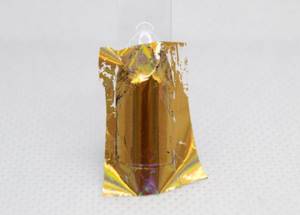
- Gold transfer foil;
- Golden broths.
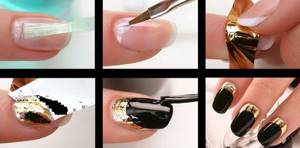
Step-by-step photo instructions
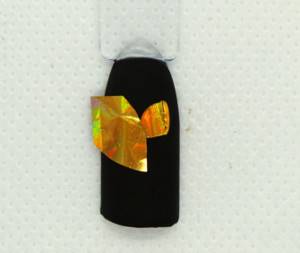
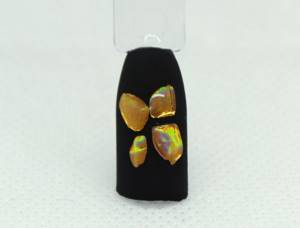
Step 1 – This glitter foil design looks better on darker shades of gel polishes.

Step 2 – Apply a matte finish to the gel polish. Then we take a thick base, add a large drop of top, cover it with a small piece of foil and send it to the lamp. Next, use tweezers to tear off the foil.
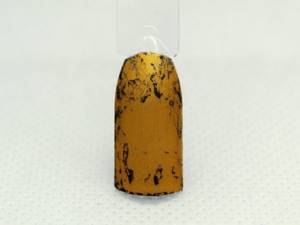
Step 3 – Slightly retreat from the previous drop, place a new one and cover with foil.
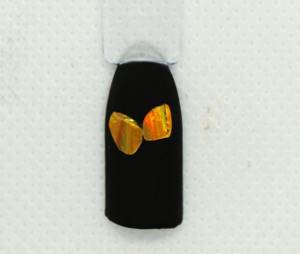
Step 4 – After the base has dried in the lamp, tear off the foil.
Important!
You can’t do a similar nail design with foil on gel polish, because it won’t dry. The top will bleed a lot. But the thick rubber base is just right. Once you have applied the pieces of foil, there is no need to press hard on them. The most ideal material for liquid metal manicure is transparent thick gel paint.
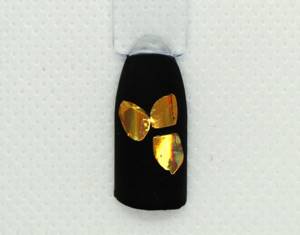
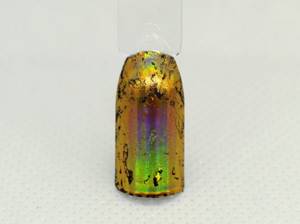
Step 5 – The drops spread and the result is difficult to predict, so make them farther apart.
Step 6 – For the design you will need 4 large drops made using foil.
Step 7 – To make the drops shine, you need to cover them with topcoat, barely going over the edge to securely secure the foil.
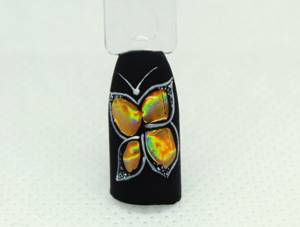
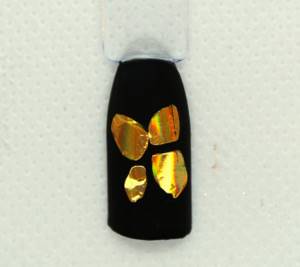
Step 8 – To arrange the drops into a certain composition, take gel paint and draw a butterfly.
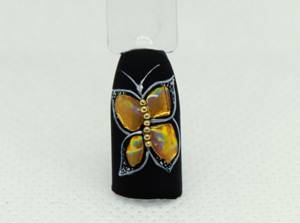
Step 9 – This master class ends with the broth step. We attach them in the center of the picture.
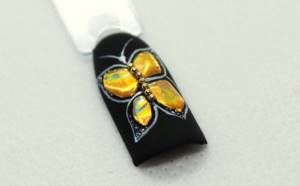
These are the unusual nails with foil in the form of drops of liquid gold. Before doing such a manicure, check on the tips whether your tear-off foil sticks to the base with this application technology. Not all foil is suitable for this manicure.
We hope you enjoyed the tutorial on how to design nails using foil. These techniques can be mastered by beginners at home and after that they can come up with interesting ideas on the topic of metallic manicure.
The author of the master class is Evstigneeva Anna.
Working with translation material
Before applying foil to gel polish, you need to do several standard procedures for such a manicure, since shiny tape is applied only to the colored coating. So:
It is important to remember that this option is easier to implement, but achieving a perfectly smooth foil coating will be difficult.
For undried top
The method of attaching foil to an undried top is similar in technique to the method using gel polish, which is described above in the article. In this way, you can print foil both on the entire plane of the nail, and in the form of shiny fragments.
To get a brilliant imprint in the right place according to the design idea, you need to apply stripes, spots, and geometric shapes with a top coat onto the colored gel polish coating. It is recommended to use a thin paint brush to apply the material. Then apply a piece of foil to this place and dry it in a lamp for 30 seconds. Then separate the transparent foil base from the nail plane.
You should not apply a large amount of topcoat, because when it comes into contact with the foil, it will form streaks after drying in the lamp.
Another option
There is another technology for applying foil to gel polish and making the coating smoother. For this you will also need transfer material; only the method of its application changes. Nail preparation is carried out in a similar way until the color is applied. Each layer is dried completely, after which the finishing coat is applied. The foil is glued to the “wet” top, straightened out and sent under the lamp. Only after drying is the protective film removed and the transfer coating remains on the nail. It should be secured with a topcoat and dried well, after which the stickiness should be removed.
What kind of foil is needed?
Foil for nail design can be transferable or tear-off . The difference between them is very subtle (and visually practically unnoticeable), but this significantly affects the quality of application to gel polish. For these purposes, you need to use transfer foil.
First of all, I would like to point out that nail foil has different uses. With its help you can create a special shiny color coating - this is actually why it has gained such popularity. It can be applied both to the entire nail and to parts of the design (for example, the famous casting technology). But foil is also used to reprint an independent finished design. You can do this:
- For the entire nail
- Partial transfer of the design (craquelure effect).
It is when foil is imprinted on the entire surface of the nail that problems often arise. And all because our nails have natural curves, which is why the foil is refracted and the transfer of the design is not continuous, but with cracks. It's difficult to get rid of them completely, but using the right foil printing technique you can minimize their number.
Partial coverage
In order for a design with foil on gel polish to be made in the form of a specific pattern or French manicure, it is necessary to clearly define the boundaries of the coating. For this purpose, the nail preparation technology remains unchanged until the application of colored varnish. After it dries, the nail should be treated with a buff so that the foil does not stick to the rough surface. The required pattern on the nail is drawn with a colored coating using a brush and dried a little. After this, you can press the foil onto the entire surface of the nail; it will only transfer to the drawn pattern. The protective film is removed and the gel polish with foil is covered with a top coat, dried and degreased.
If, after careful pressing, the pattern is not imprinted on the nail, the varnish may not provide the required stickiness and the pattern should be applied with a base coat.
Application methods without glue
It will not be possible to glue foil onto your nails over the entire surface without glue, but it is quite possible to decorate parts of the nail with separate shiny elements. To do this, you need to perform a manicure and apply a colored gel polish coating. It needs to be dried in an LED lamp for at least 30 seconds and covered with a finishing layer of topcoat.
To print foil, you need to choose only topcoats that form a sticky layer after drying (usually it is removed with a clinser as unnecessary). Foil is printed onto this dispersion layer, applying it with the glossy colored side to the surface of the nail. You need to carefully smooth out the foil and wait about 30 seconds.
Then carefully separate the backing from the film so that the colored foil coating remains on the nail. To fix it, you need to put your hand in the LED lamp for 10 seconds and cover it with topcoat and dry it for about 60 seconds.
Design with foil on gel polish - photo and video
With the advent of gel polish, an incredible number of options for nail design have appeared, with both standard materials and somewhat unusual ones being used. Thus, drawing with foil on gel polish is gaining popularity.
Masters value it for its plasticity and shine, and thanks to the wide variety of colors, it is convenient to use it on nails to implement a variety of ideas.
To create an original gel manicure with foil, everything you need is sold in special stores, and the cost of the material is quite affordable for everyone.
Making a mirror finish is quite simple, so even a non-professional can handle a manicure at home.
It doesn’t take much time to work, so the design is easy to make, both for everyday wear and for special occasions.
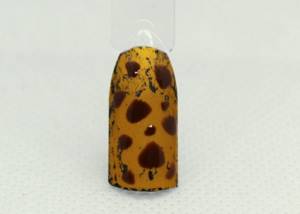
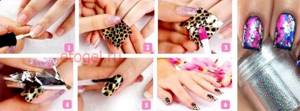
Lesson 3 – Fashion design 2022 “Golden leopard”
Yes, the leopard has returned to us again. To make the fashion print more sparkling, you can use gold foil when creating the design.
Materials for manicure:
- Base, glossy top, matte top, black or dark brown gel polish, brown gel polish;
- Black gel paint;
- Gold transfer foil;
- A sponge or device for a gradient is aero puffing.
Step-by-step photo instructions
Using step-by-step photos, we'll see how to make a “fashionable leopard” on your nails.
Step 1 – Just like in the first manicure, we will use a black base.
Step 2 – Leopard print is best done with gold foil. The surface of the nail must be completely covered. To do this, you need to use transfer foil, which must be tightly applied to the nail and smoothed. If you still have black areas, you can additionally make an impression in this area.
Step 3 – As a result of the previous manipulations, you should get an almost completely foil nail. Minor roughness and reflections in the coating are acceptable.
Step 4 – Next, cover the foil with a very thin layer of matte topcoat.
Step 5 – Remove the stickiness and use a thin brush dipped in brown gel polish to paint the spots.

Step 6 – Next, paint an outline with black paint over the dried spots.
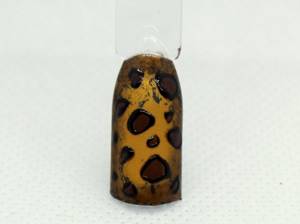
Step 7 – Next, take the dark gel polish and sponge. Apply circular tint.
Step 8 – Next, duplicate the layer of matte topcoat. Let the material cool after the lamp and remove the stickiness.
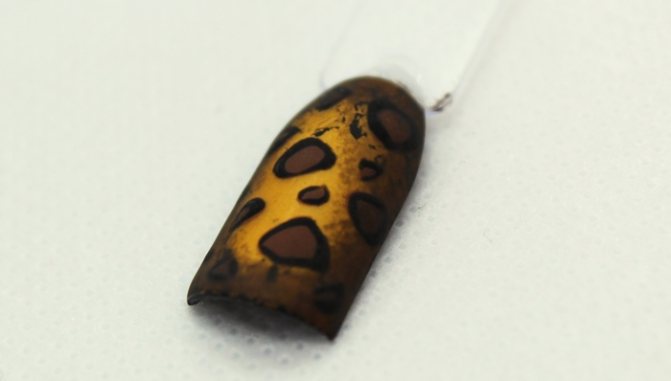
These are the new manicures with foil that you can do yourself at home.

The matte gold leopard looks much more impressive than the classic one, and is not very difficult to do. Just a couple of additional manipulations.
What foil to buy for gel polish - what types are there?
First of all, it is worth keeping in mind that food foil cannot be used in manicures.
The material for nail design differs in both composition and properties, which allows it not to tear and at the same time remain on the nail plate for a relatively long time.
Depending on the application options, as well as the characteristics of the structure, tear-off and transfer are distinguished.
Tear-off is highly dense and durable, sold in rolls or in the form of stickers.
It is fixed on the nails by gluing or under the influence of heat. The glue is applied to the entire nail or locally - in patterns.
Individual decorative elements are cut out of it and carefully placed on the nail plate using tweezers.
Excess material is carefully removed with a nail file. Most often this option is used in aquarium design.
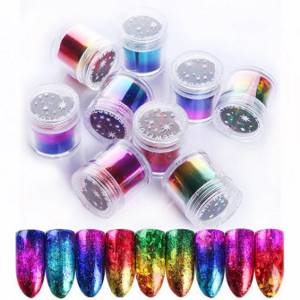
Transfer foil for gel polish is the best choice for those who are just starting to master this technique. It is easier to apply and costs less. Sold in rolls in small round jars.
The surface of the material is smooth with various patterns. The choice of colors and textures is very large.
To completely cover the nail, choose silver, gold, mirror variations. The protective film will help not damage the surface during use.
The foil is tightly applied with the matte side to the nail, with the sticky layer not removed, smoothed from the center to the edges and torn off.
It can also be attached to glue (not PVA, but a special one) or emulsion. When the glue dries, it loses its white color and becomes transparent and does not spoil the surface of the material.
It is recommended to use a finishing coat on top to preserve the metallic shine of the original design for as long as possible.
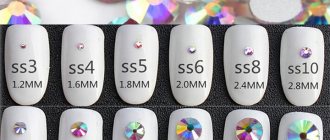
Imitation gold leaf is sold in booklet form - potal. You can also purchase foil varnishes or foil in the form of fine crumbs. But it is most convenient to purchase the material in sheets, since it is easy to cut out any patterns - both large and small.
At the same time, the strong structure of the sheet foil will allow you to smooth it out without fear of damaging it.
For a festive manicure, you can use crumpled material; it looks unusual. Using this foil it is easy to make a mosaic pattern with a combination of different colors.
Design Benefits
A shiny manicure can be created using different decorating materials, such as glitter or kamifubuki. But manicurists prefer foil. It is provided in the nail art market with a large number of options (colors, textures).
Foil has a number of advantages: ·
- convenient to use;
- variety of colors;
- retains a bright shine after application;
- durable to wear when fastening rules are followed;
- It's inexpensive.
Foil is sold in the form of multi-colored sets. This allows you to choose the desired shade for any color gel polish coating.
What materials and tools will be needed for the job:
| Name | Description and quantity |
| Top | Polymer material intended for fixing the design (used as one of the options for imprinting foil) – 1 pc. |
| Foil | Any type of material in sheets, containers or rolls - quantity as desired. |
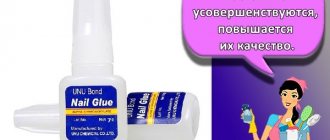
| Glue for foil | Special glue in a plastic bottle, air-dries – 1 pc. |
| Orange stick or silicone brush | A tool for distributing foil over the surface of the nail and removing air bubbles under the material. |
How to apply and secure the foil on the nail will be described below in the article, depending on the complexity of the design and the availability of additional materials.
Technology - how to apply foil to gel polish
Let's look at how to make a mirror design using foil at home.
As in all cases, it is necessary to do a full manicure, including treatment of the cuticle and shiny layer.
VIDEO ON THE TOPIC » alt=»»>
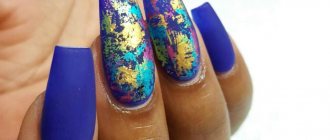
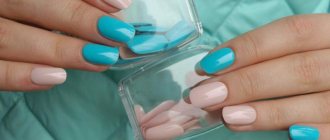
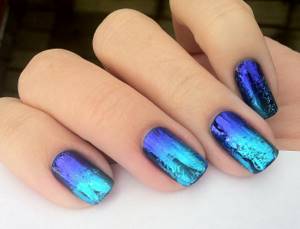
Let's consider one of the design options using Silver and Turquoise foil
For design you need:
There can be many variations of this master class. Quite popular is French manicure with gel with foil , that is, the edge of the nail is decorated not with a contrasting color varnish, but with foil.
In all cases, the technology of how to print foil on gel polish will remain unchanged.
What to do, why foil does not print on gel polish
When working with a material such as nail art foil, problems may arise. Thus, many novice nail artists complain that they are unable to print foil on their nails or that they end up being a mess.
How long does a foil design last on gel polish?
The service life of the foil directly depends on its quality and the quality of other materials used, adherence to application technology and the accuracy of the owner of the manicure.
If the master uses both base and top coats, as well as colored varnish with thorough drying, and acts carefully and correctly, you can expect that such a manicure will last at least 1-2 weeks.
If the work is done not with gel polish, but with regular polish, unfortunately, such a coating will not last so long - the foil will decorate your nails for only a few days. But if you need a metallic manicure for a special occasion, you can resort to this option, especially since the design will not take much time.
Source
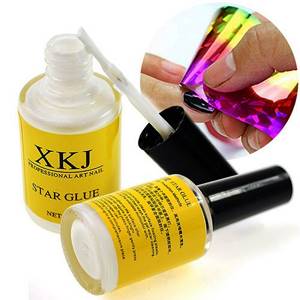
Glue
You can glue the foil on your nails using a special glue for foil. This material is produced by almost all companies that produce nail art products and foil. It is usually produced in opaque plastic bottles with a brush in the cap.
With its help, simply apply glue to the nail. The material does not require drying in an LED lamp, except for special gel fixatives, which must be dried in UV rays.
Popular brands of foil glue among manicurists:
- Born Pretty;
- CityNail gel glue (10 ml);
- SVN (10 ml);
- AND (12 ml);
- Global (10 ml);
- Globdilndils 6 ml (China);
- XKJ (16 ml);
- Maxximum Star Glue (8 ml);
- Nail Foil & Glitter Tattoo Glue (12 ml);
- Naomi FOIL GLUE (12 ml).
It must be remembered that regardless of the type of glue with which the foil is attached, the durability of its use in manicure determines the quality of the finishing coating.
HOW TO CORRECTLY TRANSFER FOIL TO GEL POLISH
Foil for nail art is a decorative product with which you can quickly and effectively decorate any coating (varnish, gel polish, gel, polygel) with minimal time and maximum aesthetics of the final design. By type, this decor is divided into gold leaf (flakes), “broken glass” (cut), foil for casting and transfer. It is with the latter type, which was one of the first to appear in the nail industry, that novice masters have the most difficulties in working. In our article today we will look at the main methods of applying foil (on gel polish, on top coat and on glue). We'll tell you why foil may not print on gel polish and explain how to avoid this.
The most common mistake when creating a nail art with transfer foil is confusing it with the tear-off look. Many craftsmen believe that there is no difference between these decorative options, so they are disappointed with the results of their attempts to fix the foil on the gel polish coating. In order to achieve a positive result in implementing this technique of decorating natural or extended nails, you need to know the intricacies of each method of imprinting transfer decor. Let's look at their pros and cons and look at step-by-step instructions on how to properly apply foil to gel polish.
Option #1: print foil onto a sticky layer of gel polish.
The advantage of this method is its speed and ease of execution. The downside is that it is least effective for decorating the entire surface of the nail plate with a layer of bright, sparkling, colored foil coating. To achieve an effect that both the master and the client will like, you can fulfill three conditions:
Purchase high quality foil to minimize possible transfer flaws;
Do not overdry the coating. After drying in a lamp, the dispersion layer of gel polish must be strong enough so that the print is rich and uniform;
Keep the coating clean. If dust particles, lint, or nail dust stick to the dispersion, you will not be able to get a solid, clear print.
It is quite difficult for a beginner to observe all these nuances at home. Therefore, it is more expedient to use this method for the craquelure technique of transferring transfer foil.
Option No. 2: glue the foil onto the undried top coat for gel polish.
The advantage of this method is that the master can transfer a design from a roll of transfer foil perfectly accurately, without bald spots or loss of fragments of the design. The downside is that with this technique it is extremely difficult to attach the foil without creases and tightly to the entire surface of the nail. Therefore, it is best to resort to this option when you plan to decorate your nails locally, with a pattern in the form of geometric shapes.
The design is carried out as follows: the selected foil is glued to the wet layer of the top. Next, you should tear off the protective transparent film from the surface of the foil and fix the pattern with a second layer of topcoat. For reliable fixation and comfortable wear, the decor must be carefully covered with a layer of material so that the foil particles do not stick out or puff up on the surface. Essentially, the craftsmen do the leveling, which requires more time than when using the first method.
Option #3: use special glue for transfer foil.
Typically, craftsmen resort to this method in cases where the gel polish chosen by the client has a weak dispersion layer, or the foil they like is capricious in transfer. A special adhesive-iron, the formula of which allows you to tame any foil, is applied with a brush to the colored gel-varnish coating. Before applying it, you need to carefully remove the residual stickiness from the gel polish, apply the glue itself thinly and let it dry completely. It’s easy to catch the right moment: as soon as the white glue on the nail becomes completely transparent (both when drying in air and when drying in a lamp), you can start working.
This option is best used if you have chosen foil with a pattern that needs to be transferred to the entire nail. The glue will help make a print without cracks (or by minimizing the refraction of the foil) even if the client’s nails have a pronounced bend.
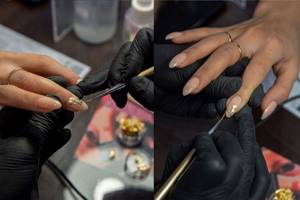
Let's take a step-by-step look at how to glue foil on nails using glue:
Perform standard preparation of natural nails for applying a durable polymer coating (classic trimmed, combined or hardware manicure). Push back and remove the cuticle, remove the natural gloss with a buff or fine abrasive file and degrease the nail plate;
Apply gel polish base and dry it in a lamp;
Cover your nails with colored gel polish (or use a camouflage pigmented base as a 2-in-1 coating), polymerize it in a UV or LED device according to the manufacturer’s recommendations in 1-2 layers;
Apply foil glue and wait for it to dry;
Stamp the foil onto the glue, pressing it with the matte side to the nail and smoothing it using an orange stick or a “hoof” brush;
Sharply tear off the foil from the nail. Places of bald spots (if the pattern allows) are masked by re-printing the foil onto the glue, or by resorting to painting with gel paints; Cover your nails with a layer of top coat and cure them in a lamp. If necessary, remove the sticky layer from the top coat with a lint-free cloth soaked in a special liquid.
Let's consolidate the information received - in the next section of our review we present to your attention the author's photo master class on transferring foil to a sticky layer of gel polish.
Source
Material classification
Manufacturers of nail art products offer different types of foil. They differ in several parameters and are packaged in collections of the same texture, but in different colors.
Main types of foil by application method: ·
- Tear-off foil - sold in rolls, where bright elements are printed onto the tape web and separated by perforations.
- Transfer foil is produced in the form of long tapes, which are rolled into rolls and packaged in plastic containers or in the form of a set of small fragments of such tapes. Foil is easy to use (it is preferred by beginner craftsmen for creating designs at home). There are several methods of attaching to the nail plane, but a prerequisite is the presence of a strong sticky (dispersive) layer on the surface of the nail. ·
- Thermofoil - is characterized by increased resistance to abrasion during manicure wear, but has difficulties during application (mandatory heating during application).
- Liquid foil is an innovative product that greatly simplifies the application of bright material on the nail and is convenient to use to completely cover the nail plate.
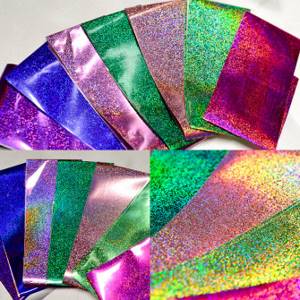
Foil can be divided by color:
- plain foil in a variety of bright, neon and glitter colors;
- foil of the same color, but with a geometric or floral print of the same color, highlighted by a higher print density; ·
- multi-colored material with a matte effect;
- color drawings on a transparent tape that are transferred to the nail;
- plain ribbons with a holographic effect;
- holographic designs on a transparent background, which are transferred to the colored gel polish coating;
- foil with the effect of rainbow stains - “broken glass”.
The shape of the foil is: ·
- sheet - presented in the form of a flat sheet with a colored coating applied, it is often rolled into rolls with the shiny side inward to avoid damage to the pattern or shiny layer;
- pressed - available in gold and silver colors in the form of separate pressed pieces in small glass or plastic jars, differs in that it is very thin and requires tweezers to apply to the nail;
- adhesive tape - foil in a roll with a ready-made sticky layer, on the other side a pattern is applied;
- stickers - patterns are applied to transparent tape, which are pasted over from the backing using tweezers and transferred to the nail in the desired place according to the design.
Even a beginner can glue foil onto nails when creating a design, but a manicurist’s collection includes all foil options, since the right to choose the color and quality of the material belongs to the client.
INSTRUCTIONS FOR APPLYING TRANSFER FOIL USING GLUE
Do you want to learn how to properly and aesthetically decorate your gel polish design with transfer foil, but you can’t print it correctly? Our detailed master class on the classic method of transferring foil to a full nail will help! We will reveal all the intricacies of this technique and talk about the stages of creating this popular design.
Foil for nail art is a decorative product with which you can quickly and effectively decorate any coating (varnish, gel polish, gel, polygel) with minimal time and maximum aesthetics of the final design. By type, this decor is divided into potal (flakes), “broken glass” (cut), malachite (stylized as semi-precious stones) and transfer. It is with the latter type, which was one of the first to appear in the nail industry, that novice masters have the most difficulties in working.
In our article today we will look at the main methods of applying foil (on gel polish, on top coat and on glue). We'll tell you why foil may not print on gel polish and explain how to avoid this.
The most common mistake when creating a nail art with transfer foil is confusing it with the tear-off look. Many craftsmen believe that there is no difference between these decorative options, so they are disappointed with the results of their attempts to fix the foil on the gel polish coating. In order to achieve a positive result in implementing this technique of decorating natural or extended nails, you need to know the intricacies of each method of imprinting transfer decor. Let's look at their pros and cons and look at step-by-step instructions on how to properly apply foil to gel polish.
Option #1: print foil onto a sticky layer of gel polish.
The advantage of this method is its speed and ease of execution. The downside is that it is least effective for decorating the entire surface of the nail plate with a layer of bright, sparkling, colored foil coating. To achieve an effect that both the master and the client will like, you can fulfill three conditions:
Purchase high quality foil to minimize possible transfer flaws;
Do not overdry the coating. After drying in a lamp, the dispersion layer of gel polish must be strong enough so that the print is rich and uniform;
Keep the coating clean. If dust particles, lint, or nail dust stick to the dispersion, you will not be able to get a solid, clear print.
It is quite difficult for a beginner to observe all these nuances at home. Therefore, it is more expedient to use this method for the craquelure technique of transferring transfer foil.
Option No. 2: glue the foil onto the undried top coat for gel polish.
The advantage of this method is that the master can transfer a design from a roll of transfer foil perfectly accurately, without bald spots or loss of fragments of the design. The downside is that with this technique it is extremely difficult to attach the foil without creases and tightly to the entire surface of the nail. Therefore, it is best to resort to this option when you plan to decorate your nails locally, with a pattern in the form of geometric shapes.
The design is carried out as follows: the selected foil is glued to the wet layer of the top. Next, you should tear off the protective transparent film from the surface of the foil and fix the pattern with a second layer of topcoat. For reliable fixation and comfortable wear, the decor must be carefully covered with a layer of material so that the foil particles do not stick out or puff up on the surface. Essentially, the craftsmen do the leveling, which requires more time than when using the first method.
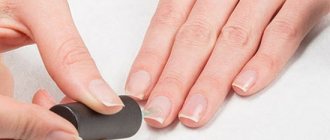
Nail preparation
In order for the foil to adhere tightly to the gel, you need to pay attention to proper processing of the nail plate. There should be no irregularities left on it that could spoil the quality of the work.
You can first make a steaming bath with the addition of sea salt and essential oils. This will soften your fingertips, simplifying the manipulation technique, and also reducing the risk of damage to sensitive skin. After this, use an antiseptic and begin preparing your nails for the gel.
Before applying the gel, you need to perform basic surface treatment:
- Adjust the free edge with a file.
- Apply the remover to the cuticle to soften it.
- After a minute, use an orange stick or pusher to push away the keratinized epidermis, lifting it slightly.
- Cut the cuticle with cuticle cutters.
- Sand the surface with buff, removing cosmetic defects and irregularities.
- Remove sawdust and nail dust from the plate.
- Apply dehydrator to degrease the coating.
The last step of using a degreaser cannot be ignored, since the composition helps normalize the acid balance and eliminate the fatty film from the surface, which can reduce the effectiveness of gel adhesion.
Additionally, after this you can use a primer. The product also does not require drying in an ultraviolet or LED lamp, but it increases the long-term preservation of the results of the procedure.
Stages of creating a manicure with foil
To create any manicure and master new techniques, you need special tools. To do a manicure using foil at home, you will first need to be patient, and secondly, purchase all the materials listed in the list below.
Required tools:
- cuticle remover;
- manicure set with nail file;
- varnish – base;
- buff;
- degreasing liquid;
- primer;
- fixative;
- special foil - any shade;
- glue if there is no adhesive base on the foil;
- UV lamp;
- Special stick.

Types of glue
In order to create a design using foil, it is not enough to choose a high-quality base material; you also need to choose the right glue. Glue can be bought both in special stores and ordered online. The main thing is to read reviews about the product when purchasing an adhesive substance online.
Among most users, the most popular glue is Jina. It is sold in tubes with a brush for easier application. The glue from this company adheres well to the nail plate, holds the glued material for a long time, and does not require additional devices for drying. The price for a jar of Jina glue is 80 rubles.
Before using foil glue, you need to apply the base color of the polish to your nails. Only after the base has completely dried can you use glue, applying it in a thin layer to the entire surface of the nail plate. When the glue changes its color, only then can you stick the nail film, otherwise the foil may stick poorly or not stick at all.
HONGYI glue holds not only foil well, but also rhinestones. Sold in jars with a thin brush. A bottle of glue with a volume of 16 milliliters costs 160 rubles. The glue dries within five minutes, does not require additional drying under ultraviolet light and is easily removed from the skin around the fingers.
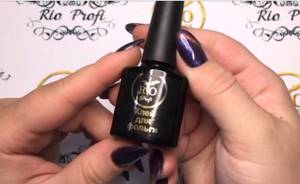
The Rio Profi company produces transparent glue, which makes it possible to obtain a glossy finish, is evenly distributed over the nail plate, and dries in just three minutes. It goes on sale in black opaque vials with a volume of 10 milliliters. The price of one bottle is 149 rubles.
Global Fashion - the glue from this company dries in just a few minutes; during drying, the product changes color, from white to transparent. A change in color palette is a signal to apply foil to the nail. The glue is sold in 15 ml tubes and can be used with either a thin or a regular brush. The price category varies from 135 rubles to 165 rubles.
Using transfer foil and glue
The instructions below describe in detail how to create a manicure at home on natural nails.
Step-by-step instruction:
- Remove the previous coating from the nails.
- Get a European or edged manicure.
- Using a file, give each nail the desired shape.
- Polish your nails using a buff with 300 grit abrasiveness.
- Degrease your nails.
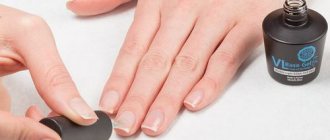
- Apply base.
- Dry everything under an ultraviolet lamp.
- Remove the sticky layer using a special napkin.
- Paint your nails in a color similar to the color scheme of the foil or apply a transparent base.
- Dry under a UV lamp.
- Remove the sticky layer.
- If you use a simple varnish, then steps 7–11 are not necessary.
- After the varnish has dried, completely coat the nail plate with glue. If you need to make some kind of pattern, then only a certain part of the nail is treated with glue.
- Wait a few minutes, depending on the glue brand, until the coating becomes transparent.
- Apply the inner, white part of the foil to the area where the glue was applied.
- Using a cotton swab or other handy object, distribute the foil evenly over the surface of the nail.
- After a few seconds, the foil must be removed from the nail with a sharp movement to the side.
- After 2 hours, apply a finishing coat to the surface of the nail, preferably a gel finish. If you do this too early, the foil may shrink.
For tear-off foil, it is better to use glue, since the material from which sheet foil is made is more rigid and may not adhere well to the nail.
Working with foil without glue
If you don’t have glue on hand or don’t want to spend money on buying this product, you can use foil to create a beautiful design without first applying glue. The easiest option for working without adhesive is to purchase adhesive tapes or stickers. If you have non-adhesive transfer or sheet foil, then both regular varnish and gel polish are suitable for the job.
How to use nail foil without glue:
- complete the first six steps from the instructions described above;
- coat each nail with primer, wait for it to dry completely without using a lamp;
- cut sheet foil into ten pieces or tear crumpled foil into small pieces;
- if it’s a transfer film, then it doesn’t have to be cut;
- apply foundation;
- give time for complete drying under the lamp;
- Having chosen the color of the gel polish, paint each nail;
- place your nails under the lamp for a few minutes until completely dry;
- Without removing the sticky layer, apply the foil to the nail;
- evenly distribute and level the foil over the entire area of the nail;
- sharply remove the transfer film; for another type, skip this step;
- Apply finish to the surface of the nail with foil;
- let dry under an ultraviolet lamp;
- After drying, remove the sticky layer.
Thermofoil
One of the most popular and most convenient types of film. To work with thermal film, in addition to the standard set of tools, you will need a hair dryer or lamp. Foil is often sold in the form of a plate on which ten stickers are glued, shaped like a nail plate. Stickers can be of different colors, with colored designs or simply plain. Before creating a design, you need to get your feet in order by doing a manicure and degreasing your nails.
Depending on the chosen base and main varnish, the design time will increase. If you choose gel polish, you must dry it under a lamp and remove the sticky layer. If you use regular varnish for the base, you just need to wait until it dries completely.
Next, use tweezers to peel off the foil and warm it up a little. Apply the heated form to the root of the nail plate, gently stretching it to the tip of the nail. After application, smooth the foil well and remove excess pieces using a nail file. Secure the result obtained using a special tool.
How to make foil?
Aluminum foil is made in four main steps:
- hot rolling of aluminum strip;
- cold rolling of aluminum strip;
- cold rolling of foil;
- cutting and rewinding foil into rolls for consumers.
25 Nov
2015 Interesting materials:
How to expand an image in html? How to stretch leather sandals? How to stretch synthetic clothes? How to stretch textile shoes in width? How to stretch a selected image in Photoshop? How to terminate an Internet contract with Rostelecom? How to dissolve fat-soluble dye? How to Unban yourself on Discord? How to unblock Adobe Flash Player in Microsoft Edge? How to unlock access to the Steam trading platform?
Types of glue for foil
- Global Fashion – adhesive for foil, hypoallergenic. In demand for applying glitter and decorations to artificial and natural nails. In addition, it is used to create temporary tattoos on the body using glitter, powder and a special pigment. Made in South Korea.
- Star Glue is a high-quality, opaque glue for manicure with metallic foil. It is easy to use, dries in about 5 minutes, and holds the material quite tightly. Comes with a hard synthetic brush. Not afraid of temperature changes, made in China.
- Rio Profi is a transparent and thick, but evenly spreading adhesive for transfer foil. For any type, be it stickers, crumpled or embossed foil. Rubber-based composition, hypoallergenic formula without the addition of harmful substances. The glue is tenacious and dries in 3 minutes. A very popular brand, most users have only positive ratings. He is rightfully among the leaders. Some people don't like its thickness. Waterproof, lasts up to 14 days or more. Afraid of low temperatures. Russian brand.
Double-sided tape has several names. These names vary by brand, although the adhesive is generally the same. Most often ultrabond or primer. A method was described above in which an acid-free double-sided tape primer was used. It gives residual stickiness, which is what we used to glue it. Inexpensive excellent product, economical. It forms a sticky shine on the nails and does not fade like acid primers. The technology allows you to work without a drying lamp. The process is identical and similar to double-sided tape, which adheres the surface of the nail to the material.
So, in this short article you have learned how to use nail foil. It is worth saying that some adhesives have one common drawback.
Some types of glue cannot be transported in winter.
It is more accurate to order from sellers in the beauty industry from other regions when the ambient temperature is below 0° C. If you liked the article, then leave comments, dear ladies. See my work and current technologies on Instagram.
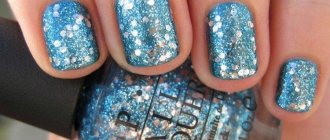
Options for using foil
Thanks to foil, you can easily create a beautiful design on your nails. Foil is used for casting on nails, for moon and French manicure. If you are going to a party, you can do a mirror manicure using gold or silver foil. For this design, it is better to take a leaf look.
Using crumpled tear-off foil, you can create a beautiful manicure with multi-colored grains. The smaller the pieces of foil are torn, the more beautiful the design turns out. You need to fix small pieces using tweezers; you can stick them either on glue or on an adhesive layer of varnish.
Lunar design
Thanks to the use of foil when creating a lunar manicure, nails not only look beautiful, but also attract the attention of others with their shine and unusual design. Moon manicure looks great on both short and long nails. The main emphasis when creating such a design is on the hole or lunula - a short distance from the base to the center of the nail. The hole can be made in different ways:
- triangular;
- convex;
- curved;
- straight.
Before creating a lunar manicure, you need to think about not only the type of hole, but also the color scheme of both varnish and foil. It is best to choose a contrasting design. For example, a golden moon on a black or dark blue background.
Before creating the decor, you should get your nails in order by doing a manicure and removing any remaining polish. You need to cut out ten pieces of foil to decorate the hole. To make even and neat stripes, it is best to use stencils, or first make a sketch out of paper and then transfer it to foil.
Stages:
- Degreasing.
- Covering the nails with a base.
- Drying the first layer.
- Applying the main varnish color.
- Dry in air or under UV light, depending on the selected material.
- Removing the sticky layer when using gel polish.
- Applying glue to the nail hole.
- After the glue becomes transparent, use tweezers to glue the cut foil.
- Leveling the foil sheet with a cotton swab.
- Apply gel sealant.
- Dry your nails.
If you use transfer foil, then glue a piece of transfer foil onto the wet base layer. After thoroughly leveling and securing, tear off the protective coating with a sharp movement. Then carefully paint each nail with colored polish, leaving a moon shape. Finally, apply the finishing coat.
French with foil
French manicure has gained popularity for a long time. This design is widely used in weddings as well as for everyday gatherings. To add some flair to your French manicure, you can use foil for the smile line. The free edge can be shaped like a crescent or a triangle. For beginners, special stencils are sold that can be used to make straight lines. Thanks to foil, you can create not only a standard jacket, but also an oblique one.
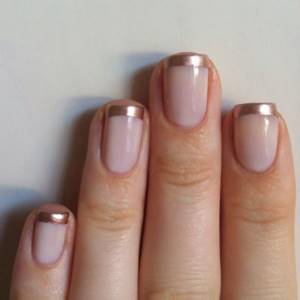
Creating a French manicure is relatively no different from lunar design. The main feature will be gluing the foil not to the hole, but to the regrown area of the nail. For an oblique French, you need to first cut the sheet foil into triangles. If you take a transfer film, then after applying and drying the main color of the varnish, glue a part of the nail diagonally, then you need to follow all the steps for working with the transfer foil.
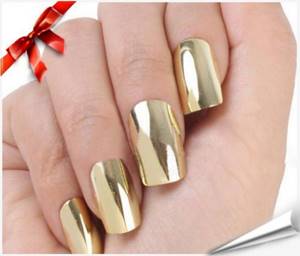
Mirror or metal manicure
Reflective manicure is best done using thermal film; thanks to this type of foil, the manicure always turns out beautiful, and the nail plate is covered with an even, shiny layer. The rules for using thermofoil are described above. It is best to take foil in silver or gold color, without additional drawings.
Creation:
- treatment of the nail plate;
- cuticle removal;
- degreasing;
- grinding;
- applying the base and drying it;
- covering the entire area of the nail with glue;
- applying foil, apply it to the nail with the inside;
- smoothing the film with a stick;
- removing the top layer of film with a sharp movement;
- Applying a fixing agent.
Nail design casting
A manicure with a casting effect is often created on artificial nails, but it can also be done on natural nails at home. To create a cast manicure, it is best for beginners to take transfer foil; it is much easier to work with it, unlike an invoice - sheet foil.
There are several options for how to use casting foil on your nails. The first method requires the presence of glue; the second option requires gel polish. For each option, you must first do a standard nail treatment: manicure, cuticle removal, degreasing.
Step-by-step instruction:
- Applying a protective coating to the nail.
- Polymerization under ultraviolet lamp.
- Applying the main shade of varnish.
- Drying under a lamp.
- Removing the sticky layer.
- Grinding.
- Applying a design with a thin brush using glue or bright-colored gel polish.
- If glue was applied, then you need to wait for it to discolor, if varnish, then you need to dry the drawing under the lamp for about two minutes.
- A piece of transfer foil must be applied with the inside to the glue or varnish.
- Press the foil onto the entire contour of the design.
- Remove the rest of the foil with a sharp movement.
- Cover the design with a top.
- Dry under a lamp.
- Remove sticky layer.
The casting design can be complemented with liquid stones or acrylic powder. You can make stained glass windows using multi-colored varnishes.