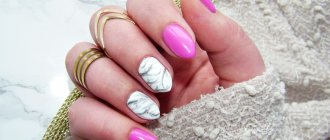
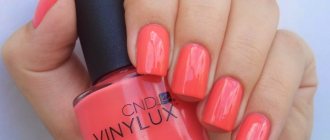
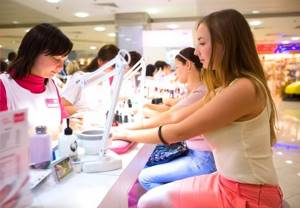
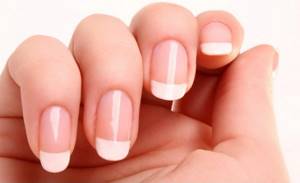
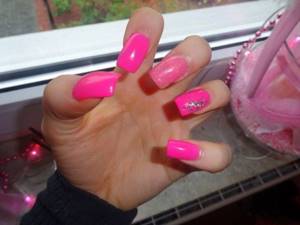
A fashionable manicure is always beautiful, well-groomed nails that are pleasant to look at and apply varnish, paint or other types of art. Have you noticed how quickly your nails lose their spectacular and neat appearance after a classic trimmed manicure? Already on the second or third day after the procedure, regrown tissue forms at the site of the removed cuticle, which immediately spoils the entire manicure and gives the hands an unkempt appearance. To avoid this, many girls switch to unedged manicure, which is a dry type of manicure and does not involve mechanical removal of the cuticle at the base of the nail plate.
Among the people, unedged manicure has another name - European. No one thoroughly knows why they call it that, but judging by the “legend” it was invented somewhere in Europe and almost 85% of European women prefer this particular type of manicure.
What is an unedged manicure?
It is also called European. This method of hand care is considered safer than the classic one. The bottom line is that to remove the cuticle, they do not use cutting tools, but special means that dissolve it.
You may be interested in: Manicure machine: reviews, review, instructions
All other procedures that an unedged manicure involves are standard. This includes shaping the nails and polishing the plate, as well as varnishing. If desired, it can be a decorative or medicinal product.
Preparing the tools
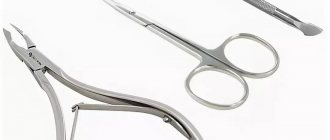
As noted earlier, an unedged manicure is a simple procedure, so even a novice nail technician can perform it. So, before completing the task, carefully place the following items on the table:
- Cream (moisturizing or nourishing);
- Nail scissors with rounded ends;
- Finger care oil;
- Pusher;
- Orange stick;
- Cuticle remover;
- Files with soft and hard abrasive;
- Buff;
- Biowax.
Let's move on to execution
When all the preparatory work has been done, it’s time to start implementing your plans:
- Remove old varnish.
- Choose a technique. If you prefer wet methods, apply a special cream to your fingers or put them in the bath for 20-30 minutes.
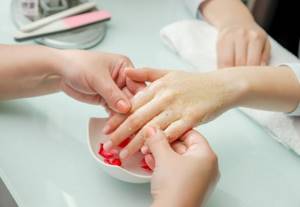
- Apply a special gel or liquid to the base of the nail plates. In most cases, a small drop on each finger is enough.
- Spread the liquid with an orange stick.
- After five minutes, remove any remaining product under running warm water.
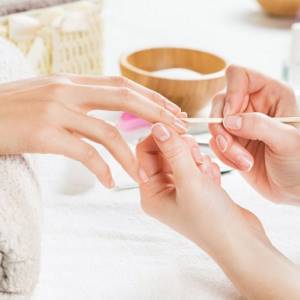
- Cover the cuticles with nourishing oil.
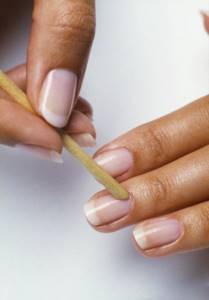
- Using the same orange wood stick, push it to the very edge of the nail.
- Cut or file the skin around the plate with a diamond file.
- Now you should move on to sanding.
Advice! As mentioned earlier, do not try to apply decorative colored varnish immediately after treatment. Lubricate your hands with nourishing cream or a mixture of essential oils and rest a little. At this time, a large amount of useful substances will reach the surface.
Difference from classic manicure
The European method is based on the use of a softening gel, which allows you to delicately treat the cuticle. Classic edged manicure is the complete opposite. For this technology, craftsmen use wire cutters. This tool cuts off excess cuticle. Hence the appropriate name.
You may be interested in:Beautiful summer manicure for a teenage girl
When performing a classic manicure, accidental cuts and wounds are possible, which increases the risk of infection. That is why you need to choose a master especially carefully.
With an unedged manicure, cutting tools are not used, which significantly reduces the risk of injury to the cuticle and damage to the integrity of the skin. In addition, disposable orange sticks are used for processing. This allows you not to worry about sterilizing your instruments, as is the case with a classic manicure.
Orange stick for manicure
I would like to tell you separately about this wonderful instrument, invented in France. An outwardly unpretentious, modest stick made of orange wood is an ideal tool for processing cuticles. After all, wood of this type is very dense, but does not delaminate at all, so it does not injure even sensitive skin.
Outwardly, such a tool resembles a thickened toothpick and is also pointed, however, only at one end. It's inexpensive, so we definitely recommend taking it into account. After all, some procedures without it, especially unedged manicure, are difficult to imagine. Another important advantage of such a stick is the presence of antiseptic substances contained in its wood.
Advice! For the most sensitive skin, you can purchase orange sticks with rubber tips.
An outwardly unpretentious, modest stick made of orange wood is an ideal tool for processing cuticles.
Using this tool, you can:
- moving the cuticle: it is the main tool for processing nails without trimming;
- removal of softened cuticle treated with a special gel or cream;
- cleansing the inner surface of the nails;
- sticker of tips (plastic parts that imitate nails) during extensions;
- laying out acrylic material and biogel;
- removal of extended nails;
- decoration: artistic painting or application of small details, appliqués, sparkles and rhinestones.
Advice! After the procedure, it is better to immediately discard the orange sticks and not reuse them. After all, soft wood quickly absorbs dirt and remaining fatty deposits.
Advantages
- Safety. Because there are no cutters, there is no chance of cuts.
- No redness due to the fact that the cuticle is not injured.
- Simplicity. If you have the necessary tools, it is easy to perform an unedged manicure at home.
- Rapidity. If you choose the so-called dry method, you won’t have to steam your hands. Accordingly, less time will be required for the entire procedure.
- Durability of the coating. With dry processing, the varnish applied after a manicure will last longer.
Execution steps
Let us describe in detail and step by step how to perform an unedged manicure at home:
Depending on the technique chosen, the skin is steamed in water or cream or left dry
- Before the procedure, the old varnish must be removed.
- Depending on the technique chosen, the skin is steamed in water or cream or left dry.
- Cream or gel is distributed at the cuticle locations. A drop is enough for one nail.
- Now gently rub the product with an orange stick. It is more convenient to use the widest one (they are numbered by thickness).
- The time it needs to remain on the nails is always indicated on the packaging. As a rule, it is no more than 5 minutes.
- The gel or varnish is washed off with running water.
- Any nourishing oil is applied to the cuticle.
- With gentle movements of the orange stick, the cuticle moves to the very edge of the nail.
- The skin around the nails is cut or filed with a diamond file.
- All that remains is to file your nails and then polish them.
Any nourishing oil is applied to the cuticle. With gentle movements of an orange stick, the cuticle moves to the very edge of the nail
Advice! Do not apply nail polish immediately after treatment. First, lubricate them with any nourishing cream or essential oil and leave for a while. Let your nails be supported by useful substances.
Flaws
You may be interested in:Nail shapes for manicure: regular, square, almond, oval, round, sharp
Delayed effect. To achieve a decent result, you will have to be patient. An unedged manicure at home is unlikely to give you immediate results. Especially if the cuticle is hard.
You need to be patient, carry out several procedures, and only after that will you be able to understand what effect an unedged manicure can give at home.
Technology for performing European manicure at home
Before you do an unedged manicure at home for yourself, you need to prepare your hands. First, remove the old coating from the nail plates. It is advisable to use liquids with vitamins that do not contain acetone. To remove gel polish you will need:
- Cotton pads;
- Pusher;
- Cosmetic foil;
- Coating removal liquid.
Lightly file the top so that the solvent is better absorbed. Apply cotton wool with liquid to the nails and wrap each finger in foil. Leave these caps on for 15 minutes, then carefully remove. The remaining varnish is removed with a pusher. You can use a wooden stick.
After this, the nails need to be given several hours to recover.
If there are burrs and microcracks on your fingers, take a bath with medicinal herbs or oils. Doing a European manicure at home requires thoroughly dry hands.
Adviсe
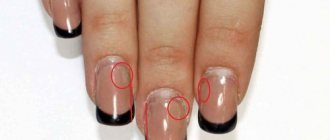
Having understood the essence of the method, it is easy to guess who this method is suitable for. An unedged manicure, the photo of which is presented in the article, is ideal for girls with thin skin. If the capillaries are located close to the surface, the classical method is undesirable. High probability of cuts.
European manicure involves delicate care, without the risk of skin damage.
Girls who have rough cuticles can also switch to the untrimmed method. However, you need to be patient. The effect will be cumulative. Only after several procedures will you be able to boast of a well-groomed cuticle.
How to do an unedged manicure?
There are several ways to do it.
- Dry does not require steaming. Simply cleanse the skin and apply a special product that can soften the cuticle. Dry manicure is ideal for brittle nails.
- Wet is recommended for ladies who have burrs, cracks and other damage. Before performing a European manicure, take a bath with special oils and lotions. They not only soften, but also nourish the cuticle at the same time.
- The hot method involves heating a special lotion or cream to 50 degrees. An electric bath is used for this. The hot method is most often used in spa salons. Recommended for brittle, dry nails or problematic cuticles.
Paraffin therapy
Additionally, you can pamper your hands with paraffin therapy (a procedure in which your hands are immersed in warm liquid paraffin for several minutes). Thanks to it, the skin becomes soft and smooth, remaining that way, which is important, for several more days.
To care for nails and hand skin, special SPA programs have been developed and cosmetic lines Space Fingers, E.Mi, Luxio, Gerlasan, Be Natural, Aravia, INM, Masura are used.
Safety of clients in our salons Manicure is a procedure during which the skin is damaged. It is very important to us that you feel safe. We try to use only disposable consumables. In cases where this is not possible (cutters, nippers, scissors), all instruments undergo several stages of PSO (pre-sterilization treatment) and sterilization in a professional dry-heat oven. That is, everything that is not disposable is processed in our salons in the same way as it is done in dental clinics and medical institutions (hospitals, clinics) How does this happen? 1. First of all, all instruments are completely immersed in a disinfectant solution 2. After the allotted time, the instruments are removed from the solution, washed under running water and immersed in an ultrasonic cleaner (which allows you to thoroughly and without residue remove any remaining dirt and disinfectant solution) 3. Then we rinse the instrument again under running water using a stiff brush and leave to air dry for at least 1 hour 4. Next, the instrument is packaged in a craft bag and sent for sterilization in a dry-heat cabinet 5. At the end of the sterilization program, craft bags with a sterile instrument are sent for storage in an ultraviolet cabinet
Spanish manicureFrench ManicureEuropean manicureJapanese manicureGolden TraceMen's manicureChildren's manicureClassic manicureHygienic manicureHardware manicureFrench manicure
Cost of services: Manicure
| Name | Price, rub.) | |
| Manicure+gel polish | 2 000 | make an appointment donate |
| Hardware manicure | 1 500 | make an appointment donate |
| Preparative manicure Space Fingers | 1 500 | make an appointment donate |
| Brazilian hand treatment | 600 | make an appointment donate |
| Manicure for men | 1 500 | make an appointment donate |
| Classic manicure for women | 1 500 | make an appointment donate |
| European manicure for women | 1 500 | make an appointment donate |
| Hot manicure | 1 500 | make an appointment donate |
| French nail polish | 600 | make an appointment donate |
| Nail polish | 500 | make an appointment donate |
| Manicure for children (up to 12 years) | 600 | make an appointment donate |
| Paraffin therapy (paraffin bath) for hands | 500 | make an appointment donate |
| Shaping your nails | 200 | make an appointment donate |
| Polishing nails with Solar Oil | 200 | make an appointment donate |
| Massage of arms (hands) using additional products | 300 | make an appointment donate |
| Moisturizing hand mask | 350 | make an appointment donate |
| Hand peeling | 350 | make an appointment donate |
Preparation
Even before you start performing an unedged manicure step by step, it is recommended to treat your nails a few hours in advance to give them a little time to “rest” and recover.
It is necessary to remove the old coating using vitamin nail polish remover, which does not contain acetone.
Particular attention here should be paid to nails that have been painted with gel polish. You will need:
- cotton pads;
- special liquid;
- some foil;
- wooden sticks or pusher.
You may be interested in: Geometry on nails: step-by-step application instructions, fashionable manicure, using a template and giving your nails a beautiful shape
You should also be patient. The procedure is not quick.
First you need to file down the top so that the liquid penetrates better. Cotton pads soaked in it are applied to the nails, then wrapped in foil. Exposure time – 10–15 minutes. After this, the remaining shellac is scraped off with a pusher or stick.
If you have to do an unedged manicure, it is important to know that the skin of your hands should remain dry.
If you choose the wet method, after the steam bath, be sure to blot off excess liquid with a napkin. It is also recommended to wait about ten minutes before starting treatment so that the beneficial substances are absorbed.

By the way, an aroma bath can be performed more often than an unedged manicure procedure. This will make the cuticle and nail folds softer, and at the same time whiten the plate.
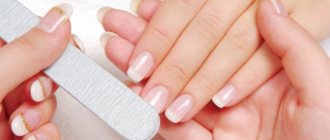
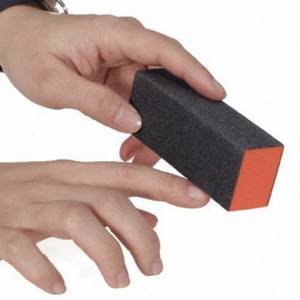
Polishing with buff
This stage is very important, since it is responsible for the aesthetic component of the manicure. After treatment, the fingers look well-groomed, and the nails acquire a natural shine. By the way, as a result of long-term use of gel polishes and tips for extensions, depressions, irregularities and grooves are formed on the surface. So, they are very easy to remove with the help of files with a soft abrasive.
What is a buff? Outwardly, it resembles a block rough on all sides. For the convenience of women, they are numbered as the size of the polishing particles increases.
- Polishing can also be done with special files. It should be softer than usual. The only drawback of most of them is the paper base. This is a serious contraindication, because such a product is very difficult to clean without water. To achieve the best result, you should carefully move along the plate from the center to its sides.
- After treatment, apply a layer of biowax, which contains silicone and paraffin, as well as a large amount of nutrients. Just pour a little product into the middle of the nail, and then rub it in with a buff.
- Biowax helps achieve perfect smoothness by plugging microcracks and depressions.
Polishing nails with a buff
Advice! By constantly performing the above manipulations, you improve blood circulation and accelerate growth. However, it is important not to overdo it here, because removing a thick layer can trigger reverse reactions.
What will you need?
In order to perform a high-quality unedged manicure, you need to prepare the following products and tools in advance:
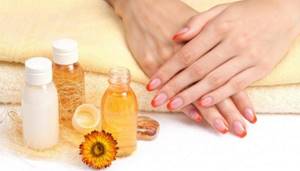
- Cuticle softener. It is recommended to choose bottles with a narrow spout. This will make it possible to apply the material most accurately and economically.
- File. Allows you to give your nails the desired shape. Choose files designed for natural nails. After all, European manicures are not done on artificial ones.
- An antiseptic is useful for cleaning your hands before leaving. This will destroy germs.
- Orange stick. Useful for processing cuticles. You can use a pusher instead.
- Cuticle oil. Necessary to protect delicate skin from aggressive softener.
- Napkins. Will be needed to remove excess product.
Tools and materials
In terms of the set of materials and tools necessary for European manicure, this method of nail treatment is the cheapest, most accessible and easy to do on your nails at home. To do this you will need to have:
- File for natural nails . Every girl has one of these in her makeup bag. It is used to correct the shape and length of nails. Additionally, you can separately use a slightly harder file to treat rough skin around the nails. Some people use pumice for these purposes. If you want to have glossy shiny nails, then also get a polishing file.
- Means for softening and removing cuticles (remover) . They are easy to find in any cosmetics store in a variety of forms. On my blog I have already reviewed some of these tools, for example, in the form of a pencil or with a pipette. Their cost is not at all high, and one bottle lasts quite a long time even with regular use.
- Orange sticks . They are thin wooden sticks made from orange wood and have an antiseptic effect. One of the ends of the stick has a sharp shape - it is convenient for cleaning the space under the nail. The second is beveled, to remove softened cuticle. Instead of orange sticks, you can buy apricot sticks. They are disposable and are used not only for the European manicure procedure, so you can immediately buy a set of 50 or 100 pieces - there is no expiration date. From my experience in European manicure, I can say that one such stick is enough for me to treat one hand.
- Cuticle oil . Rubbing this product completes the treatment of the cuticle in any type of manicure.
One remover, oil, file and orange sticks will be enough for a European manicure. Of course, the list of tools and tools can be expanded to suit your needs:
- Instead of orange sticks, you can use a pusher (manicure spatula) with a hatchet at the other end. Some may like that it is reusable, but it can scratch your nail (and if you follow all the rules, it must be disinfected, even if you are the only one using the tool). And it’s not for nothing that European manicure is considered the safest and most gentle, which is why it is recommended to choose wooden sticks.
- Instead of remover, you can soften the skin in a warm bath with soapy water. Then you will need an appropriate water container to fit your hand.
- For additional care, you can use special products, such as nail wax, hand cream, scrub and other benefits that you want to pamper your nails and hands with.
Step-by-step instruction
After careful preparation, you can start performing unedged manicure at home step by step. The algorithm is as follows:
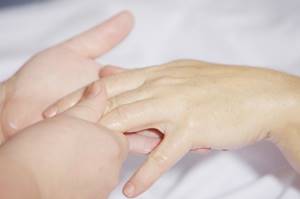
- To protect the cuticle from the harmful effects of the softening liquid, you need to use oil. It is available in pencils or bottles. Choose the option that is most convenient for you. Apply a thin layer of oil to the cuticles and leave for a while, allowing it to be absorbed. Rub the remaining product into the skin.
- Now you need to use a cuticle remover. If you look at a photo of an unedged manicure at home, you can understand that the gel is carefully applied to the cuticle. In this case, you need to try not to touch the rest of the skin.
- It takes a certain amount of time for the product to take effect. There is no universal advice. You must read the instructions carefully. All cuticle gels differ in composition and, accordingly, exposure time. Each manufacturer has its own recommendations.
- After waiting the required time in accordance with the instructions, you can begin processing the cuticle. First, the remaining gel must be wiped off with a napkin so that it does not interfere with processing.
- Using a wooden stick, you need to remove excess softened cuticle, simultaneously pushing back the skin and giving a neat shape to the nail hole.
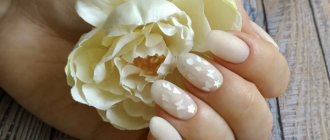
- The final stage will be the application of a nourishing cream, since the nails and the skin around them have been exposed to an aggressive agent, as well as coating with varnish - decorative or medicinal.
After carrying out the procedures described above, every lady will be able to enjoy the magnificent result of an unedged manicure.
Choosing the right product
All products designed to soften rough dermis are called the sonorous foreign word “removers”. They are available in the form of various pencils, gels and liquids. The main components here are potassium or sodium hydroxide. They help dead particles to quickly break down.
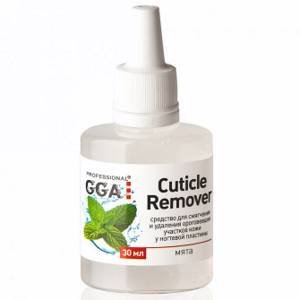
Manufacturers add plant extracts that contain alpha-hydroxy acids to more gentle mixtures. They do not affect the deep layers of the skin, but only remove glue-like substances.
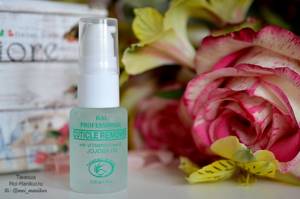
It's no secret that various forums constantly appear on the Internet where women leave their comments and reviews about this or that product. After analyzing the opinions posted, we can conclude that the most popular are mixtures like El Corazon and Shillac. According to customers, the keratinized cuticle after applying these miracle elixirs is destroyed in a matter of minutes and can be easily removed with an orange stick. In addition, they create a protective film that prevents the appearance of microcracks, which has a beneficial effect on the rate of burr formation.
Advice! The liquids described above are classified as potent, so they can only be applied once a week.
It should also be remembered that alkaline potassium and sodium hydroxides can cause dryness and an unpleasant feeling of tightness. Therefore, experts recommend not to ignore the manufacturers’ instructions, which indicate the optimal time for contact of substances with the skin of the hands. In addition, it is necessary to thoroughly rinse off the residue under running water.
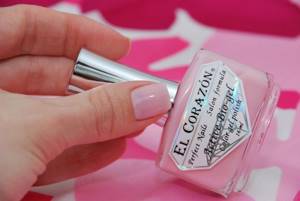
Which varnish should I choose?
When deciding what product to cover their nails after treatment, many girls have doubts. Which is better: regular varnish or shellac?
The last option has gained particular popularity. And it’s no coincidence. After all, shellac can last for several weeks. However, as the nails grow, the coating loses its appearance and needs to be replaced. But this doesn’t stop some: they are able to wear the same polish for longer than a month.
Shellac after an unedged dry manicure is the ideal solution. Due to the absence of a steam bath, the nails are not exposed to moisture. This allows you to wear the coating longer without fear of detachments.
If you prefer regular varnish, be prepared that it will be less durable. The base coat and top coat will extend the durability. They are applied before and after colored varnish, respectively. Aerosol drying can also be used. A special liquid sprayed onto the nails after applying the polish will speed up its drying and protect it from damage.
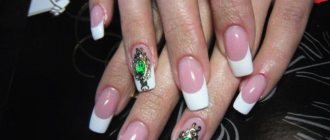
French manicure or "French"
French manicure or “French” was proposed by ORLY in 1976.
ORLY is located in California, near Hollywood. One of the producers of the film studio asked Jeff Pink to come up with something so that actresses would not have to change their nail polish for each new costume. Then the idea was born to give the nail a healthy look, emphasizing its free protruding edge with bright white varnish. This style favors moderate length nails and a natural spatula or smile shape. This option remains popular as it suits any clothing style, image and mood and looks natural. Today's fashionistas can replace the white border of the nail with gold or silver. Perhaps not on all fingers, but on one, and then the “French” will become even more refined.
How long does the effect last?
A high-quality unedged manicure can delight its owner for 5–7 days. After this, you will have to perform the treatment again so that your nails maintain a well-groomed appearance.
If the cuticle was too rough before switching to European manicure, at first you will have to use tweezers to achieve the ideal result. However, after several procedures this need will disappear. Over time, you will be able to use only the cuticle softening gel and enjoy the amazing results.
Cuticle care
Even after performing an unedged manicure, you need to continue to care for your cuticles to maintain the effect. You can select and regularly use special products. They are usually designed to slow down cuticle growth. This way you can enjoy your perfect manicure longer.
Among additional measures, experts recommend doing housework with gloves to prevent contact of delicate skin with aggressive household chemicals. This is another way to extend the longevity of your manicure.
It is equally important to prevent the skin from drying out. It must be protected from wind and frost. This advice is especially relevant in cold seasons.
The most important thing is not to neglect regularity. No matter how carefully you take care of your cuticles, they will still grow over time. Timely treatment will allow you to maintain the effect permanently. In addition, the more regularly you perform an unedged manicure, the more pronounced and longer the effect will last.
Where to do it: with a specialist or on your own?
Not every girl wants to perform manicures and other beauty treatments on her own, preferring to visit beauty salons. However, there are not always positive reviews of unedged manicures performed by a professional. Some people encounter unprofessional employees, others are dissatisfied with the result or durability, etc.
That is why, increasingly, many ladies prefer to master the intricacies of unedged manicure and perform it themselves. This approach definitely has some advantages. Having mastered the technology of European manicure, every girl will be able to perform the procedure without visiting a specialist. This will allow you to spend less time and money.
Reviews
Girls who switched to unedged manicure are usually satisfied. Among the advantages are low trauma and speed of execution. There is no need to steam before a European manicure, which saves time.
The unedged method is so simple that you can master it yourself.
Those who expect to get a perfect result right away remain dissatisfied. However, European manicure has a cumulative effect. The true result can only be assessed after several procedures. Not everyone has the patience. Also, this method is not suitable for ladies with rough cuticles.
Knowing all the technology, mastering an unedged manicure is not difficult. However, you should be patient and the result will not be long in coming.