French manicure has not gone out of fashion for many years. It is obtained in different ways - by extensions, on natural nails or using false nails. Most often, French manicure on natural nails is done using white polish and a stencil, but there is another, less common method - a pencil for a French manicure.
[yandex1] [google1]
Why is it needed?
Natural nails may turn yellow over time. At the very beginning of regrowth, the free edge of the plate is snow-white. But over time, it begins to turn gray and stain. This can happen both through the use of colored varnishes and cleaning, for example, oranges and other everyday activities. Dust can even stick to your nails, making them darker, etc.
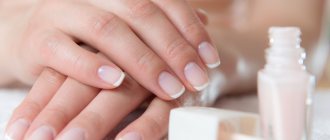
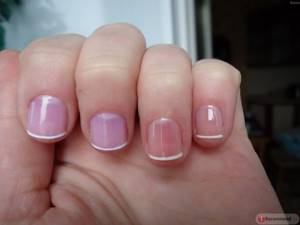
A whitening nail pencil helps solve this problem. However, this name is not entirely correct; it does not bleach, but simply colors the plate. To do this, you need to sharpen it sharply, remove dirt from under the free edge, and then draw a pencil under it along the smile line. This will help remove any remaining dirt and also give the tip of your nail a healthy white color.
Composition and features
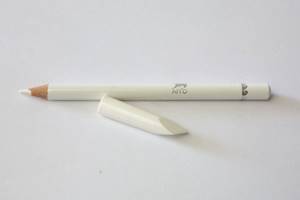
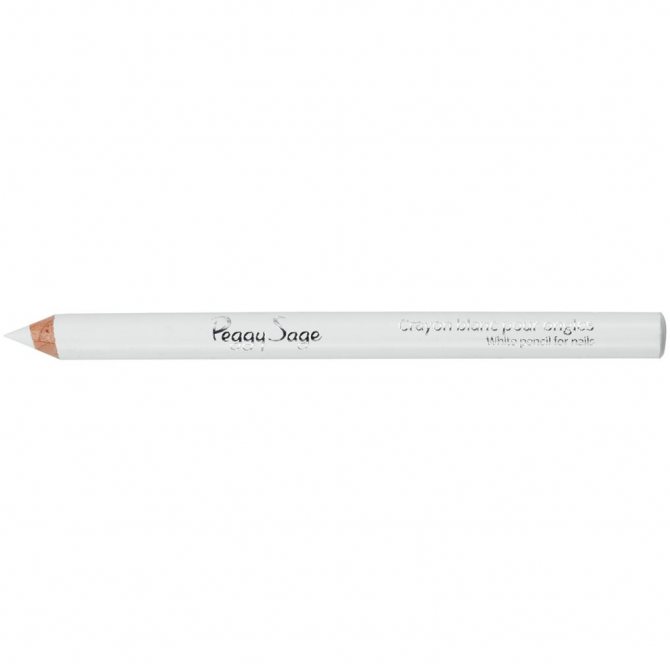
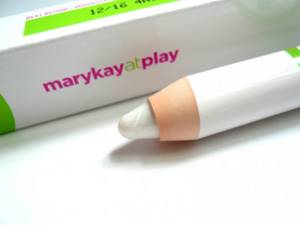
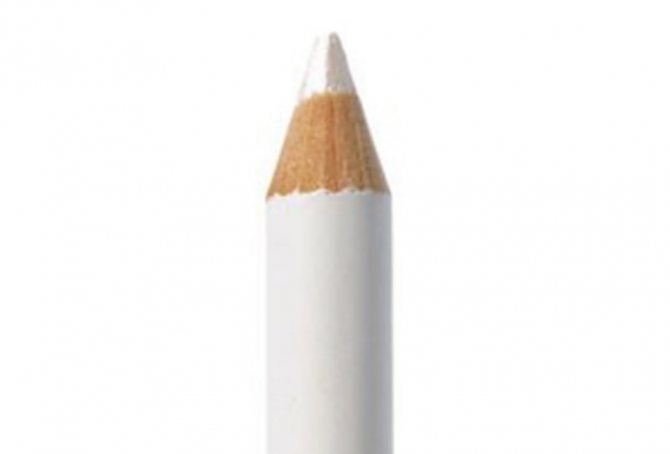
At its core, this product is a white pencil. Depending on the brand of the manufacturer, medical chalk or white clay may be used to create the lead. The lead is placed in a wooden case, like in ordinary drawing pencils. It is dense enough that you can sharpen it sharply and draw a line under the free edge.

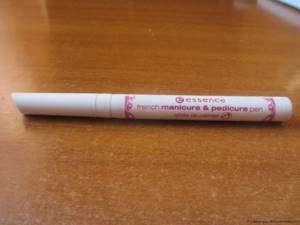
There are other forms of release of this pencil, which are much more reminiscent of a manicure corrector. They are used in almost the same way and give similar results. French hair done using such a device does not look like one made with extensions or painted with varnish. The pencil rather gives a more natural effect of healthy nails without coating. Although, as the manufacturers of this device claim, it is enough to create a full-fledged French manicure and you just need to apply a clear varnish to the nail. But practice shows that this is far from the case.
First of all, the difficulty is that such a pencil follows your natural smile line, which can be uneven, blurry, wavy or asymmetrical. In addition, it does not produce a sharp enough border or a rich enough white color. And also, the result of using such a pencil disappears after the first or second hand washing. However, it does not take up much space, which means you can successfully take a white nail pencil with you in order to correct your manicure if necessary.
Minuses
The main disadvantage of using such a pencil is the extremely low durability of the manicure obtained with its help. Essentially, when using it, you simply apply a layer of chalk to the inner surface of the free edge of the nail. Naturally, the result of such coloring remains unchanged only until the nails first get into water. This is especially noticeable on long nails; on short and very short nails, the manicure can last a little longer - until the second or third wash. In addition, chalk may also remain directly near the smile line, since water does not always get there.
The second disadvantage of a whitening nail pencil is that it is inconvenient to use. It is especially difficult, and sometimes completely impossible, to use it on short and very short nails. The fact is that the cone-shaped shape of the stylus does not allow you to do a manicure quickly and accurately. While the sharp tip of the stylus gets close to the smile line, the rest of its width stains not only the nail, but also the finger underneath it. It is almost impossible to avoid this drawback during operation, as well as to eliminate it after application, since the chalk simply smears or is erased from the nail too. This makes using the pencil impossible, especially for those whose nail bed is located far enough from the tip of the finger, that is, a fairly large part of the free edge is above the finger.
However, even if you understand how to use a whitening nail pencil so as not to stain your finger during application and do not wash your hands during the day, this still does not guarantee you a perfect manicure. In the process of performing the simplest actions with your fingers, the skin of their tips will still come into contact with the free edge, and your hands will sweat. This together will create all the conditions for the chalk to remain on the skin of your hands.
In addition, these pencils are often very soft. Applying color this way is even more difficult, since it gets more dirty and goes on unevenly, but the main problem is different. The coating remains quite sticky all the time after application, heating up from the skin. As a result, dust and other particles of dirt accumulate under the nails many times more intensely, and the manicure loses its attractiveness within three to four hours after application. In addition, if it is done on short nails, then there is a possibility that the pencil coating will stain not only the fingers, but also the palms and everything around.
[yandex2] [google2]
Step-by-step execution technique
To make a manicure beautiful and durable, you need comfortable and sharp tools; it is important to follow the technology, including the drying time of each layer. Stages of creating a French jacket:
- Removing gloss. The nail plate must be freed from shine so that the coating adheres well. Use a soft buff to remove the gloss, then wipe the plate with a dehydrator. Next, you can start manicuring or strengthening your nails if they are too brittle and thin.
- Base. A thin layer of transparent base material is applied to the degreased plate. Dry in a lamp for the prescribed amount of time (depending on the power of the device). A layer that is too thick may leak onto the side rolls and cuticles. Each layer is sealed at the end to extend the life of the manicure. You should not touch the base - it can be sticky.
- Background. The classic technique involves applying camouflage gel polish to the base layer of the surface. It is desirable that its shade matches the color of the skin. You will need at least two background layers, each of which is dried in a lamp. The pigment is taken carefully, little by little, so as not to spread. Before placing the manicure in the lamp, you need to let the gel spread slightly to avoid streaks. Beginners rarely manage to carefully apply gel at the base of the nail. Therefore, it is recommended that after drying the first layer of the background, use a thin brush to add color at the base. This way it will turn out smooth and beautiful, without flowing. Immediately apply a second layer of pigment and send it to dry.
- "Smile". Apply with gel or acrylic paint, contrasting with the background with gel polish. It is easier for beginners to use templates, it will turn out faster and easier. The straight line of the jacket depends on how smoothly the stencil is fixed. If your hands are not shaking, you can try drawing a line with a brush along the contour of the edge of the nail. If your hand trembles, there are remedies for correction. Working too long will cause the gel polish to smudge. To avoid such a nuisance, after drying the background in the lamp, it is better to neutralize the sticky layer. Then you can safely apply the French line without worrying that it will spread out. Considering the dependence on time, every 2 nails with a “smile” should be sent to the lamp to dry, without waiting until all fingers are processed.
- Sealing. After the contrast strip has dried in the lamp, it is sealed with a thin layer of topcoat. Thanks to its ability to self-level, the composition will even out the coating, smoothing out the difference between the background and the “smile”. If initially the contrast line turned out to be too thick, it will have to be evened out a little with the help of a soft buff until it becomes more invisible. Next, apply a layer of topcoat and dry.
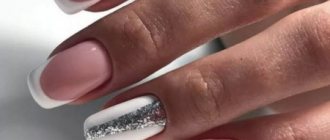
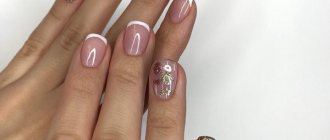
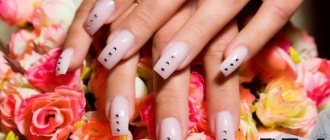
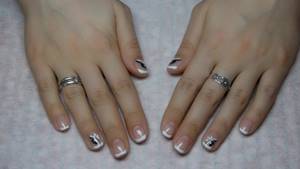
- Decoration. Optional step. It will be of interest to those who want to get an original result. To do this, a couple of nails are left for decoration instead of a “smile”. Stickers are placed on accent nails, patterns are drawn, or stencils are applied. Even a French manicure can be applied over decoration, provided that the decor is fixed on one nail and not on all. The trend is seasonal decor in the form of snowflakes, leaves, sun and raindrops.
The step-by-step steps just seem complicated. If you do everything consistently, you can create a very beautiful French manicure.
Wax pencils
Relatively recently, wax French pencils appeared on the market. They eliminate some of the negative features and disadvantages of chalk and clay analogues. In particular, if you applied the coating with a wax pencil, then the likelihood that it will survive hand washing is much higher. In addition, it is these pencils that provide the densest layer and are most evenly and easily applied.

However, they also smear on the finger when applied. But during use, the coatings, even on short nails, do not get dirty, since they are resistant to sweat and the wax coating itself is not sticky. After several uses, your own nail becomes denser and whiter, and may even become less flaky. This shows the therapeutic effect of such coatings.
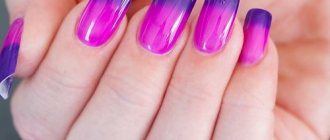
Variety in manicure
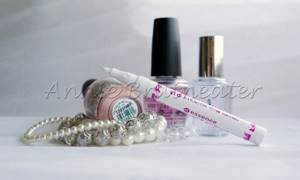
Diversity is the trend today. Modern cosmetics manufacturers offer sets for French nail design, consisting of six tones. Now every fashionista will be able to choose the shade that best suits her skin color. Even a visit to the solarium can be a reason to change the tone of the “base”. In this case, it makes sense to turn to a darker tone, which will most favorably highlight the beauty of tanned skin.
You should know that French manicure can be used by men. This is the only type of manicure with enamels suitable for the stronger sex. To make men's hands look well-groomed, experts advise trying a French coat for men. Many modern beauty salons offer a similar service. French can be done without using varnish. In this case, the master resorts to the help of special pencils.
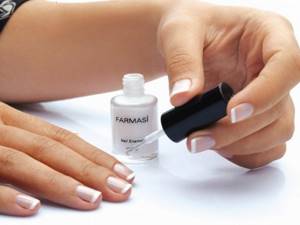
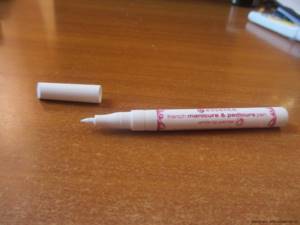
Varnishing pencil
This pencil is something similar to a traditional office manicure corrector. It is made in the form of a plastic pen with a thin spout at the end. There is a small ball in the nose, which, when pressed, releases the polish contained in the pen onto the nail. Thus, the principle of operation and method of using such a pencil are similar to a stationery proofreader.
The disadvantage of such a pencil is that it gives a thin strip about 1 - 1.5 mm wide. Thus, it can only be used on short nails. After all, if you try to shade a long free edge with it, you will notice that it lies extremely unevenly.
https://youtu.be/JJx_asF_-BA
Useful tips
Whatever pencil you choose, clay, chalk or wax, when applying it you need to follow several rules. They will not only simplify the application process, but also extend the life of the manicure and make it better and more accurate.
- All work with a pencil should be carried out strictly on dry nails. It is important that not only the plate itself is dry, but that there is also no liquid along the smile line. If you have recently washed your hands, it will be quite difficult to remove the water from there, and therefore it is better to wait a few minutes until it dries completely;
- The pencil should be sharpened as sharply as possible. This is especially difficult to achieve when working with soft pencils, which, moreover, tend to wrinkle when they get under a nail, etc. Clay pencils are most often soft and flexible;
- Before use, it is recommended to moisten the lead in water to make the coating more dense and even. Some pencils already create such a coating, however, chalk pencils often have to be kept in water for a little while;
- In order to reduce the amount of pencil that gets on the skin, the tip of the finger under the free edge can be sealed with tape or separated with a sheet of paper. These measures will not make the application completely clean, but will reduce the amount of pencil on the skin;
- You can wipe off anything that does get on it using a cotton swab dipped in water. But this must be done very carefully, so as not to damage the coating on the nail.
To complete this manicure, it is recommended to cover your nails with clear varnish.
It is better to seal the edge very carefully, because the varnish can “wash off” the coating. However, if it remains on the brush and ends up in the bottle, it can cause the finish to fade or become cloudy. [yandex3] [google3]
Homemade Cuticle Oil Recipes
To prepare a mixture to strengthen cuticles, whiten nails and give them a glossy shine, use jojoba vegetable oil (7 ml) as a base. Add rose moschetta extract (3 ml) and vitamin E to it. A few drops of ylang-ylang and lemon essential oils will harmoniously complete the composition.
You can prepare a composition for healing and rapid regeneration of the cuticle. Mix olive, almond and grape oils (5 ml each). Add essential extracts of lavender and tea tree (3 drops each). Vitamin E will be the final component here.
You can create your own recipes based on your experience. With a little imagination, you will be happy to use natural cosmetics without unnecessary preservatives. By the way, the mixture is stored for quite a long time - 3-5 months, since it does not contain water. In conclusion, we present to your attention a video with another recipe for cuticle oil. Enjoy watching, dear girls!
Application
Below we will describe the technology of how to use a pencil for a French manicure yourself. Almost all such pencils are intended exclusively for home use and are not used by craftsmen. Before you begin your manicure, sharpen your nails and carefully remove any dirt from underneath them.
- Sharpen the pencil sharply;
- Place small pieces of paper under your nails to separate the edges of your nails from the skin;
- Dip the pencil in water;
- If the instructions recommend, keep it in water for the required amount of time;
- Place the lead under the nail and draw a line, pressing one side of the lead cone against the back of the nail;
- If the nails are long and you have painted not the entire free edge in this way, but only part of it, shade the unpainted area;
- Apply a thin coat of clear varnish on top, leaving the cut edge unsealed.
After the top coat of varnish has dried, your manicure is ready for use. More information about what a white nail pencil is, what it can be and how to use it is described in the video in this material. The use of this pencil is suitable for everyday manicure in a nude style.
How to do a French manicure at home - step by step
People say that the master's work is feared. But what to do when you are as close to the master as you are to the moon, and you can’t bear to try on a Frenchie on your hands? We have collected the most effective methods, describing them step by step. Read carefully, memorize and feel free to start experimenting.
With stripes
French manicure using stripes is perhaps the simplest of all of the above. It will appeal to established lazy people or beginners who have never dealt with complex designs. We covered the subtleties of hygienic manicure in this article, but we will describe the direct process of decorating with stripes below:
- Apply a primer that seals and protects the plate or a colorless base;
- take one strip from the set and apply it to the nail, simulating “trying on”;
- remove the protective film and attach the strip, moving no more than 5 mm from the edge;
- paint the empty part with a white or milky shade of varnish;
- After waiting for it to dry completely, remove the strip and fix the result with a glossy topcoat.
Without stripes
French manicure without stripes differs only in the preparatory stage, then the process moves according to the plan outlined above
Still don't know how to make a stencil for a French manicure? Then all attention to our life hacks:
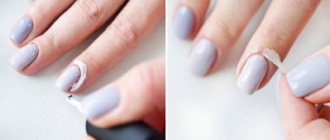
- An alternative to strips can be regular or masking tape. Cut short, miniature pieces in advance to the shape of the plate and glue them to the free edge;
- peel-off liquid used to protect the cuticle during ombre. Can be used as a stencil to prevent white paint from spreading;
- cling film, which is always in the kitchen of housewives. It also adheres well to nails and works on the strip principle;
- medical plaster. By cutting off a small piece of medical tape from its adhesive side, you can use it as an alternative to a stencil.
By the way, the process of how to properly do French in stages is described in detail in the training video:
https://youtube.com/watch?v=acZnGRpdygo
With stencil
With a stencil, drawing a smile line becomes a mere trifle, which even a beginner can handle. Remember that stencils come not only from ordinary paper, but also from durable metal ones; we will tell you about the intricacies of using the latter in the master class:
- After applying the base and the main beige or powdery pink color, wait until they dry completely;
- Apply a small amount of white paint to the metal plate with the pattern;
- Apply a stamp with a corner and gently, progressively “press” along the free edge of the plate;
- let the varnish dry and only then complete the manipulation with a layer of glossy or matte topcoat.
With a brush
French manicure with a brush is a task for experienced users. It makes no sense to describe in detail the instructions for drawing the treasured white lines, but here are a couple of tips that will definitely help make your French jacket neat and elegant:
- choose a brush with the longest bristles, elastic and loosely packed;
- when modeling, move your finger smoothly, but not the brush, so the smile line will be clearer;
- Remember that the curve of the line should accurately reflect the curve of the cuticle for an extremely natural appearance of the design;
- first outline the outline of the smile line and only then paint over the drawing itself;
- Use the flat side of the brush to seal the end of the nail plate to avoid chips and cracks;
- Use only tools with synthetic bristles.