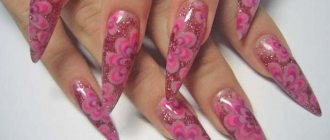
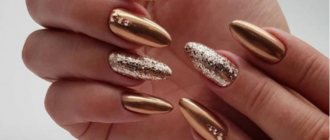
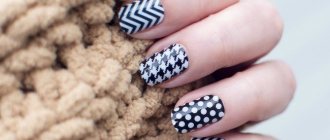
Girls now prefer to apply a decorative coating to their nails, transforming the state of their natural manicure. However, before this, many of them resort to extensions to artificially increase the length of the free edge or change its shape.
Nail extensions are performed using tips or forms, which depends on the convenience of the artist and the initial condition of the nail plate. If a girl wants to make the correction herself, it is better to use nail extensions, since this reduces the risk of a sloppy manicure due to uneven distribution of the gel.
Types of tips
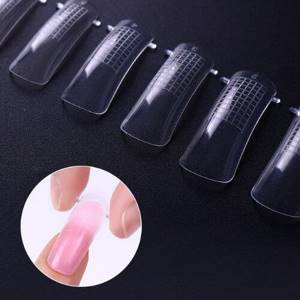
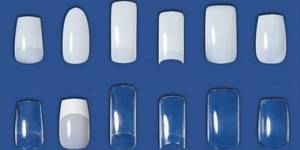
Tips are plastic overlays or template forms that are used by masters as a substrate or as a stencil for forming an artificial nail plate.
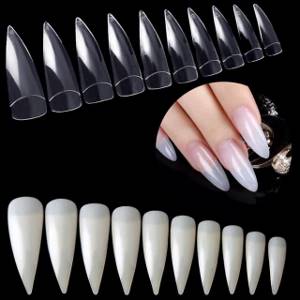
This is the most convenient and popular extension option for beginners. It is also popular among experienced craftsmen, especially if it is necessary to reduce time and simplify the procedure. There are several varieties of tips, each with its own peculiarity in operation and design nuances.
To form an artificial nail plate, acrylic, gel, biogel and acrylic acrygel, which is a combination of gel and acrylic, can be used. Acrylic dries in air, and gels dry in a lamp.
Tips-tips
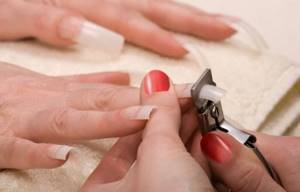
These are plastic nail tips with a convenient transition zone for high-quality adhesion along the smile line. Disposable. They are attached using a special glue that comes with them or can be purchased separately.
They come in different sizes within one set. It is necessary to select it individually for each nail, and, if necessary, pre-file it in width so that it perfectly matches the width of its plate. After gluing, the length is cut and filed. Next, everything is covered with camouflage extension material to create an outwardly complete nail plate.
White tips are very convenient for extending French manicure. This is a ready-made perfect smile line; you just need to cover the nail with a thin layer of base or camouflage gel or acrylic, and then with a top coat to add shine.
Camouflage nail gel - let’s figure out what it is and how to use it correctly
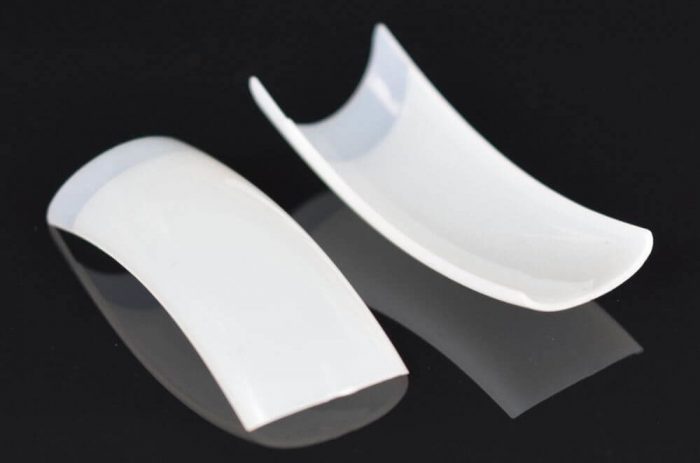
Upper forms
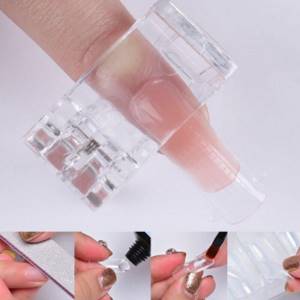
Upper forms - used for working with acrylic, gel, acrylic and biogel. The material is applied to the form, pressed against the prepared nail along the entire length under the cuticle or from the middle of the plate, then dried in a lamp and filed.
The top molds are made of a dense material compared to the more flexible liquid molds, and have a more curved design. Thanks to this, they allow already from the first layer to form a convex stress zone or fold zone, which is subject to the greatest loads when worn. The top forms are reusable. On average, they are enough for 100-250 extensions.
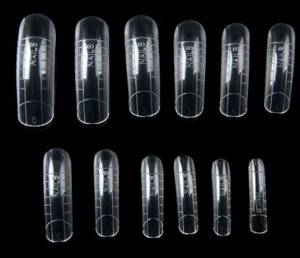
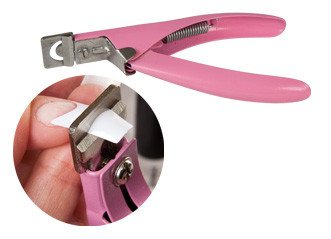
Liquid tips
They are used for extensions with all liquid materials, hence their name. Often opaque, with a matte surface. They have short “removal handles” at the ends. Unlike top forms, liquid patterns are more flexible and flat. They do not immediately form a stress zone, but only create the first base layer. Then you need to paint the architecture manually - with camouflage gel or acrylic using a brush.
When working with liquid tips, the material is applied to a mold and pressed against the nail plate. Smile lines are already drawn in the form, which is very convenient for beginners when laying out a French jacket. After drying in a UV or LED lamp, the tip is removed and the plate is filed down. Liquid tips are also reusable, like the top forms.
Depending on the desired result, you can work with any of the three types of tips. Try everything one by one to choose the most convenient and practical for yourself.
What manicure is suitable for a schoolgirl?
A beautiful children's manicure is not only about nails decorated with intricate designs and all kinds of rhinestones. Well-groomed and neat hands of a teenage girl with a minimal amount of varnish and decor look very stylish and elegant. Let's look at several types of school manicure that would be appropriate within the walls of an educational institution.
Manicure with transparent coating
Ideal for girls of primary school age. Enhance the natural beauty of healthy, strong nails with clear polish. How to properly paint a little schoolgirl’s nails at home? Everything is very simple. Applying varnish to a child’s nail plate is carried out in the same way as for an adult.
First you need to cover your nails with a base and then with decorative varnish. All this can be secured with a quick-drying coating. Marigolds like those in the photo below will not attract undue attention and will not be a reason for a reprimand from the teacher, even in a school with a very strict dress code.
Add a little glitter to the surface of the nail, and the schoolgirl’s manicure will shine with new colors. Such beautiful nails will not contradict the strict requirements of the school and will be an excellent addition to the discreet image of a diligent student. Look how a shiny manicure looks in the photo.
Manicure in pastel colors
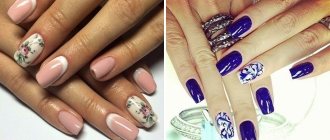
For a girl, light varnish colors are best, which will only emphasize her elegance and fragility. On short nails, a monochromatic coating of pink, white, peach and beige shades looks very cute and touching. Restraint and moderate severity are always in fashion. In addition, plain pastel nail art is a popular trend in 2014, so you can create not only a simple, but also a stylish manicure.
French manicure
An excellent choice for high school girls. The world-famous classic nail design is universal; it would also be appropriate for going to school. French manicure harmonizes perfectly with any outfit, including a school uniform, and testifies to the refined taste of its owner.
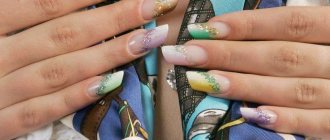
Provided that school rules allow the application of all kinds of designs and patterns on the nails, you can complement the decor with a French manicure or highlight the smile line not with white, but with some other pastel shade. A classic or decorated jacket can be made at home, spending a little time and effort on it. You can see examples of elegant design in the photo.
Newspaper manicure
Newspaper print is a very unusual solution for decorating children's hands. Numbers, letters, mathematical formulas or musical notes printed on the nails are fully consistent with the school theme. Such an original design will arouse admiration from your classmates and even interest from some teachers, who will probably give you a pleasant compliment. If you like stylish nail art, be sure to read the article on how to do a newspaper manicure. You can see some cool designs in the photo.
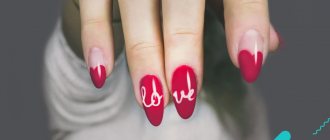
Manicure with drawings
A manicure for attending school should be discreet and discreet. If the school administration allows the use of patterns when decorating the nails of their students, then you can give free rein to your imagination and experiment. However, do not forget that an educational institution is not a place for bright, flashy nails with provocative pictures. It is best if it is a standard jacket with a small pattern or a design in the form of a flower, butterfly or bow on a background of light or transparent varnish.
As a modest manicure for an exemplary student, you can decorate not all nails, but only one, focusing attention on it with the help of a simple ornament. A picture drawn with a thin brush or special stamping will reflect the character of a teenage girl, distinguishing her from her peers
Interesting manicure ideas for school, from which you can choose the appropriate option for yourself, are presented in the photo.
You can learn how to make a beautiful and simple manicure at home using varnish and a regular ballpoint pen by watching the interesting video lesson that we have prepared for you. Dear girls, stick to the golden mean in your manicure, try to avoid flashy colors and designs, but do not forget about your sense of your own style. Always be the most beautiful!
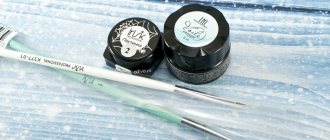
Basic set of materials
In addition to the templates themselves, you will need:
- glue for extensions
- length cutter
- sawing machine
- UV or LED lamp
- file and buff
- pusher
- tassel
- lint-free wipes
- material to choose from: gel, biogel, acrylic, acrylic in base and camouflage shades
- degreaser/dehydrator
- acidic or acid-free primer
- base
- top or finish to add shine
- varnish and decor as desired.
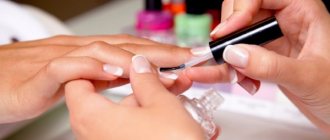
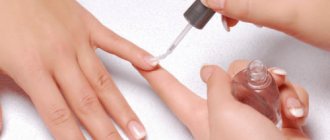
Preparing the nail plate
This stage is the same for all types of extensions using tips and consists of the following mandatory steps:
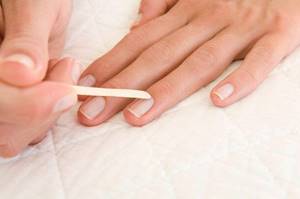
- Manicure . Before extensions, you need to do a trimmed, hardware or combined manicure to remove the cuticle and remove the pterygium. They are most often the cause of detachments of artificial material.
- Filing the top layer of the nail . To improve adhesion to the artificial material, it is important to remove the top layer of the natural nail. Don't get carried away, it will be enough just to remove the natural shine. Experienced masters use either a buff or a file for natural nails for this.
- Degreasing and dehydration . First, apply the cleaner to a cotton pad and remove the dust after filing. Then apply a special degreaser to your nails with a brush.
- Application of primer . This product lifts the scales of the nail plate and ensures adhesion of the artificial material. After applying the primer, wait until it is completely dry, otherwise peeling may occur in the future. When working with gel, an acid-free primer is used, and when working with acrylic, an acidic one is used.
- Applying the base . The base is applied in a thin layer under the cuticle, especially if the extension occurs not on the old layer of material, but on your own nail plate. Dries in a lamp. The sticky layer does not need to be removed.
Now let's move on directly to the extension procedure with various tips.
What is needed for this procedure
For the extension procedure to be successful, prepare the necessary equipment.
- Tips.
- High-rigidity file for processing extended nail plates. Less harsh for processing natural ones.
- Polishing buff.
- Cosmetic glue.
- Tip cutter.
- Degreaser.
- Brush.
- Primer.
- Acrylic powder, liquid.
- Fixative.
Extensions using tips - step-by-step instructions
- We select templates according to the size of each nail
- Glue the tips with glue onto previously prepared nails
- We remove the length with a tip cutter and file the edges
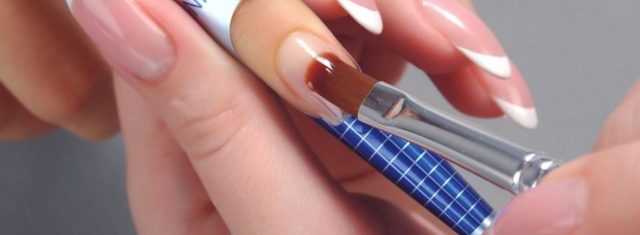
- We apply camouflage gel with a brush, build the architecture, and dry it in a lamp. When using acrylic, apply the material in a translucent or pink shade and distribute it evenly with a brush, wait until it hardens
- Remove the sticky layer from the gel
- We file down the length and thickness
- We apply a top coat or decorative varnish and design as desired
pros
- The fastest extension option
- The ideal smile line with French extensions
- A simple and convenient way for beginners to practice
Minuses
- Sometimes nails peel off due to poor-quality glue or incomplete adhesion of the artificial nail.
- Template blanks still look artificial; experience and skill are needed to achieve naturalness in their design
- Gel and acrylic can bleed at the tips, making the nails excessively thick in these areas; additional filing and understanding of architecture are required to achieve a natural result.
Acrylic
Acrylic is a durable, quick-drying material. Acrylic nails are elastic; after extensions, the nails turn out thin and look natural. When using acrylic at home, you need to choose a well-ventilated room, as the substance has a specific aroma.
Extension tools
Before you move on to creating an artificial nail using tips, you should check if you have all the tools at hand.
List of materials:
- extension material – acrylic;
- primer or degreaser;
- liquid for dissolving acrylic - monomer, volume of at least 50 ml;
- set of tips;
- brush for applying acrylic powder;
- nippers for cutting tips;
- file with abrasiveness from 100 to 180 grit;
- lint-free wipes;
- buff;
- alcohol or other disinfectant;
- a jar with a lid will be needed for the monomer;
- dust removal brush;
- glue for tips;
- oil or cuticle softener.
After purchasing all the necessary materials, you can start creating beautiful nails.
Instructions
Before you start doing any manicure, you should wash your hands well with antibacterial soap. If this is not possible, then the skin of the hands is treated with a disinfectant, alcohol or antiseptic.
Extension process:
- File the free edge of the natural nail.
- Remove cuticles using an orange stick.
- Use a nail file to remove oily shine from nails.
- Choose the right tip for each nail; the contact area should cover less than half of the nail plate.
- The numbering of tips starts with the number 1 and ends with the number 10, the first size is the widest, then the width decreases.
- Arrange the tips after selection in order.
- File down the edge of the contact area on each frame.
- Degrease the nail plate.
- Apply glue to the contact area and distribute it evenly.
- The tips should be held at an angle of 45 degrees to prevent the glue from spreading.
- Apply the tip so that the stop line is in contact with the tip of the natural nail.
- Press the frame onto the nail plate and hold until it holds firmly.
- Adjust the length of the free edge using a cutter.
- Using a file, give the frame the desired shape.
- Use a buff to reduce the boundary between the tip and the natural nail, so that when you run your finger along the plate you don’t feel the bumps.
- Mix acrylic powder with monomer until a plastic mass is obtained.
- Using a brush, evenly distribute the acrylic mass along the entire length of the nail.
- You can remove excess thickness with a nail file.
- Apply a fixative to the nail.
After the fixative has completely dried, the nails can be covered with a single-color varnish or a special design can be created. For beginners, it is better to use colorless acrylic for nail extensions with tips, and a light pink color is suitable for French manicure. Extending nails with tips using acrylic is a very easy and simple procedure.
Extensions on the upper forms - step by step instructions

- We select the shapes according to size, slightly file the width at the side rollers, if necessary
- Using a brush, apply acrylic, base gel or acrylic into the mold, spread it in a thin layer and apply it to the nail. It is necessary to apply the form slightly from the tip to the cuticle so that the material is not squeezed out at the cuticle
- Remove excess material with a brush
- We send it to dry in a lamp or air dry (for acrylic)
- Removing the upper forms
- Using a brush, apply a layer of camouflage acrylic, gel or acrylic, and build the architecture of the nail
- Dry in a lamp for 2 minutes, acrylic in air until it hardens
- We cut the length and width
- Apply top or finish, dry in a lamp
pros
- Easy to use
- Nails are more durable than nail tips due to the absence of an additional grip zone along the smile line
- Reusable
- Due to the characteristic volume in the stress zone, it can be formed already at the first stage of working with acrylic, base gel or acrylic
Minuses
- When extending very long nails, they may initially have a “pecking” shape.
- The absence of a drawn smile line in the inner part of the form, which is inconvenient when forming a jacket
A detailed description of the extension technology on the upper forms with instructions for popular designs:
Extensions on top forms with examples and instructions
Modeling
Marina Litvinova is a teacher at the Sakramel School of Nail Art, a developer of training programs and manuals. Its goal is to give masters and amateurs enough knowledge to achieve a high professional level. In this lesson, Marina will touch upon the issue of setting the form and perform a simple design. As a result, the model’s short, upward-growing nails acquire a neat square appearance. Careful preparation helps reduce the risk of peeling - applying a deep-action dehydrator, an acid-free primer that improves adhesion (acts similar to double-sided tape), and a base gel. All stages are shown and explained in as much detail as possible, which will be useful for beginners and amateurs will enjoy. Salon workers will find useful tips and life hacks, the implementation of which will help improve their professional level.
Liquid tips extensions step by step
- Selecting liquid tips by width
- Apply material for building up the base layer to the inside, distribute, remove excess along the edges
- Apply the form to the surface of the nail, press slightly
- We remove the excess squeezed onto the surface near the cuticle and side ridges with a brush.
- Dry in a lamp or air dry if it is acrylic
- Removing liquid tips
- Apply a second layer of camouflage with a brush, forming the architecture of the nail
- Dry in a lamp for 2 minutes or in air (for acrylic)
- Apply top or finish
- We make the design with varnish as desired
pros
- Durable, flexible, comfortable shapes
- Reusable, will last up to 250-300 uses
- The presence of markings of the smile line in the inner part for the convenience of forming a jacket
- It is convenient to remove using the special “tips” on the sides of the tips
- Indispensable for practice for beginners
- Allows you to create natural nails that do not differ in appearance from natural ones, unlike tips.
Minuses
- Unlike the upper forms, they provide a flatter base-plate, without a reinforced stress zone
If you have never tried to grow your nails yourself, then tips are the ideal material for beginners.
Start with the adhesive tips and then move on to the top molds or liquid tips. Ready to get started? Write to us in the comments if you have any questions. Comment
Price for extended nails and care for them
Each artist has their own gel nail extension technique, developed through years of experience and improvement. How much does the procedure cost on average?
In order for such a manicure to last long and faithfully, it is better to turn to professionals. Their price for gel nail extensions varies from 1,500 to 2,000 rubles. At first glance it seems like a lot, right? But the result will be very pleasing. The gel will last from 2 to 4 weeks depending on how quickly your natural nails grow.
Of course, there are more economical options for extended nails. You don't have to go to a professional salon to get beautiful gel nails. It’s enough just to ask friends and acquaintances where and what the price is. You can find very low prices, like 150-200 rubles. There are masters who work for both 500 and 600 rubles. You just need to ask.
To maintain the beauty and smoothness of your nails, you need to follow some rules:
- Avoid mechanical damage.
- Correct the shape.
- Get a manicure.
- Visit the salon.
- Take care of the cuticle.
New nails extended with gel can easily break if you bite them, tap them on the table, or do not use gloves when cleaning.