Hello, dear guests and readers!
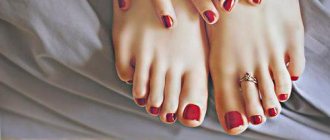
In the image of a modern girl or woman, manicure and pedicure are an integral attribute that emphasizes her individuality. Today I will try to focus your attention on hardware pedicure, which is an innovative way to care for your feet, both from a medical and aesthetic point of view.
It easily removes dead epithelial cells on the feet, copes well with ingrown toenails, hyperkeratotic nail plates, calluses or cracks, can gently treat the area around the wart, does not touch or injure living skin tissue.
This is why experts recommend this skin and toenail care system to people with circulatory problems or diabetes.
The hardware pedicure technique has recently gained increasing popularity, displacing the classic method of treating the feet. It is professionally performed in nail salons by nail technicians.
However, many girls today, in order to get their legs in order on their own, choose this convenient technique, which does not take much time and even saves money.
Therefore, for those representatives of the fair sex who decide to do a hardware pedicure at home, I will tell you about the features of this procedure, the components of household pedicure devices, and the diagram of the correct sequential actions.
Classic or edged pedicure at home: description and materials
A classic pedicure is a procedure that combines:
- soaking the feet in water with further removal of the rough skin of the cuticle and pterygium using scissors or nippers, a pusher and an orange stick;
- correction of the shape and length of the nail plates;
- processing with a stop file or grater.
Due to the fact that this version of the pedicure procedure uses cutting tools - scissors or nippers - it is also called trimming.

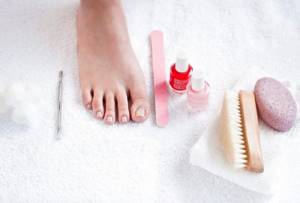
To perform a trim pedicure at home, you will need the following materials and tools:
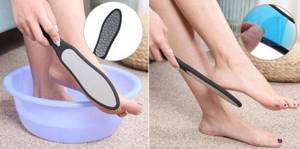
- Foot bath
- Salt, soda, shower gel or liquid soap
- Large scrub
- Pusher, orange stick
- Nail file 180/220 grit
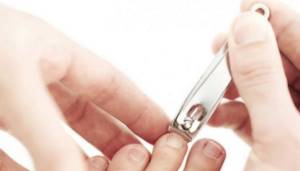
- Nail clippers
- Nail scissors or skin clippers
- Grater or file for feet, coarse abrasiveness 80/100 grit
- Finger separator
- Light moisturizer
- Cuticle oil
- Large napkins or towels
- Gel polish or varnish for decorative nail coating
Trim pedicure at home
It is recommended to perform the procedure once every 10-14 days at home, depending on the load on the legs. This intensity will allow you to properly care for the skin of your legs and feet, preventing the appearance of cracks and ingrown nails. Between the full procedure, it is recommended to sand your feet every 3-5 days with a coarse file to remove rough skin.
Classic pedicure is easy to learn. To do it as efficiently as possible, take care of good tools and nail files. This is already half the battle. It will take you about an hour to complete. You can turn on your favorite TV series.
How to perform a classic pedicure step by step:
- In a classic pedicure, steaming your feet is mandatory. To do this, immerse them in a bath of water at 37-40°C for 10-15 minutes. First add 1 tbsp to the water. l. salt, 1 tbsp. l. soda and a little liquid soap or shower gel. Baking soda will additionally soften and whiten the skin, and salt will strengthen nails and relieve swelling. You can also add a few drops of essential oil, such as tea tree, lemon, rose or lavender, to the water.
- Use a pusher or an orange stick to push back the cuticle and clean up the pterygium from the nail plates.
- Use pliers to remove the length of your nails. Do not cut it very short, the recommended length is 2-3 mm.
- By this point, your nails will have dried a little, so you can shape them with a nail file. With a rectangular shape, it is still better to round the corners a little so that they do not cling to socks or tights and do not grow into the skin.
- Use the sharp end of an orange stick to remove dead skin from under the nail plates and in the lateral sinuses. Do this very carefully so as not to injure the nail.
- Use nail scissors or cuticle cutters to cut the cuticle. Professional craftsmen recommend removing only rough, dead skin, without fanaticism. The cuticle protects the nail along the perimeter, and if it is cut very short or injured, pockets of possible infection will form with a high risk of inflammation due to contact with shoes, dust, and floors.
- Now let's move on to processing the feet. Using a grater or coarse file, remove all rough skin in the direction of the skin lines. It is recommended to do this not on wet, but on barely damp skin. If it dries out, just moisten it a little with your hand. A grater or file will remove the rough areas in pellets. If there are cracks on the legs, then they must be processed with a grater strictly along the groove.
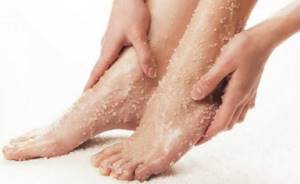
- Apply a coarse scrub to your feet and massage your feet and upper parts. Rinse with water.
- Apply a decorative coating to your nails with gel polish, shellac or regular nail polish. If gel polish is used, then leveling is not necessary. A thin layer of classic base will be enough. Before applying it, treat your nails with a dehydrator and an acid-free primer for better wear of the coating. It is better to take the top without a sticky layer. Many masters recommend using a single-phase polish for pedicure, combining a base, gel polish and top coat at the same time.
- Apply a light cream for quick absorption and cuticle oil to your feet. Give a light massage to relax your legs and improve the effect of the cosmetic product.
Precautions for trimming pedicures
- Do not use hot water for a bath above the specified 37-40 degrees, even if the temperature above seems comfortable to you. Hot water draws moisture from the skin and also improves blood flow to the feet. If you accidentally get injured while cutting the cuticle, the blood will flow more actively;
- To trim the cuticle, use only sharply sharpened tools, otherwise burrs cannot be avoided;
- Do not forget that tools that damage the integrity of the skin - scissors and nippers - require treatment even at home and even if only you use the devices. Ideally, periodically soak the devices in a disinfectant solution, but as a last resort, at least just wash them in soapy water and treat them with an antiseptic, chlorhexidine, or alcohol;
- If you use a grater or pumice stone with a reusable surface to treat your feet rather than replaceable files, change the device for a new one at least once a month. Particles of skin and moisture remain in the porous structure of pumice, which subsequently becomes a suitable place for the development of various microorganisms. You can also use a special pedicure machine to remove dead skin, but use it carefully, without strong pressure, so as not to damage the living skin.
Also, do not forget that trimmed pedicure has contraindications:
- Diabetes;
- Fungal infection;
- Poor blood clotting;
- Proximity of blood vessels to the surface of the skin;
- Varicose veins
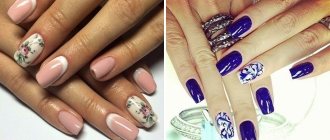
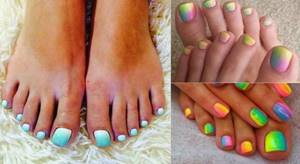
Options in different shades
Pedicure at home for beginners can be made bright and memorable if you use a technique such as gradient or ombre. It is based on the play of color, and can be created from several shades that smoothly flow into each other.
To create such a design you will need the following:
- 2-3 shades of varnish of the same or different color schemes, but suitable for each other;
- sponge;
- base, fixer.
To make a gradient pedicure at home, you need to treat your nails with a base. Then you need to apply varnishes of different colors to the sponge. The strokes should be as close to each other as possible. While the polish is still wet, you need to quickly transfer it from the sponge to your nails using patting movements. Beginners should remember that the result must be secured with a topcoat.
The gradient on all nails looks no less impressive. In this case, a different varnish of the same color is applied to each plate, starting from lighter on the thumb and ending with dark on the little finger.
Hardware pedicure at home
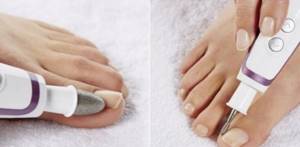
In the absence of experience with the device, many beginners have a question: how to do a hardware pedicure at home correctly? What materials and attachments are best to take, if you have no experience, we recommend reading the link. Let's look into the details.
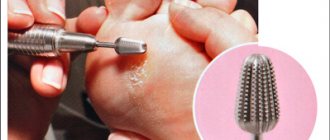
Since hardware pedicure is performed dry and without cutting tools, you will need the correct cutter attachments to work on all problem areas.
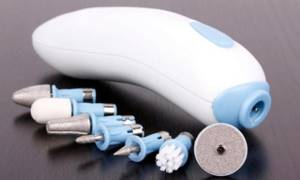
Materials and attachments for hardware pedicure at home:
- Device with a power of at least 30 W
- Diamond cutters: truncated cone, flame and ball
- Sanding sand caps and silicone sanding pads
- Foot cream
- Cuticle oil
- Decorative coating upon request
Performing a hardware pedicure at home with your own hands can be a difficult task without proper practice. It is necessary to confidently hold the handle of the machine with the cutter so that cuts do not form and do not injure the skin of the cuticle.
When working with attachments, make sure that your working hand has a good support. Use your little, ring and middle fingers for this.
- Use a diamond cutter to move the truncated cone with a blue notch and slightly lift the cuticle. Use the same cutter to shape your nails.
- Using a flame cutter with a blue notch, open the cuticle even further and remove all the pterygium around the perimeter of the nail. Hold the cutter almost parallel to the nail plate, do not press hard.
- Use a diamond-coated ball cutter to gently cut the cuticle, moving from bottom to top from the nail.
- Use a silicone polisher to treat the cut area.
- Use sand caps to treat the foot, metatarsus, and toes. Move evenly along the lines of the skin. Don't stop for a long time in one area.
- Use the silicone sanding pad to sand the foot and metatarsus again.
- Apply cream to your feet and oil to the cuticles, give a relaxing or toning massage.
A properly performed hardware pedicure lasts 2-3 weeks. Then the procedure must be repeated. We have already talked in detail about hardware pedicure in this material, but here we discussed how to select, use and store cutters for the device.
What can be done about neglected heels?
You can also use special preparations that are designed specifically for pedicures for neglected heels. As a rule, they are made on the basis of acids - lactic, glycolic, and fruit acids. They allow you to quickly, effectively, completely non-traumatically cleanse and exfoliate the skin. The effect is quite interesting and is achieved with a minimum of friction and any mechanical impact.
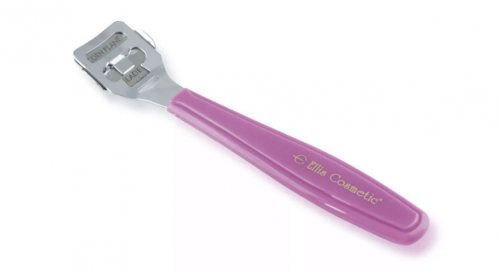
Cleaning heels in advanced cases is quite difficult even physically, so you can take a closer look at special devices. Take a closer look at a professional device: it will provide the most gentle grip on the skin of your heels and will do the job without microtrauma. The scraper removes dead skin cells as effectively as possible.
Pedicure using acid, alkaline keratolytics or removers
This pedicure option is suitable for anyone who does not want to work with cutting tools or apparatus. It is easy to perform, takes minimal time, and the results are just as effective.
To do an acid pedicure at home you will need an acid keratolytic. It is also called remover, peeling. There is also an alkaline version of the composition. This is a product that softens the skin to a liquid paste. All that remains is to remove it with a pusher or an orange stick in the cuticle area and a file on the feet.
Alkaline keratolytics are stronger and penetrate deeper into the skin. Acidic ones are softer in impact and are suitable for unused feet.
Even after removing the product, it continues to work for some time in the deep layers of the skin, so it is necessary to use a neutralizer. It is consumed economically, and the results from using the system are impressive.
The products are presented in the form of foam softeners, gels, and liquids. Popular brands:
- Callus Remover PNB
- Naomi Callus Remover
- My Nail Callus Remover
- Salu
- Comilfo
- Pro Link Be Natural
- Farmona
Types of keratolytics used in pedicure: a complete guide for masters
Step-by-step instruction:
- Apply remover to dry cuticle skin and leave for 1-5 minutes, as indicated in the instructions for each specific product.
- Use a pusher or an orange stick to remove the cuticle and pterygium. Wipe with a damp cloth and treat the area with a neutralizer.
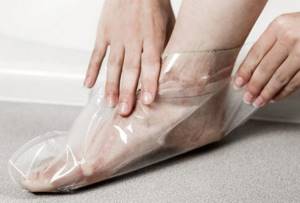
- Apply a keratolytic agent to the surface of the foot and toes, wrap your foot in polyethylene, cling film or put on a shoe cover to create a greenhouse effect. Leave for 5-10 minutes, depending on the condition of the rough skin.
- After the time has passed, wipe your foot with a damp cloth and use a grater to remove all remaining dead skin.
- Apply neutralizer.
- After drying, spread the foot cream with massage movements.
- Apply a decorative coating to your nails and apply oil to the cuticles.
There is also another product for chemical peeling of feet, which we discussed in detail - these are special exfoliating socks for pedicure.
How to extend the life of a pedicure
The final stage is varnish
The final step in a DIY pedicure is a colored or clear coat. The choice depends on your preferences. Transparent polish is suitable for those who want to strengthen their nails, while colored polish is suitable for those who like to be the center of attention.
First, we treat the nail plate with a degreaser. It perfectly removes cream residue and prepares for even application of varnish and long wear.
To prevent the coating from smearing, we will need special finger separators; they can be bought at any cosmetic store. We put them on and start applying varnish.
It is advisable to make the first base layer with a transparent strengthening varnish. This will help protect the nail plate from toxins and pigments, as well as create an even base for applying the next color. Let the varnish dry completely and then proceed to the color layer. To make the coating more dense and rich, it is recommended to apply the product a couple of times.
We complete the procedure with a strengthening transparent varnish. It will extend the wear of the pedicure and protect it from chipping.