Hardware pedicure - what is it?
Hardware pedicure has gained great popularity and fame due to the fact that this type of foot treatment is more durable. If, after you have trimmed the calluses and polished off the corns, the skin begins to get rough on the second or third day, then after hardware treatment, calluses and corns begin to appear only after the second week.

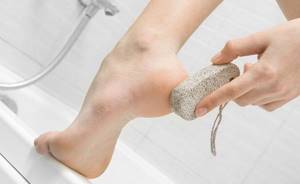
This is due to the fact that a trimmed manicure always injures the skin, cutting off the rough area under the finger, you always touch the top layer of living tissue, the skin begins to regenerate and protects itself with rapid growth. It is much more effective to remove calluses and corns with pumice stones, brushes, etc. But this is long and tedious.
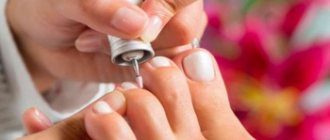
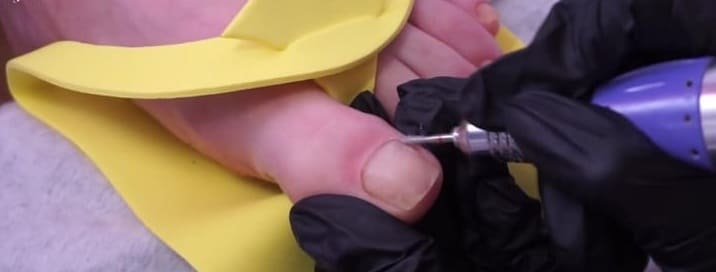
Hardware pedicure is the treatment of the skin of the feet and nails using a device and special attachments, cutters and caps. They come in different shapes and are made from different materials. Due to rapid rotation on the nozzle, the device removes rough skin, cuticles and forms the nail bed.
The device has different rotation speeds and power and is adjusted depending on the condition of the skin and the type of attachment installed. What are the features and advantages of hardware pedicure:
- removal of rough skin without steaming;
- effectiveness - removal of calluses and corns;
- therapeutic effect - removal of ingrown nails and cracks;
- you can learn to do it yourself at home;
- Suitable for any skin, even particularly sensitive ones.
Advantages
The hardware method is increasingly replacing the classic trimmed pedicure due to the absence of disadvantages. The only downside may be the need to spend money on purchasing a good device and cutters. However, the impeccable results are worth the investment.
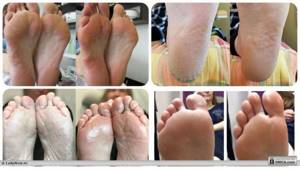
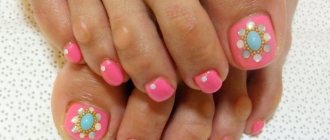
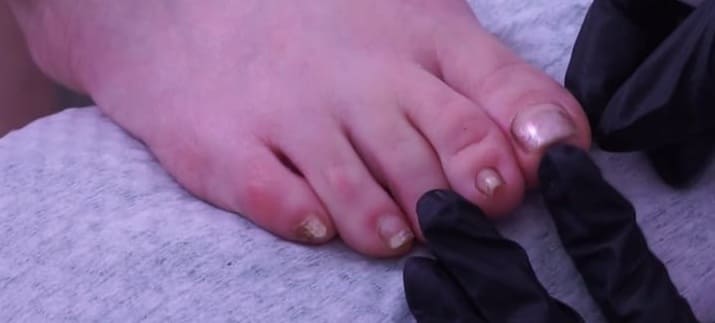
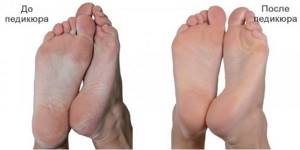
Photos before and after hardware pedicure
Advantages of hardware pedicure:
- safety from cuts and other damage, thereby eliminating infection by fungus or bacteria;
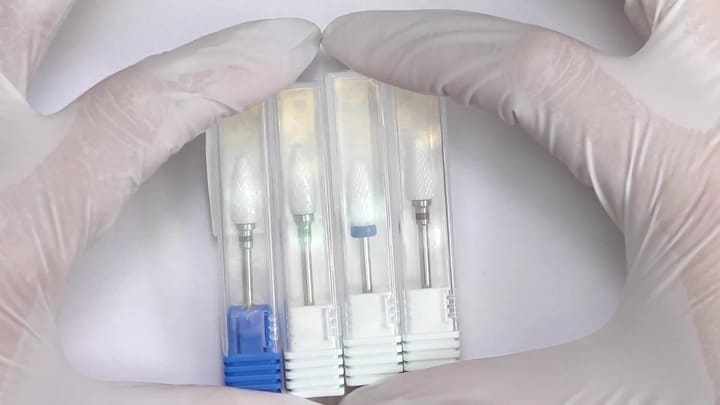
- all items are easily disinfected; for greater confidence, there are disposable nozzles;
- delicate treatment suitable for sensitive skin, even children's;
- the result lasts longer, the procedure can be performed once a month, unlike the classical method, recommended for every two weeks;
- copes with most problems - hyperkeratosis (roughened layers of skin), ingrown nails, corns, heel cracks and spurs, hardened calluses, fungal diseases, thickening of the nail plate;
- does not require preliminary steaming, all manipulations are performed dry;
- much less time is spent than with manual instrumental techniques;
- the procedure is painless and does not cause discomfort;
- has no contraindications, suitable even for patients with diabetes and varicose veins.
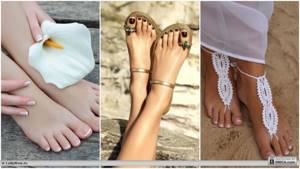
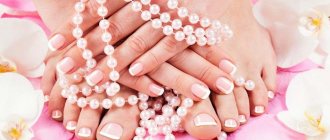
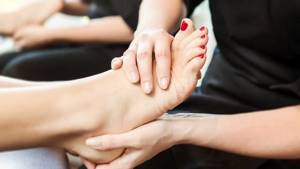
Beautiful legs after a pedicure
The well-known truth that proper foot care has a beneficial effect on overall health makes many people think about acquiring the skill of doing a hardware pedicure on their own. With this device you can be confident when wearing open shoes, as well as visiting the beach or pool. After all, the hardware method is great for maintaining the beauty and softness of feet for a long time.
Device for hardware pedicure
Removal of rough skin on the feet occurs using a special apparatus and attachments. If you go to a specialist, there is no need to study the characteristics of the device, but when choosing a device for home use, it would be a good idea to remember the main characteristics.
- power - devices above 35V are suitable for manicure, pedicure and gel polish removal, less - for home use;
- rotation speed per minute – the quality of processing itself depends on the speed, it should not be lower than 25,000 rpm;
- foot control – convenient for professional craftsmen;
- reverse – rotation of the nozzles in different directions.
Devices with greater power and size are purchased for salons, compact devices are purchased for home use.
Nozzles, caps and cutters are made of dense and soft material, come in different sizes, and are suitable for their processing speed. Nozzles vary in grain size:
- Coarse-grained - intended for treating the skin on the feet.
- Medium-grained - designed for pushing back and removing cuticles.
- Fine-grained – for polishing nails and skin ridges.
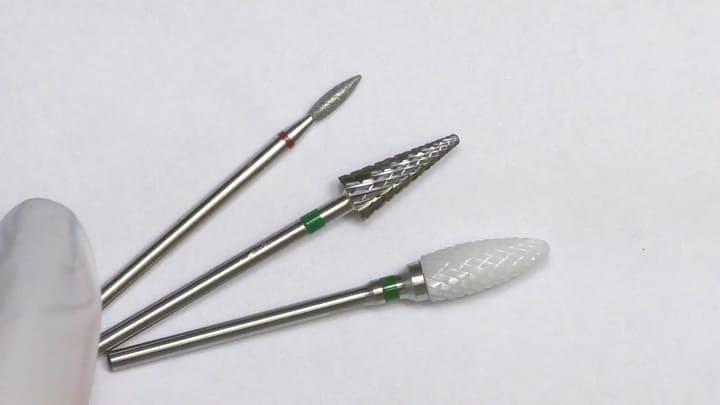
Nozzles are divided according to the material used to make them.
- Ceramic - a mixture of ceramic abrasive and glue, safer for use. They differ in the degree of grain size.
- Diamond - a mixture of glue and diamond chips, more durable. They also have different degrees of grain, which vary in color. The red ones are the toughest, for removing rough skin and removing varnish, blue, green for sanding.
- Metal - made using notches on metal tips. Designed for treating calluses and corns. Do not create dust during operation.
- Silicone - made using silicone and abrasive particles.
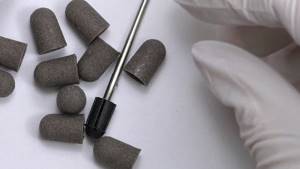
The cap is a replaceable part for removing keratinized epithelium and polishing the skin of the feet. The caps are made of rubber and abrasive and can have a pointed, rounded or cylindrical shape. Remember, the salon must use disposable caps, and the technician must open the packaging in front of you.
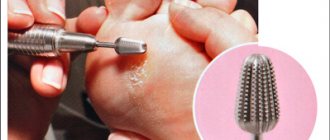
A cutter is a tip made of steel with the addition of abrasive particles. Milling cutters come in different shapes:
- cylinder - for removing calluses and old skin;
- ball - care for nail sinuses and cuticles;
- ellipse – removal of core calluses;
- cone – treatment of ingrown nails;
- disc – polishing and shaping the nail.
It is certainly necessary to understand the design of a pedicure machine if you are just planning to buy a device for yourself, but it is much more important to learn the order of what and why you need to do in a home hardware pedicure.
ORDER AND BUY NOW for 70 rubles.
Processing technology
In addition to the device itself and various attachments, you must first prepare consumables and the compositions to be applied:
- File;
- Bafik (for surface polishing);
- Metal pusher or orange stick;
- Brush;
- A machine that automatically draws sawdust from the machine;
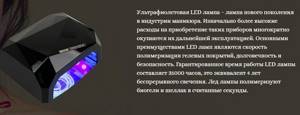
- UV lamp;
- Top, base, colored gel polish, application brush;
- Decor for decorating nails.
Additionally, use an antiseptic to treat the surface of the feet and a degreaser, which increases the strength of the adhesion of the pigment to the nail.
Hardware pedicure - step by step for beginners
Be prepared for your first pedicure to take two hours. Once you master the technique, this pleasure will last no more than an hour. What steps will you have to take.
Step-by-step hardware foot pedicure
- Before starting the procedure, the feet must be disinfected. Simply put, wash your feet first.
- Nail plates must be shortened using special clippers, if required.

- A remover is applied to the skin of the feet to soften it and removed after a few minutes.
- We set the power of the device to 10-12,000 rpm and a coarse-grained cap with 60/60 abrasive and process the foot.
- Next, you need to polish your feet using a fine-grained nozzle with 100/100 abrasive until the skin is even and smooth.
- Rub remover into your toes.
- We polish the toes using a cone-shaped ceramic nozzle.
- Lastly, you should treat the cuticle and side ridges with a special cutter - a diamond-coated ball.
- Using a felt cap, polish the nail until it shines.
- Apply a nourishing product to the skin of the feet.
- After this, we proceed to applying nail polish.
If you use gel polishes, remember that such pedicures are dried in LED lamps.
VIEW NOW
Skin types
The choice of attachments and operating parameters of the device depend on the condition of the skin of the feet. The master himself assesses the amount of work and sets up the device. Each skin type has its own characteristics that affect the procedure.
Normal
Such feet are characterized by slight roughness in the heels and outer lateral part of the sole. Corns may form in the summer due to dirt and dust that gets into open shoes. In most cases, pedicure is limited to polishing; cutters are rarely used. The result lasts for at least 3 weeks.
Average
A more problematic type, characterized by a tendency to dryness. It is considered the most common in our climate zone. The skin becomes yellowish due to the thick stratum corneum; if not properly cared for, calluses and cracks appear. The procedure takes longer and requires grinding. The effect lasts for an average of 2 weeks.
Problematic
Due to increased dryness, the soles of the feet become covered with cracks, calluses, and become very flaky. It hurts to step on a person's feet. One treatment procedure is not enough. Every week and a half, you can restore the health of your feet with the help of the device and correctly selected attachments. The master also gives recommendations for home health improvement.
Contraindications
Hardware pedicure has such contraindications as:
- Pregnancy period. The fact is that various chemicals are used to soften the skin, which can harm the fetus;
- For any diseases of the kidneys or liver. The reason, again, is the chemicals contained in the products;
- Individual intolerance to individual components.
Indications for the procedure
In some cases, the choice between classic and hardware pedicure is a matter of health. Processing with cutters and attachments is necessary when:
- hangnails - removing them with forceps will be difficult and traumatic;
- thin cuticles - ordinary tools damage it, causing pain for several weeks after a pedicure, and the device carefully removes it;
- uneven surface of the nail - polishing with attachments smooths out the bumpy surface, makes the thick nail plate thinner;
- diabetes mellitus – only a device can quickly improve the legs of people suffering from diabetes;
- damaged nails - special attachments correct any imperfections;
- ingrown nails - cutters not only treat ingrown nails, but are also considered its main prevention;
- cracks, corns, calluses - dealing with them manually is more difficult and takes longer.
Home foot care
Whether you get a pedicure at home or in a salon, your feet need some maintenance care in between. This not only prolongs the durability of the pedicure, but also improves the condition of the feet, health and vitality in general, since we spend a third of our lives on our feet.
Home care consists of the following stages:
- Cleansing
- Hydration
- Nutrition
- Protection
- Massage
Cleansing is not only daily hygiene procedures, but also the use of large scrubs to remove dead skin. Peeling is recommended once a week followed by application of cream.
After contact with water, and every evening before bed, apply a nourishing, moisturizing or protective cream to your feet, depending on the condition of the skin and the season.
Once a week, make nourishing foot masks at night under plastic or silicone socks. Masks can be found in the lines of almost all foot cosmetics manufacturers.
Creams containing paraffin have a protective effect on the skin. You can also do cold or hot paraffin therapy once every 10-12 days. The resulting thin film retains moisture and protects the skin from the effects of negative environmental factors, which is especially important in summer.
Once a day, massage for 10-15 minutes using either a light moisturizer or oil if you do not plan to go outside. It relaxes, tones vital acupuncture points and uplifts your mood. In addition, massage helps cosmetic products to be absorbed.
Tidy up your nails
Step-by-step pedicure instructions indicate mandatory nail treatment. Carefully give the plates the same shape and length. To do this, use a file, tweezers or scissors. Toenails are always coarser and thicker than those on the upper limbs. This is why they require polishing. Using a hard buff, file off the top layer of your nails. After this, sand the plates with a fine-grained surface.
Applying varnish or any other coating should be done only after the feet have been completely treated. Degrease the plate first. If you use gel formulations, you will need a special lamp.
Step-by-step instructions for implementation
Next, we will look at step-by-step instructions on how to do a manicure for beginners:
- Prepare your feet. Wipe off any old polish if it remains on your nails. Remove gel polish using cotton pads soaked in acetone, foil and a sanding cutter or file.
- Wash your feet or take a bath. In order for the roughened areas to soften and be easier to process, your feet should be kept in warm water for 10-15 minutes. You can add salt, oil or other additives to the bath.
- Apply preparations that soften rough skin to corns and calluses. Leave for the recommended time indicated in the instructions. This will soften the stratum corneum and make it easier to remove.
- Wipe off any remaining product with a napkin. You can use a small towel; its fleecy structure will also capture the softened layers of skin. Rub your feet vigorously and roll up the skin particles with a towel. The towel must be washed after each use. It is unhygienic to reuse it during your next pedicure without washing it.
- Treat your feet with a large milling cutter with a high level of abrasiveness - it will remove rough skin and deal with calluses and corns.
- Use a medium abrasive cutter and then a fine abrasive cutter to polish and polish the feet, making them smooth.
- Use a small fine milling cutter to process the side rollers of the fingers and the areas between the fingers. For these areas it is important to use a fine-grained nozzle; too hard one can damage the delicate skin.
- Remove the cuticle using a diamond bit with a ball at the end or a needle-shaped cutter. If you are treating your feet with a machine for the first time and are afraid of damaging the cuticle, do an unedged pedicure. Soften the cuticle with a special product and move it back. Remove with the machine when you get used to using it.
- File off the overgrown edge of the nail or trim it and shape it with a cutter with medium abrasiveness.
- Polish the nail. To do this, you will need a special felt nozzle or a rubber cutter. If there are no such attachments, use a regular buff, that is, a soft file.
- Wipe your feet with a disinfectant to prevent infection. Apply moisturizer.
Note! If you have ingrown nails or overgrown nail plates or warts, it is better to go to the salon. It is difficult for beginners to get rid of these problems at home, especially when using the device for the first time.
For a detailed video on how to do a hardware pedicure at home, watch here: