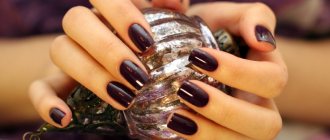
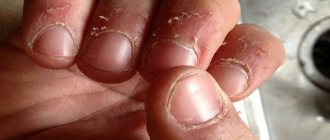
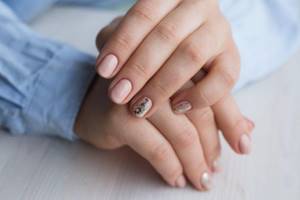
Any decorative coating can break and chip over time, especially if there is a mechanical load on the free edge. But it is not always possible to visit a nail service specialist to repair a manicure, which is why many girls resort to home extensions.
A mandatory element used for a procedure is a form. It is on this that the gel base is fixed, but consumables are not always at hand, which is why girls are looking for something to replace forms for nail extensions at home, sometimes losing the quality of the technology.
What is nail extension?
Nail extension is a procedure in which the natural nail plate is lengthened and thickened using auxiliary materials: acrylic, tips or gel.
Read also: Calculation of curvilinear integrals
The essence of extensions is simple: to increase the length of the natural nail and give it additional thickening.
To do this, a layer of material is applied over the nail plate, which is then polymerized under ultraviolet rays (if it is a gel) or in air (if it is extended with acrylic).
This is a real salvation for those with thin and brittle nails or those who suffer from the habit of biting them. Extended nails are durable and in appearance are no different from natural ones.
Online Manicure Courses from 2,000 rubles Manicure Courses in Moscow Manicurist Courses in St. Petersburg Nail Extension Courses in Moscow Pedicure and Manicure Courses in St. Petersburg
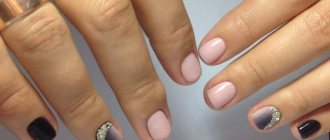
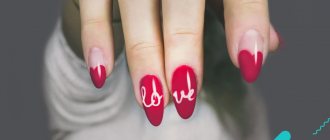
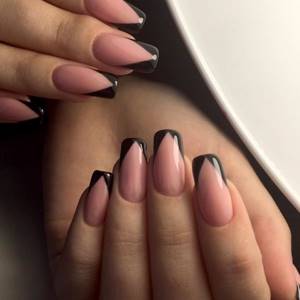
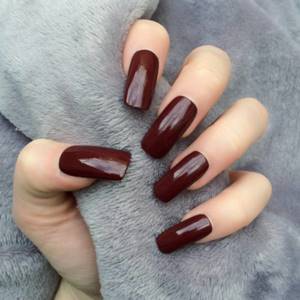
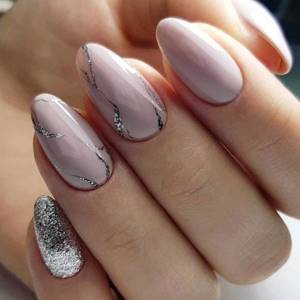
What can our nails look like?
Each person's nail plate is unique. Therefore, when designing it for each woman, an individual approach is required. It happens that you really like some fashion trend, but it may not suit you at all.
The main forms of nails are:
- Square shape. These nails will look great on long and thin fingers. It suits many women because it looks very neat. In order to change the shape of the plate in this way, a lot of work is not needed.
- Rectangular. This type of manicure is suitable for nails of different lengths. Looks great in everyday use, but not everyone will like the presence of sharp tips.
- Round. If a girl has large hands, this nail shape will suit her perfectly. A big plus here will be the preservation of the strength of the nail plate and its greater resistance to chipping. If you have weakened nails, short length and round shape are the ideal choice. In addition, this option is indispensable when caring for a child on maternity leave, when long nails become a hindrance. If you get tired of the “circle”, you can always grow your nails again and change their shape to any other.
- Oval. This is a universal type of manicure. It suits almost everyone. This explains its high popularity. Nails, just like with the previous design, remain strong. An oval can have straight sides, square or classically rounded sides.
How to glue tips correctly

When starting to figure out how to stick tips on their nails, many girls forget that they should first prepare everything they need, otherwise force majeure will definitely not be avoided. And it wouldn’t hurt to perform a standard hygienic manicure on time in order to not only give your hands a beautiful look, but also provide the necessary care, hydration and nutrition.
Equipment and materials
- Tips of the required size, shape and color.
- A special adhesive substance that has the same base as the extension gel.
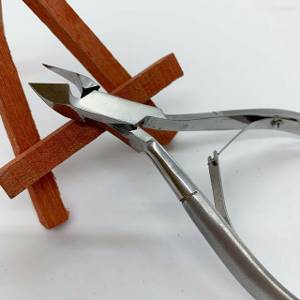
- A tool for cutting linings, called a tip cutter among specialists.
- Gel or acrylic for extensions, as well as special brushes for this.
- LED or UV lamp for drying the material.
- Primer and bonder.
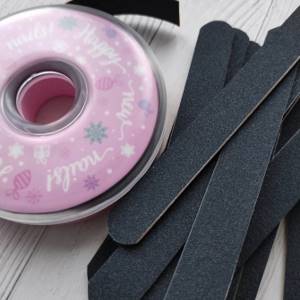
- Abrasive files of different degrees of hardness and grain size.
- Buffs for polishing.
- Brushes for shaping extension material.
- Brush for sweeping away sawdust or dust.
- Liquid for removing the dispersion layer from gel polish if necessary.
- Pigmented shellac of the chosen shade, a base for it and a top coat for fixing.
- Forms (top or bottom).
- Sequins, bouillons, rhinestones, yuca flakes and other decor for aquarium design.
Upper forms
When starting work, be sure to take care to disinfect all the tools. This will help you not to worry about inflammation or irritation, even if you use it alone.
- Buff over the natural nail, lightly removing the gloss.
- Gently apply primer over the entire surface of the nail and wait until it dries completely in the open air. Try not to get the substance on the cuticle or side ridges, it is quite caustic and can cause a slight chemical burn.
- Cover the nail with bonder and dry under a lamp.
- Select tips that best suit the shape and curve of each finger.
- Lubricate the inside of the tip with a special gel-based glue.
- Gently and carefully glue the overlay to the free edge of the nail so that the edges overlap the contact area.
- Using a file, adjust the shape of the nails and the junction of the natural nail with the extended one.
- Take a suitable form and place a layer of acrylic or gel in it.
- Apply the form to the nail using a special method, starting from the free edge to the cuticle, and making sure it is correctly oriented in different directions. This way, air bubbles do not form in the gel, which could turn into detachments in the future.
- Without removing the form, and for safety, holding it with a special clothespin, place the nail in the lamp and wait until the gel polymerizes.
- Gently squeezing and unclenching the form, remove it from the nail.
- Remove the dispersion layer with a special liquid.
- Apply a layer of transparent modeling gel and dry it under the lamp.
All that remains is to cut out the nail correctly to give it the correct shape and remove any hangnails or irregularities, smooth out the edges or corners. It also doesn’t hurt to pay close attention to the shape of the apex of the nail, which is determined by the upper shape. Towards the free edge, the material on the tip should be reduced to zero.
Easy extension
To avoid purchasing special upper forms, you can use the following method.
- Repeat all the steps described in the previous subsection, up to sanding the junction of your own nail and tips.
- Load your brush with gel and acrylic and lay it out exactly as you would on the lower form. A detailed article on how to properly extend gel nails is already on our website.
- Turn the nails over so that the material forms the correct apex. Care should be taken to ensure that the thickest layer of gel is located just above the stress zone, that is, at the junction of the overlay and the natural nail.
- Dry the extended nail in the lamp until the composition is completely polymerized, then remove the sticky layer.
- Go over the surface with a buff, and if necessary, with files, to remove the gloss and give it a perfect shape.
- Apply the base for the gel polish, the pigmented coating itself and the selected decor.
- Apply a layer of topcoat and dry again in a lamp.
At this point, all work on simple extensions is completed, all that remains is to find out the answer to the simple question of how long the tips last on the nails. Everything here is individual and depends on many factors, for example, on what a person does, and on the quality of the materials used too. Most often, the first correction is required no earlier than a week or two later, and you can not remove the overlays for up to 4-6 weeks, until your nails finally grow back. Tips on glue perfectly tolerate sea water, ultraviolet radiation, temperature changes, as well as heavy loads, so they last a long time without peeling or other troubles.
What are the features of each form?
When talking about how to correct the shape of your nails, you need to remember some important rules:
- You can file your nails ONLY when they are completely dry. If the nail plate is wet, it will certainly be injured;
- It is important to imagine very well what kind of shape you want to achieve and keep this image in your head;
- When doing a manicure, make sure that the work surface is very well lit. A magnifying glass can be an excellent helper for you;
- The length should be aligned with the shortest length of the nail.
Types of nail extensions
According to the method of execution, nail extensions can be of two types - using tips or using special forms.
To extend nails, you need to use a degreaser, primer and gel
These methods differ from each other:
- When applying nail extensions, tips are used - an artificial base that is applied to the nail.
- When extension forms are used, the artificial base is created independently. For this, gel or acrylic can be used.
The stages and features of the extension will differ depending on the chosen method. But both of them can be performed independently.
Review of tools for pressing arched nails
A couple of years ago there wasn’t such a wide selection of tools for pressing arched nails. When they first started making arches, nail industry masters adapted improvised means for these purposes, from their nails to construction clamps and homemade wooden sticks. What the masters couldn’t come up with to achieve the perfect arch! But time passes, everything changes, and a large number of tools for clamping the arch appear on the nail industry market. I would like to conduct a short review of the tools that I have worked with during my career.
1. Glands and tubes
remain my most faithful assistants to this day. Now every master can easily tell you about these simple devices, but back then it was a novelty. Craftsmen on the forums shared their experiences on what is best to use tin; the most common were tubes of paint, baby cream and mustard. Nowadays you can buy tin without any problems. Modern forms sometimes make it possible to do without hardware; in this regard, judging by the reviews, transparent plastic forms are very good. Unfortunately, I have not yet been able to verify this from my own experience, since at one time I purchased a large supply of molds. For a long time it was impossible to purchase straws in our city, but I still managed to do it.
I think there is no need to go into detail about how the glands and tubes are used to press the arch, especially since many basic courses teach this.
2. Clips in the form of clothespins.
I purchased my clothespins in a store from Natalya Stepanova through an intermediary in our city. Small, very tight, comfortable, they squeeze the arch perfectly when doing acrylic modeling; I also use them when strengthening with gel. When using clothespins, the most important thing is to clamp them correctly so that the client does not get hurt.
Just for fun, I purchased 1 piece of a larger iron clothespin from an online store and a plastic clothespin from the same Natalya Stepanova. I didn't have a good relationship with these clothespins. The iron clothespin broke into two parts after several uses, and was not of good quality. And I had a small incident with a plastic clothespin. I clamped the acrylic with it a little ahead of time, as a result of which it dug into the material and had to be pulled out with great effort. I no longer experiment with clothespins and successfully use my first clothespins both for gel strengthening and for modeling.
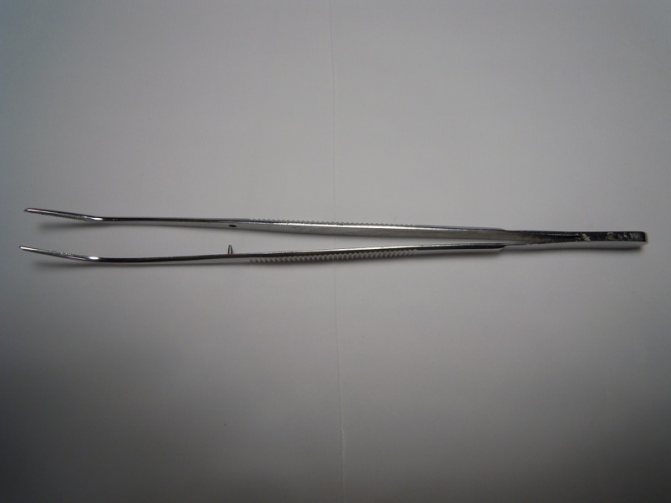
3. Tweezers.
It was purchased from a representative of the Victory company in our city. To pinch straight parallels with these tweezers, you have to try very hard. Too “soft” to press, as a result of which the side parallels could turn out to be waves. To pinch in the mustache area, you had to apply force, but at the same time manage not to pinch.
4. Reverse tweezers.
I don’t remember under what circumstances I got him, but I worked with him for quite a long time. In principle, I was happy with everything about it, the only thing is that my tweezers have a slight tilt to the left, which needs to be taken into account when clamping.

5. And finally, a hard clamp
from Nayada Nails Studio. Now it is my favorite. Not only does it have a stylish design, but it is also made of stainless steel, which is easy to clean and disinfect. Long jaws (4cm) allow you to clamp the material efficiently and accurately, which gives the artificial nail a beautifully modeled shape. It will work clearly even in cases where you did not have time to press the material in time. And even if its price is quite high, but with it I achieve the result I need.
From the review it is clear that the choice of tool for compressing the arch plays an important role. No nail modeling can do without them. With their help we create beautiful and durable nails.
Share what tools do you use to press arched nails?
The main content of the post is posted here
Self-adhesive foil for casting: how to use?
Nail casting is one of the ways to create luxurious nail designs without painting.
The step-by-step process looks like this:
- Prepare your nails with a hygienic manicure;
- Give the nail plate the desired shape;
- Apply a base coat to your nails and dry it;
- Apply two layers of colored gel polish, making sure to dry each of them in an ultraviolet lamp.
- Remove the sticky layer.
- Apply a strip of foil to the nail and cover with a top coat.
- Finally, remove the dispersed layer.
A spectacular, shining design is ready! Its creation will not take much of your time, but it will give a lasting effect.
Read also: Online lesson angle. degree measure of angle
Gel extensions: tools and materials
Let's look at it in detail.
List of basic tools
Ultraviolet lamp.
Almost no nail extension is possible without a special ultraviolet lamp. This is one of the most important devices, thanks to which the thick gel polymerizes and acquires solid properties and dries.
An LED, hybrid or ultraviolet lamp can be used to dry the gel on the nails. The choice depends on what structure the gel polish has. Lamps with a power of 36 W or more are considered the best.
@beauty_onnails
Tools for removing cuticles.
Such tools can be found in almost every home cosmetic bag: standard manicure sets most often include tweezers, nippers, a file and scissors. Additionally, you will have to buy orange sticks or a pusher spatula. These tools help push back the cuticle, lift it, and trim it. The main condition is that the tools are clean, sharp and undamaged.
@line_beauty_161
Antiseptic.
When removing cuticles or cutting off excess skin, as well as to disinfect instruments, you need to have the simplest antiseptic on hand. It is used to treat hands, nail plates, as well as the tools necessary for extensions.
Files.
Files are necessary to give shape to extended nails. Files are classified according to their hardness. The stronger the abrasiveness of the file, the more it affects the nail, and the more it removes the unnecessary layer. The abrasiveness of the files is selected depending on the condition of the nails.
Also, special files are needed for different areas of the nail plate:
- Oval – to correct the edge of the nail shape;
- In the form of a boomerang - for treating nails near the cuticle;
- Rectangular - rub the upper part to remove the excess layer of gel or the resulting tubercles.
@filinova_nail
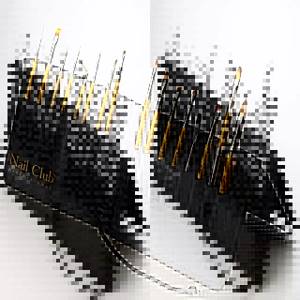
Brushes.
Brushes are used to apply designs, base coats, designs and decorate nails. When choosing them, pay attention that the pile is natural and hard, otherwise the coating will be uneven.
There should be several brushes, with straight edges, bevels, and tapered tails.
@nailclub_official
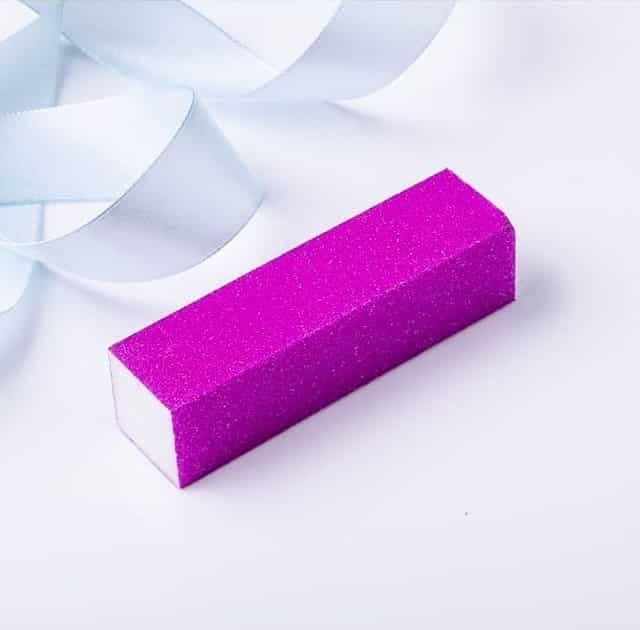
Buffs.
Buffs (or buffs) resemble four-sided rectangular files with foam rubber in the middle, only their coating is finer than that of ordinary files. They are used for top grouting of nails, to remove excess particles from the edge of the nail.
Each side has a different level of hardness, and use it from the hardest side to the least abrasive to polish the nail.
@nails_di_shop
List of basic materials
So, when thinking about what is needed for short nail extensions, you should know that in this case you will not need too many materials. A larger assortment is useful for extensions to fiberglass and top forms. But more on that later.
First of all, you will need the gel itself. It is a viscous thick substance with which the shape of the future extended nail is modeled on the treated nail plate, and then the composition is dried under an ultraviolet lamp.
Gel polishes for extensions can be one-, two- and three-phase. Single-phase gel polishes are recommended for home use. This way, a manicure on gel nails will be easier to do, and it will take a minimal amount of material.
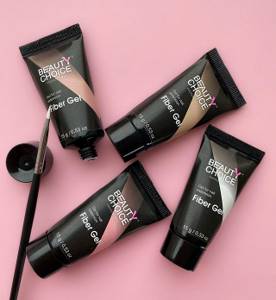
@beautychoice_prof
Single-phase gel is a base, modeling agent and top in one bottle. Therefore, you do not have to select different products for each stage.
The primer is used to make the nails adhere more firmly to the gel, and also helps prevent the formation of uneven spots and air bubbles. Primers are:
- Acidic (bond);
- Acid-free (ultrabond).
Top (matte or glossy) is, as a rule, a finishing coat that helps strengthen nails and consolidate the previous coating (pattern, colored gel polish).
Since some of the above materials have a sticky layer, you may need a cleaner (degreaser) to remove the stickiness. At home, you can replace the cleanser with lint-free wipes soaked in medical alcohol.
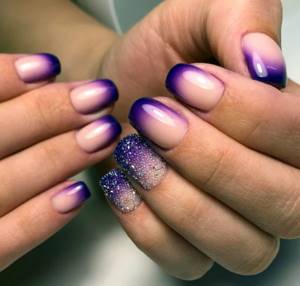
Additionally, decorative elements are used:
- Rubbing;
- Sequins;
- Rhinestones;
- Foil;
- Broths;
- Kamifubuki, etc.
As a result of using all these materials and tools for nail extensions, you will get a beautiful manicure at home, which you can show off to your girlfriends.
@nogti__idei
How to extend nails with acrylic on top forms?
Acrylic has several advantages over gel.
Firstly, you don’t need a special lamp to polymerize acrylic: it hardens in air.
Secondly, it is much stronger than gel. The disadvantage is an unpleasant pungent odor.
Acrylic extensions can also be done on lower forms or tips, similar to gel extensions. But, since these methods have already been described above, let’s consider extensions using upper forms.
What is it: the top forms are very similar in appearance to tips. The only difference is that they do not have a recess for gluing at the tip, and they have small “antennae” on the sides.
The technology is as follows: a small amount of material is placed inside the mold and leveled with a brush. This design is then applied to the nail.
After the acrylic hardens, the mold is removed and can be reused. The result is an extended nail with a perfectly smooth surface. This technique is quite simple, and even a beginner can handle it.
What is required for nail extensions on the upper forms?
- Acrylic Powder;
- Monomer (liquid) is a special liquid that starts the hardening process at the moment of mixing with acrylic powder;
- Primer;
- Brush;
- Set of top forms for extensions.
To apply nail extensions on top forms you will need: acrylic powder, monomer, primer, brush, a set of top forms for extensions.
Gel or acrylic?
To begin with, you should always decide what material you will work with. There are two methods: acrylic and gel. Let's look at each of them in more detail:
Acrylic is a composition obtained by mixing powder and monomer, and only in this case does it begin to harden. The trouble with acrylic is that it is quite difficult to work with, and it also has a specific smell.
Gel - gel has a more viscous, liquid consistency and does not need to be mixed with any other additional materials. The gel can only dry and harden under ultraviolet rays.
Advantages of home extensions
Working with tips, forms and gel at home has many advantages compared to turning to professionals. Firstly, it is convenient - there is no need to make an appointment and adjust the schedule. In the event of an unforeseen situation, it will be extremely difficult to explain to the master a valid reason.
Secondly, you purchase tools and materials yourself - your choice may fall on expensive types when craftsmen try to save money.
Thirdly, personal instruments provide a guarantee of preventing fungal infection - unscrupulous or negligent craftsmen do not properly disinfect instruments before each client.
Fourthly, and this is the main argument, the financial benefit - the purchase of tools and material covers the costs of repeated contact with the master. In addition, if a defect occurs, you can make a correction at any convenient time.
The following positive points are highlighted in favor of the gel:
- the material hardens quickly under ultraviolet light, so the extension itself does not take much time;
- the material is non-toxic and does not cause an allergic reaction;
- nails are treated with gel on top without damaging the nail plate;
- formed nails look natural.
The only disadvantages of forming nails with gel include possible breakage of the nail plate - with a direct blow, the nail breaks. Your own nails are also constantly subject to breakage, but their restoration often takes several months, but a gel nail can be restored immediately.
How to care for extended nails?
There are several tips that will help you maintain beautiful long nails for a long time:
- Make adjustments at least once a month.
- Protect your nails from direct impacts, use fasteners, pins, buttons, etc. carefully.
- Forget about metal files, only fine abrasive tools!
- Before a manicure, always use a special base for polish.
- It is advisable to remove overgrown cuticles with oil or other mild means. Use varnishes and nail polish removers that do not contain acetone.
- Wear rubber gloves while cleaning to protect your nails.
- Be careful with hot air and hot water - these are the enemies of extended nails.
Follow these simple rules - and your nails will never cease to delight you with their beauty.