Regular polish is currently losing its popularity due to the emergence of so-called gel polish. Every day it becomes more and more difficult for him to compete with him. Of course, there are reasons for this. In this article, we will take a detailed look at the main advantages and disadvantages of regular nail polish, tell you how to properly perform a manicure with a simple polish, and also show you some amazing nail design ideas that can be done using the most common polish.
Advantages and disadvantages of regular nail polish
As we said earlier, regular nail polish is fading into the background. It is increasingly being pushed aside by gel polish.
Gel polish is a special nail coating consisting of a mixture of regular polish and gel. Thus, it has the strength of a gel and the shine and beauty of a varnish.
However, not everyone is ready to completely abandon manicures with regular polish. Here are some of the main advantages of regular varnish:
- Coating time. The application time for regular polish is several times shorter than for gel polish. Gel polish must be dried in a special lamp for at least 30 seconds, but this does not need to be done with regular polish.
- Freedom of choice. Here it lies in the fact that you are completely unattached to any particular style. A manicure with regular polish can be changed at least every day, unlike gel polish, the wear time of which is at least two weeks.
- Less damage to the nail plate. When manicure with regular varnish, as a rule, the surface of the nail is less damaged. Gel polish (especially the base coat) penetrates very deeply and literally connects to the nail plate. As a result, it becomes thinner.
But of course, we must not forget about the disadvantages of conventional varnish. For some they will seem insignificant, but for others significant:
- Short wearing time of the coating. Of course, a manicure with regular polish lasts much less than a gel polish coating. However, there is one trick due to which the coating with regular varnish will last much longer: On the first day after applying the coating, try to exclude contact with water or reduce it to a minimum.
- Strong smell. Of course, this does not apply to all varnishes, but many of them contain components that emit this pungent odor.
Whether you use gel polish or regular nail polish is up to you.
How to paint your nails - step by step instructions
I offer you the most complete guide to home manicure, after studying which you can easily repeat everything yourself. So, let's go!
- Varnish selection.
- Choosing a place for a manicure.
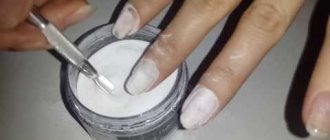
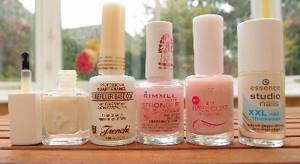
- Preparation of materials and accessories.
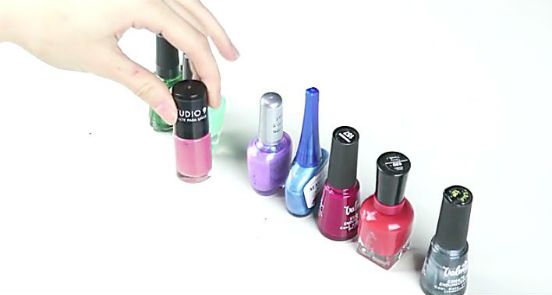
Listen to your mood or choose the color of nail polish based on your clothes. You shouldn't use old polishes, they are too thick and it will be very difficult for you to get a neat manicure. Also, expired varnishes can be far from healthy.
If you still want to try to restore, add 2 drops of acetone liquid or a special diluent to them, close the lid tightly and shake to mix the two components.

To start, find a well-lit room in your home, choose a stable surface, a table is best, a study table or a dining table are good options. To avoid staining your furniture, place an unnecessary towel under your arm. Varnish vapors can have a negative effect on the human body, so it is advisable to open the window.
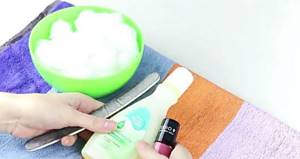
Now you need to collect all the manicure accessories at your workplace so that you don’t have to look for them throughout the apartment. Among them should be:
- nail polish remover;
- pusher or orange sticks;
- one or more colored varnishes;
- tweezers and nail file;
- cotton pads (balls) and sticks;
- clear nail polish.
Now you can get to work.
- Removing old coating from nails.
- Shaping nails.
- Pushing back the cuticle.
- Varnish preparation.
- Hand placement.
- Applying the base.
- The right set of varnish.
- Drop in the hole.
- Three stripe rule.
- Reapplying varnish.
- Consolidation of the result.
- Cleaning up after errors.
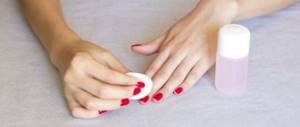
Soak a cotton pad in acetone liquid and press it onto your nail for 5-10 seconds. This will allow the coating to be removed faster. Once the time is up, run a cotton pad along the nail to remove the old polish. Do the same with each nail plate.
Instead of nail polish remover, you can use ready-made wipes, many of which contain moisturizing oils. Then you should wash your hands. Even if you didn’t have any old coating on your nails, still do this procedure or use a special degreaser.
This will remove excess oil from the nail plates, make them grease-free and matte, which will promote better adhesion of the varnish to the nail, and as a result, the manicure will be more durable.
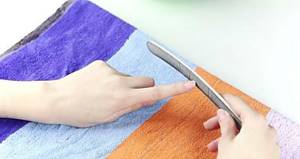
Take a file, preferably glass rather than metal, and start filing your nails in one direction.
Do not move it back and forth, otherwise you will harm your nail plates, they will become brittle and peeling. Nails are not wood, file them strictly from the edge to the center on both sides in turn. Using a nail file, give them the desired shape, it can be round, square, almond-shaped, etc. Read this article for details.
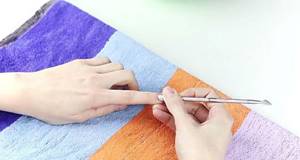
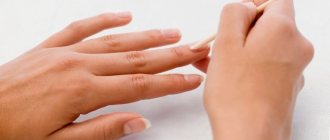
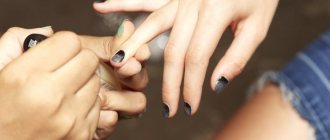
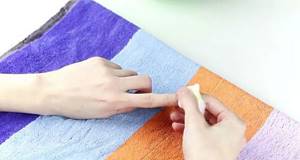
The skin at the bottom of each nail is called the cuticle. They need to be pushed away with a pusher or an orange stick so that the manicure looks neat and clean. The easiest way to do this is if the nail plates are steamed.
To do this, place your fingers in a bowl of warm water for 1-2 minutes, or longer. Now dry your hands thoroughly with a towel. Take an orange stick or similar and push the soft skin (cuticle) back towards the edge of the nail.
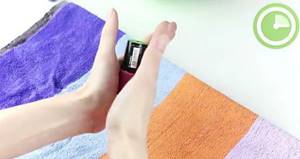
Roll the bottle with varnish between your palms for 25-30 seconds, this will help warm its contents. This way all the pigment will be distributed evenly. But don't shake it like you usually do, otherwise there will be bubbles in the polish that won't allow your nails to be perfectly smooth.
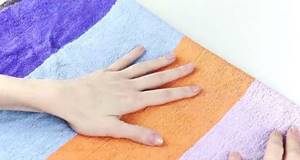
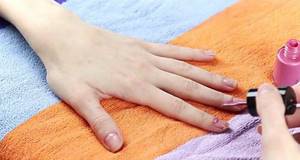
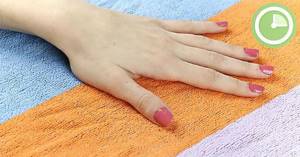
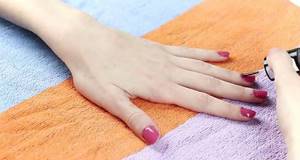
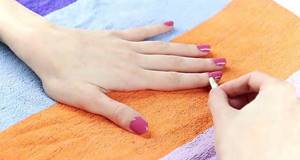
To prevent the varnish from smearing, you should press your hand tightly to the table, while placing your fingers apart from each other. Always start painting with your index finger, moving towards your little finger, and finish with your thumb. To conveniently apply varnish to the largest nail, you need to press this finger to the edge of the table.
It doesn’t matter which hand you start painting your nails with, but it’s better to use your dominant one, and then the other. To make your manicure look equally even on both hands, only constant practice will help you.
Before you paint your nails with your chosen polish, you need to apply a base coat. This can be a clear polish, a special nail base or a strengthening serum. You can choose one or combine two at once. This will ensure better adhesion of the polish, color retention and protection of the nail plates.
Here you don’t have to worry about painting, because no one will see the transparent base, even if you accidentally go beyond the edge of the nail. After you have covered your nail plates with clear varnish, let it dry thoroughly, otherwise the colored varnish will form streaks.
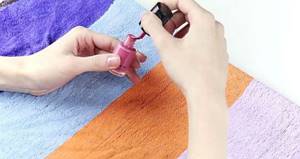
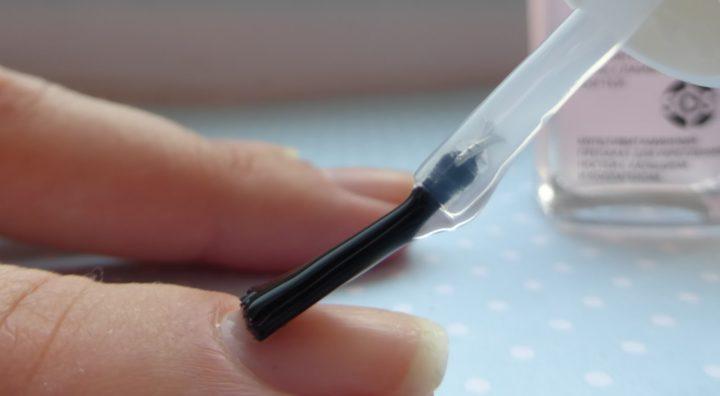
Open a bottle of colored polish and wipe off any excess from the brush. To do this, wipe it a little on the inner edge of the bottle. This trick will allow your polish not to go beyond the nail itself and will make your manicure neat.
Take a look at the brush; it is most convenient to apply the varnish with flat bristles. Although now more and more varnishes are created with comfortable brushes, but before they were mostly round. To learn how to pick up the right amount of polish, you will also need practice.
This method is used by professional nail technicians, so it may take you some time to master. But in the end you will get an excellent result - neat and well-groomed nails.
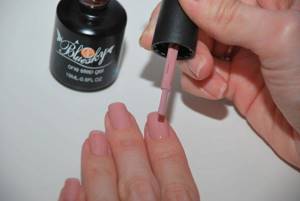
To do this, you need to place the brush just above the cuticle, at the bottom in the middle of the nail plate. Then simply let a drop of colored polish fall onto the area. It should be the appropriate size to cover the entire nail.
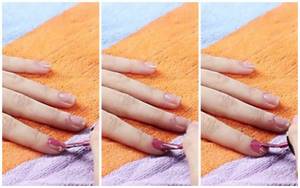
Experienced manicurists claim that this is one of the easiest and best ways to apply nail polish. To do this, place the brush on a drop of varnish and stretch it along the nail strictly in the center, moving from the hole to the tip. Put the brush back and make exactly the same line on the left side of the nail plate, and then move on to the right.
Remember that you should have enough polish in the socket to cover the entire nail without having to dip the brush into the bottle again. If there is too much of it, the layer will be too thick, and it, in turn, will take a long time to dry. You will have to wait, otherwise you may smear the polish on your nail.
Nail technicians advise brushing along the sides, leaving a small distance between the nail and the skin. This gap will be practically unnoticeable, but this way you will avoid getting the varnish on your finger, which will not look very neat. But don't worry, everything can be fixed.
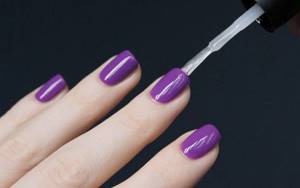
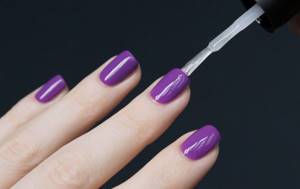
Getting the perfect manicure almost always requires multiple applications of polish. Usually it is two layers, but sometimes there are three. So you have to learn how to make them thin. Thick layers can simply smudge if you don't dry your nails completely.
Therefore, once you have applied the colored varnish for the first time, let it dry for 3-10 minutes, depending on the varnish coating. Then reapply the varnish in the same way. Take your time, be patient, because your goal is a beautiful manicure. Let dry thoroughly.
As you can see, painting your nails is not a quick procedure, so set aside at least 30 minutes of your time. To avoid boredom, turn on the TV or your favorite music. This will allow you to have a pleasant time.
Apply a layer of clear polish over your finished manicure, thoroughly covering each nail. Here you don't have to follow the three-lane rule. At the end, it is advisable to secure the tips of the nail plates by brushing along their upper edge.
This must be done after the color coating has completely dried. This can be regular varnish or top coat. This will give your nails a glossy shine and protect them from premature cracking and peeling.
We are all human and can make mistakes. If you accidentally go beyond the edge of your nail, it can be corrected. But this should be done only after the last layer has completely dried. Take a cotton swab and dip it in the acetone liquid, now carefully go around each nail, removing any excess color.
But don’t rush, otherwise you’ll get stuck right into the painted nail, and you’ll have to do the whole procedure again, the only good thing is that it’s only with one nail. Although in terms of time it takes almost as long, because the varnish coating must have time to dry.
Technique for performing manicure with regular varnish
A manicure with regular polish is practically no different from a manicure with gel polish and is performed in several basic steps:
Step 1. Preparing your nails
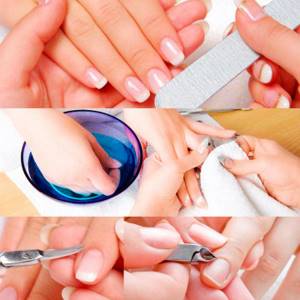
At this stage, it is necessary to remove the old coating, process the cuticle, sand and polish the nails.
Step 2: Applying base
This is not at all necessary, but a base coat will help hide some imperfections and make the nail surface perfectly smooth.
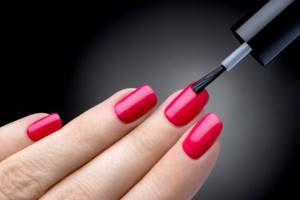
Step 3. Applying varnish
The next step is to apply the varnish itself. Regular varnish is applied from the middle of the nail, gradually moving towards the edges. Finally, the end of the nail is also sealed with varnish.
It is better to apply 2 or 3 layers of regular varnish. This way it will completely cover the nail and the coating will last much longer.
Step 4. Apply top coat
This coating will fix the result and allow you to preserve your manicure longer. However, you don’t have to apply it if you want to change your look every day or two.
Top coating
The last thing to apply to a decorative manicure is a top coat. It is also called finishing because it is applied to the nails last. It protects color from mechanical stress, makes nail art durable and gives an additional effect. It can be dazzling shine, matte, quick drying or glow in the dark. The top should not be too liquid in consistency, otherwise it will quickly drain and you won’t be able to apply it carefully on your nails. Therefore, pay special attention to this.
If you are confident in the correctness of the architecture, you don’t want to change anything, everything suits you, then you can apply the top coat thinly to the entire surface of the nail plate and hold it in the lamp until it dries completely. But you can also use the additional leveling technique, which will beautifully complete the architectural process and give the color coating depth and shine:
- Apply the first thin layer to the entire colored nail surface;
- Near the cuticle we paint with a pushing movement of half a millimeter;
- Do not dry in a lamp;
- Immediately place a drop in the hole area and flatten it left and right;
- We make a pushing movement forward, and then pull the material towards ourselves;
- We level it with light flat movements and turn it over at an angle of 45 degrees, hold it like this for 10 seconds;
- We send it to a LED lamp for complete polymerization for 30-60 seconds.
- After drying, wipe the nails with a lint-free cloth soaked in cleanser.
What is a sticky layer and means for removing it
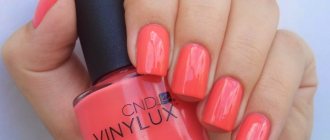
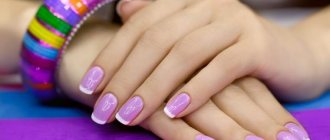
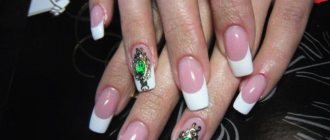
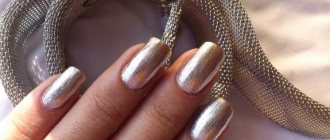
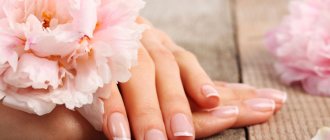
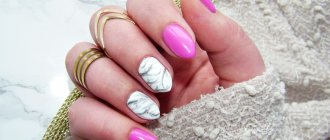
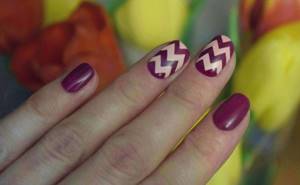
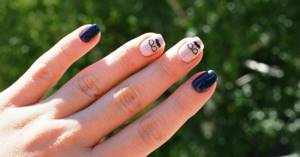
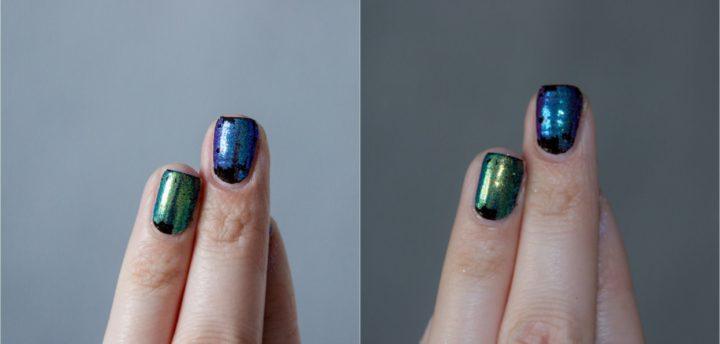
Beautiful nail design ideas with regular polish
Here are some chic ideas for a home manicure with regular polish.
What to do if varnish gets on the cuticle
It often happens that varnish gets on the cuticle and ruins the entire manicure, but don’t be upset, now we will show you how to fix such a manicure.
To do this we need a lint-free cloth, a flat brush and nail polish remover or acetone.
We wet the brush in nail polish remover and move it over the area where the nail polish needs to be removed. We wiped off the polish, wiped the brush on a napkin, soaked the brush in nail polish remover, repeated, and so on until it was clean.
Removing nail polish on the cuticle
Result of work: before the varnish flows and after
Tips to help you paint your nails perfectly
The following tips on how to paint your nails correctly and beautifully will help you achieve a flawless manicure:
- Before you start applying colored varnish, you can practice using transparent varnish. Daily coating of the plates with treatment bases will help you get used to proper brush work.
- To ensure a dense and beautiful coating, the varnish should be applied in two layers.
- If the coating is damaged during drying, you can smooth it out with a damp fingertip. It is necessary to smooth the coating carefully in a circular motion.
- It is better to apply “loose” varnish on a layer of white. Thanks to this, the coating will be more saturated.
- To ensure a perfectly even coating, the varnish should be applied to the base.
- To make a hole on the plate, you can use strips cut from regular tape.
- If you only have clear varnish left at home, you can make it colored by adding blush particles and two beads that will help the materials mix.
- PVA glue will help prevent the area around the plate from getting varnished; it should first be applied with a cotton swab to the rollers and skin at the base of the nail, without touching the plate itself. When the glue dries and the nails are already painted, the film must be removed.
- If the product does not dry for a long time, you can resort to using ice water and dipping your hands in it; the coating will dry much faster.
- To remove the polish from one nail and not ruin the manicure on other nails, take a cotton pad soaked in acetone, you can use the following life hack: you need to place the sponge in a glass jar, pour acetone into it and immerse one finger in it. Thus, the manicure on other nails will remain the same. The jar should be tightly closed.
- A thick layer of cream will help prevent streaks in the area around the plate after erasing the varnish.
- If you bring your nails painted with glossy varnish to a pan of boiling water, the coating will become matte.
The principle of action of the strengthening agent
It is used as a base for manicure or as an independent coating. Vitamins, minerals, healing oils and other components of the preparations penetrate deep into the cell structure, providing nutrition, hydration, and protection from aggressive external factors. You should buy cosmetics after consulting a dermatologist to reduce the risk of side effects.