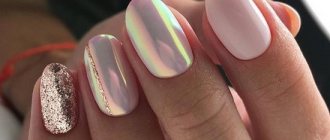
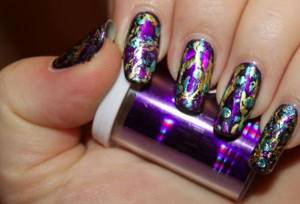
Brilliant manicure has not lost its position in nail art for several seasons in a row. Design is done in different ways - gel polishes with a mirror shine, rubbing, metal powder.
Brilliant manicure has not lost its position in nail art for several seasons in a row. Design is done in different ways - gel polishes with a mirror shine, rubbing, metal powder. One of the easiest ways to create a sparkly design is with foil. It looks like a thin metallized film of different colors and textures. Attention! Food foil is not suitable for nails.
Benefits of Foil Design
Rhinestones are rapidly losing their relevance, and they are inconvenient to wear: they can come off at any moment. The same cannot be said about foil. It holds tightly to the nail plate and allows the master to create a variety of patterns.
It also has other advantages:
- low cost;
- large selection of shades;
- ease of use;
- availability;
- durability.
Even beginners can use nail foil. The main thing is to take into account the recommendations of specialists, because each type of film should be glued differently. So, only transfer and sheet foil are suitable for casting, and for minx manicure you will have to use a hairdryer.
Advice It is advisable to use materials from the same manufacturer to ensure high-quality grip.
What is transferable and non-transferable
Types of translation:
- Holographic.
- Plain colors (mirror, matte, gold, etc.), embossed.
- Colored with patterns.
One tone, more is suitable for monochrome covering the entire plate or for casting. Embossed paper can create a variety of multi-faceted and deep effects, as there are various prints and patterns on its surface.
Non-transfer (sheet) is more dense in structure, cut to any size in parts to form different compositions. You can make any shapes or ornaments of your choice. Attached to the nail bed with regular varnish or a fixative, specialized glue. Also, when extensions are applied, it is applied to a wet gel or acrylic glue.
It is lower in price, easier to apply and suitable for inexperienced neil-art artists. Recommended for express design.
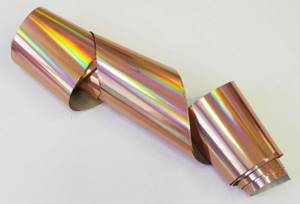
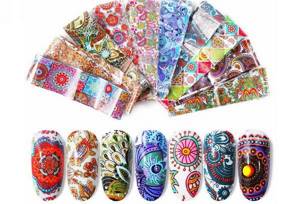
The transfer is ultra-thin. A rich range of colors with a variety of decor, patterns and foil designs on the nails.
Types of foil
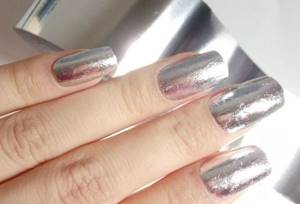
If earlier a design with foil was an expensive, salon-style design, today any girl can do a mirror manicure at home. There are many types of foil available, to suit every taste and every idea.
Transferable
For beginners, this option is the most optimal, since the choice of patterns is huge and the price is minimal. Transfer foil is produced in rolls, packaged in a miniature plastic bottle. It can be applied to both gel and regular polish.
Where can I buy:
- You will find a large selection of transfer films on the official Kodi Professional website,
- Don’t neglect the famous AliExpress.
Stickers
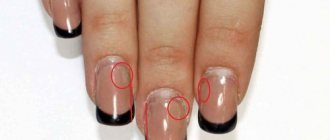
Stickers are the second best option for beginners, because this foil has a sticky back side, which makes it easy to attach it anywhere. Difficulties arise only when working with self-adhesive strips. Firstly, it is quite difficult to glue them evenly, and secondly, they tend to peel off at the edges. To properly attach the water stickers you will have to tinker a little longer.
Leafy
Sheet film does not have a sticky side and is produced in the form of small plates, for which you should purchase special glue. The sheets are cut and used to create patterns, imitate broken glass, and even for casting.
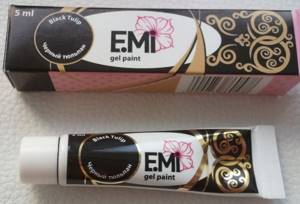
The casting looks different depending on what you are printing the foil onto. A pattern drawn with glue will look like a shiny design, and to create voluminous monograms, use gel paint (E.Mi Black Tulip paint has proven itself to be the best).
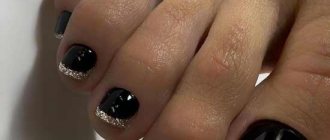
Thermofoil
Glittery manicures have gained popularity thanks to celebrities such as Lady Gaga and Rihanna, and can be achieved using minx film, better known as thermofoil. It was patented back in 2006, but appeared in Russian stores only recently. The peculiarity is that before use it should be heated with a hairdryer or lamp. Thermofoil does not cause allergies and is absolutely safe for human health; its only drawback is its fragility.
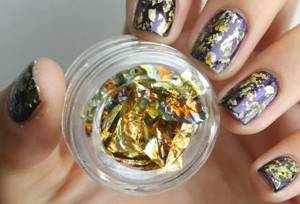
Zhataya
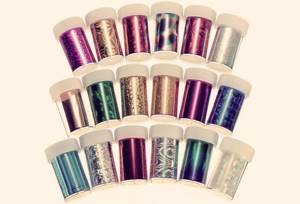
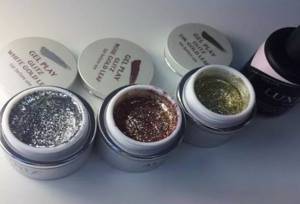
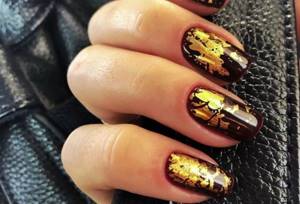
Crumpled foil is sold in small plastic jars in a compressed form; it looks like gold leaf. It looks best in combination with an aquarium design.
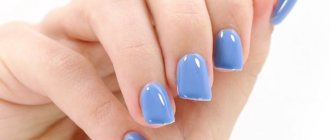
Liquid
Essentially, it is a gel polish with a lot of glitter and pigments. Such gels can be dried in any lamp and are thick and durable, so working with them is a pleasure.
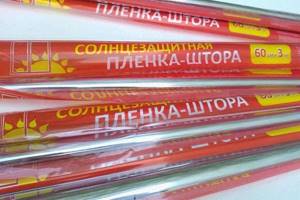
Window sticking: rules and nuances
Self-adhesive mirror film is easy to apply:
- Use a sharp utility knife or scissors to cut a piece of film. Its length should be equal to the height of the glass.
- Remove a small piece of protective paper from the film and carefully apply it with a sticky layer to the top of the glass (the glass should be perfectly clean). Smooth with a damp cloth to remove wrinkles and air bubbles.
- Continue to gradually remove the film from the protective paper and glue it onto the glass, carefully smoothing it out.
As for food foil, the easiest way to stick it is with double-sided tape. Another option is also possible: spray the glass with soapy water from a spray bottle and attach foil to it. If the width of the roll is smaller than the width of the glass, place the panels overlapping.
Please note: you need to glue the foil onto the window with the shiny (reflective) side facing the street.
Choosing glue
You can do without glue only by working with stickers and thermofoil. All other types require preliminary fixation, which is why it is so important to choose the right adhesive.
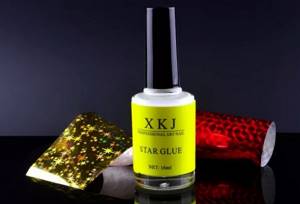
Star Glue
The glue comes in a bottle with a convenient long brush. It is easily removed from the skin, dries quickly, and is suitable for mirror manicure and attaching rhinestones. The average cost is 160 rubles.
Global Fashion
It comes with both a thin and thick brush, making it convenient to use for casting. The volume of the bottles is 10-12 ml. Drying time from 2 to 5 minutes. Approximate price 120 rubles.
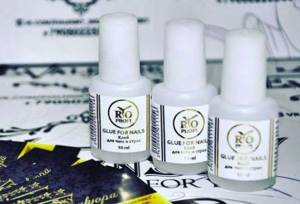
Rio Profi
The price of Rio Profi is about 200 rubles, but it is worth it, because it provides lasting results and guarantees a long-lasting effect. Thanks to its water-repellent properties and quick drying (1 minute), it is loved by many nail technicians throughout the CIS.
How to glue foil on nails
Foil is distinguished by a variety of colors and textures, so the design using it is unique and effective. Having purchased everything you need, you can start creating a design, but you will have to work with each type of foil differently. Therefore, we will consider all options.
Thermofoil
Without additional coating, this design will last a week, but only with very careful wear. The foil coated with the finishing gel will last a little longer, but the dishes will still have to be washed with gloves.
Features:
- You cannot wet your nails before using thermal film, so do a dry or hardware manicure.
- Degrease the nail plate and treat it with a primer coating (ultrabond). This product improves the adhesion of the material to the nail and helps avoid detachments, but apply it only under gel polish. If you are getting nail extensions, use an acid primer instead.
- Apply base and 2 layers of gel polish (remember to dry your nails thoroughly after each coat).
- Remove stickiness with a special napkin.
- Before attaching the film, run a soft buff over the nail on which the design will be placed (this is done for better attachment).
- Use a hair dryer to heat the thermofoil for 10 seconds. When the film becomes soft, start gluing it, moving from the cuticle to the tip. This will be easy to do, since it comes in cut form and follows the nail plate.
- Flatten the foil with an orange stick and carefully cut off any excess if there is any.
- Apply top, paying special attention to the ends.
Advice It is better to use minx film for special occasions, since it is the most short-lived of all types. The owner of a mirror manicure should avoid contact with hot water and refuse to visit the sauna or solarium.
Liquid foil
Instructions:
- Treat your nails with primer and apply base.
- Roll the bottle in your hands and only then apply the foil.
- Drying time in a UV lamp is 2 minutes; in an LED device, 60 seconds is enough.
- To make the coating brighter, add 1-2 more layers.
- Then apply the finish and seal the end.
If you wish, you can complement this manicure with stickers or painting.
Advice: Never shake a bottle of gel polish, otherwise bubbles will form in it.
Transfer foil over regular and gel polish
How to glue correctly:
- Get your nails done.
- Cover your nails with polish and wait for it to dry. Remember that the design looks brighter in dark shades.
- Apply the selected glue and let it sit for 2-3 minutes (the white color will become transparent after drying).
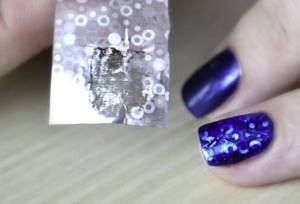
- Place the transfer foil with the matte side on your nails, smooth out any creases and press.
- Tear it off with a sharp movement. If the design is not completely printed, repeat the procedure without touching the already printed design. Otherwise, the foil will become smeared or cracked.
- Wait a few minutes and apply the sealer. Some varnishes make the foil less shiny; to avoid this, experiment on tips first.
If you want to print foil onto gel polish, proceed the same way, just don’t forget about the sequence: degreasing, base, gel polish, foil and finish. Dry each layer thoroughly. Also, if you are designing your own, hold off on applying the topcoat as the foil may wrinkle.
TipFoil adhesive has a milky white tint, but becomes transparent after drying. It is at this moment that the design can be imprinted, and if you apply it to wet glue, the design will not transfer.
Sheet foil casting
How to proceed:
- Prepare your nails and shape them.
- Apply base and selected shade of gel polish.
- Dry the gel, remove the sticky layer and sand the surface where the design will be.
- Using a thin paint brush, create the desired pattern using casting gel paint and dry it under a lamp for 2 minutes.
- Place the foil with the wrong side to the monograms and press it along all the contours.
- Quickly remove the foil and apply the finish.
- Dry it and wipe off the stickiness with a lint-free cloth.
This design will look even more impressive if you complement it with rhinestones, liquid stones or acrylic modeling.
Water stickers
How to use:
- Paint your nails with polish and dry it.
- Prepare a container with warm water and immerse the sticker in it.
- Peel the film from the base and stamp the design on your nails.
- Secure the design with a top coat.
In this way you can create lace, mirror, geometric and watercolor designs.
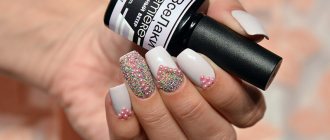
Crinkled foil
This design is applied to a wet gel with a sticky layer. Clear varnish can also be used, but in this case the foil will stick much less well.
How to glue correctly:
- Prepare your nails according to the already known pattern.
- Tear the crinkled foil into small pieces of varying sizes.
- Once the final coat of your chosen shade has been applied, dry the gel polish but do not remove the tack.
- Dot the foil randomly, creating a crackle effect, and then press it with your fingers.
- Cover the design with topcoat (prefer a thick texture, like Nail Best) and dry it.
Crinkled foil provides a beautiful abstract and distressed effect, but it can be tricky to design with because it sticks quickly and can stick in the wrong place.
Nail preparation
Before you do a gel manicure with a foil design, you need to carry out a nail preparation procedure.
Materials:
- orange stick;
- nail clippers;
- nail polish remover;
- nail file;
- cotton wool discs;
- nail brush.
When everything you need is ready, you can start processing your nails:
- Using a cotton pad soaked in liquid, we remove the old varnish manicure (if a design with gel polish was previously made, it should be removed with special means).
- Using a stick, lift the cuticle.
- Using pliers we cut off the cuticle and burrs from the side rollers.
- Using a file, we shape the free edge of the nail and lightly file the surface itself. This is necessary to remove shine from the nail.
- Use a brush to remove sawdust and excess dirt. Degrease using nail polish remover.
How to apply foil without glue?
It happens that you want to create a festive design when there is no glue at hand. It is possible to solve this problem:
- Apply the base and gel polish in the same way as in the instructions above, but once you reach the last layer, do not remove the tack.
- Press the foil onto your nail and then quickly tear it off.
- Cover your nails with top coat and dry it.
This method will allow the foil to last for about 7-10 days, but if you want to enjoy your manicure for 3-4 weeks, then use glue.
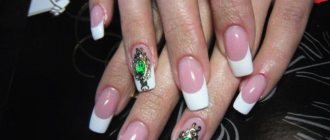
A manicure with foil looks so chic that it is even called “Hollywood” and indeed, every girl will feel like a star with such a brilliant design, which, thanks to imagination and foil, can be done without leaving home.