Not every girl has the artistic talent to create designs on her nails, and not everyone can afford regular visits to the salon.
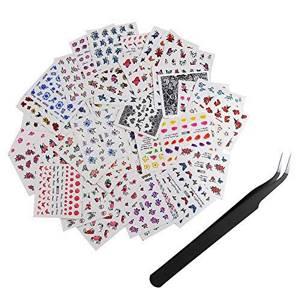
Commercially available nail stickers can easily solve this problem. They are easy to apply and simply remove, while the manicure remains neat and attractive. And a huge number of options is a great opportunity to realize the most original idea.
What types of nail stickers are there?
Self-adhesive
One of the most popular types of stickers, where the inside is covered with glue and adheres perfectly to the base, and a beautiful pattern is applied to the outside. Before gluing, you should prepare the nail plate and mark the location for placing the sticker. Then detach the decorative element from the base and apply the sticky side to the nail.
You should not test the stickiness of the inside of the sticker with your finger; in this case, it may lose its properties.
Self-adhesive with subsequent tearing off (stencils)
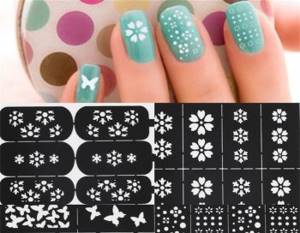
They are glued to the plate only for a short time and are used to create a shape, for example, to draw straight lines for a French jacket. They stick to a cleaned or already painted base. When creating a French manicure, the form is glued to the very edge of the plate; in other cases, it is positioned as desired. Immediately after attaching the stencil, check the edges: they should fit snugly to the nail. After the applied layer has dried, the sticker must be removed. If irregularities arise, they will have to be corrected.
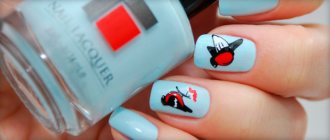
Transfer stickers (sliders)
They are also called water based because they are soaked in water before application. Apply to a treated or coated nail with a base (gel). The set with blanks is cut into the necessary parts, then they are lowered into cool liquid. Once the main part comes away from the film, carefully apply it to the nail with tweezers and wait for it to dry for about 1 minute. Move on to the next finger.
Adhesive stickers

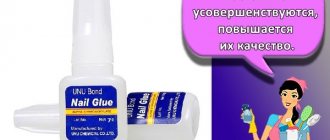
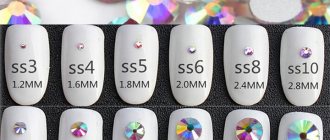
This type of decor includes rhinestones and other weighted decorative elements . Attaches to any platform. If the plate was varnished in advance, the decor may come off due to a poor-quality base. You only need to use special nail glue for design. The binder material is applied to the back of the element and then firmly applied to the nail. After a few minutes of waiting, you can start gluing the next finger.
When gluing heavy elements, it is not recommended to use superglue or materials intended for joining iron, plastic and other construction works. Otherwise, you risk damaging the nail plate.
Pros of use
Before you resort to using sliders for nails, you need to understand how to properly apply stickers to gel polish. Water slides or adhesive-based applications differ somewhat from each other in the technique of application to the nail plate. But in general, the instructions for decorating them on the surface of the nails are simple. That is why this method of decorating nails is used not only in nail salons by experienced and qualified nail technicians, but also by amateur girls at home when creating an original design with their own hands.
What are the fundamental advantages of using this element of nail design?
- Comfortable application - there is nothing easier than transferring the sticker from the substrate to the surface of the nail bed. It is clear that attentiveness and accuracy in actions will be required in order to apply the material to the nail plate correctly, but this, in general, is not particularly difficult even for beginners in this matter, not to mention highly qualified specialists in their field.
- Instant adhesion and almost instant drying - creating slides on nails is not only surprisingly easy, but also amazingly fast. After the first seconds of fixation on the nail, the wet surface of the film begins to dry out. In a minute or two, the nail will be ready for the top coat.
- Practicality - you can wear this manicure for up to three weeks, taking into account, of course, the fact that the technique of applying stickers to a manicure with gel polish was performed correctly and correctly.
- Possibility of self-use - the option with stickers is incredibly popular with girls because it can be used without the help of a manicurist. Personalized design modeling with slides at home is now as accessible as doing your own makeup, which, you see, is quite convenient. At the same time, there is no need to spend money on providing professional services of a nail technician. This leads to another advantage – cost savings.
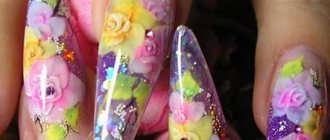
- A chic aesthetic look - achieving amazing beauty on your nails with the help of correctly selected color schemes and successful artistic illustrations on stickers will not be difficult even for beginners. Moreover, in order to get a drawing worthy of admiration, it is not at all necessary to have even the basics of artistic skill, because amazing drawings already prepared on substrates can be transferred to the nail in an instant without any little skill in using a brush with paints.
What are sliders and what are they like?
Transfer stickers for nails, or sliders, are a thin film placed on a colored or white paper base. Translated from English, the word “slide” means to slide or slide, so it’s easy to guess exactly how the finished drawing will be applied. To make the gluing process easier, the picture needs to be slightly moved from the base with a wet hand.
You will find an overview of sliders and three interesting technologies for applying them to nails in the video:
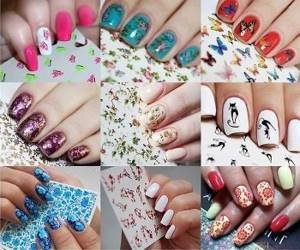
Sliders are classified depending on their size and structure:
- for the entire nail;
- individual decorative elements;
- for a transparent base;
- in the form of a dense pattern.
Preparatory stage
Any work with nails involves the implementation of a list of manipulations with the hands, which are aimed at cleansing them of dirt and keratinized areas of the skin that can interfere with the quality of the work, and are also aimed at eliminating all kinds of obstacles in the form of remnants of the old design, gel detachments, and so on. How to apply stickers on gel polish? By performing step by step step by step and being extremely attentive and careful, you can achieve a decent result without making any supernatural efforts in the process of performing manicure work.
So, what actions mark the preparatory stage?
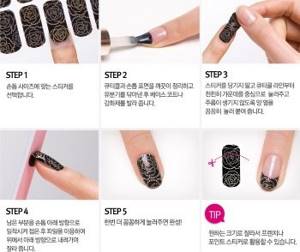
- Step 1: eliminating the remnants of the previous manicure, removing the varnish using a liquid that does not contain acetone with a strong odor.
- Step 2: taking a hand bath to soften cuticle growths and gently cleanse the nails of excess skin.
- Step 3: disinfect hands and nails with an antiseptic.
- Step 4: preliminary disinfection of working tools.
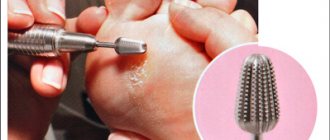
- Step 5: carrying out the cuticle removal procedure to prepare the nail for applying gel polish, and then slides.
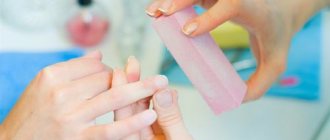
- Step 6: shaping the nails and removing the top shiny layer using a buff; if the nails are not natural, but have already been strengthened with gel, then it is necessary to adjust their thickness with a file of a more severe abrasiveness.
- Step 7: after applying a primer that ensures good adhesion of the gel polish to the surface of the natural nail (optional), you need to apply a top coat to the nails, taking into account that the background color of the sticker should not “compromise” with it.
Having finished with the preparation process, you can quickly move on to the actual design of the marigolds using slides.
How to prepare your nails for applying transfer stickers
Before gluing transfer stickers, you need to do a manicure on all fingers, and then the treatment of the nail depends on what surface you will apply the image to.
- If the transfer sticker will be glued without a base, the nail plate must be leveled using a special block, then the dust must be removed and only then pasted.
- If the decorative element will be placed on a nail coated with varnish or gel, then you need to wait until the base dries and remove all the dust with a brush.
If you decide to glue transfer stickers onto a Shellac base, then the applied layer must first dry under an ultraviolet lamp.
Why doesn't the slider design hold up?
So, you've got the manicure of your dreams, but the joy is overshadowed by slider peeling or other problems:
- The gel polish itself does not last: problems can arise at the stage of performing a manicure (wrong technology or skipping steps), or in the deplorable condition of the nails: for example, they delaminate. In the latter case, we recommend visiting a therapist, perhaps he will prescribe treatment;
- the film comes off along with the top: perhaps air has gotten under the slider;
- the slider is erased: most likely, you forgot to cover it with top;
- the manicure is “soft” to the touch and comes off in layers: the problem may be that you did not dry one of the layers well enough, or you applied the coating in a very thick layer;
- manicure chips or comes off: perhaps you work with aggressive liquids without gloves or constantly keep your hands in water.
Also, the reason for a short-lived manicure may lie in low-quality coatings or even fakes. Be sure to purchase all materials only from trusted stores that sell exclusively certified products!
We hope our review was useful to you, and you can easily decorate your manicure with the most beautiful slider! Well, if you want to become a real professional and learn all the intricacies of nail design, master a new profession and earn money, then we are waiting for you at the courses at the ParisNail manicure and pedicure school!
How to correctly translate stickers: step-by-step instructions
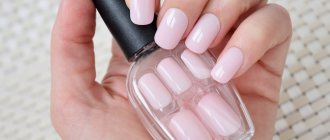
- The first thing to do is degrease the plate and treat it with an antiseptic . Then apply varnish, gel or acrylic as a base. It is recommended to choose lighter tones of varnish to make the design on the sticker look brighter.
- Dip the slider in water for 15 seconds and use tweezers to carefully remove it, blot it with a paper napkin and separate the adhesive layer from the backing. We apply the decorative part to the nail . It should retreat from the cuticle and side ridges by 1.5 mm for better fixation.
Before applying the slider, the nail can be moistened with water to make it easier to get rid of air bubbles under the sticker.
- The final stage is to cover the nail with a finishing layer . If it is varnish, then in 2 layers. When applying the gel on top of the sticker, use a UV lamp to ensure complete drying. And when using acrylic, the material does not smear over the nail, but is applied using slapping movements.
Watch how a professional glues sliders:
How to choose?
When choosing a suitable nail decor, first of all, get acquainted with the application technology if you are new to this field. Making decorative designs correctly is not difficult, but some options will require a little familiarization and training.
Experienced craftsmen should focus directly on design, that is, the style and themes of a given material. It will also be useful to get acquainted with well-known manufacturers of quality products that do not peel off quickly after application.

We present to your attention several well-known brands of thermal stickers that allow you to make an original design and decorate your nails:
- Sally Hansen nail stickers give you the salon-like effect of nail care. There are options that are glued to the entire surface of the nail plate, and there are separate three-dimensional pictures. A new collection has been released - varnish stickers made with real varnish, which are very easy to stick.
- Decoupage stickers from the company Amy are popular, allowing you to create an incredibly delicate, feminine design on your nails. Lace patterns are made on a silicone base, so they do not tear or bend when attached to the nail plate.
- An excellent choice would be nail options from Faberlic, which are made in the form of translucent films with the theme of lace or other images. Fix them on a white or colored substrate. You can find out more about how to apply Faberlic stickers in the instructions.
- Accessory stickers are represented by a large collection of art. Allows you to glue a water picture without much effort. Very durable stickers, manicure lasts for a long time, is not afraid of washing dishes and cleaning around the house. They can be removed with a special tool.
- The collection of foil nail foils stickers is varied; the type called Hollywood manicure, interspersed with glitter, is especially popular. To properly stick nail foils, there are simple instructions that even a beginner can understand. You can read it on each set of products.

Original design ideas
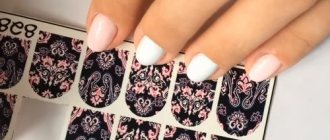
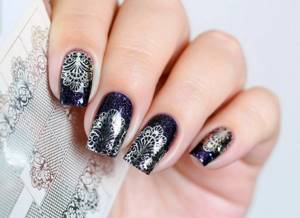
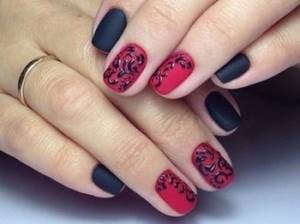
The most effective designs for sliders are lace, Egyptian-style images, and leopard print. Patterns with rhinestones also look bright.
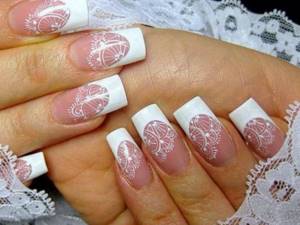
Lace on nails
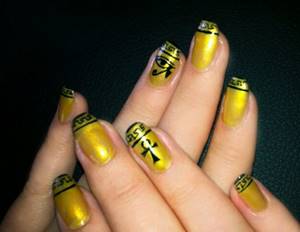
Egyptian manicure
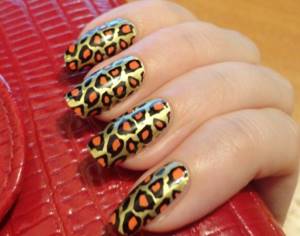
Leopard print
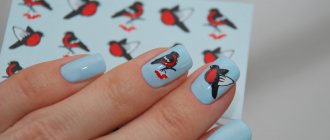
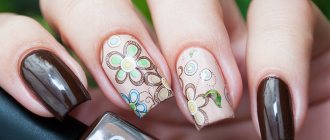
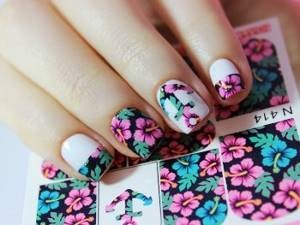
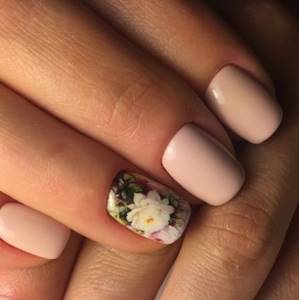
New Year's stickers are very popular, as are butterflies, dragonflies, flowers and other natural patterns.
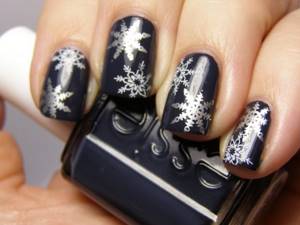
New Year's design
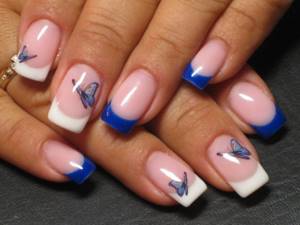
Butterflies on nails
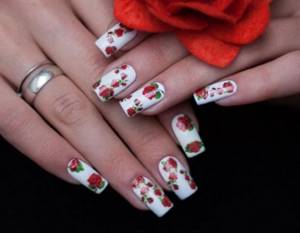
Floral motifs
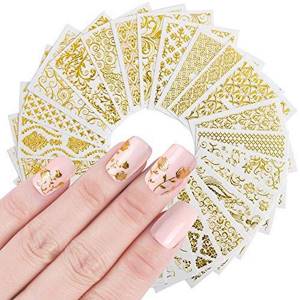
The foil stickers make a special impression. They can be used for holiday designs.
Foil slider design
If desired, any fashionista can create drawings on her own by selecting the desired design on the Internet and printing it.
Main stage
The key point in designing with stickers is the high-quality transfer of the slide from the substrate to the plate. How to apply stickers on gel polish? How to glue the blanks so that they do not bulge, crumple, or stick their free edges together?
A leisurely, systematic implementation of the following sequential steps will be sufficient.
- Step 1: preparing stickers for work. If they are water based, you need to dip them in a saucer of water. If the slides are made on an adhesive basis, you need to cut out pieces of the photo design that best fit the shape of your nails using nail scissors.
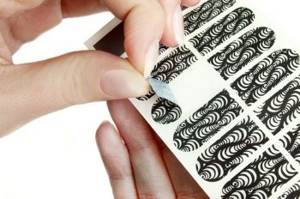
- Step 2: successively transfer the stickers from the blank to the nail. The important point here is to separate the adhesive part from the base as delicately as possible, so that the sticker does not bend, its ends stick together, or become crowded. In this case, it would be more correct to use thin tweezers to maintain the adhesive part of the slide.
- Step 3: Selecting the correct location on the plate. If the sticker is partial, then the correct placement of the artistic element in an aesthetically correct part of the nail plays an important role, especially if the nails are long. Often girls choose the corner root zone or the corner area along the cut line. If the sticker is solid, it is necessary to apply it continuously over the entire surface of the plate.
- Step 4: smoothing out the smallest lumps of film. The thinnest texture of the sticker tends to shrink, curl and bend when pressure is applied to it. Therefore, here you need to be extremely careful and not overdo it with pressure on its surface. If, nevertheless, the sticker has moved off the nail and is too wrinkled, it is better not to regret it and use a new sample. The skill of clearly drawing slides also comes with some experience.
- Step 5: Dry the wet surface of the sticker. This mostly applies to water-based slides. How to apply water-based stickers to gel polish? You need to achieve perfect straightening of the sticker on the surface of the nail, and then dry it with a dry cotton pad or swab.
Types of stickers
To prevent your manicure from looking too sloppy, you should not choose stickers for all nails. A design with decor on two or three nail plates will look interesting and original. Let's not forget that the sticker itself represents a complete composition. Therefore, there is no need to complement it with rhinestones or sparkles. It is better to combine stickers made in the same style in different colors and shades. This design will be more harmonious and original.
Stickers with 3D effect
homemade sliders
1
If you like a pattern in a magazine, apply clear nail polish on top of it (on one side).
2
Let dry.
3
Cut out the design along with the varnish: the blank for the slider is ready.
4
When you want to use the slider, place it in water for a minute until the paper part of the slider is completely wet.
5
Take out the homemade slider and gently roll the paper base with your finger so that only a thin layer of the design remains on the varnish.
6
Transfer the slider to the dried varnish and cover with clear varnish.
© mvk.ua
Questions and answers
I put stickers on my nails, but they peel off on the 2nd or 3rd day. What's wrong?
The problem may be poor finishing of the ends, insufficient adherence of the film, or a small amount of topcoat. It is best to glue the slider on a sticky layer. If everything is done correctly, but the design still does not stick, try using an acid-free primer or ultrabond. Walk it around the circumference of the drawing. The primer will slightly dissolve the film and cause it to literally “stick” to the coating. After this, apply 2 layers of top in succession.
How to choose quality nail sliders?
It is worth giving preference to proven brands: NeoNail, Vogue Nails, Arti for you, BPW.Style, Ib di nails, Freedecor. High-quality stickers do not tear, are easily transferred to the nail, and practically do not form wrinkles. They are distinguished by rich colors and a large assortment.
Initially, water stickers were invented for home use. With their help, any girl who does not know the technique of artistic painting could make a stylish and beautiful design. However, soon the demand for stickers increased. Today, slider design is done in expensive salons. More and more new types of stickers are being produced. The variety of ornaments, photo printing, designs and shades can satisfy the most demanding taste. The technique of using sliders is very simple. A little practice and you will get results no worse than those in the salon.
Advantages
Despite the huge competition, water stickers for gel polish successfully hold a leading position among all possible manicure options. And this is not surprising, because compared to other design solutions, you can apply water-based stickers under gel polish without using special equipment and even without experience or training. In addition, the use of this method has a number of other advantages;
- The ability to complement the existing design - due to the fact that the gel polish is applied before the moment when it is necessary to apply water-based stickers, a woman can choose the most optimal one and stick the option she likes.
- An easy technique to implement – absolutely anyone can stick this decoration on, which is why it is widely used. This also eliminates the possibility of transferring consumables, which significantly reduces material costs.
- Durability – properly selected gel polish allows you to reliably glue any material, so that your nails are in well-groomed condition for the longest possible time.
Additional Tips
Step-by-step instructions with a detailed description of how to apply stickers to gel polish and how to apply adhesive film to nails correctly can be supplemented with a couple of simple but important tips.
- To prevent the sticker from shrinking when separating it from the paper base, you need to use tweezers as a film holder and help yourself with an orange stick, holding the paper base fidgeting on the saucer with its tip.
- To make the foil sticker lay more softly and evenly, slightly heat it up on the matte side - it is important not to confuse this side with the glossy side, otherwise the mirror effect will not be achieved.
- It is better to blot off excess water on the nail with a cotton pad, otherwise the slide will slide over the nail even when trying to apply the finishing coat.