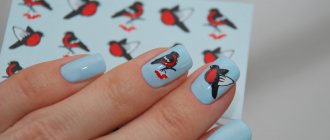
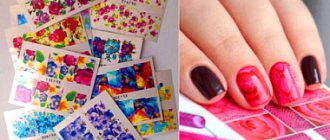
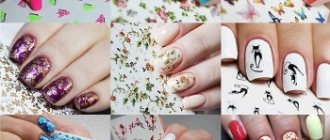
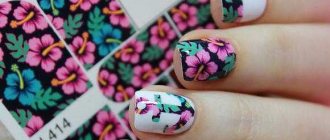
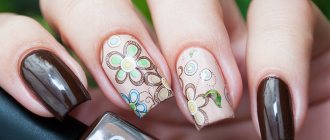
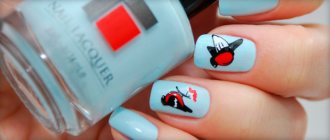
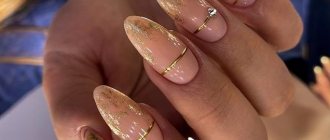
Water-based stickers for gel polish are one of the most popular types of manicure design, allowing you to glue absolutely any stickers and make your own feet a real work of art. This article will provide step-by-step instructions that will allow you to glue water-based nail stickers onto gel polish without any problems.
Stickers for nails
What you need to know about nail stickers?
Many people remember how in childhood they glued flower petals to their nails, imagining themselves as adults. Apparently, it was these pleasant memories that gave impetus to the creation of nail stickers. When they first appeared on the market, they had an adhesive base. Being dense, they formed folds and generally looked cheap - not an option for an “adult” manicure.
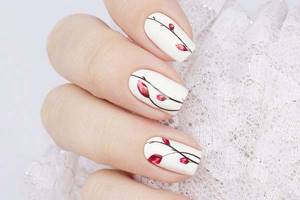
Very soon they were replaced by water stickers - thin films with a printed pattern. They fit tightly to the nail plate, are wear-resistant, and some are even stretchy. Many people know modern stickers as sliders, from English to slide, which translates as “slide” or “move.” The name contains the secret to removing stickers from the backing.
Rules for saving results
How long does a manicure done using thermal film last? The answer to this question depends not only on how well it was applied and fixed on the nail, but also on whether the owner of this type of nail art follows the rules for maintaining the achieved result.

In order for nails designed with thermal film to remain as elegant as the manicures of stars in magazine photos, their owner should avoid contact with high temperatures and warm water. However, this rule applies to a greater extent to those ladies who did not finish their nails with top-end products. It is the latter that allow you to maintain the result for up to two weeks. If they are not used, the result will please you for only half a week.
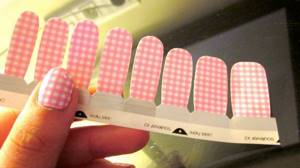
It’s so easy to not only perform a manicure with thermal film with your own hands, but also preserve the result for a longer period.
How to use?
The aqueous sticker consists of a cardboard backing, a film with a pattern and a protective film.
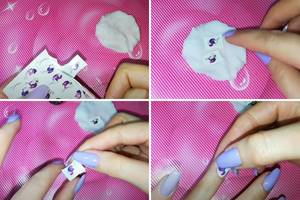
To transfer the design to your nails, you need:
- Remove the protective film from the entire surface.
- Cut out the desired fragment with nail scissors.
- Moisten (put in a cup of water or on a wet cotton pad).
- Wait 10–15 seconds.
- Using a sliding motion, separate the film with the pattern from the substrate.
- Pick it up by the edge and transfer it to the nail.
- Smooth out with a cotton swab.
The correct way to stick stickers is not on the “bare” nail, but on the coating. A transparent layer is applied on top for better wear resistance.
Under regular varnish
Anyone can make a design with stickers. To do this, it is not at all necessary to acquire gel polishes, tops, bases and a UV lamp. Sliders are also “friendly” with ordinary varnishes.
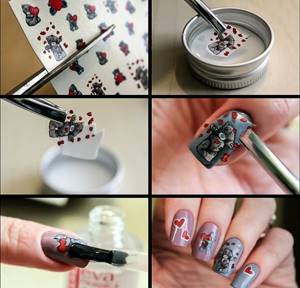
Materials:
- white or colored varnish for the base;
- clear varnish for finishing;
- manicure scissors;
- stickers;
- cup of water;
- cotton pads or napkins;
- cotton buds;
- nail file or nail polish remover.
Progress:
- Cover your nails with a base color polish and dry.
- Cut out the sticker, wet it, wait 10-15 seconds.
- Separate from the substrate and transfer to the nail plate.
- Remove moisture with a napkin or disc.
- Use a cotton swab to smooth out the film.
- Wait until completely dry.
- If the sticker extends beyond the edges of the nail, file off the excess with a file or dissolve it with nail polish remover (from top to bottom).
- Apply clear varnish over the stickers.
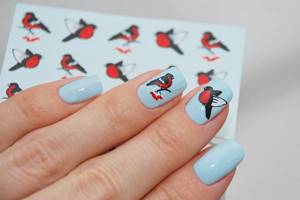
Under polymer varnish (gel polish)
Of course, it is preferable to glue sliders under gel polish. This way they look better and last longer.
To create the design you will need:
- base or base + gel polish of the selected color with a sticky layer;
- top;
- Ultraviolet lamp;
- sliders;
- a cup of water or wet wipes;
- orange stick;
- scissors;
- file
Progress:
- Remove the protective film and cut out the designs to the required size.
- We prepare the nails for coating: we do a manicure, degrease.
- Cover the nails with base and dry.
- Apply gel polish of the selected color and dry it too (you can skip this step). We do not remove the sticky layer.
- We soak the stickers one by one and transfer them to the nails.
- Smooth it well with an orange stick. Fold the film down at the edge of the nail if it is large.
- We wait for it to dry and cut off the remaining film.
- We apply two layers of the topcoat, drying each thoroughly in a lamp: the base, and then the top coat, or alternately two top coats.
It is most convenient to glue the sticker onto a sticky layer of dried varnish. This way you can move it and not be afraid of damaging the coating. But if the stickiness is bad or non-existent, you can coat the plate with a primer, top or base (without drying) before applying the sticker.
Peculiarities
Despite the fact that from the outside, the method of fixing the decor seems quite simple, before applying the sticker to the gel polish, you should take into account some of the features of this method of decorating a manicure or pedicure.
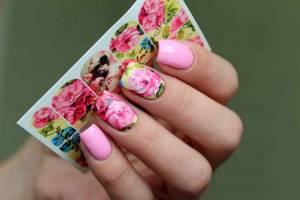
There are several options for stickers that can be used for manicure:
- Thermal. To secure them, heat treatment is required to warm up the adhesive base of the material. When hardened, it is tightly fixed to the surface.
- Water based. To secure them, the base of the fragment needs contact with moisture; after 20 seconds, use it for a manicure.
- Self-adhesive. The most convenient decor option, which is used most often now. The drawings are placed on thin paper - a backing that you simply need to remove and fix the details.
Despite the fact that the latter option is more convenient to use, it does not always have the highest long-term preservation; craftsmen often recommend using water or thermal decor.
The very method of creating an unusual design has many positive aspects:
- Ease of use. Even a beginner can perform the procedure; no special skills are required;
- Low price. To apply gel on all nails, you will need 3-5 rubles worth of material;
- Uniqueness. A wide range of designs that can be used to create unusual work;
- Versatility. They can be fixed on gel, acrylic or regular varnish;
- Rapidity. To secure one slider to the nail bed, the girl spends about a minute.
One of the common myths is that to create an unusual design on gel polish, you need to have a honed artistic skill, thanks to which you can draw unusual patterns.
Nowadays, any skill of a specialist is being replaced by ready-made patterns on self-adhesive paper, which are independently attached to the nails.
Types of stickers
The choice of nail stickers is so large that it is impossible to fit them into a small section of the article. Let's look at the main types that are popular:
- Transparent film with a pattern. Represents patterns, ornaments or designs with high pigmentation. They are translucent, and therefore are always applied to a colored base. Typically in a contrasting color.
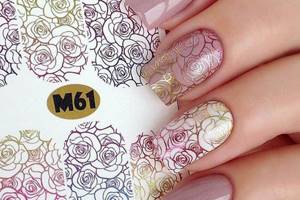
- Continuous film (photo printing). Features a high density pattern. These stickers are designed to cover the entire nail plate. Usually they are used to accentuate a manicure and are glued to 1-2 nails. For greater clarity and brightness of the design, experienced craftsmen advise choosing a white varnish or base as a base.
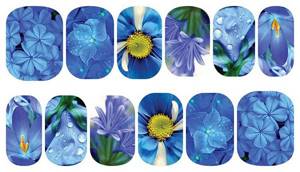
- Applications and stickers with a given shape. Sliders can be small patterns, stripes, lace. Some of them are designed for a specific manicure: French, moonlit, etc. With others, you can “play around” and place it in the corner of the nail, at the base, in the center, or try a combination of several applications.
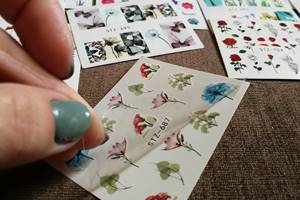
- Volume sliders. They are distinguished by their pronounced relief. Such stickers are difficult to distinguish from artistic paintings if they are applied correctly. To ensure that the designs remain voluminous, almost the entire top is removed from the relief with a brush.
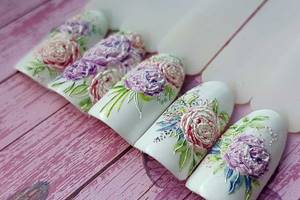
Some stickers require soaking in hot water (about 50 degrees). They begin to stretch, which makes them fit better to the nail plate and do not form folds.
How to apply stickers to shellac?
This manicure looks impressive and expressive, does not require much time to create, and is durable.
How to apply decorative film to shellac surface:
- cut out the elements with scissors and apply them to the nail, determining the correspondence between the required dimensions of the plate and the ornament;
- immerse the selected option in water for a few seconds, dry very carefully with a lint-free cloth or in the air;
- The sticker should only be applied to wet shellac to ensure an extremely strong bond;
- Cover the surface with another coating and place under the lamp for a couple of minutes.
Secrets of the perfect slider design
A high-quality manicure requires careful work. Listen to the following tips:
- Apply the base coat very thinly to avoid the appearance of voluminous nails.
- Smooth the sticker and then dry it to increase the durability of the manicure.
- Seal edges and ends carefully. These are the most vulnerable places. It is better if the sticker does not reach the edge by literally 0.5 mm.
- If you are using solid stickers without a given shape, do not rush to cut the design to fit your nail. Adjust the bend line at the nail bed, and leave a margin of 1–2 mm in length. After placing the sticker, the excess can be easily removed with a file or nail polish remover.
- Complete the design with rhinestones, gradients, and small paintings to complete it.
Photo ideas for manicure with stickers
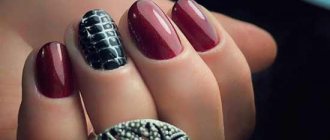
In the photo below you can see nails with metallic stickers - this is the hottest trend of the new season. A shiny film covers the fingers entirely or in openwork stripes complements the main color of the gel. Preparation for its application is standard - sawing off the edges, sanding and applying a transparent base. The slider is cut immediately before use and this must be done as carefully as possible to avoid unsightly creases and bends.
Advice! It is better to heat the metallized film not in water, but with a light bulb on or a hairdryer on - this way streaks will not appear on its surface.
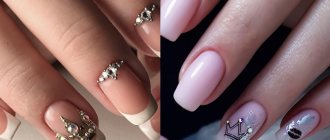
No less popular is the classic French jacket with stickers - to create a smile line, slider pieces with original patterns are used, which are cut out with scissors and glued to the free edge of the plate. The French design with lace at the tip of the nail looks gentle and romantic.
Questions and answers
I put stickers on my nails, but they peel off on the 2nd or 3rd day. What's wrong?
The problem may be poor finishing of the ends, insufficient adherence of the film, or a small amount of topcoat. It is best to glue the slider on a sticky layer. If everything is done correctly, but the design still does not stick, try using an acid-free primer or ultrabond. Walk it around the circumference of the drawing. The primer will slightly dissolve the film and cause it to literally “stick” to the coating. After this, apply 2 layers of top in succession.
How to choose quality nail sliders?
It is worth giving preference to proven brands: NeoNail, Vogue Nails, Arti for you, BPW.Style, Ib di nails, Freedecor. High-quality stickers do not tear, are easily transferred to the nail, and practically do not form wrinkles. They are distinguished by rich colors and a large assortment.
Initially, water stickers were invented for home use. With their help, any girl who does not know the technique of artistic painting could make a stylish and beautiful design. However, soon the demand for stickers increased. Today, slider design is done in expensive salons. More and more new types of stickers are being produced. The variety of ornaments, photo printing, designs and shades can satisfy the most demanding taste. The technique of using sliders is very simple. A little practice and you will get results no worse than those in the salon.
3D
This manicure can be done in two ways:
- Achieve a 3D effect using photo design and slider design, in which the image on the sticker creates the illusion of volume.
- You can achieve volume by using protruding parts that are fixed to the nail with special glue. Stickers are not used in this case.
Using stickers is the best way to create a beautiful manicure at home. The variety of images will allow any girl who does not have the gift of drawing to decorate her nails with any pattern. Ease of use and affordable price make stickers a valuable decorative part for manicures with any coating, be it gel polish, shellac or acrylic. Another significant advantage is their absolute harmlessness to nails and ease of removal.
Benefits of nail stickers
Those who admire manicures with nail stickers explain their positive attitude to the following facts:
- They are simple and convenient to use. In any case, a manicure can be done much faster than painting with varnish using a brush.
- If you have questions, video lessons are available to watch on the Internet at any time. Masters are not shy about posting videos of their work to give others a source of inspiration.
- Low cost makes it possible to frequently change the manicure design. Of course, the price largely depends on the type of product, but in general the cost can be called cheap.
- The manicure itself will no longer be monotonous and boring.
- A huge range of designs and textures allows every woman to find an option according to her personal preferences.
- This material does not need to dry. This means that a manicure using it is done many times faster than creating patterns using varnishes.
