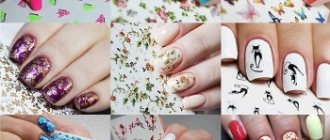
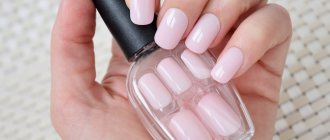
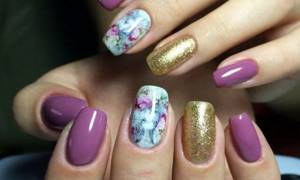
Using regular nail stickers, you can create an original manicure. Any girl can do this nail art on her own.
A woman always pays attention to every little detail in her image. Beauty salons offer their services, nail technicians create unique designs, and the latest procedures help restore youth. Everything works to make a woman attractive and well-groomed.
- It is impossible to imagine a beautiful woman without a stunning manicure
- Modern masters are able to turn a nail plate into a real work of art.
- However, despite a professionally performed manicure, girls often remain dissatisfied and therefore masters suggest using beautiful and original nail stickers
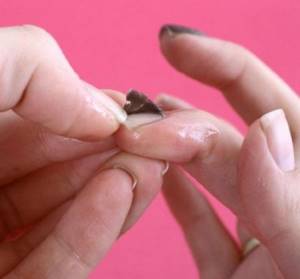
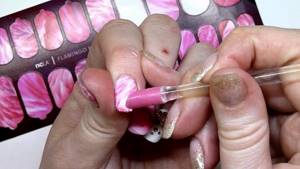
How to glue 3D stickers on nails?
How to glue 3D stickers on nails?
Many ladies know about this method of nail design, but do not use it to transform their nails. When using, for example, 3D stickers, you can get a stylish image of any complexity - clear and beautiful.
Important: the 3-D image on the nails is voluminous due to the convex texture. After gluing such a pattern, a sculpting effect is created.
Many manufacturers produce such products with a ready-made background, so there is no need to create it yourself.

How to glue 3D stickers?
How to glue 3D stickers on nails? Follow these steps:
- Give your nails the desired shape, push back or trim the cuticles
- Apply an orange stick to the side ridges and carefully remove any remaining skin from the nail
- Polish the surface of the nail plate with a buff
- Now you need to degrease your nails with a special liquid.
- Remove the sticker from the base with tweezers and place it in warm water for half a minute.
- Apply the image to the nail and smooth it out carefully
- If the sticker covers the entire nail, then there is no need to apply a topcoat, otherwise the convex effect will disappear. If the design is applied only to part of the nail, then you need to cover the free areas of the nail plate with the finishing varnish.
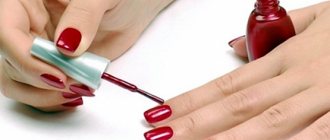
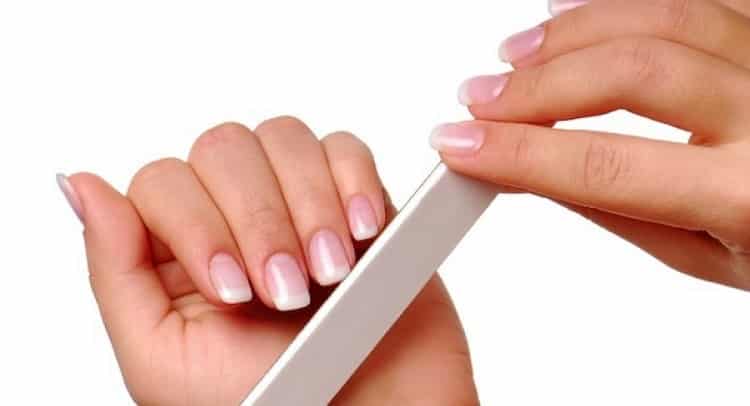
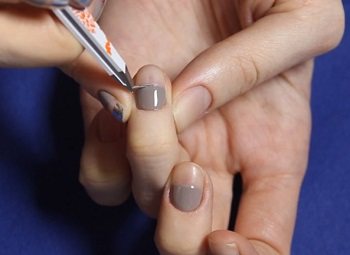
Preparing nails for applying self-adhesive stickers
Before you start decorating the nail plate, you should prepare properly, peel off the previous decor, if necessary. To do this, you should do a neat manicure, because the cleanliness and neatness of your nails determines how the manicure will ultimately look.
"Advice. Using a special device, push back or cut off the cuticles and clean any existing dirt. Use a file to file the shape and polish the surface.”
If the picture looks like a continuous film, then you will not need to apply a base varnish. If the sticker is partially attached to a certain area, then you can paint the nail with a simple varnish of the desired tone, in an even layer.
Next, you need to have a certain set of tools at hand. You will need a container of water to apply water stickers, scissors to remove excess material and cut out the shape beautifully, alcohol to degrease the plate, finishing varnish, a nail file, cotton swabs and the products themselves. Also, before starting the process, read the useful recommendations and step-by-step instructions to have an idea of how to properly glue water-based stickers, use foil, transfer and glue holographic, transparent, and roll-roll products.
How to apply metallic nail stickers?
How to apply metallic nail stickers?
Metallic effect stickers are easy to use and easy to apply. An adhesive layer has already been applied to their surface, so they only need to be moistened with water and applied to the nail.
How to apply metallic nail stickers? There are several nuances when using this type of design:
- It is necessary to level the nail plate or cover it with two layers of base varnish
- Remove the sticky layer with a buff so that the sticker adheres tightly to the nail
- Take the sticker with tweezers and apply it to your nail. Cut off the excess part
- Now you need to moisten it in warm water so that the glue is activated and apply it to the nail
- Using an orange stick, carefully straighten the sticker. Pay attention to the edges so that they fit snugly in all places.
- If the design was intended to apply varnish next to the sticker, do this with a thin brush butting the sticker
- Cover the nail plate with the sticker with a thick layer of base polish.
Important: The metallic sticker will not lose its shine until removed. The manicure will look great for a long period of time.
Why does the design come off with the top coat?
Many women face this problem because not everyone is able to properly attach the sticker to gel polish. Especially if its layers were not dried enough.
Therefore, in order to minimize the possibility of such a nuisance, it is important to carefully dry each applied layer separately, using a special lamp. Even if the surface is even a little sticky, you should wait and continue creating a manicure when the polish has completely hardened.
How to apply shellac stickers on nails step by step?
How to apply shellac stickers on nails step by step?
In any beauty salon, a manicure with a pattern on shellac is expensive. If you don’t have the money or time to go to a salon, you can use stickers with a beautiful pattern. It's simple, easy and cheap.
How to apply shellac stickers on nails step by step? Follow these steps:
- File your nails to the desired length and shape
- Select stickers and trim them to fit your nail length
- Remove old nail polish and push back cuticles
- The surface of the nail plate must be degreased using alcohol or nail polish remover.
- Apply a base coat to your nails and cure them in a UV lamp
- Cover your nails with shellac and also dry under a lamp.
- Now take the sticker with tweezers and apply it to your nail. Transparent water-based images are perfect for this type of manicure.
- Remove the protective top layer from the sticker
- Apply a top coat of varnish and cure in a UV lamp
Important: Water-based stickers fit perfectly under shellac, but for varnish manicure, choose adhesive stickers.
Benefits of manicure with stickers
Manicure using decorative stickers and transfers is very popular among women of all ages because it has many advantages. Consider the most important of them:
- Various types of additional accessories for manicure provide an excellent opportunity to make your nails well-groomed, original, bright and stylish.
- You can purchase this decor in many specialized stores. A wide range of different stickers will not leave any fashionista indifferent and will allow you to create new, beautiful images. This will allow you to look stunning at any celebration and event and feel confident.
- With their help, you can quickly replace a boring, monotonous design by adding all kinds of sparkles, rhinestones, metallic shine and shine to your nail decor, depending on your imagination.
- Attaching this type of design is very simple and quick; the process will not be difficult even for beginners. To do this, you can read the instructions, tips for beginners, and also look at pictures showing everything step by step.
- By doing your own manicure at home with stickers, you can significantly save your budget on decorating your nails and not spend money on a nail salon.
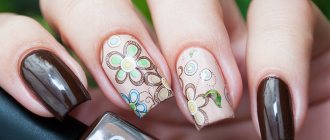
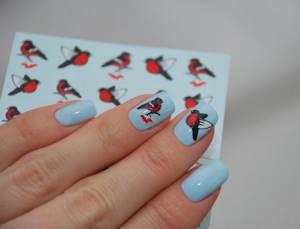
How to apply water transfer decals to nails?
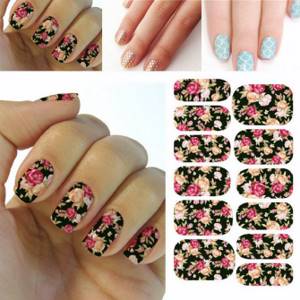
How to apply water transfer decals to nails?
If you constantly don’t have enough time for a manicure, then water stickers will help. A large assortment of images for this design will help you choose a pattern for both an evening dress and an everyday outfit.
How to apply water transfer decals to nails? The process of gluing these images is the same as the process of applying adhesive-based stickers:
- The surface of the nail is treated with a degreaser
- Stickers are cut along the contour of the nail and dipped in warm water for 5 seconds.
- The stickers are detached from the retainer and transferred to the nail
- After this, a final coat of varnish is applied
Important: On a base made of regular varnish , you do not need to wait for it to dry - the sticker is applied immediately. Under shellac , the sticker should be glued to the polymerized layer. When working with acrylic , be careful not to damage the surface.
Possible problems and their solutions
When performing any work, unpleasant moments may arise that you immediately want to eliminate, but this is not always possible. Every moment has its own reason and solution.
Reasons for peeling sliders
Failure to comply with the technological process can lead to poor fixation of the material and its subsequent peeling.
Reasons for peeling:
- The varnish layer on which the slider was applied was not dried properly.
- Weak fixation of the slider. This reason will arise if you do not leave space (0.5 mm) near the cuticle and lateral skin ridges for sealing the film.
- Poor smoothing, unevenness and bubbles. When smoothing, do not touch the film with your fingers; this is done with a napkin, an orange stick, a silicone brush, etc.
- After applying the water slider, be sure to dry the surface from excess water. To do this, use napkins or discs to soak the water, and a lamp to dry completely.
- No protective layer applied or poor application. In some cases it is better to apply twice and wait time for drying.
- Low quality of materials used.
- Contact with water occurred a short time after the attachment procedure.
For such reasons, peeling can occur on the third day after completion of work, in some cases earlier.
The drawing turned out to be insufficiently bright or almost invisible
The dullness of the design and its illegible outline are due to incorrect application of the color of the first layer of varnish. Most of the material has a transparent base, and it must be pasted in a tone that matches the image. If the picture has dark outlines, then the varnish layer should be light and vice versa. But in most cases it is better to apply a colorless or light layer.
Same with lace. If it is black or dark in color, then the base should be light. If the lace is white, then the first layer is covered with dark varnish.
Chips in the finishing coat
If the surface constantly clings and turns out to be uneven, then the reasons may be the following:
- The protective layer was not completely dried before use.
- The protective layer has a thickened shape.
- Poorly smoothed film.
- Material tearing and ends coming apart.
- Poor quality cutting of material before use.
- Careless handling while doing household chores.
Pattern peels off with top coat
Peeling of the material together with the protective coating can provoke prolonged contact with water: washing dishes, furniture, laundry, etc. When doing housework, wear gloves. This will protect the manicure from mechanical damage and will not reduce its service life.
The sticker does not completely adhere to the nail plate
Bloating or poor fit of the pattern can occur for the following reasons:
- The material was not applied carefully, proper smoothing was not carried out, and air accumulated.
- Product defect. On an adhesive base, incomplete distribution of the adhesive. This happens on low-quality films. If poor-quality application of the adhesive base is noticeable before gluing, then it is necessary to additionally apply a layer of nail glue and continue to use gluing according to the instructions for it.
- Failure to comply with gluing technology.
We recommend watching the video:
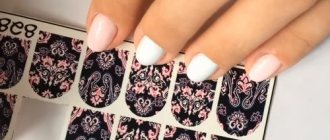
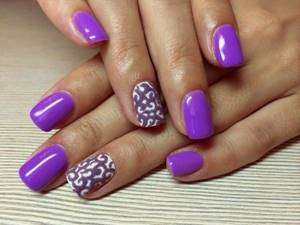
How to apply lace stickers on nails?
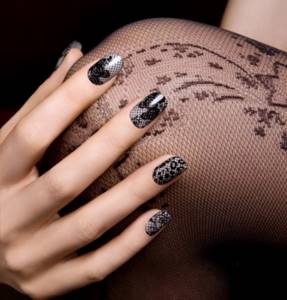
How to apply lace stickers on nails?
Interweaving lace patterns on a manicure will help create a feminine look that is sure to make a splash. Stickers in the form of lace are made on a transparent base, so you need to apply light “lace” on a dark base and dark patterns on a light base.
It is worth noting: Thanks to this technique, the pattern will be clearly visible on the nails.
How to apply lace stickers on nails? The process is standard, as when applying other types of stickers: processing the nail plate, applying a base layer, activating the sticky layer with warm water, fixing it on the nail plate and securing it with top varnish.
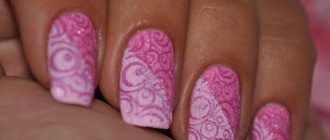
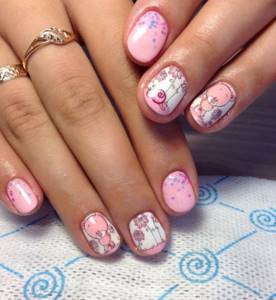
Translucent sliders
New for the 2022-2023 season will be a manicure with translucent stickers, which are very reminiscent of the fashionable technique of watercolor painting on nails. It is best to use such sliders on a light background, so they will look gentle and sophisticated, conveying all the beauty of the design with flowers, branches and buds.
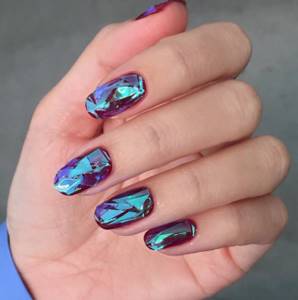
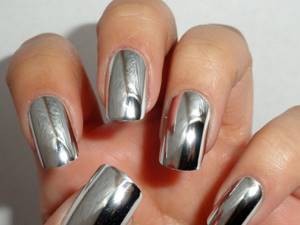
How to apply “broken glass” stickers to your nails?
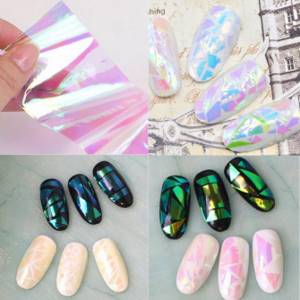
How to apply “broken glass” stickers to your nails?
The effect of broken glass on nails is achieved by applying holographic pieces of foil paper or polyethylene with a mirror or mother-of-pearl coating. The wealth of colors and textures helps you translate any of your ideas into a manicure design.
Important: The mirror coating can be applied to the entire nail or you can place plastic pieces in layers . in the form of miniature accents on the nail plate, which will perfectly highlight the overall design of the manicure, will look stylish
How to apply “broken glass” stickers?
How to put broken glass stickers on your nails? Follow these steps:
- File your nails and push back your cuticles
- Apply the base and lay out colored pieces of foil in any shape
- Apply a layer of topcoat. If necessary, apply another coat of top coat - this will help create the effect of a pattern that is underneath the clear glass.
- Dry your manicure under a UV lamp and evaluate the result.
Important: A stylish manicure will lift your spirits on an ordinary day and add attractiveness to a festive event.
Hollywood manicure with thermal film
The history of the creation of this unusual manicure is very interesting. One day, two friends, one of whom lived in Australia and the other in America, got together to come up with some stunning manicure.
First of all, they sought to make it durable , since one of them worked in a car repair shop. And I wanted to be beautiful even in such a “dirty” job. Technical film coating technology has been known for a long time . And the ladies thought: why not apply this idea for manicure.
Protective film has begun to gain popularity in the states. Metallic shine, golden or silvery nails – isn’t this a real breakthrough in the beauty industry ! Hollywood stars impeccable nail art with pleasure .
Under the spotlight and camera flashes, such an unusual manicure looked especially bright and catchy. After some time, thermal film became available to beauties all over the world .
an unusual manicure is that it can be easily done at home .
Are you going to a party or social event? Then you can safely use golden or silver tones. They will shimmer beautifully and attract attention . For everyday use, there are more muted tones of thermal film. In any case, your nails will look original and flawless .
How to apply gold stickers on nails?
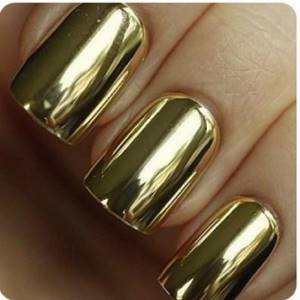
How to apply gold stickers on nails?
Gold on nails speaks of high status and adds glamor to your look. This manicure is suitable for an evening out at a special event or for going to a club where there are a lot of sparkling lights.
How to apply gold stickers on nails? The process of performing such a manicure is similar to other types of nail art using other types of stickers:
- It is necessary to wipe off the old polish and degrease the nail plate.
- Apply the base coat in one layer. Let it dry
- Now take the sticker of the required length and remove it from the transparent film
- Place the gold sticker on your nail and gently spread it with an orange stick along the edges and near the nail fold.
- At the end of the nail, use a nail file to file off the excess part of the sticker, as if drawing a line along the edge. The sticker will become thinner and its unnecessary part can be easily removed
- Use a buff to align the edge of the nail and the sticker.
- Apply one coat of finishing varnish and your manicure is ready.
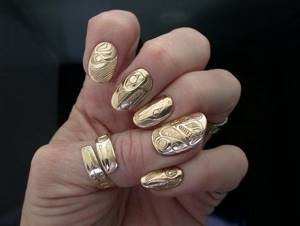
How to glue gold stickers?
How to make a golden manicure is described in detail in the video. In this video you can see that this nail art looks stylish even on short nails.
Is it possible to make stickers yourself?
It is not at all necessary to purchase stickers intended for manicure. You can make them yourself. The only drawback is the simplicity of the image.
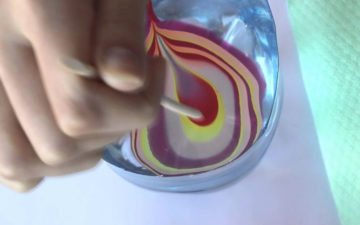
Using water and varnishes of several colors, you can create an original 3D design.
To do this, you need to drop a few drops of each varnish into water, then immerse the nail in the resulting composition, after removing the excess varnish, remove it with a cotton swab.
Wave stencils deserve special attention. They are cut out of paper with serrated scissors and coated with mother-of-pearl varnish.
The plate is covered with a base layer, then a self-made sticker is fixed on it. It is covered with a fixative on top, otherwise it will last for a short time.
How to apply velvet stickers on nails?
How to apply velvet stickers on nails?
Velvet manicure is a new trend in nail art, but it has already managed to win the hearts of young beauties. But getting such a manicure in a salon is expensive, so now fashionistas are offered velvet nail art with stickers.
Velvet stickers will look beautiful on any color of nail polish. How to apply velvet stickers on nails? The process of applying such stickers is similar to the process of gluing gold foil on nails:
- Velvet stickers do not need to be dipped in warm water - they are made on a self-adhesive base
- Remove the velvet from the transparent film and glue it onto the prepared nail plate
- There is no need to apply finishing varnish - the “velor” effect does not require this
Important: Don’t worry about the durability of this manicure. Velvet stickers will have their original appearance within 2-3 weeks.
Reviews
Martha: I tried to make myself a mirror design using golden stickers. I can't say that I liked it. The plates themselves are very large; they had to be trimmed all the time; several of them got damaged in the process. And it’s generally impossible to smooth out wrinkles perfectly. In general, I don’t recommend it, it’s long, difficult, and even starts to fade quickly.
Lena: I am a manicurist, I always have a variety of sliders in my “arms”, my clients love them very much. This takes much less time than painting, and the result is always perfect. And if you apply it with gel polish or during extensions, then it’s absolutely great.
Vika: I periodically buy myself small lace designs, I really like how they look on my hands - feminine and delicate. Overall, it’s quite a convenient and simple method.
Which fingernails should I put stickers on?
Which fingernails should I put stickers on?
If this is your first time doing a manicure yourself, then various questions may arise. What nail polish should I paint my nails on, and which fingernails should I put stickers on?
It all depends on your imagination. You can decorate with stickers one nail, several or all nail plates.
Advice: The main thing is that the manicure does not look too messy and sloppy. The color of the pattern on the stickers should match the tone of the base varnish.
Important: If you decide to stick one sticker, then it should be placed on your ring finger. This way the manicure will look stylish and beautiful.
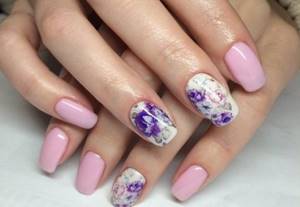
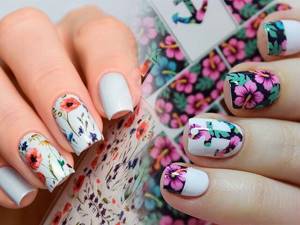
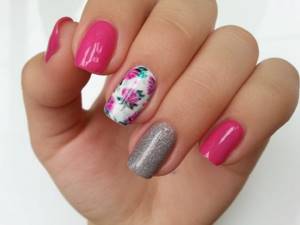
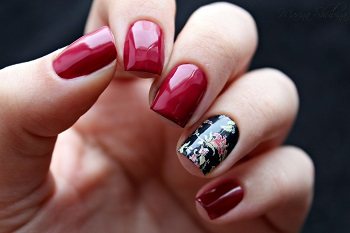
Nail design using pictures
There are a lot of options for how to paint a fashionable manicure using thermal film and stencils. The choice of plot and image depends on the occasion for which it is all intended, whether it is an everyday option, or for a holiday, celebration, or theme party. Consider examples of interesting options:
- For a daily trip to work or school, you can use transferable and stick-on options in the form of a common French jacket, which includes stripes on the tips of the nails. You can also diversify the design of red nails, for example, by gluing Chinese characters.
- For autumn, a background with warm palettes of brown, burgundy, beige with stickers of autumn leaves is relevant. A maple leaf or openwork leaves on the ring fingers look good, and the rest can be made plain. Decorating with the Eiffel Tower on the fingers looks impressive for those who prefer the French style.
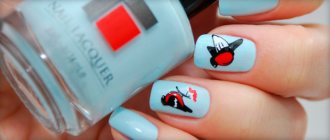
- For summer, you can choose bright designs on pink, green, blue nails, and also use a marine theme with images of mermaids, sea stones, sailboats, anchors, shells, and fish.
- For a party, you can use a black design or mirror films. Nails with black panther stickers will definitely not go unnoticed. Briefs with the style of Harry Potter or Harley Quinn are in fashion now.
- A white jacket decorated with lace, openwork patterns, and ribbons is suitable for a wedding. You can attach shiny liquid stone or rhinestones to your nails.
- For little girls - fashionistas who want to become like their mother, you can pick up and stick stickers for children. It could be a funny Mickey Mouse, a rainbow smile, beautiful butterflies, bright flowers, heart-shaped designs with rhinestones, ladybugs, cute cats, or scenes from the Hello Kitty cartoon and much more.
Where to buy nail stickers?
Where to buy nail stickers?
Currently, manufacturers offer various designs and colors of nail applications. A large selection of stickers is presented on Aliexpress.
If you are wondering where to buy nail stickers, then take a look at what the largest market on the Internet has to offer. The selection process will give you true pleasure, and the prices will pleasantly surprise you.
Nail designs with stickers do not damage the nail plate and add sophistication and attractiveness to the look. Choose stickers and applications and change your look every day!
What is thermal film for nails?
The technology for applying thermal film or the minx procedure is very simple . Of course, it costs a lot of money in the salon, but the result will pleasantly surprise you. After all, a flawless manicure is worth it! You can do this procedure at home , but before doing this and not spoiling the material, you will need to at least once look at the work of the master.
Using thermal film for manicure is a new bright trend
So what is this technology? Let's take a closer look:
- To begin with, the nails are put in complete order : they are filed, the cuticle is moved back. Marigolds are treated with a degreasing agent
- The thermal film is heated either under an ultraviolet lamp, or a hair dryer is used for this purpose. Then it is applied to the nail and it sticks to it
- Excess material must be removed and the nail filed again.
At first glance, this procedure is quite simple , but it will take at least half an hour.
As for the advantages of thermal film , they are obvious:
- Rich palette of shades , in which you can find about 350 colors. This means that you can complement any look.
- With thermal film you can forget about the need for manicure for three whole weeks.
- Removing thermal film is quite easy , and you do not need any chemicals
- This material is not subject to any
- Thermal film is hypoallergenic
- This nail art has become a favorite among the stars, and who else if not they are known for the latest beauty and care products?
Such an impressive list of advantages deserves that you at least once treat yourself to such an impeccable manicure.
Useful tips
- After a manicure with thermal film, you need to avoid contact with hot water . Otherwise, you can ruin the composition of the material, and the manicure will only last a couple of days.
- If during wearing the film begins to peel off, you can try to restore it. Just warm up your nails for a couple of seconds with a hairdryer and press the film onto the plate again. After this method, your manicure will be as good as new.
- Removing the film from nails will not be particularly difficult. You need to take some hot water into a bowl and dip your nails in it for 1-2 minutes. The film will come away from the plates on its own without the use of force.
- Always apply a topcoat to your nails . It will provide the film with additional protection. Otherwise, the thermal film will only last a week, especially if you use chemical cleaning products or frequently come into contact with hot water.
- not recommended to do this manicure before going to the sauna or solarium. Under the influence of temperature, the film will begin to peel off and become deformed; it will no longer be possible to restore such a manicure.
- Before doing the procedure at home, we recommend visiting a salon specialist. Then you can carefully follow the process of creating a minx manicure, learn how to use film and gain visual experience.
- Combine several colors of thermal film to create original and fashionable solutions.
Removing thermal film from nails is not difficult
Before performing a manicure yourself, we recommend visiting a specialist.
Manicure using thermal film is simple, and the benefits of its use are obvious. Having mastered the technique of manicure with a minx coating, you can easily create it at home. Experiment and create bright masterpieces using thermal film for nails.
More interesting articles: