Issues discussed in the material:
- 3 factors on which the frequency of manicure depends.
- How often to do a manicure with gel polish.
- Nail techniques that allow you to do manicures less often.
- 12 tips for maintaining the results of a manicure for a long time.
How often to get a manicure so as not to spoil your nails is important for every fashionista to know. Regardless of what procedure was used for treatment, nails and cuticles grow over time, and the hands look unkempt. But this time may be different for each woman.
Some people are able to walk around with perfect nails for a month, while others’ cuticles grow back by the end of the first week after visiting the salon. But each procedure has a certain regularity, because you need to let your nails rest and recover after treatment. In this article we will tell you how often to get a manicure and what tricks will help you postpone your next visit to the nail specialist.
What is gel polish?
Gel polish is a universal decorative gel-like product for nails that can stay on them from two weeks to a month. Initially, gel polish came to us from Europe. Every year it began to gain popularity. How often can you get a gel polish manicure? Today, most girls have forgotten about using conventional varnishes. Every month ladies give themselves a manicure using gel polish or shellac.

Composition of the product
How often can you get a gel polish manicure? Is its composition harmful? In fact, experts say that high-quality gel polish is absolutely harmless. It should usually include the following components:
- A photoinitiator is a substance that protects the nail plate from exposure to ultraviolet rays when drying gel polish. This component is considered completely non-toxic and harmless.
- A film former is a substance that creates a film on the surface of the nails and is responsible for long-lasting manicure wear. How often do corrections need to be made? Everything is very individual, but in most cases the period can reach up to a month.
- Various pigments that determine the color and saturation of the varnish. The more there are, the better.
- Thinners are substances responsible for good adhesion of gel polish to the nail plate.
- Additional fillers - for example, glitter of different sizes and so on.
The benefits of such a manicure. How often should I do it?
Some doubt whether gel polish is a completely harmless substance. How often can you get a manicure with it? Today we will talk about its benefits and learn in more detail about the beneficial substances that may be included in its composition. Pros of use:
- A huge advantage is that the gel can remain on the nail plate for a long time. Depending on its quality and brand, it can last up to a month.
- The second important advantage is that gel polish is very practical and easy to apply.
- Thirdly, this manicure looks very beautiful and neat on your nails. In addition, it is not destroyed by chemical elements.
- There are also medicinal varnishes, which may contain useful and nutritious components. For example, various vitamins, calcium, phosphorus and so on.
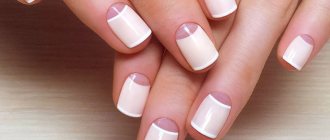
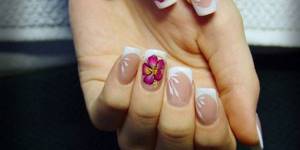
Shellac manicure samples: description of the operation scheme
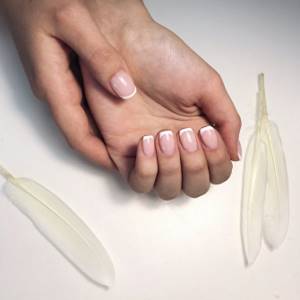
Shellac for short nails
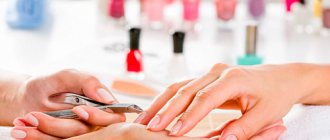
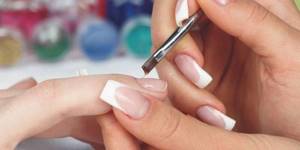
According to the generally accepted varnish application scheme, approximate instructions for processing one finger look like this:
- First, the nail is given the desired shape.
- Then the surface of the plate is cleaned.
- After this, the master proceeds to applying the base layer, after which it dries for about 10 seconds.
- It takes no more than a minute to cover the nail with a layer of varnish and dry it under the lamp.
Additional Information! If necessary, a second coat of coating may be applied, which should be done without unnecessary pause.
The cosmetic operation is completed by fixing the final coating, which consists of “sealing” the tip of the nail and then drying it for 2 minutes.
First, the shellac coating is applied to the fingers of one hand (in addition to the thumb), and then, following the same pattern, to the second hand. After finishing both hands, the master returns to the thumbs.

The cosmetic operation is completed by fixing the final coating
On a note. This step-by-step nature of the operations eliminates the possibility of errors when processing nails, which will be impossible to correct at a certain stage.
What harm is possible?
How often should you get a gel polish manicure? Experts recommend taking breaks at intervals of two weeks to a month. In fact, the gel can become harmful only if the master is careless about his work and neglects the rules.
- If you apply gel polish frequently, the nail plate may dry out and begin to peel.
- A low-quality gel may adhere poorly to the nail, which will lead to its rapid destruction.
- In addition, gel polish can cause allergies, so it is better to do a test first.
How often do you get a gel polish manicure?
Modern girls find it difficult to imagine their image without a complete and beautiful manicure. However, doctors assure that often doing a manicure with gel polish is very harmful, since its use can lead to the destruction of the natural top layer of the nail plate. In addition, some experts say that fungus or other diseases may even occur. For example, gel polish contains a component called formaldehyde. If it enters the body, it can have a negative impact on the functioning of some organs and systems. Scientists say that most modern varnishes contain a minimal amount of harmful components and are considered safe.
Much depends on the quality of the gel and the work of the manicurist. If the specialist does everything correctly, the nail plate will receive minimal damage. In addition, toxic substances will not enter the body. However, doctors still recommend taking breaks of several weeks before the next manicure.
Everything you need to know about manicure and gel polishes: interview with the owner of the Ananasnails studio
The beauty industry is moving forward by leaps and bounds, but this makes it increasingly difficult for us, ordinary consumers, to understand what is happening around us. There are so many legends and myths about gel polishes, and when we come to the salon, we are often faced with the ignorance of the masters and our own modesty, so we decided to deal with the topic of nail coating and asked the founder of the Ananasnails manicure studio, Olga Panasenkova, to answer the most frequently asked questions.

Can gel polish ruin your nails?
No, only the wrong technology can ruin your nails. The option of removing by soaking may not be suitable for a person, the solution itself may not be suitable for the brand of coating, and an acetone-containing liquid can be very harmful. As a result, a person simply “burns” his nails, the nail plate shrinks, turns white, and then his hands begin to hurt. Ideally, it is better to remove the gel polish with a device to the base (as when correcting extended nails), leaving a thin layer of it on the nail without damaging the nail plate. If you need to remove it down to the nail, then soak it in a liquid without acetone for no more than 3-5 minutes, this is enough for the base to gently peel off from the nail and for the plate not to be damaged by metal pushers. This is for those who don't want to cover it. If after removal the client plans to make a new coating, then the base can not be soaked, but left in a thin layer. Since the base does not age, when a new layer polymerizes, they simply combine. This does not injure the nail itself, especially if it has been damaged before. If they wrap your nails in foil along with the color, scream and ask them to file them down to the base. If the master does not have a machine, then this can be done even with a file; there are hard buffs, after all. You cannot remain silent about this if you value your nails.
Removal by soaking is harmful due to the acetone in the composition, which dries out the nails, they begin to flake and crumble. All liquids work differently, usually they loosen the gel polish and it comes off well. You cannot keep the solution for more than 5 minutes, because it may cause a chemical burn. Sometimes the master asks you to sit for half an hour, but this is absolutely wrong. They ask you to tell me when it will burn. But it shouldn’t burn! This is already a chemical burn, and depending on your sensitivity, these will be different stages.
Now there are a lot of cheap removers on the market, as well as gel polishes themselves. Many cause allergies and burn the nail plate in combination with a powerful lamp. But the method of removing by soaking is a thing of the past; it is suitable only for those who want to take breaks and restore their nails after drying out.
By the way, about allergies. Are there any contraindications for gel polishes? What could be the consequences? Gel polish itself is not harmful; the compositions are almost the same for all. There are several Chinese brands to which you may be allergic due to one component. There are absolutely hypoallergenic coatings like CND; now many good Russian brands produce high-quality products. The base should be good, and what brand of color you use is not particularly important. As for the quality of the color itself, it does not affect the nail plate in any way, it is only the appearance.
Sometimes craftsmen use cheap materials and fakes and perform the procedure incorrectly. Some aggressive drugs cause onycholysis. The nail moves away from the nail plate, and huge voids appear. In this case, you should not apply any gel polish. You need to take a long break for treatment. Sometimes masters, in pursuit of money, do not talk about the onset of onycholysis and cover their nails. But it doesn't work that way. Ideally, the master should not persuade a client with injuries to have a coating; it is better to advise a good doctor and check his health. Sometimes nails are an indicator of disorders in the body; you should immediately go check your kidneys, liver and other organs.
What types of manicure are there? Which one is better to choose? How do they combine with gel polishes?
There are classic, hardware and combined with cutting with scissors or nippers. The latter is the most modern type of manicure, because the master sees on dry skin where the dead skin cells end. This is an advantage to do the procedure without any cuts or damage. With a classic manicure, the cuticle soaks and turns white; if it is thin, you cannot avoid cuts. Hardware manicure is much better, the main thing is to take care of the attachments and clean them, but this is the responsibility of the master.
A classic manicure can be done before coating, but it is worth considering that gel polishes do not behave very well with water. We soak the old coating before applying a new one, do a manicure using water, and then degrease everything with alcohol wipes or dehydrators, but this additionally dries out the nail plate. Therefore, it is easier to do a hardware manicure on a dry surface, and here you will immediately understand that the skin is not damaged. Of course, here everything depends on the master and his skills: you can cut down a lot with the device, you can harm the client if you don’t know how to work with attachments. It all depends on the experience, diligence of the master and conscientiousness.
What is alignment and why is it needed?
Nowadays, almost everyone straightens the nail plate using gel polishes. This is the creation of the ideal nail architecture. All flaws are hidden with gel polish, a smooth surface is created, but quite a lot of base is used. If there is not enough of it, alignment will not work. Liquid bases can be used to level the nail plate, but this is not suitable for thin and brittle nails.
Often people ask to seal the end, but this makes no sense. The very first thing where the gel polish starts to fall off is the end, it gets touched and the gel polish starts to fall off.
How long can I wear gel polish and how often can I reapply it?
You cannot overuse gel polish, as detachment may occur. Water, foundation, food, anything can get under the coating. And germs can multiply. It is better to make corrections once every 3-4 weeks, but not less often, no matter how well the coating lasts. There may also be a greenhouse effect. If you use the classic removal option, then try to renew the coating not very often, otherwise you will dry out the nail plate. I have clients who go once every 10 days because they are annoyed by the appearance of the overgrown nail, but I only remove it with a device. We paint under the cuticle, carefully lifting it, but some nails grow quickly, everything is very individual.
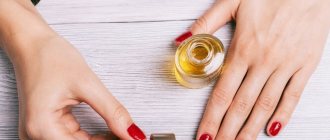
Do I need to “rest” from gel polishes? Are breaks beneficial?
A break makes sense if you remove gel polishes with your teeth, hands and other unconventional methods, injuring your nail. You need to rest wisely, doing useful things for the body, for example, salt baths with oils. You can also rub in wax. The nail itself, its visible part, is dead cells. You need to nourish from the inside, a growing nail gets everything it needs from the nail bed, so it makes sense to take a course of vitamins, do paraffin therapy, use oils and care.
A good procedure for brittle nails and peeling is IBX: the product penetrates the very structure of the nail, it is something like nail lamination, it eliminates chips and glues the layers together. IBX can be done under coating. This is a good option if you had a bad removal done, but you don't want to go without color on your nails.
It takes at least 6 months for a nail to fully recover. And the master should not persuade you to cover it with something; a good master will simply offer to carry out the care procedure. If you go to the same nail technician for years and do not use aggressive removal products, then your nails will be fine and they are unlikely to need rest. You only need a break from a bad master and salon.
Is it possible to restore nails with gel polish?
It all depends on the problem. If your nails are thin, then they will feel good under the coating, but again, you cannot remove them with liquid, so as not to dry them out and injure them. It is better to change the coating more often, ask not to file the nail plate itself, and use only a soft buffer to level the base. Gel polish can help restore by protecting the nail plate from mechanical damage.
Sometimes people ask to add acrylic, but it doesn't restore anything, it just makes the nail stronger. A very good option if, for example, there is flaking at the ends. We do acrylic every other time because it stays in the base and we don't want to overload the nails.
What should you pay attention to when choosing a salon and specialist?
On the purity of the work, the presentation of the master, his development. If you look at the work, glare is an important indicator. The highlight shows the architecture of the nail, it should be oval and beautiful around the edges. If it is round, then the material is heavily piled up. If it goes crooked, it means the alignment failed. You can look at the end of the nail to make sure it is even. The highest point of the nail, the apex, should be truly the highest and taper off towards the edges. Each master has his own style, some make the coating thicker, some thinner.
It is worth paying attention to the appearance of the master, his concern for health: does the master use a spray for disinfection, a vacuum cleaner so as not to breathe dust, a mask, gloves, sterile instruments. If a person smells unpleasant or something is wrong, run away from such a salon. The master should look well-groomed and clean.
Can a master cheat with the sterility of instruments?
Tools must be in a craft bag of an air or steam sterilizer. We treat ours with air; within an hour, the instruments are treated with heat of 180 degrees. A logbook is kept. As for cheating, you can't be sure because sometimes the experts fry empty bags. In unscrupulous salons, the master may have only one set of tools, which he washes with water and alcohol spray and returns back to the bag. It's a matter of trust. I periodically go to different salons for the sake of experimentation and new information, I see who works how, so as not to make the same mistakes. One day I came to a salon where one of my clients went, where the masters did not change their gloves all day, they did both manicures and pedicures for everyone. The craftsman did not treat the instruments and, along with the remains of leather and other things, threw them into the dry heat. Such stories occur due to laziness; a non-lazy master prepares a disinfectant solution in advance. This way you can catch a fungus, or something more serious, because you can’t kill bacteria with dry heat alone, and the biomaterial remains on the instruments. They had no water in the cabin, although many use ultrasonic washers. Water can be added once every few days, but everything will be ready to clean the instruments before heat treatment.

What should the client know about tool processing?
There are certain stages of sterilization. The rules are as follows: we put the instruments in the solution for 15 minutes, then thoroughly rinse them with a brush for about 15 minutes and put them to dry (the instruments dry closed for an hour), then load them into bags, sign the date and put them in a dry heater. After frying, the indicators on the bags change colors. If you come to the salon and see that the package is lying with the indicator down, ask to see the package; if they refuse, leave this salon. We had a story: a girl got a manicure in another salon, they did a bad job, but the worst thing was that she developed a rash on her fingers, and it all ended with a dermatologist and treatment.
The tools can then be used for 60 days, which is very convenient when there is a small flow of people. The master must have at least three sets; in our salon, for example, there are 20 sets for three masters.
Everything is serious now with files too. These are either disposable or with replaceable disposable files. The bases are also sterilized after clients. Sometimes disposable files are given to clients, but everything is included in the price (such a manicure will cost from 2,000 rubles). We also sterilize metal-based pedicure files with dry heat.
It's better to go to trusted places. Don’t look for a master close to home, look for someone who does his job well and is responsible for your health, and not just your beauty. Let them do it for you longer in some salon, but you will be sure that you will not catch hepatitis there. Beauty is not worth such sacrifices.
What should you not be embarrassed to ask and ask the master about?
About the form. Each has its own form. The master can make a strict square, but some people like more rounded corners. Sometimes they ask to make the free edge softer. This may be unusual for the master, but the client must indicate exactly what is required. Don't be afraid to say something if you don't feel comfortable. If you feel that it is burning or painful, then you must say, since the master may not know about the client’s sensitivity. You always try to clean the cuticle deeply, but everyone has a different pain threshold and location of the capillaries. Sometimes there may be discomfort from pressing, there is no need to be shy.
What can and cannot be done before and after a manicure?
If you are going for a hardware manicure, you do not need to smear your hands with cream on the day of the procedure, because the attachments for the device will not be able to clean the skin, and the cutter will become clogged with softened skin. This will not allow you to clean the cuticle.
After a manicure, you can and should use oils, creams and other care. If your nails grow too long, you can remove the length with a nail file. Nothing should happen to the gel polish. If a chip occurs, the nail can also be filed.
Under no circumstances should you remove the coating with your fingers and teeth, or remove it at home with nail polish remover, or peel off the gel polish with metal sticks. This damages the nail. If you urgently need to remove the gel polish, you can file it down to the base, but it’s better to do all this in a salon. You should absolutely not cut the cuticle yourself or remove it from the side rollers, because this will make the skin even rougher. It is better to treat it with a device, and maintain it at home with a nail file, gently running it over the rough skin on the sides. The cuticle can be pushed back with an orange stick using oil; only the burrs can be trimmed
You should not give yourself a deep pedicure, because you can introduce bacteria to yourself. Remember that the tools at home must be individual, each person must have separate scissors and a file.
Text: Daria Evtyanova
Photos: Ananasnails materials
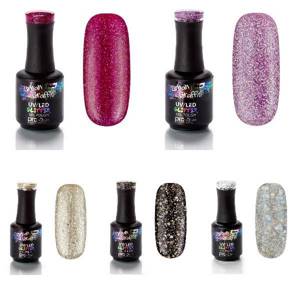
How to choose high-quality gel polish?
Today there is a huge variety of varnishes on the market. The price of some is loyal, while the cost of other gel polishes reaches almost a thousand rubles. Does quality depend on price? Experts say yes. More expensive varnishes are of high quality. For example, Kodi gel polish. Its cost varies from 300 to 700 rubles. This brand has gained trust in the market, so the following rule follows - it is best to purchase varnishes from trusted manufacturers.
In addition, you should pay attention to the composition of the product. A high-quality gel should contain the most harmless substances. The presence of a sufficient amount of oligomer indicates that the product will adhere well to the nail plate and be worn for a long time. A plasticizer is considered an essential component of varnish. It is responsible for cold and heat resistance. A quality product should contain a minimum amount of acids, which can lead to nail peeling.
Features of nail care
In order for a woman to look her best, she should first of all worry about the condition of her nails. At the same time, we must not forget that they need individual care, which is organized in compliance with the following rules:

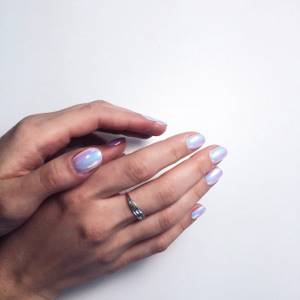
Well-groomed nails
- You should monitor their condition and protect your nail plates regularly.
- Nail care is especially important during the cold season (including autumn), when their structure is sensitive and easily vulnerable.
- Covering them with varnish of your favorite color can mean the end of a more extensive procedure, consisting of a whole range of nail care measures.
- To strengthen the top layer of the plate, it is recommended to take measures to saturate it with micronutrients, the benefits of which have been tested by time. Shellac-type varnish can be an indispensable assistant in this.
The peculiarities of this procedure also include the costs associated with its implementation, which are often very sensitive to the women’s budget. In this regard, personal care, which can be organized no worse than in a beauty salon, is of great importance.
Important! To keep your nails in perfect condition, it is not at all necessary to visit a cosmetologist and spend a lot of time and money on it.
Home environments with their cozy and relaxed atmosphere are quite suitable for applying shellac polish. But all this is true only if the basic rules for handling this symbiosis of varnish and gel are observed.
Recommendations from experts
If you go to a manicurist, there are several tips that will help you keep your manicure looking beautiful and neat for a longer period of time.
- First of all, in order for your manicure to last longer, you must avoid contact with very hot water. This may cause the gel to peel off from the nail plate.
- Be sure to wear rubber gloves before coming into contact with chemicals, as they can corrode the manicure coating.
- It is advisable not to file your nails, as this can lead to chipping of the gel polish.
- It is necessary to properly care for the gel. Special means should be used. For example, oils, hand cream. If you have a small UV lamp, then you can purchase a top product and cover your manicure with it once a week. This way it will last longer.
What is nail correction
In this case, it means applying an additional layer of modeling material to the regrown part of the nail plate. Manicure correction also includes treatment of the nail ridges, cuticles, overgrown nails are filed or trimmed, and a decorative design is applied. The frequency of corrective procedures depends on the rate of nail growth. As a rule, after extension they begin to grow faster because the plate is protected from external negative factors.
What is included in nail correction?
There are several options that have different prices. As a rule, the cost varies between 50-70% of the original; nail extensions and corrections in some cases are very similar in duration and volume of work. In many ways, the price depends on the condition of the nail plate, whether you are getting the adjustment done at home or in a salon, and what material was used. The duration of the procedure depends on this (1-2 hours). What types are there:
- Small. Correction of minor surface damage (scratches, chips, etc.).
- Average. It must be carried out 2-4 weeks after the last correction/extension.
- Difficult. It is carried out when most of the nail is broken, peeled, or mixed.
How many times can you correct extended nails?
The length of time you can wear this manicure depends on how quickly the plates grow and how carefully you treat your nails. Typically, 1 recovery procedure is required every 3-4 weeks, but sometimes it is performed once every 14 days. Girls are often interested in how many times they can correct their extended nails. This depends on the material that was used during the procedure. For example, with gel extensions you can make 4-5 adjustments. The gel then deteriorates due to natural reasons and should be replaced/simply removed.
Price for nail correction
There is a special catalog of masters in Moscow, where the rating is indicated and reviews of the work are written. This will help you find a proven specialist, and not a novice master who can ruin your manicure. How much nail correction costs depends on the material used, whether you come to the salon yourself or the procedure will be carried out at home. The average price is around 1,500 rubles, but you can find it inexpensively for 1,300 rubles. or more expensive for 2000-2300.
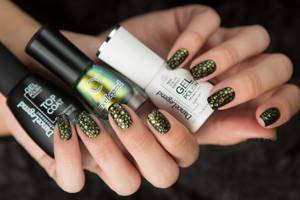
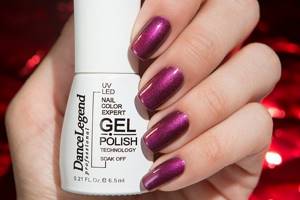
The difference between gel polish and shellac
There are two types of long-term coating - gel polish and shellac. What are their differences or are they completely identical? Gel polish is a gel-like product that must be dried using a special lamp. Shellac has more properties of a varnish than a gel. There is not much difference between them. They differ only in properties and price category. Shellac is a little more expensive than regular gel. Which one is better to choose? Gel polish is better applied to the nail plate. Plus it lasts longer. Before applying the gel, you must apply a primer. It will be a little more difficult to remove such varnish, because it dissolves only with the help of a special product. Also, when using shellac, you do not need to sand the nail, which preserves its integrity.
How to correct extended nails
If you do not want to contact a specialist, and you are confident in your abilities, then you can restore your manicure yourself at home. You will definitely need to order or buy in the online store all the necessary materials and tools. Nail correction at home is justified from a financial point of view if you do it regularly. The main advantages of this solution are that you can make corrections whenever you want and help your friends.
Those who are interested in how to correct nails should first watch the lesson or read the step-by-step instructions with photos so as not to spoil the manicure. In addition to modeling material, you will need to purchase a UV lamp. To simplify the process, you can buy a manicure machine, the only drawback is that you need to learn how to use it and understand the sets of attachments. You don’t have to buy the most powerful router; you definitely don’t need a professional one. Its cost is relatively low, and you will use it for a long time.
- How to cook fish soup from salmon head
- Wormwood for fleas in the apartment - tincture and decoction. Does the herb help and how to remove fleas with wormwood?
- Bead embroidery for beginners
Correction of extended nails with gel
This is one of the material options that is used for extensions and modeling. Correction of gel nails involves the use of specific materials that you will have to purchase yourself. For the procedure you need to have:
- degreaser;
- gel;
- modeling gel;
- liquid for removing the sticky layer;
- acid-free primer;
- antiseptic;
- cuticle oil.
This is the most minimal set for correcting extended nails with gel. If you used a single-phase gel for the first time, you can use it for correction. In the case of a three-phase procedure, any system is suitable. Next, you need to have a minimum set of tools that will help you do everything easily and quickly:
- lint-free wipes;
- buff for polishing nails;
- Ultraviolet lamp
- pusher or orange sticks;
- brushes for modeling nails with gel;
- gel files, suitable for 150/180 and 100/100 grit.
- nail clippers for cutting cuticles or blades;
- artificial nail clippers.
Below is a step-by-step description of how to correct gel-based nails. It is very similar to the procedure when working with acrylic. The instructions consist of the following steps:
- Degrease, disinfect hands, tools, remove varnish and paint from the plate (it is better to use products without acetone).
- Use an orange stick to lift the cuticle.
- Using a nail file, correct the shape, first file off those parts of the gel that have begun to lag behind. Then, in the place where the old coating begins at the cuticle, remove all the gel, you should get an imperceptible transition to the natural nail.
- Treat the surface with primer so that the infection does not get under the nail, remove excess with a towel.
- The smooth part of the regrown plate is cut off using a buff. Next, the hole is immediately filled with gel and dried with a UV lamp.
- When the material dries, you need to remove the sticky layer and form the correct shape. Use a file to immediately correct any unevenness, if any. The base layer of gel is applied evenly over all parts of the plate. A little more material is needed for the stress zone (just above the middle of the nail), but do not overdo it. Then dry the material again in a UV lamp.
- Then you need to correct the shape, smooth out defects and unevenness using a nail file. Be careful not to accidentally wear off the base layer to the old coating.
- Remove dust regularly with a brush.
- Before applying the finish, you need to make the desired design (drawing, French).
- Next, apply the finishing coat in one layer and dry under a lamp. To make it smoother, then apply a buff.
- You need to treat the side rollers and cuticles with nourishing oil (rub in like a cream).
Correction of acrylic nails
This type of artificial material is very popular among girls. Correction of nails with acrylic is carried out according to a similar algorithm, as with the option described above. To ensure everything works out correctly, you can use the instructions described below:
- Treat your hands and work surface with a disinfectant.
- Remove the varnish layer with a non-acetone product.
- Treat cuticles with a softening agent. After 2 minutes, use a wooden stick/spatula to remove the pterygium from the natural plate.
- Remove any remaining product using a lint-free cloth. File down the free edge with a nail file and set the desired shape. It is necessary to cut down 2/3 of the thickness of the material.
- Remove shine from the natural nail for better adhesion of the plate to the acrylic.
- Treat the peeling areas with a fine-grain nail file.
- Next, you need to treat the part where there is no acrylic using a degreaser.
- Treat the nail plate with a primer, which connects the keratin of the natural part with the artificial material.
- Run the simulation. Make sure that the acrylic is applied evenly over the entire area and does not penetrate the skin or into the lateral sinuses. Extension brushes should only be made of natural bristles; do not press too hard when applying.
- Then place your hands under a UV lamp for 2.5 minutes.
- Apply special oil to the cuticle.
Nail correction with shellac
This is a new type of coating that is easier to apply and lasts as long as gel/acrylic ones. Nail correction with shellac is carried out in two ways: with or without complete removal. To carry out the procedure, a standard set of instruments is used. Correction of gel polish is carried out according to the following instructions:
- It is recommended to treat nails that are too dry using a special activator. it consists of essential oils and water, apply it to the sides and keep for 5 minutes.
- Use a pusher to pick up the shellac polish. Carefully remove the coating; this is easier to do using the same activator.
- Using a nail file, give the regrown edge the required shape.
- Next, get a manicure or use a special gel to soften the cuticle and push it back.
- Clean the plate with a nail polisher until a shine appears. This step cannot be skipped; then it will be easier to remove the layer if necessary.
- Degrease the surface.
- Coat the substance that replaces the base and finish, dry it under a lamp.
- Select a shade of shellac, apply one layer to the surface, and dry.
- Then another layer, and again you need to dry it.
- Apply finishing coat last and let dry.
- Apply cuticle repair serum.
Nail correction using tips
This procedure is similar in its algorithm to working with gel extensions. Restoring sealing, updating the coating, replenishing modeling materials, giving an aesthetic appearance - all this is the correction of nails using tips. Below is an algorithm for acrylic technology:
- Saw off the overgrown tips with a reversible nozzle and process to a thin substrate.
- File the surface of the nail with a 180 grit file, smooth out the transition from the tip to its own plate.
- Use a spatula to push back the cuticle.
- Use a diamond attachment to perform a hardware manicure.
- Degrease, disinfect the nail, wipe with a napkin (dry).
- Apply a small amount of acid-free primer at the base of the tip.
- Lengthen the nail bed with camouflage acrylic and shape using a brush.
- Model the cuticle growth area and apex with matte, one-time powder.
- Next, you should compress the stress area.
- Use a clothespin to secure the clamp.
- Model the free edge of the nail with white acrylic. You can put it on two tips at once.
- Form the free edges with the base of a thick brush.
- Use the drum attachment (reversible) to file the tip of the nail.
- Treat the inner, longitudinal arch in the same way.
- File the cuticle and apex area with the “corn” attachment.
- Use a 100 grit file to file down the nail plates.
- Sand the inner arch of the nail using the reverse corn attachment.
- Use a carbide tip to treat the hyponychium area (where the inside of the nail comes into contact with the skin).
- Treat the outer and side parts with a 100 grit file and remove dust.
- Coat the inside of the loose tips with finishing gel without sticky salt.
- Cover the outside with gel too.
- Keep your hands under the UV lamp for 2 minutes.