Often used on women's handbags, the quilted pattern remains incredibly popular. Despite its simplicity, it captivates with its impeccable style and interesting appearance. Therefore, today we invite you to learn how to make a beautiful quilted manicure. Detailed step-by-step instructions will help you quickly master a new nail design with gel polish, and colorful photos will give you a dose of inspiration and good mood.
An easy way to do a quilted manicure
You can perform a manicure using special nail design tapes. This is the most optimal and convenient option. Now we will tell you in detail how to make a simple nail design with diamonds.
- Prepare your nails by giving them a beautiful shape. Apply the first layer of French gel polish, dry it in a lamp and remove the sticky layer.
- Apply the tape so that you get diamonds. Apply gel polish again and cure in a lamp for 30 seconds.
- Carefully remove the ribbons. Using a thin brush and the same gel polish, add volume to each diamond. Periodically fix the pattern in the lamp so that the gel polish does not spread.
- Cover your nails with top gel polish, fix small rhinestones in the corners of the diamond and hold the nails in the lamp for final drying.
- To make the rhinestones stick better, outline them with topcoat using a thin brush and dry again.
After performing these simple procedures, you will receive a very beautiful and neat quilted manicure. It looks very elegant, so it will successfully complement any look. Nail art is suitable for both everyday life and festive events. Be sure to watch the video, which will allow you to get a clear idea of the technique for performing a quilted manicure with gel polish.
https://youtu.be/T2CerP0QWuI
Gel polish on short nails in 2022
Owners of short, neat nails often worry about how gel polish will look.
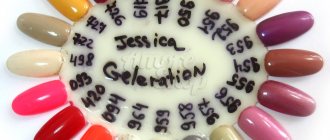
In pictures we most often see manicures on long nails, but will it look so good on short ones? Definitely yes. Gel polish on short nails looks very feminine, neat and cute. The main thing is to choose the right color and nail design. It is important that the cuticle and skin around the nail plate are in perfect condition and that the shape of the nails is neat. The following gel polish options are most suitable for short nails:
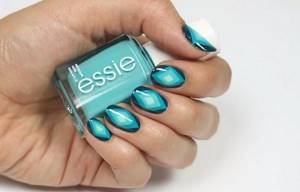
- Matte textures in dark shades. Dark colors visually lengthen nails and make fingers more graceful. Bordeaux, purple, dark chocolate, even black - these shades look luxurious, especially if several nails are matte and the rest are glossy.
- Minimum decor. Short nails should look stylish and laconic. Too many rhinestones, designs and other decor “overload” short nails, and they don’t look very good.
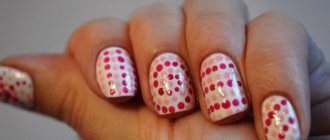
- Bright multi-colored manicure. Short nails painted in different contrasting colors look very beautiful and cheerful, the brighter the better.
- French and its variants. Anyone who thinks that French is for long nails is mistaken. On short nails, French, especially deep, and anti-French look very stylish. Preferably - in a classic look - pastel shades, a delicate nude background and a white “smile”.
- Geometry. Short nails look very beautiful with stripes, triangles, and dots. Both asymmetry and strict symmetrical lines are suitable. Colors can be contrasting, bright and bold.
Method without using tapes
It may turn out that you do not have special tapes on hand that are used to create quilted nail designs. Good news - now we will tell you how to make an equally beautiful design with diamonds on your nails without using a special manicure tape.
- Before covering your nails with gel polish, be sure to treat their surface with a buff so that the manicure lasts longer. The next step is to thoroughly degrease your nails.
- Apply a base coat to your nails and dry it well in a lamp for 2 minutes.
- To create a design on your nails, you first need to cover them with a base layer of French gel polish. Dry it in a lamp and highlight the free edge of the nail with white gel polish, performing a French manicure. We do not touch one nail on the ring finger - that is what we will decorate with diamonds.
- Using a very thick white gel paint, with a thin brush, begin to carefully apply the design. Draw diamonds from the middle of the nail. After one row is ready, dry the nail in a lamp so that the paint does not spread. When the entire surface is covered with diamonds, dry your nails in the lamp again.
- Next you need to add volume to the drawing. To do this, apply a second layer of paint.
- Apply top coat to the remaining nails, dry the manicure in a lamp and remove the sticky layer.
- The finishing touch is to decorate the quilted nails with rhinestones, fixing them with special glue or gel polish in the corners of the diamonds, and hold them in the lamp for a little longer.
You will get a very beautiful and interesting design that every woman will definitely like. To make it easier for you to master the technique of performing it, we suggest you watch a useful step-by-step video.
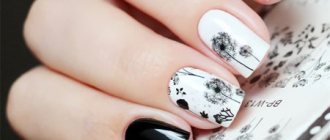
Geometry on nails
Diamonds in a design do not necessarily imply imitation stitching. You can combine a geometric pattern with a gradient, then the diamonds will gradually become richer, while maintaining a clear shape, without streaks or irregularities. This is a very complex, time-consuming, but at the same time extremely effective type of design. With it, your hands will definitely be in even the simplest look.
In addition, you can place a diamond in the center of the nail, for example, making it blue. And form the rest of the design “around” it, outlining each subsequent contour with an increasingly darker shade of blue. The result will be something between a gradient and an optical pattern.
And, of course, we must not forget the clear geometry that is so fashionable now, usually made of black, beige or powder and one bright color. Thanks to the contrast of tones, the manicure turns out to be very sharp, catchy, and fashionable. Often the contrast of shades is emphasized with thin lines of silver or gold glitter. But rhinestones and stones are rarely used in clear geometry, perhaps due to the laconicism of the designs.
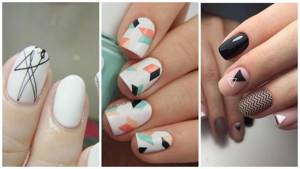
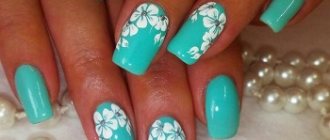
Photo gallery of stylish nail art
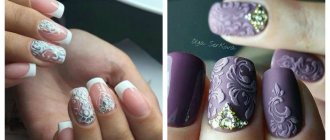
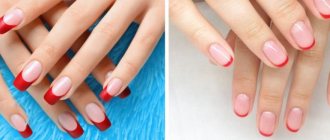
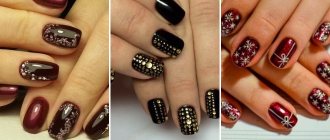
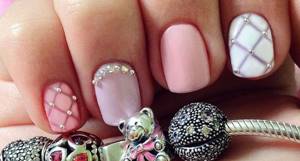
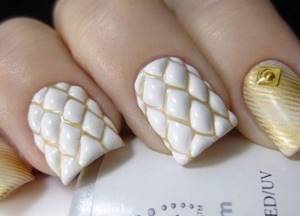
Quilted manicure, depending on the chosen color and technique, can look completely different. You can do it in one color, play with contrasts, make it matte or glossy, complement the design with rhinestones, sparkles and other decorative elements. Every time, even by making minor changes, you will receive a completely unique, beautiful and stylish manicure. We invite you to look at a few photos that will show you all the beauty and charm of quilted nail art.
As you can see, there are a lot of options. Use different colors, get creative, and combine it with other design styles to add a touch of personality to your look . You can decorate all your nails in this style or just one, and apply a monotonous coating to the rest. Limitless scope for imagination opens up before you.
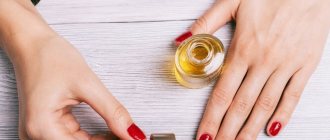
Not all women use gel polish. Many people still make do with regular varnishes, despite the fact that they last much less. They are easier to work with; they do not require the use of additional devices, for example, a UV lamp or liquid to remove the sticky layer. Therefore, many people consider gel polishes to be a product for professionals.
If you don’t have a special lamp and gel polishes, don’t be upset. A manicure with a quilted pattern can also be done with regular polishes. For this you will also need thin self-adhesive tape, varnish and rhinestones. This manicure looks no worse. In conclusion, we bring to your attention another video in which you will find step-by-step instructions on how to perform a quilted manicure with regular polishes.
Materials and tools for creating a quilted manicure with gel polish
For a quilted manicure you will need:
- gel polish
- top
- UV lamp or LED lamp
- tape or manicure tape (they will simplify the creation of a manicure, but there is a way without them)
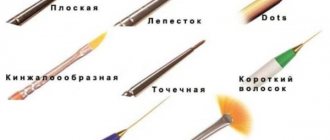
- fine brush for detailing
- additional decorative elements - rhinestones or bouillons (optional)
Reference! Most often, white is used as a basis for quilted manicure. This manicure is considered winter, but there are no restrictions. Depending on the chosen design, it can convey both a gentle spring mood and even the rich colors of summer.
There are two options for quilted manicure:
- Volume. More difficult to perform, it will require more varnish and skill, but the result is worth the effort and materials spent.
- Flat. Easier because you don’t need to apply even layers on top of the diamonds to add volume. There is less chance of breaking the geometry and ruining the work.

If you don’t have manicure tape on hand, you can do without it. But this method is more complicated and, if you have never worked with a tool before, it is better to practice first or purchase a tape. With proper skill and a brush, thin, even patterns are created. Let's consider both methods to choose the best suited skills and set of tools.