Don't know how to paint on your nails? It doesn't matter - you can easily learn this. Let's do a cool manicure with our own hands. What do we need for this? First of all, time and patience. We sit down on a comfortable chair, stock up on acetone, files, varnish, brushes, paints, cotton wool and everything necessary for work and begin painting on our nails. We advise you to cover the table with film or paper, so you will not stain the surface. Print out the drawing so that it is in front of your eyes. Otherwise, you risk getting your equipment dirty. For beginners, we recommend starting with simple drawings.
You need to figure out what is more convenient for drawing, what to choose: brushes, needle, toothpick, dots. How to work with tape and acrylic paints.
Practice first on a suitable surface or paper, and only then draw on your nails. Before applying the design, do a manicure, giving your nails a well-groomed look. Next, you need to apply a clear base coat to your nails.
Brush drawing:
How to learn to draw monograms. 1 lesson
Toothpick drawing:
Nail design using a TOOTHPICK
Our task is to understand how you can make a cool manicure with beautiful designs yourself, at home. With a little patience and skill, you can successfully make drawings at home without the help of a nail art specialist. Start learning with simple drawings, then complicate the task. Over time, you can take on complex designs. The easiest way is to use tools such as a toothpick or a needle.
Where to start: necessary tools and materials
Before you start learning how to paint on nails, you should keep in mind that this activity requires patience and a desire to improve your skills.
First you need tools:
- a needle or toothpick are great for beginners. They can easily draw simple patterns. This should be done carefully, without pressing too hard on the nail plate, so as not to damage it;
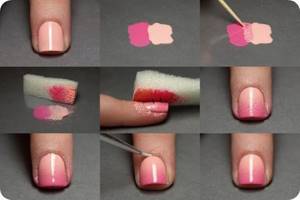
- sponge It is used when working with pearlescent paints. They also get a gradient manicure;
- a stick with a wooden base, the end of which has a cut. It is more convenient to use when decorating a design with rhinestones or similar materials;
- tweezers. Can be used instead of a wooden stick. Also used when working with fabrics and lace;
- dots. It is also called a dotting brush. It is basically double-sided and has 2 balls of different sizes. Used not only to make dots, but also for many patterns;
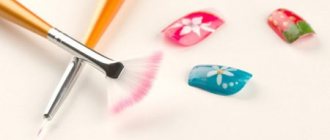
- brushes for painting with acrylic paints. They need to be treated carefully. After work, be sure to clean and dry. It is preferable to store it in a case.
There are several types of brushes and each has its own purpose:
- draw small details;
- mix shades and fill spaces in the drawing;
- for fine lines;
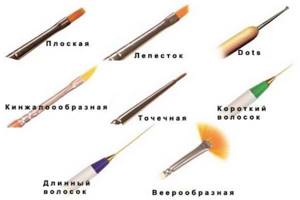
Before you learn how to paint on your nails, you need to know what brushes are needed and what they are needed for. - to combine colors without mixing them (fan brush).
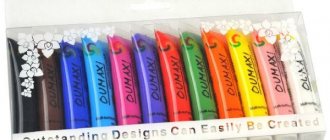
To create a drawing you will need:
- varnishes. They are most suitable for beginners, as they make simple drawings. Due to the thickness of the texture, it is impossible to work with brushes with this material;
- acrylic paints. Used to create more complex designs. The color range is quite varied. You should not experiment and replace them with gouache, as it will simply “float” on the varnish.
To decorate your manicure, use:
- rhinestones of different shapes;
- beads for manicure;
- broths;
- pearls;
- sparkling microdust.
Manicure techniques
Drawing on nails is accessible to everyone, as there are many manicure techniques that you can learn at home:
- monograms. The technique is distinguished by various combinations of thin lines. A pattern made independently is considered unique. To simplify the drawing process, special stencils are used. You can also buy stickers with ready-made patterns and simply stick them on a varnished nail plate;
- using tape. With its help you can realize the most unusual ideas for graphic drawings. If you don’t want to “play around” for a long time to get the desired result, you can use multi-colored adhesive tapes that you just need to stick on the nail;
- using a sponge A gradient manicure is done. The drawing requires 2 or more colored varnishes. Looks great on any nail length;
- tulle. With its help you can create a pattern with a “snake skin” effect;
- point technique. By drawing with dots you can achieve an original pattern. If there is no dots, then it can be replaced with hairpins, toothpicks or other objects with a thin rod;
- drawings with a needle. First, a dot or several are placed, and then patterns or lines are made with a needle;
- brush drawings. The process is similar to the needle process, only the distribution of the varnish is smoother. In this case, the brush must be thin.
How to use Gossamer gel paint?
The novelty belongs to those varieties of decor with which you can create beautiful nails using any tool familiar to the master - a dots, an orange stick, a special brush, just fingers dressed in protective gloves and even pedicure tools (if everything else is not on the desktop) . There are several ways to create this spectacular, memorable and very stylish design. Let's consider options for a classic look (when the web is not decorated with anything else) and creative design (decorating gel paint with loose decor).
How to use spider web gel paint for a manicure with gel polish (solo image):
- We carry out standard treatment of the nail plate: we treat the cuticle (with a remover, nippers or a fraser), remove the pterygium, buff the nail and degrease it.
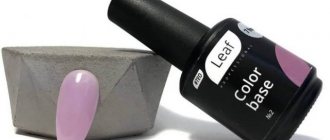
- Apply primer and wait for it to dry. Next, we cover the nails with a base (classic, camouflage, strengthening or rubber), polymerize in accordance with the manufacturer’s recommendations.
- Depending on the density of the gel polish, we apply it in 1-3 layers, drying each thoroughly in a lamp (hybrid or LED device, depending on the type of coating). And let's start decorating!
- Using a thin brush or dots, collect a small amount of material from the jar. In the case of creative abstractions, we dip a finger in a protective glove into the paint, close the fingers together and spread them apart, observing the formation of threads. For a manicure created using fingers, before polymerization, you should remove the remains of the “Cobweb” from the skin around the nails using a lint-free cloth and degreaser. And clean hard-to-reach places with a flat brush to adjust the decorative coating.
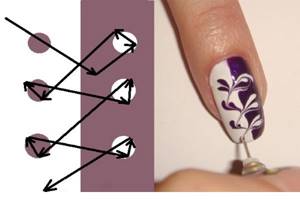
- Before drawing graphic images, we determine the direction of drawing the threads. We place a dot with gel paint on the area of the nail, from which we will paint in the direction of the free edge (or vice versa - towards the hole). We pull a thin thread from the point without touching the nail plate, finishing it with the next point (or breaking the line at the edge of the nail).
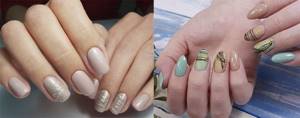
Photo by: @alenka.makarova_/@lilia_dyganova
- When creating a dots image, you should take into account its diameter: the larger the ball, the thicker the lines and dots will be, and the longer it will take to dry the design. Ideally, you should first practice on tips, experimenting with the thickness of the lines and their drying time. In order to avoid chipping the gel paint from the nail, you should not make lines thicker than 1 mm. Otherwise, the “Gossamer” will not dry well (liquid material will remain inside the line) and will not be durable to wear, even if fixed with a thick topcoat (classic, matte or rubber).
- If the image is planned to be voluminous (convex), then after drying all layers of shellac (gel polish), the nails need to be covered with a top coat without a sticky layer and polymerized. And then you can begin to implement the planned design. For planar nail art, gel taffy can be supplemented with “liquid mica” gel varnishes, rubbing, metal 3D decor, kamifubuki (or kagami), sparkles or foil, rhinestones or sculpting elements involving gel-platinin (or 3D gel) . The look is completed with a top – glossy classic or decorative.
Photo author: @yana_nailart_/@yuliya_razudalova Photo author: @viart_master
Creative design with “Cobweb” and loose decor (using rubbing as an example)
The elastic gel itself looks very elegant, airy and attractive on nails of any length and shape. However, it is quite appropriate to complement it with iridescent decorative elements. Such designs will be especially in demand for festive looks and manicures “for an important occasion”. Let's reveal some secrets on how to make the spider web gel shimmer and shine beautifully, and at the same time not stain the entire design and the adjacent periungual skin with shining decor.
- First, we choose a good top coat with a sticky layer, which we cover with gel polish, dry it very thoroughly and remove the stickiness. We will use it to fix the resulting manicure. Next, we draw the desired pattern with a “web” and dry it for 20-25 seconds, so that the result is a good dispersion layer.
- Secondly, we choose to apply the rub (any kind (both northern lights and unicorn) will look great, not a sponge or finger, but a soft brush (makeup brushes are good - brushes for competing or applying blush).
- And the third point: we apply the pigment not by rubbing, but as if stroking the gel paint with a brush. Carefully shake off the remaining rubbing compound and seal the nail art with topcoat in two layers. The little masterpiece is ready!
Photo by: @arminails/@swarovski.magazin1
How to draw with a toothpick
When you first try to draw patterns, it is better to use a toothpick to avoid damaging the nail plate.
In addition to this, you will need:
- several varnishes, including colorless (used as a protective one);
- a small piece of lint-free material to remove coloring material from the toothpick;
- nail polish remover.
Creating a drawing occurs in several processes:
- apply the main tone and wait until it dries;
- use a varnish brush of a different color to put dots or draw a line;
- then use a toothpick to make a pattern;
- Cover the finished dry drawing with protective varnish.
French design with stripes
Since the French jacket transforms with each new season, you can safely experiment with the design within the framework of your preferences. A gradient jacket or with metallic stripes to match or a wider accent to the middle of the nail are ideas that are already gaining popularity among celebrities. This solution looks fresh and fashionable for ladies of all ages.
Creating a design with a needle
For such drawing, it is more convenient to use a machine needle rather than a household needle, since you can use both sides of it to create a pattern.
You will also need:
- protective and colored varnishes;
- cloth to remove varnish from the needle;
- nail polish remover.
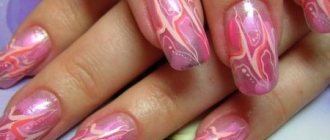
Drawing with this tool goes like this:
- protective varnish is applied - it must dry;
- then the nails are painted with the main tone of the design;
- on the still wet base, spread drops of varnish, one or more colors;
- then use a needle to mix the shades to obtain an original pattern;
- To make the drawing have clearer outlines, apply colored drops to a dry base;
- Finally, apply a protective varnish.
The process of painting with acrylic paints with brushes
Before you start painting with acrylic paints on your nails, you should learn how to use a brush. Training can be carried out on a cardboard or plastic surface.
To draw you need to have:
- 2 varnishes – for the base and colorless;
- acrylic paints;
- at least 3 brushes – thin, beveled and rectangular;
- needle or toothpick;
- palette for the main material;
- water;
- napkins.
The drawing process goes like this:
- cover your nails with a varnish base;
- start painting only after it is completely dry;
- first you need to draw the contours of the intended pattern and only then paint over it;
- make sure that the new layer of paint does not fall on the previous one that has not dried;
- Fix the finished drawing with colorless varnish.
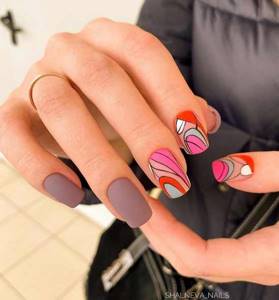
New matte striped nail designs
Of the new products that are winning the hearts of fashionistas, we can note textured and “deep stripes”. These patterns are created using the contrast of a matte base and glossy stripes. As a result, the pattern takes on an incredible look, which can be called real magic in the field of nail design.
See also: New manicures with stripes 2022 - photos and fashionable nail ideas.
How to make simple designs on nails with a needle
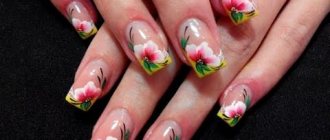
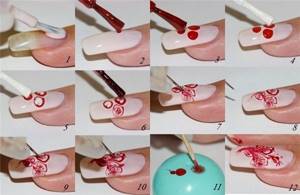
One of the spectacular needle designs is a flower located in the corner area of the nail. It will be appropriate both on a French manicure and on a plain finish. There is no need to worry about learning how to draw such a pattern on your nails.
To achieve the result you need to do 4 processes:
- Cover the nail plate with varnish, which will become the background of the picture - preferably light shades, perhaps even transparent. Let it dry.
- Apply 3 medium sized drops of varnish using a contrasting color. Starting from the center, stretch with a needle to form 3 petals.
- The middle of the flower can be made with shiny varnish or a pebble can be placed in this place.
- When the drawing is dry, fix it again with colorless varnish.
Nail design with gold stripes
Designs with gold stripes are gaining popularity in the new season. Executed with mesmerizing metallic varnishes or glitter, the elements add depth to the manicure. Surprisingly simple, but lines lined with rhinestones, bouillons or small metal beads also look interesting. This design is suitable for formal events.
How to make simple designs on your nails with a toothpick
This tool is best used for drawing spirals.
Manicure process:
- The nails are coated with varnish, which will serve as the basis for the design.
- After it dries, a line of a different color is drawn. Its location and thickness depends on the idea of the pattern.
- Next, spirals are made, which can be located on one side of the line or on both.
- A protective agent is already applied to the dry drawing.
- If you want the pattern not to be so clear, the line should be made on a non-dried base.
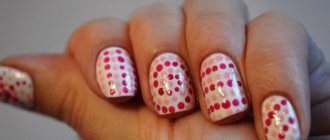
The following drawing is considered simple to perform, but always original:
- The main color is applied to the nails.
- When the varnish is dry, use a toothpick to place small dots of one or more shades. They can be distributed either chaotically or with the appearance of some kind of pattern.
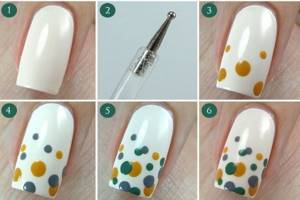
- Cover the top again with colorless varnish.
Photo design of short, medium and long nails with stripes
A fashionable manicure trend in recent years is stripes on nails. Making such beauty is not at all that difficult. For inspiration, look at photos of the work of nail bloggers from Instagram.
- We recommend on the topic: Nude nail design - 100 beautiful photo-new manicures.
- Nail design with stickers: 100 photos, new items, fashion ideas.
- Nail design with a pattern: 101 photos, new manicure ideas.
How to make simple designs on nails with a brush
Since you won’t be able to learn how to paint masterpieces on your nails with brushes right away, it is recommended to first make simple and original patterns of lines and petals.
A manicure is done in the following sequence:
- A light varnish is applied to the nail, which will become the background of the design.
- For lines, it is best to use white and black paints.
- In the corner area of the nail plate, use a thin brush to paint 3 or 4 petals with white paint.
- Distribute slightly curved black lines between the petals at a short distance from them. Their length and width can be any.
- When the paint is dry, use a thin brush to paint along the lines with white paint.
- In the place where the petals begin, you can use a pebble as decoration.
- Use a thin brush to make a few shiny strokes next to the varnish lines.
- When the finished drawing is dry, fix it with colorless varnish.
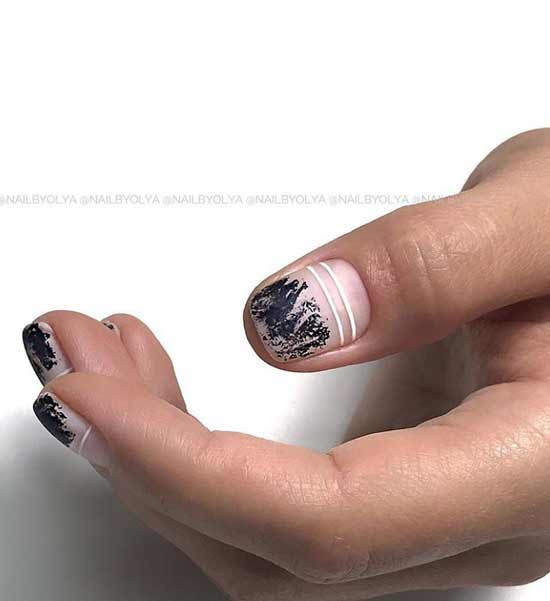
Nail design with black thin lines
For adherents of minimalism, a design with thin black lines is suitable. Gossamer or geometric motifs are combined with light base tones. Matte nude shades or a light pastel palette look sophisticated. You can use both straight straight stripes and curved curves that create unusual patterns.
Silhouette and abstract designs are combined freshly and creatively with everyday looks. This solution creates an interesting manicure, suitable for fashionistas of all ages. The main thing is to maintain an even structure of the coating using special thin brushes.
The process of creating lace nails
But how to learn to draw a lace pattern on your nails, because it requires real skill. There are several options for doing this manicure.
For those who have learned to handle a brush and acrylic paints well, you can paint on your own:
- Apply varnish to the nails, which will be the background of the picture. It can be either light or transparent, or dark. Wait to dry;
- You need to paint with the thinnest brush. On the basis of a contrasting color, lace is created, the pattern of which will be the result of your own imagination;
- Fix the finished dry drawing with colorless varnish.
To create such a pattern, you can use lace fabric:
- First of all, you need to prepare the basic material. Cut out pieces from the fabric, the shapes of which are identical to the nail.
- Apply a colorless varnish, it will be the background of the picture, and wait for it to dry a little.
- To make it more convenient to distribute the fabric on the nail plate, you should use a toothpick.
- Next, the fabric is coated with colorless varnish. Wait a little for it to be absorbed and apply again to fix the design.
The simplest and fastest version of this manicure are water stickers with lace of a wide variety of patterns.
Nail art with white stripes
And in order to decorate an even and universal white tone, masters offer ideas where striped patterns of this color are created using three-dimensional techniques. In tandem with a matte finish, you get an original manicure that will appeal to many fashionistas. For a business look, you can turn to light beige tones, and for an evening weekend style, to magical black and coffee chocolate.
How to draw French on nails
To make a beautiful French manicure, your nails must be the same shape, length and have neatly trimmed cuticles. On long plates, any imperfections are very noticeable. For a classic French coat, in addition to colorless and white varnish, beige, peach or transparent pink are also used.
The drawing can be done in the following ways:
- Apply the base shade first. Wait until it is completely dry and make “smiles” with white varnish. Seal the result with clear varnish.
- First, a colorless base is applied. After it dries, “smiles” are made and everything is secured with colored varnish.
To make the “smile” perfect, the width should not exceed a fifth of the nail plate, and the bend should be made symmetrically to the growth of the cuticle.
This is especially true for short nails - if you make it too wide, then such a manicure will make your hands look rough. It will look best when it is no wider than 2 mm. “Smiles” can be applied in 3 ways:
- using a stencil;
- carefully paint with varnish, and remove any unevenness with a brush and varnish remover;
- Use a thin brush to outline the “smile” and sketch.
Today, classic French manicure is common using bright contrasting colors.
In addition, there are so many drawing options that any mistakes can be “hidden”:
- Millennium French is drawn like the classic one, only the “smile” is decorated with glitter;
- art French is characterized by the presence of a pattern or decorative elements;
- the moon jacket is a mirror image of the classic one, where the “smile” is placed on the light part of the base of the nail plate;
- They also experiment with “smiles”, making them in various shapes.
On long nails, a millennium French manicure looks more impressive, and on short nails, a classic manicure in bright colors.
The use of decorative elements in manicure
To make the drawing more original, many decorative elements are used:
- Stickers with a huge selection of patterns, which are applied to the main tone using a toothpick. If desired, you can coat the design again with colorless varnish.
- Rhinestones are small stones of various shapes and shades. It is best to fix them with glue. You can also use varnish, but they won’t last long this way.
- Broths or beads - multi-colored glass balls. They are used both as a separate part of the pattern and to create a specific pattern. Place on a surface that is not completely dry. Secured with clear varnish.
- Foil is a thin sheet of metal. Has many shades. Used as part of a pattern or as the main background.
- Confetti - circles made of foil in shiny colors. They are used both for a chaotic pattern and a specific pattern. Placed on a dry surface.
- Sticker – paper sticker. Can be used on the entire nail, and as an element of the design.
- Designer ribbons are self-adhesive multi-colored strips that can easily add a pattern to a design. The main thing in using them is that when gluing, the surface must be dry and make sure that the edges do not lift up.
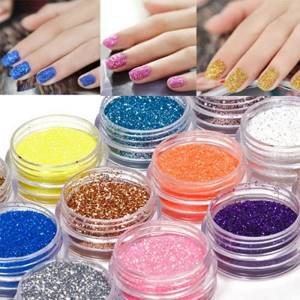
- Glitter. There are 2 types - dry and liquid. The first ones are a shiny powder and are applied to a wet drawing. The second ones are already placed in transparent varnish.
No matter how complex a skill a designer manicure may seem, if you wish, you can learn to draw incredibly attractive patterns on your nails yourself. The main thing is to study the techniques and obtain the necessary tools and means for a high-quality designer manicure.
Nail design with silver stripes
Silver wide lines along the edges of the nail (or in the center) will visually emphasize the subtlety of the shape and increase the length. This option is well suited for pastel and dark solid bases. To add variety, you can choose sand types of varnishes. Also, diagonal stripes against a background of shimmering ombre or gradient as an accent will perfectly complement the overall picture.