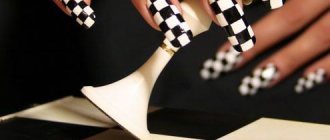
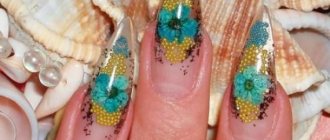
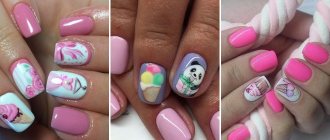
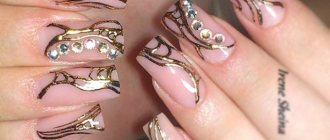
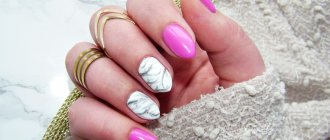
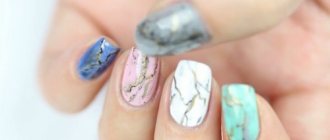
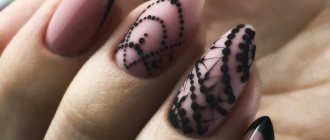
A girl's hands should always be well-groomed and beautiful; this characteristic always demonstrates a woman's neatness and desire to take care of herself. An important detail is the nails; a manicure can be either almost invisible, natural, or a real work of art with amazing paintings. Manufacturers offer a lot of materials for creating unique nail designs: glitter, rhinestones, various paints, powders, stamps, etc. A product such as gel paint has gained enormous popularity; it has become simply indispensable in the work of many craftsmen. What is it and what are the advantages of such a product? Let’s try to figure it out.
Gel paint - what is it and what is it for?
Everyone knows that artificial nails are created using a special material - gel, which polymerizes (hardens) in an ultraviolet lamp. This composition is available in different variations; there are both transparent and colored items. Based on this, many are perplexed - why do we need gel paints? The first and most significant difference between a regular gel and gel paint is its purpose. The first product is intended for modeling the nail plate, the second is exclusively for design. This kind of paint can be used both on artificial turf and on a natural plate, and it is thanks to it that it is possible to create clear and richly colored designs.
In terms of its composition, the product is closest to a gel, only it has a denser consistency and a very rich, dense color. The product is available in small jars or tubes. To fix it, you also need to use a lamp.
note
If you are using false foil, then you will have to cut patterns out of it, then remove the backing to ensure that the adhesive covering the bottom of the foil is firmly attached to the nail plate.
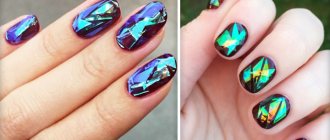
You can make a mirror manicure that covers the entire nail plate with a beautiful and shining coating, resulting in a monochromatic decoration. This type of design is created using a film varnish, which you can buy at any cosmetic store. All you need to do is choose films according to the size of your nails, apply them to the nail plate and use a hairdryer to attach the coating to your nails. Excess film is simply cut off with nail scissors.
Stained glass and mosaic manicures done using the casting technique look very expensive and luxurious. This volumetric design is created using special stained glass varnishes - self-leveling varnish. This manicure looks transparent and voluminous in different colors. At the same time, your nails look crystalline and fragile, which creates a delicate and soft image.
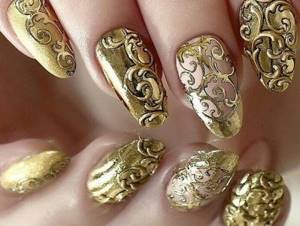
Some stained glass varnishes have a fairly liquid consistency, and this allows them to be successfully used for casting designs with foil. For example, to create a spectacular Venetian mosaic, you just need to apply foil and cover it with stained glass varnish, then paint the stains with dark varnish. As a result, you get an elegant manicure in the style of an ancient Venetian mosaic.
We recommend: Airbrush manicure for creating the most exquisite designs
Benefits of gel paints for nail design
The popularity of gel paints in the field of nail design is very simple to explain - they have many advantages compared to other available compositions for painting. The following positions are especially worth noting:
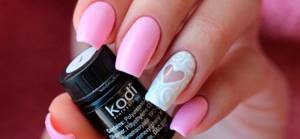
- despite the fact that some manufacturers produce a rather limited palette of colors, there is always the opportunity to mix them, creating the desired shades;
- when applying a multi-color pattern, no bumps are created, the overall picture looks uniform;
- the paint does not dry in the air, which means that before placing it in the lamp you can safely draw details and adjust the design;
- The consistency of the gel paint is designed in such a way that the design does not spread and is easy to apply. Also, when drying in a lamp, the contours do not deform and the composition does not bubble;
- One of the most important advantages is color saturation. Unlike other design products, just one coat is enough to create rich and even color. This characteristic adds not only convenience, but also efficiency;
- When applied to a natural nail, no heavy filing is required.
Required tools and materials
You probably already realized that casting is done using manicure foil. For a more impressive design, it is advisable to purchase silver or gold foil.
Since casting is performed exclusively on artificial nail plates, we will work with gel. There should be several different colors in your arsenal. A final coat is necessary for any type of manicure, and casting is no exception. Just buy a gel finish that is designed specifically for working with gel and acrylic.
And, of course, we can’t do without thin brushes and a UV lamp.
Which gel paint is best for manicure: review of brands
It is best to choose a gel paint for a job experimentally, because for some one option may be ideal, but for others it may not be suitable at all. Based on descriptions and reviews of other masters, you can determine a circle of favorites, among which you can look for your ideal.
Emi (Emy)
The paints are available in branded 5 ml tubes. The product has proven itself to be of high quality, as it provides good, dense color coverage and does not provoke allergic reactions. The products are manufactured in Germany; the line includes a large number of colors in a warm and cold palette. Sold both individually and in ready-made sets. The manufacturer’s great pride is the paint for creating a mirror-like silver or gold coating. The compositions have all the typical characteristics of gel paints - they do not spread, cover tightly with color and quickly polymerize in a lamp.
Kodi Professional (Kodi)
Every manicurist knows about the Kodi Professional brand - products under this name are widely known as specialized, professional and very high quality. Gel paints are available in small black jars with a screw cap (4 ml). The product is based on the company's modeling gel; its consistency does not allow it to spread and makes it possible to draw the finest lines. The paint does not leave a sticky layer after polymerization. You can create both flat drawings and work with three-dimensional designs and casting.
RuNail (Runail)
The release form is round jars with screw caps, the volume for this category of products is quite large - 7.5 ml. The composition is easy to apply, gives a dense color coating without glitter or pearlescent. There is no unpleasant odor, which makes working with paint comfortable and enjoyable. The product is intended for artistic painting, creating flat design and French. At the moment, the proposed palette includes 15 noble shades, which can be safely mixed if necessary. Another plus is the affordable price for high quality.
Miranda (Miranda) for painting and casting on nails
Gel paint is available in jars with a screw cap, volume 8 ml, reasonable price. The product is packaged hermetically, nothing leaks or overflows during transportation. It is immediately worth noting the saturation, even if we are talking about delicate shades. The manufacturer offers a wide selection of colors, both pure and with glitter and shimmer. The consistency is standard, dense, but easily applied to the brush in the required amount. It polymerizes quickly in the lamp and gives a rich coating. The consumption is very economical.
CANNI (Canny)
The manufacturer offers you to choose paint from a very large palette of shades, which are most closely matched to modern fashion trends. The product formula is safe, does not contain aggressive components and does not provoke allergies. The paint does not have an unpleasant odor, it is pleasant to work with, and due to its dense texture it is also very convenient. The volume of one jar is 5 ml. The colors, like other products in this line, are rich, and drawing fine lines is very easy. The product has all the necessary quality certificates, including international ones.
How to do casting on nails: step-by-step instructions
You will need a standard manicure set, gels, foil, thin brushes, UV lamp, finishing coat.
We recommend: How to apply cat eye gel polish: coating features, pros and cons of design
The nail plate must be carefully prepared and polished, especially if you want to create a design on your nails.
You can imitate any gemstone, it all depends on what color you use for foiling. If you choose silver, you will get an exquisite and natural pearl; if you want to get an extravagant ruby, choose foil of a rich red hue.
Now let's proceed to the procedure itself: how to make elegant casting on nails:
| Step 1 Apply a base layer of gel that performs protective functions for the nail plate and dry it under the lamp. |
| Step 2 Apply the color gel polish or manicure design you want to use as a background for casting, dry under a lamp. |
| Step 3 Apply patterns (casting itself) with a contrasting varnish and a thin brush and dry. If the volume of the pattern and stone does not suit you, repeat the procedure. |
| Step 4 Place a piece of foil on the patterns, press and pull off. |
| Step 5 Cover everything with the finishing coat and dry under the lamp. |
Before you engage in the procedure and figure out how to do casting on your nails, you should take into account some of the nuances that arise for every beginner. Sometimes foil gives a bad imprint on the gel and there may be several reasons for this. In most cases, you did not press the foil too well and its particles could not be imprinted as needed. The second option for failure is that the foil is of poor quality and cannot create the effect you want.
And the third reason is the quality of the gel polish, since not all products have the right texture and sticky layer so that the foil can print well. The varnish should be dense and each layer should be well dried. Therefore, all those who want to take up the technique of performing gold or silver casting on nails need to practice and select a high-quality set of tools and design products.
How to apply gel paint
The contour of the gel paint application depends entirely on the desired design - it can be individual lines or dense coloring in the area of the free edge of the nail. The process of applying the composition itself is quite easy:
- The desired pattern is applied to a previously prepared surface using a brush. Its contours can be easily corrected with an orange stick or another clean brush - if the drawing has not yet been subjected to UV exposure, then it can easily be adjusted;
- after the layer of gel paint is polymerized in a lamp for about 1-2 minutes (the exact time is indicated by the manufacturer on the packaging);
- Depending on the type of product, it may be necessary to remove the sticky layer.
To create a harmonious picture during application, you can add sparkles, rhinestones and other design elements. This technique gives a good effect - foil is applied to the dried paint and sharply torn off, leaving behind an uneven shiny coating. This helps create a bright and effective design, especially if contrasting colors are used.
Useful tips for using gel paint
Some practical tips for using gel polish: first, you need to push back the cuticle, as always, with an orange stick and remove it in your usual way; secondly, you need to remove the glossy layer of the nail with a buff; next, use a degreaser for the nail plate; then, apply a thin layer of primer; two layers of gel paint base, dry each layer for three minutes under an ultraviolet lamp; go through the buff again; finally, we cover the nail with color, drying each layer under the lamp for at least three minutes; then the sticky layer is removed and the finish is applied; drying in a UV lamp - three minutes. Manicure is ready!
Photos of designs on nails with gel paints
Examples of the work of other masters are an inexhaustible source of inspiration. You can either try to completely reproduce the chosen design, or create something of your own “based on it”. The main thing is not to be afraid to experiment and constantly train, and the photo gallery of examples will help with this.
Choosing foil
Foil for manicure is produced in two types: transferable and non-transferable. Transfer foil is sold in sheets or strips and is often covered with a protective film. Her assortment is extensive, there is plenty of room for your imagination to run wild. It is used both for regular manicure and for extensions. With this foil you can create almost any design, from delicate to bold.
Non-transfer foil is much more difficult to handle. This foil is denser than transfer foil and is sold in small rolls. When creating a manicure with its help, the design must first be cut out and then “planted” on a layer of varnish.
If you are striving for the highest quality manicure, then it is better to use E.Mi foil, which can leave imprints even on sticky skin. This foil is quite thin and flexible, and therefore is simply ideal for nail art in the art casting style.
