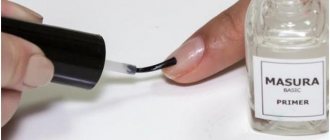
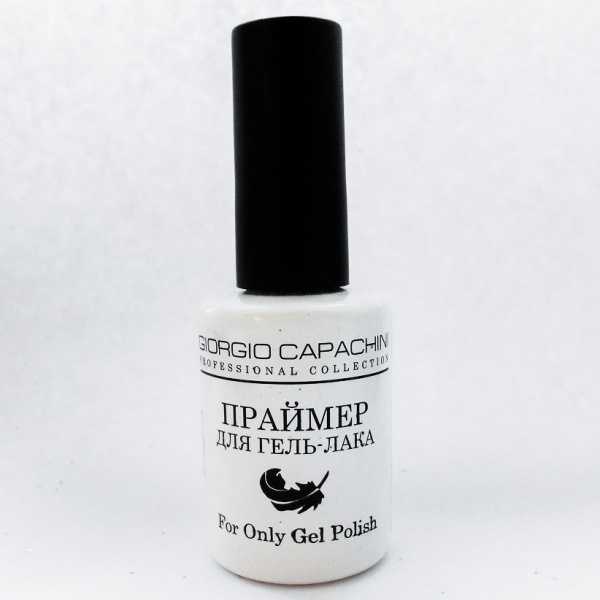
Primer is used for manicure before applying colored polish or artificial extension to clean, untreated nails. If I run out of primer for extensions or gel polish, is it possible to replace it with something? Will your manicure be durable and beautiful if you don’t use a professional product? Read the answers to these and other questions further in the article.
What is a nail primer for?
Why do you need a primer for gel polish? Its main purpose is the following functions:
- Degreasing the nail.
- Giving a slight roughness to the nail plate, which will allow the coating to adhere better.
- Nail disinfection.
- Dehydration of the plate.
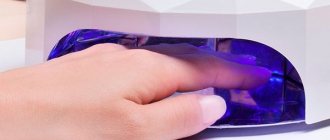
The primer does not need to be dried in a UV or LED lamp. Therefore, you can apply the bonder almost immediately. The special composition of the primer prevents nail delamination and creates a protective layer, protecting the nail plate from the negative effects of varnish and other related materials. When applying nail extensions, a primer must be used. Otherwise, the application will not be of high quality, the nail will peel off and become damaged. And the manicure itself will not last long.
Is it possible to use a simple single-phase gel for nail extension as a base for gel polish?
No you can not. The gel is not elastic, unlike gel polish. And you should use a base top designed for gel polish. Good luck to you! 
The point of coating with gel polish is not to file it off like a gel, but to dissolve it. and the gel base and finish are insoluble, the meaning of this procedure is lost. you can use colored gel
You can apply makeup, but then you will only have to file off the gel polish, not soak it... It’s better not to save money and buy a base and top for gel polish...
touch.otvet.mail.ru
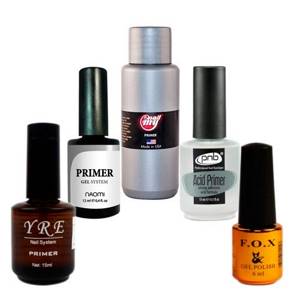
Kinds
| Primer type | Compound | Which nails are best suited for? | Features | For what procedure is it intended? |
| Acid | Methacrylic acid, ethanol, butyl acetate. | Prone to fat | Making the nail surface even, disinfecting, removing moisture, degreasing | For acrylic extensions |
| Acid-free | Ethyl acetate | Those with normal fat content | Gentle degreasing and drying | For type extensions, for shellac, gel polish |
Preprimer
Preprimer is a hypoallergenic liquid that does not contain dyes or fragrances. It is used before applying an acidic or acid-free primer. Preprimer improves degreasing and helps remove excess moisture. The deep layers of the nail are not affected. The hydrobalance is not disturbed, which is the main condition for preventing fragility and brittleness of nails. If you use a pre-primer before applying gel polish, your manicure will last longer. Nails under the coating do not dry out or break.
Acid
It is made on the basis of methacrylic acid. It is used primarily for nail extensions with acrylic powder. The acid primer lifts the scales of the nail plate thanks to its special composition. Therefore, the surface of the nail adheres better to the varnish, and a durable coating is formed.
The nail plate dries completely due to the high acid content, so this primer is also suitable for gel extensions for women with oily skin. It is not recommended for use if the nails are in poor condition, thinned, or if there is damage to the skin and cuticle. Most often, manicurists do not use ready-made acid primers due to their aggressive effect on the nail plate. It may become yellow in color and have a rough surface.
Acid-free
It is recommended for use before the gel extension procedure. Its composition helps eliminate excess oiliness of the nail, destroy pathogenic microorganisms, and dry the surface. Acid-free primer contains fewer aggressive substances, which allows it to be used for sensitive skin. But it is important to follow the technique for creating the coating, since if it is violated, irritation of the skin around the nail may occur. The primer itself does not affect the final color of the coating. Although this product does not contain methacrylic acid, it can cause 3rd degree burns. To prevent this from happening, you need to follow the manufacturer's recommendations for use. If acid-free primer gets on your skin, you should immediately rinse it under running water.
How to apply gel polish base correctly: how to use, which one to choose, reviews
Correctly applying the base for gel polish is necessary in cases where the coating on the nail does not look good, unevenness, streaks are visible, the coating bulges and peels off quickly. It is designed to improve the durability of manicure, its visual aesthetics and protection. Due to the additional coating, the colored varnish looks bright, beautiful and even.
What is nail base
Nail base is a special one-color transparent coating that is applied to the nail before the main shade. This is a must for manicure. The base helps hide surface irregularities and protects the plate from color pigments. Available not only for gel polishes.
There are several types:
- rubber (makes the base thicker, improves the process of leveling the plate);
- acrylic (contains acrylic powder, which strengthens the nail structure);
- silicone (seals all microcracks and is easily removed);
- camouflage (combines base, top and colored varnish);
- water-based (ideal for people with increased allergic reactions);
Also, bases can differ in color, be light beige, nude, colorless.
Why do you need a nail base?
The base is a necessary component of a manicure; it is used to protect the nail from paints. But its functions don’t end there:
- The base coat for nails provides the best adhesion to the surface and prolongs the durability of the manicure.
- Strengthens thinned and weak nails, protects them from brittleness.
- Levels the surface, removes bumps and irregularities.
- Gives manicure shine.
- Prevents chipping in the area of the free edge of the nail and peeling.
- Speeds up the drying process of subsequent layers.
Composition of the gel polish base
Manufacturers can add both natural and synthetic ingredients to the gel base for nails:
- Photoinitiator. That component that interacts with ultraviolet radiation and allows the varnish to harden when dried. It is harmless to the body and non-toxic. It is because of the amount of photoinitiator that a burning sensation may be felt during drying. The more of this component in the composition, the faster the coating dries.
- Film former. A substance that reacts with ultraviolet radiation. With this reaction, a durable film is formed on the surface, preventing the varnish from quickly erasing. The product is also resistant to household chemicals and acetone.
- Silicon chloride. This component is added to add shine and pearl.
- Silica. A substance that prevents the gel from separating into fractional components.
- Methacrylates. A product responsible for the thickness and consistency of varnish. Depending on its amount, gels are divided into more watery and thick ones.
- Vitamins. A vitamin complex is often added to the base, which nourishes the nail plate and preserves its condition.
Is it necessary to apply a base before gel polish?
Experts note that it is important to apply a base under the gel for several reasons, including:
- Extending the service life of the coating.
- Strength of nails that do not develop cracks or chips.
- There is no harm to the nail plate.
Before applying the base to the nail, you need to prepare it, namely sand it with a special file and degrease the nail plate with a cleaner. When working, you can use a special product called a primer. This will allow the base gel to bond better with the nail.
The main task of the gel base top coat is to increase the percentage of adhesion of the plate to the colored gel itself, ensuring long-term wear. Also, the base for gel polish no less effectively protects nails from staining them in the color of the varnish, since the stratum corneum easily absorbs it, which can lead to increased fragility and other negative factors.
The significance of the base gel layer also lies in the aesthetic side - it forms the correct and beautiful architecture of the nail plate, adapting to the anatomy, smoothing out natural dips and irregularities. Strengthens and thickens the surface, fills formed microcracks. Correct application is the key to creating a glossy second layer.
Applying the base is a mandatory and key step in the 3-step gel nail coating procedure. If you do not apply this layer, the coating will be very short-lived. The maximum service life will be 2-3 days.
Which base is better to use for gel polish?
The main task of the first stage of the entire procedure for using the gel is to ensure durability of the color coating, make the nail smooth, and cover the scales.
Important! There are several types of base coats for gel polish, and each of them has its own positive and negative sides.
- The rubber gel base has a dense consistency. Its pliability allows you to remove and make less noticeable all the natural irregularities of the nail. Manicurists recommend this particular type of coating for the reasons that it bonds well with the plate. Durability allows you to increase the duration of wear and maintains the aesthetics of the manicure. Used as a strengthening base for nails.
- Leveling, thick. It has a transparent consistency, suitable for imparting evenness. Creates an absolutely smooth coating that is easy to apply colored gel to. May vary in density and appearance.
- The base is silicone, comes in the form of a nail, which is applied to your own. Easy to remove, fills microcracks.
- Acrylic. It has a synthetic composition that differs in color. There are natural shades or color variations. The best option for extensions.
- Camouflage base. Suitable for novice craftsmen, as its advantage is ease of application, however, its single-phase nature significantly reduces its service life.
- With vitamin complexes. This base is often used for problematic, brittle, damaged nails. The composition includes vitamins E and D, which stimulate regeneration and strengthening.
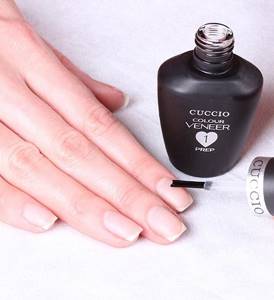
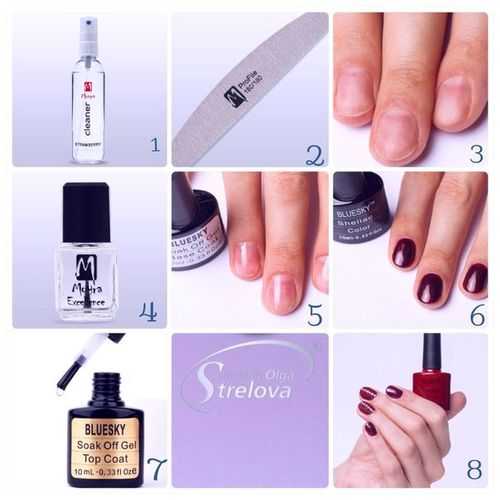
How to prepare the nail plate before applying base
Preparing your hands for applying varnish is the most important step. After all, the further quality of the coating, its cleanliness and duration of wear will depend on this.
First, the surface is carefully processed: the pterygium is removed, the cuticle, all hangnails, and excess skin on the side ridges are trimmed. They give the required shape, and the edges are sanded with a buff.
All dust, skin residues and debris are carefully removed with a brush or brush. Afterwards, the nail must be degreased. Acid and acid-free primers or alcohol are suitable for this. The primer is applied in a minimal amount to the plate and rubbed into it with your finger. Afterwards, take a break to allow the surface to dry. You don't need a lamp for this. Only after this is it possible to apply the base.
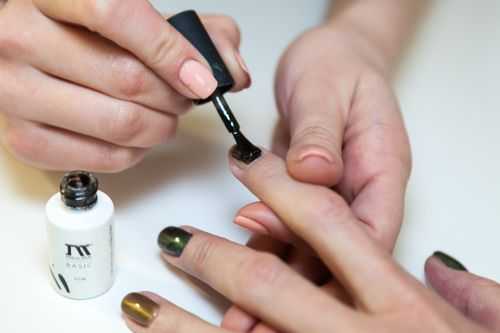
How to apply base on nails
Once the surface is completely ready for the application of the gel, the coating stage begins. Take a small drop onto the brush and apply it to the plate, slightly short of the cuticle. After this, with a spread brush, the drop is brought to the cuticle and down to the side rollers.
How to use nail primer?
Regardless of whether an acidic or acid-free primer is used, there are general rules for its use.
Therefore, before you extend your nails or start a manicure, you must follow these recommendations:
- Before applying the primer, the nail must be pre-treated. It needs to be sharpened with a file or sanded with a machine. Also perform other steps of a standard manicure.
- Remove the cuticle with a special stick, buff or pumice stone.
- It is important to ensure that the primer does not come into contact with the skin around the nail to avoid burns and irritation.
- Treat the surface of the nail plate with a dehydrator to remove fat and stickiness.
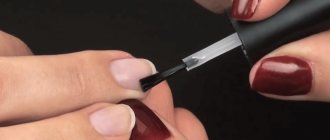
- When applying the primer for the first time, you need to drop it on the center of the nail. After the product has spread over its surface and dried, you need to repeat the procedure again.
- Remove excess primer with a cotton swab dipped in water.
- It is better to apply the product in a thin layer, otherwise the scales of the nail surface will open worse.
- The primer does not need to be dried under a special lamp, unless there is a special instruction about this in the instructions.
- Apply base, colored varnish, decor if necessary, and top coat.
If there is no primer when applying varnishes, read on to see how you can replace it.
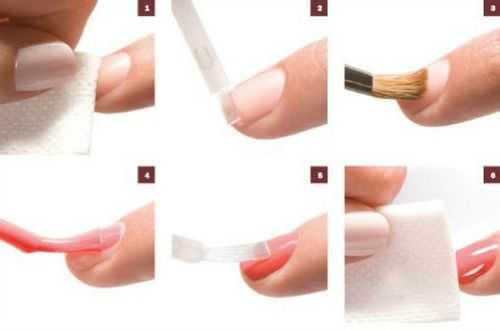
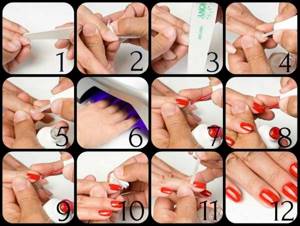
Extension on forms
Let’s make a reservation right away that this material is not suitable for the top forms that are fashionable today. Only classic lower forms can be used.
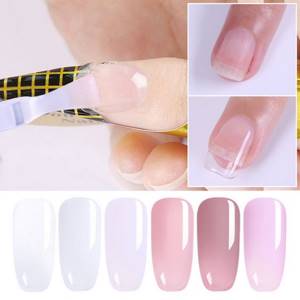
There's no need to rush. If you have little experience yet, work with each finger separately, drying each layer. Before you start using single-phase extension gel, nails should be thoroughly treated, degreased and coated with primer.
- Adjust the shape to the nail, making cuts if necessary so that the base fits as tightly as possible.
- Carefully glue the edges together, making sure that all symmetrical elements match completely. You can use a stationery stapler to prevent the form from coming unglued while working.
- Using rubbing movements, apply the first base layer of single-phase gel, starting from the end and moving towards the cuticle. Avoid contact with skin! If the gel is baked on the cuticle, detachments are inevitable.
- Cure the material in the lamp for as long as the manufacturer recommends. Evaluate the result by lightly tapping the surface with a pusher.
- Place a drop of gel on the mold, where the free edge will form. Use confident strokes to distribute the material, following the markings. Shape the apex depending on the desired length. Place in a lamp to dry.
- Carefully evaluate the surface, if necessary, add a little gel to the gaps. File off unnecessary bulges with a file. If you don't plan on doing the design, simply cover the nail with another thin layer of gel, turn your hand over, palm down, and let the material level out. Send the work back to the lamp.
- You can start sawing. Follow the direction of the side edges, check the symmetry of the nail. Single-phase gel does not need a topcoat, but you can use, for example, a satin or velor finish for decorative purposes.
- All that remains is to remove the dust and remove the stickiness with a special product.
How can you replace nail primer?

According to reviews from experts online, there are several popular ways to replace nail primer at home:
- Vinegar. If you don’t know what to replace the primer with before applying nail polish, you can wipe the surface with a cotton pad or cotton swab soaked in vinegar. The nail should dry naturally, without wiping with a lint-free cloth. Vinegar also softens the cuticle after a five-minute bath in water with the addition of it. Using vinegar instead of a primer will reduce the time for manicure, as it simultaneously acts as a primer and degreaser.
- Alcohol. Many professional products already contain it. Therefore, you can safely use it in its pure form if there is no primer. The alcohol quickly evaporates from the surface of the nail, leaving a barely visible light coating. One application is enough, as more will dry out the nail plate and the skin around it.
- Nail polish remover with acetone. Should not contain oils. They create a greasy film on the surface of the nail, which will become an obstacle to the high-quality adhesion of the plate and the gel coating.
You can also use cologne with a high alcohol content instead of a primer.
Original solution: how to replace shellac at home
Shellac has confidently won the hearts and nails of women all over the world. There is no other coating that can compete with it. The main reason hindering its use on all women's nails is related to cost. Unfortunately, she is great. The question of what can replace shellac is increasingly asked by women.

A few words about shellac
Shellac was developed at the beginning of this century by CND. To perform the coating, you need to purchase special materials, including shellac, base, top, and have a lamp, which requires large costs, which it is desirable to reduce without sacrificing quality. The search for how to replace shellac at home can be done in two directions:
Choosing a coating whose characteristics are, if at all, inferior to shellac, then only slightly. But at the same time it is more accessible to the average consumer.
Searching for materials that can replace those used when applying shellac with cheaper ones.
Coatings that, according to their characteristics, can replace shellac
It’s worth noting right away that all the proposed replacement options do not give the required result. But they can be used as an alternative budget option.
Shellac replacement options:
- Gel polishes. Despite the opinion that shellac and gel polish are the same thing, the differences are not only in price. There is a different process for preparing the nail plate. For shellac, the nail is degreased; under gel polish, the shiny natural layer is removed.
- Acrylic coating. During application, acrylic emits a strong chemical odor, which can cause allergies. Due to the long drying process, the total work time increases. But application at home is carried out without a special lamp.
- Vinyl lux covering. This is another product from CND. The process is simple: two layers of varnish, followed by a layer of topcoat, which is supplied in the kit. No base application required. As a disadvantage, it is worth noting the short service life: the manufacturer promises only a week.
- Permanent varnishes. To create worthy competition for shellac, manufacturers of traditional varnishes produce long-lasting analogues that can stay on the nails for even more than a week. To obtain a durable coating, work must be performed according to all the rules, with a base, degreaser and top coat. There is no need to dry it in a lamp when working at home.
- Stickers. They resemble foil in appearance; holograms are most often used. Allows you to quickly and easily apply a high-quality coating to the nail. The picture you like is pasted onto the nail plate, smoothed and trimmed with a nail file. Every girl can find stickers to suit her needs.
- Decoupage. The nail decoupage technique resembles the usual process. Napkins of the appropriate size are glued to the surface of the nail. Regular varnish is used as a base. After drying, the nail is given the appropriate shape with a nail file. To ensure that the coating made using the decoupage technique has a shiny and beautiful appearance, varnish is applied on top.
How to reduce the cost of shellac coating
It is not possible to replace the shellac itself and the base at home; there is no alternative. Any option will affect the quality. They save on those operations and materials that are considered additional and do not significantly reduce quality. For example, a liquid for removing a sticky layer, a degreaser.
Budget application option
Question: How can I replace shellac degreaser?
Answer: Acetone-based nail polish remover can be used to remove the sticky layer; the same liquid can be used when the question arises of what can replace shellac degreaser with.
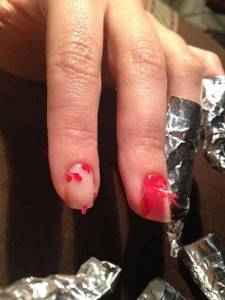
Question: What can replace foil for removing shellac?
Answer: To remove the coating at home, an ordinary cotton wool disc is divided into parts. For impregnation, substances such as acetone, isopropyl alcohol or nail polish remover are used. Attach to the phalanges of the fingers using food foil or a plastic bag. Try to avoid contact of the solvent with the skin. After standing for 10-20 minutes, remove the remaining coating with sticks.
The tips listed will help reduce the cost of applying shellac at home and reduce the amount of materials needed. You can also choose the most affordable decorative coating for decorating your nails from the available options. This allows a woman to always remain beautiful and well-groomed even in the face of temporary difficulties.
Manicurist answers questions

- Is it necessary to use a professional primer when doing extensions? If when coating a nail with gel polish you can do without a primer, then when applying acrylic or gel extensions this is a necessary step.
- Are there any differences between nail primer and base and can they replace each other? These are fundamentally different means, each of which has its own function. The primer is necessary to prepare the nail plate for extensions or gel polish, and the base is one of the three stages of their implementation.
- Do I need to dry the primer under a UV or LED lamp? No, the primer does not require drying in a special apparatus, except for the recommendations specified in the instructions for the product.
- How to choose the best primer? It is important not to buy blatantly cheap products that show signs of being counterfeit. Choose primers from well-known, reputable manufacturers, and study real reviews of manicurists and their clients.
Is it possible to apply gel polish on the gel: without base, regular, biogel
The modern beauty industry offers a wide selection of products that allow a woman to feel irresistible. You can experience the achievements of the industry for yourself by visiting a beauty salon, where professionals will help you create a unique image. But domestic women, for the most part, are not accustomed to frequent visits to beauty salons. Many people try to create an individual image on their own, using all possible means. One of these products is gel polish, which allows you to create a flawless manicure that will retain its original appearance for several weeks. But in order to create a long-lasting manicure, it is important to know the technological features of using modern gel polishes.
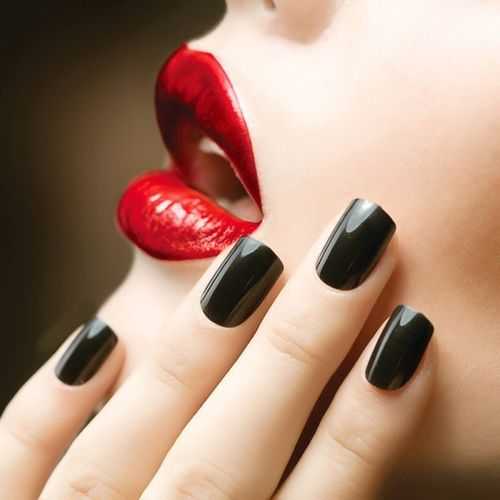
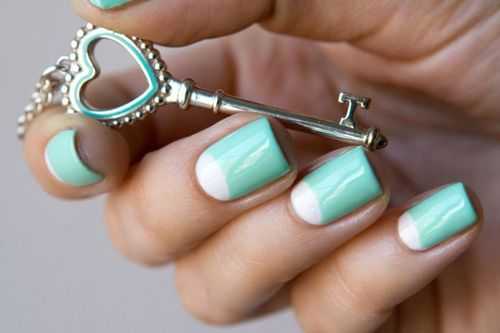
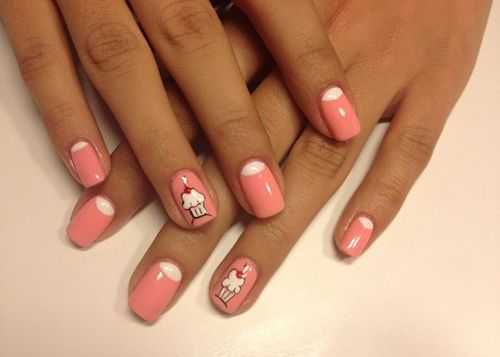
Beautiful manicure
Combination of polish and gel polish
Is it possible to apply polish under gel? We recommend that you read the advice of professionals. It turns out that regular polish cannot be used as a base for gel polish. It is not recommended to even experiment with such a combination. The peculiarity of the gel composition is that it allows the polymer to bond to the surface of the nail plate. Ordinary manicure varnish does not have this property and cannot be bonded with other compounds. If you can’t wait to experiment, you can try this option: apply gel to a clean nail, cover it with the finishing compound, and then use regular varnish. This will allow you to erase the top layer without disturbing the integrity of the gel coating and change the design of the manicure. If you doubt whether regular varnish can be applied to the gel, we will answer that it is possible.
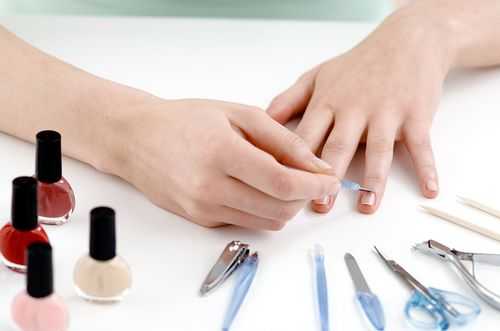
Application process
Shellac and biogel
Today, many girls, taking care of their nail health, use biogel. This is a substance created on the basis of natural components, which is intended to strengthen nails. In essence, this is a medicinal composition that is offered in several shades. In turn, shellac is a gel polish used for decorative finishing of nails. Experts believe that it is possible to combine these two compositions, but subject to certain rules. The most important thing for getting a flawless manicure is the correct application of biogel. If the method of using this product is followed, the result will please you for a long time. If biogel is used as a base, then no additional products are used. Gel polish is applied over the biogel and secured with a finishing layer. By following the technology, the result is a beautiful manicure without chips or scratches.
Features of using gel polish
Girls inexperienced in the field of beauty are wondering whether it is possible to apply gel polish without a base? Manicurists say that this is not the best thing to do. The peculiarity of helium polymer is its ability to adhere to the previous layer. But adhesion between the nail and the gel is impossible. You should not experiment, because gel polish without a base will not stick to your nails.
Often girls ask another question: is it possible to apply gel polish without a top coat? To understand the essence of this process, you need to know that the top coat is a finishing coat that gives the manicure a finished look, shine and protects the decorative coating from chipping. Is it possible to apply gel polish on top? After the topcoat has completely dried, you can decorate your nails with a beautiful pattern, which should be secured with a top coat.
The nuances of using gel polishes can be seen in the video.
Summing up
As you can see, getting a beautiful, well-groomed manicure is not at all difficult. It is important to follow the technology for making and using manicure compositions. Regular polish and gel polish are not the best combination for beautiful nails. Using biogel, which strengthens the nail plates, you can apply gel polish. To prevent the gel coating from chipping, it is imperative to use a base and finish. Without these compounds, your manicure will not last long. Knowing these nuances and observing them in their work, every girl will be able to create an excellent, long-lasting manicure with her own hands.
progellak.ru
When is a primer necessary?
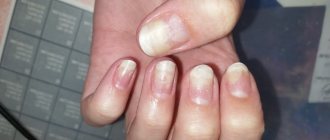
Masters recommend applying primer to clients with thin, brittle and weak nails that have splitting. In any case, the primer will provide better adhesion of the polish to the nail plate, and it will last longer. Even if you follow all the rules and recommendations for coating and modeling, without a primer their quality and strength will be significantly lower. Some masters claim that the primer has low efficiency, its effectiveness is almost zero, and the price is high. But you shouldn’t skimp on your health. If you do not use a primer before applying nail extensions, there is a risk of fungal disease. The reason for this is the moisture that forms on the surface under the non-breathable coating, which is a favorable environment for the development of microbes and bacteria.
Also, under a nail without a primer and covered with varnish, it is almost impossible to notice the onset of the development of the disease at an early stage. Therefore, girls often consult a doctor only after the artificial material is removed and characteristic symptoms of fungus appear. Thus, the nail plate changes color, an unpleasant odor, painful sensations, and redness of the skin around the nail and cuticle occur. To eliminate problems with nail health, you will need quite expensive treatment, not comparable to the price of one bottle of primer.
Is it possible to apply gel polish without primer?
The general technology for performing manicure using gel polish does not require the use of a primer. However, experts recommend not to neglect this stage and use a primer or home methods for better adhesion. You can replace the gel polish primer with such products as vinegar, nail polish remover with acetone, and medical alcohol.
Which primer should I choose, acidic or acid-free?
Which primer for nail extensions is better - acidic or acid-free? For extensions and manicures on artificial nails, it is advisable to use an acid primer. This way the varnish will last longer and maintain its aesthetic appearance until the correction procedure. Acid-free primer is preferable for use by people prone to allergic reactions, increased dryness and dehydration of the skin.
To learn how you can replace nail primer and how to do a manicure with gel polish at home, watch the video:
Is it possible without a base, how to do it at home, photos and videos for beginners
This product is an alternative to all known varnishes; with its help you can get quick and high-quality results. It protects your nails from mechanical stress and gives extraordinary beauty to your hands. Anyone can master the technique of applying gel polish by purchasing the necessary materials for this.
There is also a wide color palette, so you can create your own unique manicure.
Due to the combination of varnish and gel, the product has many advantages: it is odorless and strengthens the nail plate. Very popular today is gel polish with a cat's eye effect, which allows you to create an unusual and fashionable nail design.
What are the advantages of using gel polish?
Let's look at what advantages, for example, the TNL series of gel polishes have:
- Ease of use;
- Does not contain harmful substances that can cause allergies and irritation;
- Makes the nail stronger;
- Does not smear due to quick drying;
- Allows you to have a beautiful manicure for a long time.
These qualities, in principle, are inherent in any high-quality gel polish, which is why manicures using them are the most popular today.
How to apply gel polish correctly?
All girls want to be attractive, for this they always try to maintain their beauty. The increased demand for manicures using gel nail polish is proof of this. Using the Internet, you can watch videos in which masters reveal step-by-step the secrets of the world of beauty. If you follow the basic rules, your nails will always be well-groomed and will become the standard of beauty for many.
- The main rule is cleanliness. Your tools, hands and work surface should always be clean and disinfected;
- Be sure to thoroughly prepare your nails before applying gel polish on a perfectly flat surface, which, in turn, is very important;
- A better connection of the product with the nail plate can be achieved using a buff, removing the shiny layer from the surface of the nail;
- Use a regular nail file to give your nails the required shape: square or round, sharp, almond-shaped;
- Be sure to degrease your nails after everything.
Then you can start painting your nails. It is necessary to carefully apply the base to the entire surface of the nail using a brush, be sure to try not to reach the beginning of the cuticle. If the product gets on your skin, you can remove it with a napkin or cotton swab.
Then you should cover the nail with the first layer and dry it in an ultraviolet lamp for about two minutes until completely dry. Now you can apply the color of your choice, it is better to do this in two or three steps, so the nail will become stronger, will not break, and the varnish will please you for a long time.
The most important thing is to dry all subsequent layers separately, each for 2-3 minutes in a lamp. At the end, you need to cover all the nails with top, this will allow you to finally consolidate the result and get a beautiful shine.
Are there any contraindications to using the product?
Gel polish has a chic structure and a large selection of colors. Thanks to this, women do not need to paint their nails every day and get upset about a ruined manicure. Even for beginners, it will not be difficult to apply gel polish on your own. It, in turn, keeps the nails in order for three weeks and is not subject to mechanical damage. After application, the nails become stronger and do not become heavier, which is very important. Does not contain components that cause allergies.
But this remedy still contains a number of contraindications. When a girl has weakened nails, it is still not recommended to use it. Also, if you are allergic and there is a possibility of getting a possible negative reaction to one of the components contained in the varnish or in the composition for removing it, then use is strictly prohibited. If you have skin diseases or fungal inflammation of the nail plate, it is strictly forbidden to use gel polish until complete recovery.

What is used to apply gel polish?
Creating a manicure at home using gel polish has become accessible to everyone. To do this you need to purchase the following materials:
- Choose an ultraviolet lamp or ice lamp;
- Buy varnishes of different colors, they can be three-phase or single-phase;
- To purchase a base and top, you need to choose a quality product, the quality of the gel polish application directly depends on it, and the top, in turn, is responsible for the shine;
- Files for natural nails;
- Buff, with the help of which the nail plate is prepared for applying the product;
- Primer;
- Lint-free wipes;
- Pusher – used to remove cuticles and excess product that gets on the skin;
- Cuticle softening oil;
- Gel polish remover;
- Foil.
It’s possible that you won’t get the perfect manicure the first time, but after watching training videos and practicing several times, you will achieve a beautiful manicure made with gel polish.
Video on the topic of the article
webdiana.ru
Conclusion
When choosing an alternative option, you must remember that the coating may not be as durable, durable and aesthetically pleasing as using a professional primer. The reason for this is the manufacturer’s development of the component composition, taking into account the greatest compatibility with the preprimer, base base, gel polish or other colored coating, top. But simple home remedies can help out in the absence of a primer, if you initially do not plan to wear the created coating with the design for a long time. In this case, it is quite acceptable to replace a professional product with a budget one.
Material advantages
Often, a single-phase gel becomes the choice of beginners. This is the right decision, because you will have to spend money on just one jar to start getting better at extensions.
Another advantage is the consistency of the material. Compared to three-phase products, it is quite liquid, but not flowing. The gel is convenient to apply and distribute.
Many girls who have tried this type of material claim that it is very obedient, can be easily crimped and can be easily filed. This means that this gel is also suitable for complex arched shapes, such as a pipe.
For many who decided to find out what it is - single-phase gel for nail extensions, the discovery was the huge selection of colors. Manufacturers offer not only classic white, pink and transparent gels, but also a whole palette of camouflages, as well as luxurious opal options, gels with shimmer and sparkles, and luminescent materials. In the palettes of many brands you can easily find gel of any color.
It’s not difficult to understand how to use single-phase gel for nail extensions. If you have experience working with three-phase materials, you will probably enjoy the process. But even if this is your first attempt, you can count on a good result.
However, you should not be deceived and wait for a miracle. Working with any materials for gel manicure has many nuances. If you have the desire and opportunity to take a training course, be sure to do so. Well, if this is not possible (or you even consider nail extensions as a hobby), get ready for hard work. Follow our advice, perform each operation carefully, train and study - then everything will definitely work out.