One of the most common materials for creating nail designs are acrylic paints. They are safe for human health and easy to use. Acrylic will allow you to bring even the most daring ideas to life.
If you don’t want to waste time and money on going to a beauty salon, then you can use all your imagination and skills to do a manicure with acrylic paints at home. The main thing in this matter is to master the technique of applying acrylic paints.
Manicure with acrylic paints at home
To make your nail design stylish and neat, you need to familiarize yourself with some rules:
- The most important rule is that the paint should not dry on the brush, otherwise you can say goodbye to the lint. Of course, you can try to soak the brush in a solvent, but it is unlikely that you will be able to paint anything with it after that.
- You should always use specialized paints.
- To get the perfect manicure, it is better to use water-based paints. Such pigments can be diluted, changing their density and structure.
- You should not skimp on brushes; cheap instruments with unnatural bristles are hard, quickly become brittle and go bald.
Following the above rules, making a manicure with acrylic paints at home will not be so difficult.
How to apply the product?
To create your own manicure, you will need a base, colored varnish and a fixative. Thanks to the base, the next coating is better applied. The base protects the nail from the effects of dyes. All layers are applied thinly. A little varnish is taken onto the brush, after which the nail is carefully painted. It is necessary to ensure that the gel does not interact with the skin.
After treatment, each finger is placed under a UV lamp for 1 minute. If an LED tool is used, it will take about 10 seconds. This is needed for polymerization of the primer. Then the base coat is leveled and the sticky layer is removed. This will allow you to apply the gel polish evenly. When using this tool, you need to consider simple rules:
- Thin layers are needed as there is a risk of waves and bubbles;
- If you want to get rich colors, you will need 2 layers. Each needs to be dried for 2 minutes;
- If a dark color is used, the first layer usually looks uneven in color. Then it is better to apply a second layer;
- When applying gel polish, you should take into account the end part of the nails.
Finally, a fixative is applied. It should be a thicker layer. Nails are dried for 2 minutes under a UV lamp, and 30 seconds under an LED lamp. The result is a glossy shine.
Advantages
If we compare acrylic and varnish painting, which was previously more common, the advantages of acrylic are obvious:
- acrylic paints are easy to use;
- the rich color palette is quite wide, so you can mix a variety of shades to get new, more original ones;
- the paint dries quickly enough, so applying a second layer will not take long;
- acrylic dyes are an excellent choice for beginners, since they are very convenient for creating a variety of designs on nails;
- During the process of creating a manicure, the design is easy to adjust.
It should be borne in mind that paint dries very quickly, and beginners usually need more time to complete a design. In this case, the acrylic is diluted a little with water, so it will take longer to dry.
If we talk about disadvantages, it is poor wear resistance. Therefore, in order for a manicure with acrylic paints to last as long as possible, you need to use several layers of fixer.
Secrets from the professionals
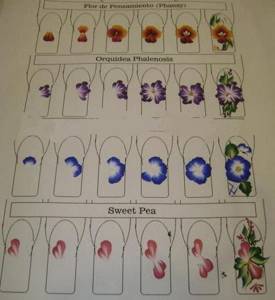
Schemes of drawings
In various sources you can find very complex schemes of drawings on nails with acrylic paints. They seem almost impossible to accomplish. However, masters with extensive experience can do this. In addition, you need to know a few subtleties, which will be described below.
- Acrylic is a fairly liquid material, and therefore it is better to carry out the design on a support so that it does not flow;
- Do not mix materials from different manufacturers;
- It is better to apply the pattern with a synthetic brush, specially made for working with acrylic;
- There are different opinions on how to dry acrylic paints on nails. Depending on the manufacturer, they take different times to dry. But most often it is a few seconds. Contrary to popular belief, a UV lamp is not needed.
Now you know everything about the technique of such nail art. Any instructional video from the Internet will make painting on nails with acrylic paints even more understandable for you. After a few training sessions, you will be able to complete the most complex designs on your own.
Paint selection
When choosing paint, the master must proceed from his preferences. The price category of the most famous brands is approximately the same, while the cost of acrylic paints is not very high, but the features of each are different.
Some pigments are ideal for watercolor painting because they mix well with each other and are diluted with water. The color palettes of different manufacturers differ in the presence of more or less saturated and bright shades.
Manicure with acrylic paints is not an easy task for beginners. To work with drawings, you need a certain palette of pigments; initially, six colors will be enough; they can be mixed with each other, obtaining new shades. But you need to purchase a set of a certain brand so that the acrylic does not change its properties when mixed.
How to dry nail polish quickly in cold water?
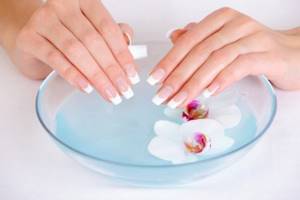
Dry your manicure in water
- As you probably already understood, low temperatures help the varnish dry faster. Therefore, cold water may seem ideal in this regard. But even in this case, there are some nuances in using the method. Everything must be done very carefully
- If you do not want the decorative coating to deteriorate, then fill a large bowl with cold water (you can place it on a container with ice) and gently dip your fingers into it. Keep them there for about two minutes, and then pull them out and shake them lightly. If the varnish has hardened, then let your hands dry naturally and feel free to go about your business
- If you see that the varnish has not dried completely, repeat the manipulation 1-2 more times. With the same caution, it is necessary to stimulate the drying of the decorative coating under running water, especially at the initial stage
- It is very important to be able to correctly adjust the strength of the water jet. If it is very strong, the varnish will be smeared in the first seconds. Therefore, it will be better if you first let the water escape a little, reduce the power of the flow and only then put your fingers under it
Basics for beginners
When starting to create designs on acrylic nails with your own hands, the first thing you should do is get used to the brush. To begin with, various design options can be practiced on cardboard or paper.
For training, it is better to coat some surface with varnish, wait for it to dry, and then apply drawings. During work, special attention should be paid to the pressure on the brush, the required amount of paint, color intensity and shades that are obtained by mixing different colors. It is more convenient to create drawings when the acrylic paint is not in a bottle, but on a palette.
After enough training, you can start drawing on your nails. You need to draw a nail plate on paper and try to draw a design you like on it. When it turns out smooth and neat, then you should perform a manicure on your nails with acrylic paints, a photo of which you can show to your friends and put in your portfolio for further work.
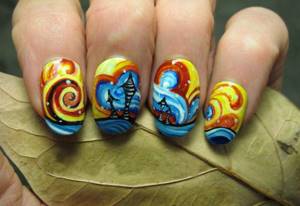
Watercolor gel polish
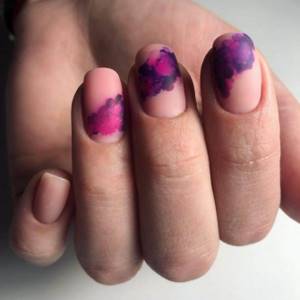
Gel polish for watercolor techniques, or watercolor gel polish, is a special medium-density gel product that is devoid of ductility.
With its help, you can create abstract patterns or apply it pointwise, creating a flowing watercolor effect. Using this method, patterns are obtained, for example, as in the photo below.
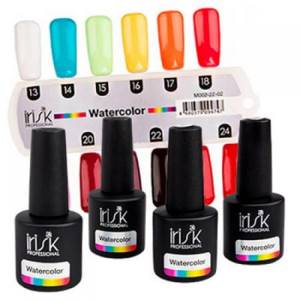
Examples of gel varnishes for watercolor techniques:
For watercolor gel polish, you need to use a special base - without it, the dye will not spread. A large selection of watercolor gel polishes is presented by the Irisk brand in the “Watercolor” collection. The manufacturer also offers a special base - Wet Gel Polish.
To create a design, prepare:
- watercolor gel polish and a special base for it;
- colored gel polish for the background;
- base and top.
Step-by-step instruction:
- Apply a thin layer of your usual base – Kodi, TNL – to the nail plate and dry it in a lamp;
- Now prepare the background - with any gel polish, preferably a light shade and dry it again in the lamp;
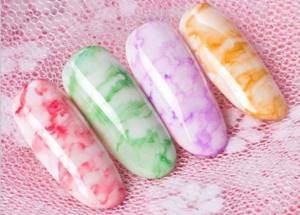
- Apply a special base and, without waiting for it to dry, start creating your abstract pattern. The drops will spread, mix and form streaks;
- After finishing decorating, dry the coating in a lamp. Watercolor patterns need to be dried in LED from 30 to 60 seconds, in UV - 120 seconds;
- Secure the design with topcoat, seal the ends and dry again.
With gel polishes, you can try to create a meaningful pattern with a brush, but the process will be quite labor-intensive. It is recommended for experienced nail artists with well-practiced nail painting skills to use this method. At the initial stage, try using special or acrylic paint for these purposes.
Drawing techniques
To create beautiful patterns on your nails using acrylic paints, it is enough to master some drawing techniques. A manicure will always look bright and stylish.
Oil technology
Thanks to this technique, you can create a wide variety of simple textured patterns on your nails. Paint with undiluted acrylic using a small flat brush.
Pastose technique
Thanks to this technique you can also create simple drawings. At its core, it resembles gouache work. This technique involves using undiluted paints. The strokes are opaque and uniform in texture and shade.
Sliding
This technique is considered the most difficult of all. This design option is not suitable for beginners. The paints are diluted with a special gel, thanks to which they acquire a special white tint. When the gel dries, the color becomes transparent, and the shade itself becomes bright and rich.
It is difficult for beginners to think about what color they will get when breeding. Such understanding comes only with time.
Glaze
The glazing technique involves diluting acrylic in water and applying an almost transparent layer to the nail. A new layer is applied after the first one is completely dry. Glazing is distinguished by its transparency, while the patterns are elegant and delicate.
Advantages and disadvantages
- Experts believe that with gel polish, nails will be protected from brittleness;
- During the procedure, injuries are excluded, which is possible during extensions;
- The product is very easy to apply, since the work uses a convenient brush;
- Cosmetics dries quickly enough;
- The result lasts for 3 weeks;
- Nails look attractive because the polish makes them shiny;
- No chips or stains appear.
The disadvantages of gel polish include:
- The procedure cannot be performed if you have nail diseases, thin cuticles or allergies to varnish substances;
- A UV lamp is required for manicure. It's even better to purchase a special set; It will take a lot of time compared to a regular manicure;
- After 10 days, the plate grows;
- Removing varnish is quite difficult.
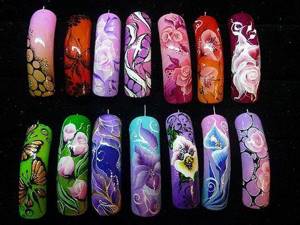
Popular types of nail designs with acrylic paints
If a manicure is done by a novice master, this does not mean that the result will be boring and ugly. There are many style trends out there, and many ideas that even a beginner can do. The main thing in this matter is to get good at it.
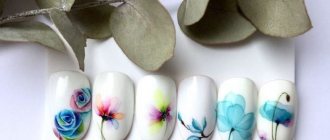
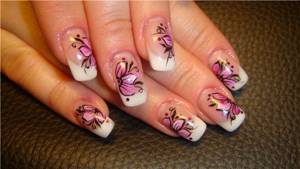
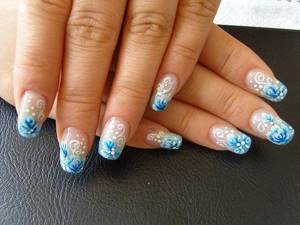
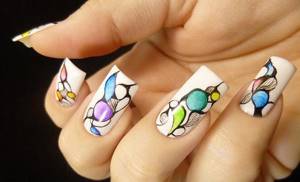
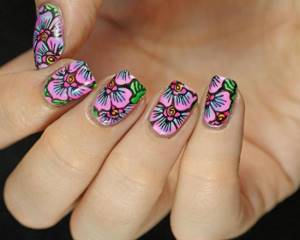
Flowers
Even a novice master can master the simplest flowers, and the manicure will be stylish and beautiful.
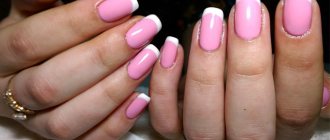
French manicure with acrylic paints
The French jacket will look more original if it is decorated with some kind of pattern. Most often they decorate the ring fingers.
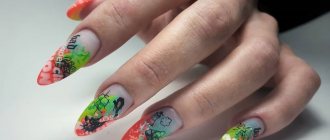
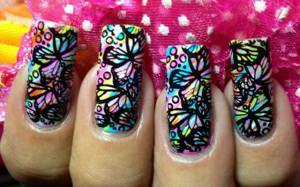
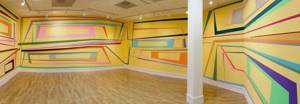
Abstractions and geometry
Clear lines and shapes always look stylish. For such patterns, in addition to brushes, you can use dots.
Romantic motives
The manicure will be more delicate if you decorate it with hearts and lace. Recently, various patterns and monograms have been especially appreciated.
Is it possible to quickly dry polish with a hairdryer?
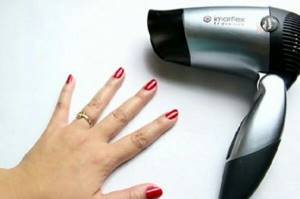
Drying nails with a hairdryer
- Probably, many women have heard about this method of drying manicure as a hair dryer. Some representatives of the fair sex even claim that this method gives almost instant results. In principle, this drying method has a right to exist.
- But you can talk about its effectiveness only if you have a fairly good hairdryer (has a cold blow function) and you have applied the polish to the nail in one layer. In all other cases, the use of this method should be treated quite carefully. After all, if you do a manicure with a thick layer of varnish, then you are unlikely to be able to dry it with a hairdryer
- More precisely, only the top layer will dry, and everything that is under it will harden for quite a long time. This, only visually perfect manicure, will smear at the slightest contact with clothing or any other things, and you will have to start all over again
- In addition, even slightly cooled air has a very negative effect on the color of the varnish. It becomes duller and cloudier. Therefore, it would be a stretch to say that a hair dryer is an ideal tool for accelerating the drying of nail polish.
Manicure: painting with acrylic paints step by step
When starting to design your nails, the first thing you need to do is prepare your nails. Following a certain algorithm, the manicure will be done flawlessly:
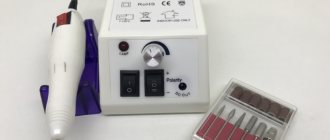
- Preparing tools. For this work you will need a sanding file, varnish, acrylic paints and thin brushes.
- Cleaning the nail plates of old polish, if present.
- Performing a classic manicure (processing and moisturizing the cuticle, giving the nails a certain shape).
- Nail polishing. It is necessary so that the acrylic paint lays evenly on the nail.
- Applying the background. The base polish should be applied to the nails in two layers, allowing each layer to dry completely.
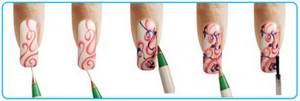
- Drawing with acrylic paints. First of all, draw the outline, then you need to paint over the inside of the drawing. A complex pattern can be performed on only one nail.
- Applying a fixative. You can use clear varnish. Thanks to this, a manicure with a pattern with acrylic paints will last longer.
When creating a manicure, you need to remember that acrylic pigments become darker as they dry. This should be taken into account when decorating your nails.
Application technology
The technology for applying acrylic paints comes down to the following:
- Process the nail, giving it the desired shape and length.
- Thoroughly polish and degrease the nail plate.
- Apply base varnish to the surface and let it dry.
- Use thin brushes to paint the design onto the surface of your nail.
- Let the paints dry.
- Apply clear polish or topcoat.
When working with paints, you need to act as carefully as possible so that the final result does not become a disappointment. You only need to squeeze out a small amount of paint from the tube, as it dries quickly. If the consistency seems too thick, you can add a little water. But it is important not to overdo it, otherwise the paint will spread over the surface of the nail. It is recommended to use a separate brush for each color so that the shades do not mix with each other.
Tips and tricks
To achieve success when creating a manicure with acrylic paints, you need to listen to the advice of professional nail technicians:
- It is better not to mix products from different manufacturers with each other.
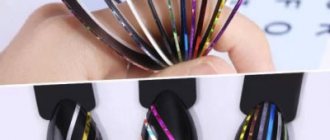
- The patterns are applied with a special brush made of synthetic materials.
- It is not necessary to use a palette; any convenient surface, for example, a CD, will be suitable for these purposes.
- You can also use acrylic paints to create patterns on nails coated with gel polish. In this case, the sticky layer should be removed, but the paint does not need to be diluted with water, since the topcoat does not polymerize.
Everyone is their own master
Development affected not only science directly, but also people in general. There are more and more talented people who do not want to trust others to create masterpieces.
Parents paint the walls of children's rooms with their kids, desperate car enthusiasts draw fancy shapes on the metal parts of their favorites, sleek young ladies with enviable persistence practice applying ornaments to their perfect nails, young rebels, followers of Picasso and Dali, secretly decorate gray fences and walls of abandoned buildings on dark nights. buildings with magnificent works of street painting.
Surely in almost every home there is acrylic paint, stored for one or another need. Sometimes it is forgotten due to unsuccessful application experience or simply as unnecessary. But at any moment, an artist who has long fallen asleep in the depths of his soul can awaken. Therefore, every artist needs to know how to apply leftovers or how to dilute acrylic paint if it has dried in order to continue creating.
How to Remove Acrylic Paint from Nails, Skin or Clothes
When using acrylic pigments in your work, you need to take into account one important point: this paint is easily soluble in water, but after drying it is not afraid of it. If dye gets on clothes, it is better to wash the stains immediately. Dried paint can only be removed with a solvent.
Acrylic can be removed from nails using nail polish remover. The skin is cleaned with soap and water, but this will take a little longer than just washing your hands.
If we talk about the palette, then there should be no problems, since the dried paint can be easily removed with a small spatula or knife.
Now that the topic of nail design with acrylic paints is fully covered, just practice a little on your nails, and a manicure with acrylic paints will decorate women’s hands. At the same time, the artistic painting will be durable and will last on the nails for a long time.
Types of acrylic dyes and their areas of application
Organic compounds have been known to mankind for quite some time. Some of them are used in their original form, others are replaced by newer and safer substances. Acrylic paint has practically supplanted its predecessor, oil paint, from the sphere of construction and design due to its exceptional properties. A polymeric, water-soluble, quick-drying dye without a pungent odor is used not only in painting, but also in external and internal finishing works.
In turn, high art has long spread beyond the stuffy studios of unknown artists. Fearless master painters have come out into the world and are applying their talents in various fields. Artistic painting these days can be seen not only on canvases or kitchen utensils. Phantasmagoric ornaments, heroes and scenes, executed by talented hands, are found in clothes, manicures, on the walls of houses and apartments; drawings adorn the shiny sides of new cars and designer furniture.
How to dry regular varnish faster?
Methods that will speed up the drying process of nail polish
As you can see, there are quite a lot of ways that help speed up the drying process of the decorative coating of nails. Each woman decides for herself which method is right for her and is the one she uses most often.
But our girls are very big inventors, so they come up with new ways all the time. Now we will introduce you to a couple more, and you can decide whether they suit you or not.
So:
- Gun for blowing small parts. Point the gun at the nail and hold it in this position for approximately 3-5 minutes. Under no circumstances should this device be brought very close to the nail plate. This will increase the force of air flow and provoke premature peeling of the varnish.
- Alcohol-based wet wipes. They must be used before applying a decorative coating to the nail. The substances that they contain will degrease the plate no worse than special products and this will help the varnish dry faster
- Try combining several methods at once. For example, degrease your nail, apply the polish while it’s cool, and then immediately immerse your hands in ice water. If you do all three manipulations in one step, your nails will dry in just a couple of seconds.