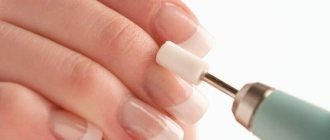
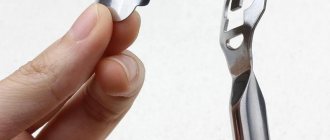
How to insert and secure the attachment in a manicure machine?
It is important for a novice master to carefully study how to correctly insert a cutter into a manicure machine, since the serviceability and service life of the device and attachments directly depends on this.
There are 3 types of devices with different methods of attaching cutters:
- Automatic: fixation occurs immediately after placing the attachment in the clamp. The nuance of this type of fastening is that either a cutter or a plug must always be in the clamp, since otherwise it may close. It can only be opened at a service center.
- Semi-automatic: fixation takes place in 3 stages. First you need to turn the handle, then open the lock, insert the cutter and close the clamp.
- Manual: the easiest way to attach. To do this, you need to press the button located on the body of the device, remove the washer and insert the cutter. Perform the steps in reverse order - secure the washer and press the button.
Important. Professionals say that all fixation methods are reliable, but the most convenient are manual and semi-automatic.
Next, you can watch a video on how to insert the cutter into the machine:
Advantages and disadvantages
You may be interested in:Combined manicure: step-by-step instructions with descriptions, photos and tips
Hardware manicure has its advantages and disadvantages. The advantages include:
- Gentle treatment of the stratum corneum and skin.
- The procedure is safe, therefore the occurrence of defects is excluded.
- Long-lasting results, as the skin at the base of the nail grows slowly. The number of visits to beauty salons is decreasing.
- Steaming is eliminated, so the intercellular fatty substance is preserved, which protects the nail from drying out.
- There are no contraindications, so manicure can be performed on different types of nail plates.
- Elimination of defects.
The disadvantages include:
- Possibility of intolerance to the procedure. You may not like the feeling of vibration, which causes a burning sensation.
- The need for time to master this technology. An inexperienced user damages the nail plate, leaving an imprint in the form of a scratch, crack, or groove.
- The need for a special attachment for each action.
- Prohibition of using the device on nails that have a neglected appearance.
How to remove it to change it?
Removing the attachment from the manicure machine is as easy as inserting it. The method for removing the cutter directly depends on the type of attachment in the manicure machine:
- with the manual method, press the button on the body, unscrew the washer and remove the cutter;
- with the semi-automatic method, you need to turn the handle clockwise until it clicks and remove the nozzle;
- With the automatic fastening method, the cutter can be pulled out only after turning off the device; to do this, you just need to pull it towards you.
It is important to remember that with the automatic type of fastening, the clamp should not be empty; it must contain either a nozzle or a plug.
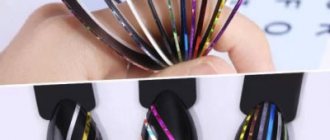
Types of cutters according to rigidity
The rigidity is determined by the marks that are on the base of all cutters.
They are grouped into categories:
- high rigidity;
- medium abrasiveness;
- soft and very weak texture.
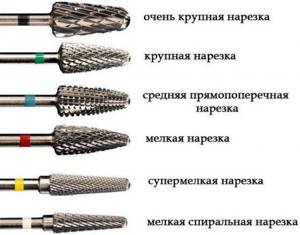
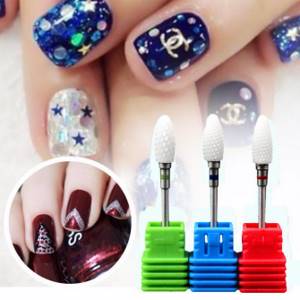
The marking is located on the cutter base ring:
| Black | High hardness is suitable for hard coatings: gel, acrylic, acrylic, gel polishes. |
| Blue | Medium abrasiveness is intended for grinding side ridges and cuticles, if they are not thin. Suitable for filing soft materials, but only as tools for leveling gel and acrylic coatings. Not suitable for cutting artificial nails. |
| Green | Medium hardness, but not recommended for working with leather. Such cutters are not suitable for people with hyperhidrosis - they cause irritation. |
| Red | Soft attachments suitable for working with leather and natural plates. Diamond-coated bits with two notches indicate increased softness of the tool. |
| Yellow | Very soft attachments that are recommended for those who experience irritation and allergic reactions. The yellow cutter is well suited for working with thin skin in manicure. |
| White | Used for processing natural plates with high sensitivity of the integument. |
Attachments for manicure apparatus, depending on the degree of abrasiveness, are used when working with gel polishes, acrylic and gel materials, taking into account the type of skin.
Possible problems: how to change it if it’s stuck, why can’t I put it on and something else?
Sometimes, when changing the attachment on a manicure machine, problems may arise. Some of them can be solved independently, and sometimes only a service center specialist can help. Solutions depend on the cause. The most common include:
- Breakage of the cutter. Perform the steps required to remove the attachment. Then shake the handle slightly so that the fragment can come out on its own by inertia. If it remains in place, you should disassemble the clamp and remove the rest of the attachment. You can try gluing the cutter using superglue.
- The nozzle is stuck. There may be several reasons - an incorrectly selected cutter, a broken clamp or motor, clogging, and others. You can only fix the blockage yourself; in other cases you will need the help of a specialist.
- The cutter is not fixed. The main reason is that the cartridge is clogged with biological waste (nail dust or shavings). To fix this problem, you will need to unscrew the cartridge and carefully clean it of dust using a brush. If this does not help, then the collet mechanism should be changed.
Attention! When solving the problem of changing a cutter yourself, it is recommended to photograph each step. Otherwise, you can assemble the mechanism incorrectly, which can lead to more serious damage.
Choice
How to choose attachments for a manicure cutter? To do this, you need to take into account the following nuances:
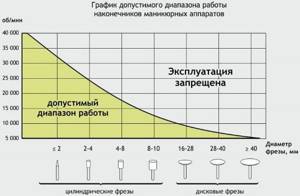
- The diameter must be selected, paying attention to the speed of the device. The larger the nozzle, the lower the speed you need to work with it.
- If the attachment only comes with a one-year warranty, that's probably how long it will last. But such cutters weigh little and are quite cheap.
- If the letter "T" is indicated, this means that the cutter is treated with titanium nitrite. This is required to increase the cutting ability of the nozzle.
- The cutter shaft may have red, green, or black stripes. They indicate the type of notch.
Knowledge of the ISO international standard system will allow you to choose high-quality devices. The nozzle marking includes 15 symbols, thanks to which you can familiarize yourself with all the properties of the tool. Thanks to encrypted information, you can find out about the following parameters:
- Type of material for the working part of the nozzle.
- Type of connection between the tip and the tail.
- Total length of cutter.
- The shape of the working part of the cutter.
- Abrasiveness class.
- Teeth cutting type.
- Diameter of the working part.
How to clean to use?
Almost all cutters are designed for reusable use and therefore require careful care, the first step of which is cleaning of biological material. It is carried out in different ways:
- Manually. The nozzle is cleaned with a brush (brass or plastic) under running water. The simplest, but at the same time the most energy-consuming method, most often used at home.
- In an ultrasonic sterilizer. Rinse the nozzles under running water and place them in the device so that they do not come into contact with each other. This method is not suitable for all types of cutters, so before use, be sure to study the care recommendations for each of them.
- Dental cleaning apparatus. Just as in the previous method, the cutters need to be rinsed under running water. Then set the temperature in the device to 90 °C and place the attachments in it for 5 minutes.
Regular cleaning can not only significantly extend the life of attachments, especially corundum and steel ones, but also prevent the spread of infection.
Below is a video about cleaning cutters:
When to change attachments?
Carbide cutters are similar to metal cutters, but their service life is much shorter. Ceramic tips are produced quickly. They are enough for 45-50 material removals, and their cost reaches 600 rubles. per unit of goods.
Attachments for manicure apparatus made of steel are more durable. You can distinguish them from carbide ones by their color - it is darker. Their cost starts from 600 rubles. And ceramic cutters will last longer than all analogues. You can change a new nozzle only after 3-4 years.
Metal cutters coated with gold or titanium do not have a specific service life. You need to monitor the thickness of the grains. When the metal base is visible, you need to change the tool.
Diamond galvanic cutters will last up to 7 years and will last for 50-60 manicures. Economical pedicure tools cost approximately 50-500 rubles, but the service life reaches from 1 to 3 weeks. Ceramic thin attachments for pedicure remove coating well only for 3-4 months, then they need to be changed.
How to disinfect?
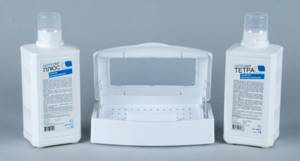
The next mandatory step in caring for cutters is their disinfection. To do this, use 2 methods:
- physical - ultraviolet or ultrasonic treatment, boiling, calcination;
- chemical – aging in special disinfectants.
Reference. The use of chemicals requires certification and strict adherence to instructions, so they can only be used in a salon environment.
At home, it is better to give preference to the physical method of disinfection. To do this, keep the cutters in an oven heated to 180 °C for 20 minutes or boil for 15 minutes.
Preparation of the solution
When nozzles are used individually, they can be sterilized with different solutions. To do this you will need:
- Potassium permanganate – 30 g.
- Medical alcohol – 100 ml (70%).
- Borax or boric acid salt – 10 g.
Alcohol is poured into a small glass vial, then borax or boric acid salt is added. It is necessary to stir the components until the liquid becomes cloudy. Then add potassium permanganate. The resulting solution is poured into a container, after which nozzles are placed there. Everything is placed in a steam bath. In addition, you can perform sterilization using ready-made preparations.
How to sterilize?
The final stage of processing of cutters is sterilization, chemical (used only in salons) and hardware. There are several types of devices designed for hardware sterilization:
- glasperlene devices, in which processing occurs by heating to 230 ° C and takes 30–180 seconds;
- autoclaves are sterilized with hot steam for 15–40 minutes;
- dry-heat ovens process instruments at a temperature of 180–250 °C for 30 to 120 minutes.
Treated cutters should be stored in a sterile, hermetically sealed container.
Care
Milling cutters must be disinfected separately from hand tools. To do this, use a special container with a sieve insert. All procedures must be carried out with solutions intended for this purpose. Not all cutters can be sterilized at home. Some attachments cannot be recycled.
To ensure 100% sterility of cutters, they must be stored in a UV sterilizer that contains bactericidal lamps. Thanks to this, the products will be absolutely safe for performing any type of manicure.
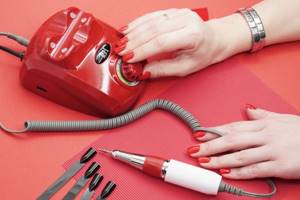
At what speed should it work?
To perform a manicure using the device efficiently and painlessly, it is important to know at what speed it should operate at each stage of the procedure.
Important! When cleaning the pterygium and opening the cuticle, the optimal speed is 15,000–17,000 revolutions; for cutting, depending on the skin type, 5,000–8,000 revolutions.
There are also speed recommendations depending on the type of cutter:
- “flame” shape with red notch – 10,000–15,000 rpm;
- corundum – 7,000;
- “corn” shape – 30,000 in FWD mode;
- for polishing – 5,000–7,000.
To quickly learn how to perform a manicure using a device, it is important not only to know the technique of the procedure, but also all the nuances of working with it. A responsible approach to training will help you gain the necessary experience and client base in a short time.
Step-by-step instruction
If you have already acquired a device and cutters, we recommend that you study the tips on how to properly do a hardware unedged manicure at home:
- The procedure is carried out only on a dry plate. Otherwise, the plate will begin to heat up, which will cause some discomfort. In addition, the areas will be less well processed;
- If you are using a combined or customizable device (for example, Strong), then you need to set the speed to a speed of up to 10,000. If it is higher, then you will simply erase your nails due to the lack of proper experience;
- Do not press the clipper close to your nail or, especially, put pressure on it while working;
- The first few times you need to practice on the silicone tips first. Then, when working with rough cutters, you will already know how to hold them correctly, at what angle and for how long.
Instructions and technology for performing hardware manicure step by step:
- The cuticle needs to be moved closer to the nail hole using a special wooden stick. Try to act carefully so as not to damage it;
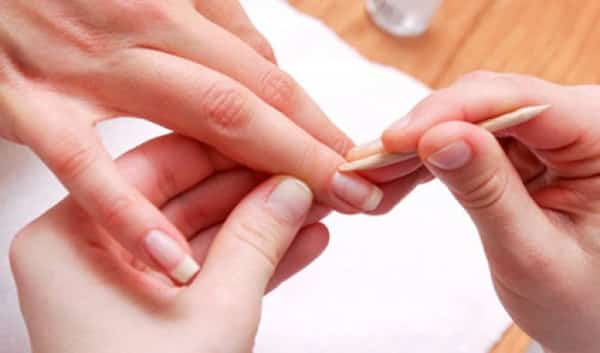
Photo – Wooden stick - On it and the side rollers on the sides of the plate, the use of drums with medium hardness is allowed. Watch your own feelings, if it seems that the cutters are not removing enough, then you can take tools with more abrasiveness;
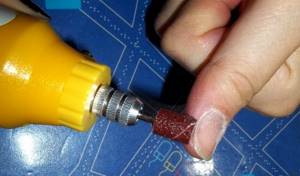
Photo - Drum processing - On the palms and fingers, you need to clean dead cells using soft abrasive ball-shaped burs;
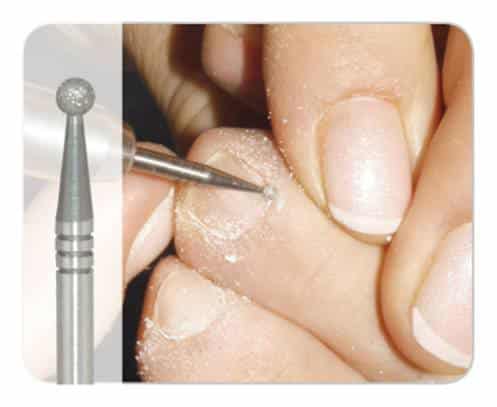
Photo - Using a spherical bur - Use cylindrical or trapezoidal cutters to give the plate the desired shape. Be careful - the rules of proper manicure require leaving more than 2 mm above the level of the fingertips, even on short nails;
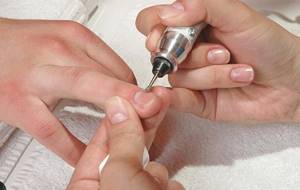
Photo - Processing with a trapezoidal cutter - After this, polishing begins. The technique of this stage is quite difficult for beginners. Firstly, you cannot bring the edge of the polisher to the nail - it will scratch the plate, secondly, you cannot hold the polish in one place for longer than 1 second;
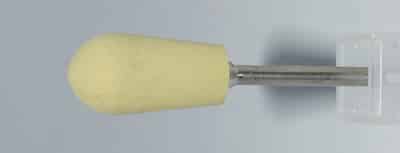
Photo – Nail polisher - All that remains is to clean the space from dust and nail residues, lubricate it with oil and paint it.
Photo - Applying varnish
For a better understanding, we recommend watching a video master class from professionals on how to do a hardware manicure.
Video training for beginners on how to do a hardware manicure
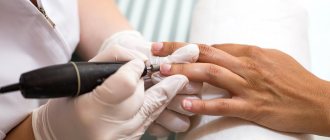
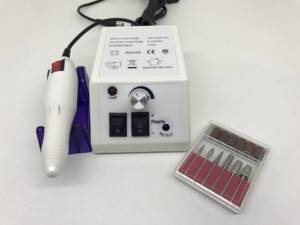
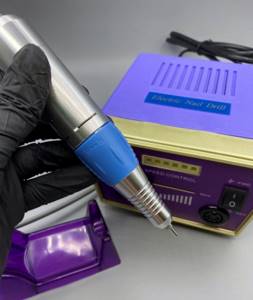
Manicure machine
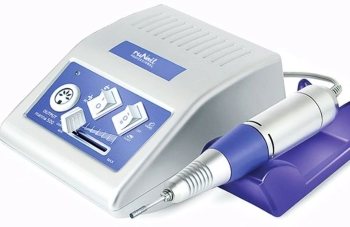
A machine for hardware manicure ( milling cutter ) is a special handle connected by a cord to a processor. Attachments, including cutters, are attached to the handle. The processor is responsible for rotating the attachments at the desired pace and direction.
The machines differ in design, power and maximum rotation speed of the nozzle.
For home use, devices with a speed range of no more than 10 thousand revolutions per minute are suitable, and masters in professional salons use equipment whose head rotates at a speed of up to 30-35 thousand revolutions per minute.