Natural beauty never goes out of style. The colors inherent in nature are universal and always relevant. Not every girl can afford a bright, extravagant manicure every day. There are different reasons, for example, dress code or personal beliefs. Well-groomed nails of a natural color, on the contrary, are always appropriate and go with any accessories and clothes. French has not gone out of fashion for decades.
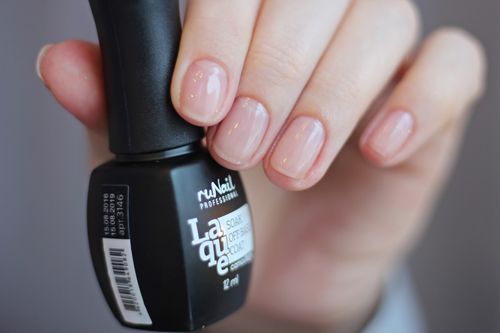
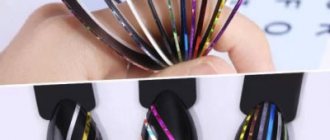
Camouflage translucent gel polish
Gel polish in natural shades is called camouflage. Let's take a closer look at the color variety, design options and features of camouflage gel polish coating.
How to remove artificial material
The material in question cannot simply be removed with nail polish remover. Experts recommend filing off the gel; a glass or metal file with notches will not work; it is better to use a buffer with an abrasiveness of 100–150 grit, designed specifically for artificial materials.
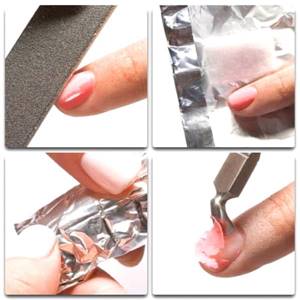
You need to file off the gel coating carefully so as not to hurt the natural nail. The dust generated during the procedure should be periodically brushed off and the nails moistened with liquid, then the layer of artificial material and natural coating will be clearly visible.
Read also: Potato soup with stew
Cleaned nails are sanded and polished, and the surface is treated with a moisturizing component. The final touch is the application of a strengthening base.
If biogel was used as a base for gel polish to strengthen nails, it is removed with a special product or regular acetone. Cotton pads are soaked in the existing liquid, applied to the nails and wrapped in foil for 15–20 minutes. When the material dissolves, it is carefully removed with tweezers. The plates are then polished and lubricated with a nutrient.
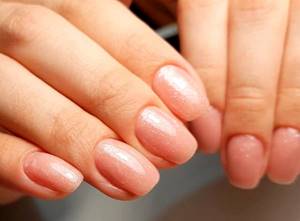
You can strengthen natural nail plates with the help of modern materials - gel or biogel. The procedure can be carried out both in the salon and at home, the main thing is to follow the instructions exactly, then beautiful nails will delight you for at least 3 weeks.
Read also: Child manipulates parents
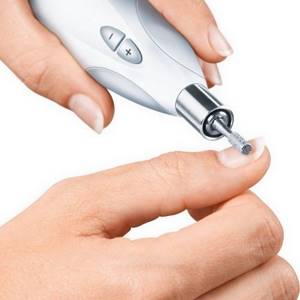
Nail preparation
Before the strengthening procedure, nails must be treated, which, firstly, will allow you to perform a high-quality manicure, and secondly, will provide your hands with a well-groomed, aesthetic appearance. Experts distinguish three main types of manicure: classic (edged), European (unedged), hardware.
A classic manicure involves removing the cuticle with special nippers, where it is first moved back and then removed. Before the hand procedure, it is recommended to take a bath, which will soften rough skin and simplify the entire manicure process.
European manicure involves removing nail polish using a special softening agent - remover. The procedure goes as follows: first the remover is applied, and after a while the softened cuticle is moved with an orange stick.
Hardware manicure is the most gentle; it not only removes the cuticle, but also gives the plates the desired shape. Such a device can be bought in specialized stores; it includes all the necessary attachments and instructions for use.
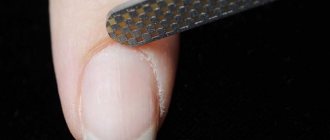
Next, give the nails the desired shape: square, almond-shaped, rounded or sharp. In this case, it is recommended to move the file in one direction, so the plates are less injured. To ensure that the gel adheres well, the nails are treated with a soft buff; however, you should not overdo it; the plate should not be too thin.
The last step in preparing the nails is degreasing them with a special composition; this procedure will also help the gel to firmly take hold. After removing excess shine, the nail plates should not be touched. If biogel is used for the strengthening procedure, then experts do not recommend sanding the nails with a buff; it is enough to just degrease them.
How to make the right choice?
You need to focus not only on the color of the base, but also on other criteria. One of the most important is the type of polymer composition. Rubber-based products are intended for aesthetic correction and modeling of the natural anatomical structure of the nail plate.
This wood resin lays down in an even layer, increases the thickness of the surface, and gives the composition thickness and ductility. Rubber bases are great for smoothing out problem nails. They are recommended for owners of thin and fragile plates. This polymer prevents the formation of microcracks.
A camouflage base (what it is and why it is needed is described in the article) is selected depending on the desired effect and the condition of the nail plates. Manicure compositions based on acrylic powder are popular.
It polymerizes under the influence of ultraviolet radiation and forms a thin but very durable film. Then another layer is applied, thoroughly polished, and only then gel polish with shimmer, glitter, silver or another effect is applied.
The tandem of an acrylic camouflage base with a finishing coat forms a durable nail frame. It prevents the plate from delaminating and ensures the durability of the manicure. Its only significant drawback is the difficulty of removal.
Why do you need a camouflage base?
Here are a few cases in which using a camouflage base for gel polish is preferable to applying a regular transparent base:
- Creating a French manicure or French manicure, including baby boomer. In this case, the base can be used not only as a base, but also applied as another leveling layer instead of colored gel polish.
- Nude manicure with or without design. The camouflage base can be used as a stand-alone coating for manicure in natural colors. The palette of base shades will allow you to choose the color exactly for your hands and nails. The camouflage base is also convenient here because as the nail grows, the boundary between the coating and the natural plate is practically invisible. Thanks to this, you can extend the wearing period until the next correction.
- As a base for thin, pale and unevenly applied gel polish colors. A camouflage base will make the coating using these colors more vibrant, applying fewer layers.
- To disguise the color of problem nails. If there are spots or any pigmentation on the surface of the nails, this can be easily masked by applying such a base.
Due to the light shade, the camouflage base does not distort the bright and dark colors of the gel polish, but on the contrary makes the light ones more saturated.
Those who, due to their line of work, are forced to adhere to a dress code or an official style of clothing, with which a bright manicure does not fit in any way, will also like this purchase.
Advantages and disadvantages
Manicure with camouflage gel is in great demand in beauty salons around the world. Thanks to the many positive aspects of this procedure. They are as follows:
- strengthens the nail plate;
- stimulates rapid growth;
- helps to increase the desired length;
- the effect lasts for a month;
- the procedure is quite quick and easy;
- eliminates the need to use decorative coating;
- protects against the formation of pathogenic microorganisms that cause fungal diseases;
- levels the surface;
- does not interfere with air circulation.
At the same time, manicure has a number of disadvantages. Namely:
- the plate rejects the gel coating in many women;
- contributes to nail damage;
- needs proper removal to prevent unwanted consequences;
- if a chip or crack occurs, the camouflage gel must be reapplied;
- if the coating is done in a beauty salon, then you will need to visit it once a month and pay a certain amount of financial resources.
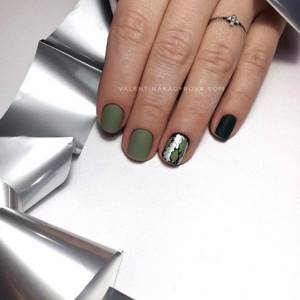
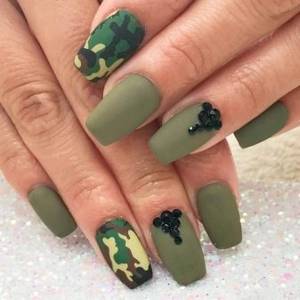
Features of military style manicure
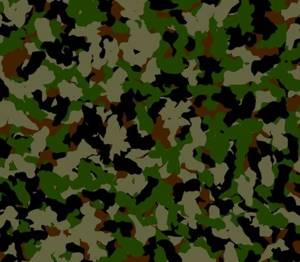
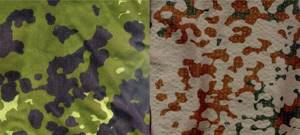
The military style is entirely based on the use of various military-themed elements, for example, camouflage and its accompanying colors (khaki, dirty green, brown, yellow), as well as soldier’s shoulder straps and stars. It is ideal for creating a festive military design for February 23rd.
But also, with the right emphasis, a military-style manicure can be worn not only during the men’s February holiday, but also every day, the main thing is not to overdo it with decoration.
To perform a camouflage design, you should carefully consider the shape of the future manicure. Square or round shapes would be ideal. Moreover, this design can be done on your own or on extended nails. You should also choose the right length, the army color itself looks aggressive, long nails can create the wrong impression and ruin the whole image.
You can do a camouflage manicure yourself, since its implementation boils down to simply applying various sizes of spots in military-style shades. To do this, use a thin brush or dots:
- First, cover all nails with the base color and let the polish dry.
- Then, with a brush, they begin to apply elongated, uneven spots in one color, and allow the drawing to dry.
- Then continue applying stains with a different color.
- In this case, the number of colors to create camouflage can vary from 3 to 5.
Important! Before applying the main color, be sure to cover the surface with a colorless base, and complete the design with a top coat.
Camouflage manicure for short nails
At a short length, camouflage looks impressive, but it is recommended to use darker colors (khaki, marsh, dirty green, brown and black). As a rule, dark shades can visually lengthen nails.
The shape, with a short length, can be square or round, in this case everything depends only on the client’s preferences.
A manicure with a pattern can be a good option for short nails by February 23rd.
What is camouflage used for?
Nude manicure based on rubber, acrylic or silicone is used to lengthen and strengthen the nail plate, disguise aesthetic flaws and anatomical defects. In a three-stage system, camouflage serves as the foundation on which the gel polish rests. Therefore, increased demands are placed on its strength and reliability.

The camouflage base (what kind of polymer it is is a separate question of choosing a product) can be acrylic, silicone or rubber. It can be made nude, pastel or transparent. The last option is used when creating an artistic French manicure - a French manicure.
The main purposes of camouflage:
- nail plate modeling;
- improvement of its anatomical structure;
- correction and masking of various defects;
- creating a durable base for applying gel polish;
- increasing the durability of manicure;
- protection of fabrics from the harmful effects of chemically aggressive coloring pigments;
An important function of the polymer foundation is to level the surface to distribute the finishing layer.
Camouflage gives destructive nail plates with microcracks, tubercles, and other aesthetic defects a uniform texture. On such a surface, the manicure retains its original appearance longer than usual. In addition, the base thickens the nail plate and makes it stronger.
Often nude camouflage is used for gel polish coating with:
- shimmer;
- sparkles;
- silver plating;
- original mirror or futuristic titanium effect.
The polymer base performs a healing function, resuscitating and restoring the natural structure of the nail plate after removing a chemically aggressive colored manicure. Its formula has a beneficial effect on the surrounding skin.
Similar Royalty Free Vectors:
Abstract surface relief
Abstract background art. 2d illustration. Expressive oil painting. Brush strokes on canvas. Modern Art. Multi-colored background. Modern Art. Expression. Artistic digital palette.
Abstract background art. 2d illustration. Expressive oil painting. Brush strokes on canvas. Modern Art. Multi-colored background. Modern Art. Expression. Artistic digital palette.
Abstract background with paint stains with space for text
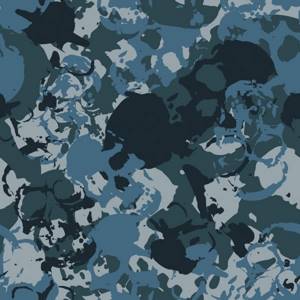
Naval camouflage
Abstract background with paint stains
Grunge texture stone and granite for various decorative designs.
Rough concrete, grunge background with space for text

Blue and gray army abstract marble texture background and abstract fluid color effect
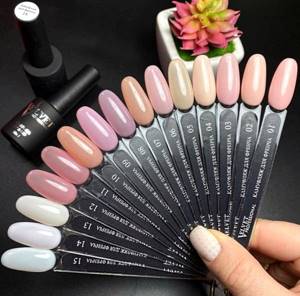
Criteria for choosing camouflage
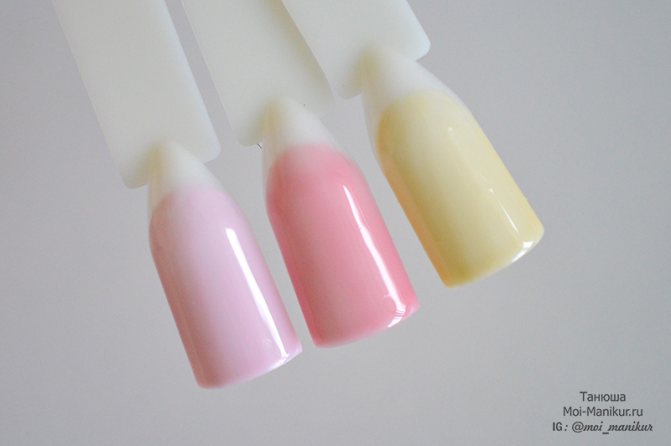
There are a large number of shades. It is understood that every woman will be able to choose the option that best suits her skin tone. Along with shades of medium pigmentation such as peach, pink and beige, there are also more rare tones suitable for very fair or, conversely, tanned skin.
But, according to experts, even the most strict and demanding fashionista will not have to sort through the palettes of different manufacturers in search of the very camouflage that is right for her. Materials for this purpose have a translucent texture, due to which they adapt to the skin of different shades. The same material suits women with different skin tones. Here you should focus on your tastes, and not on physiological nuances.
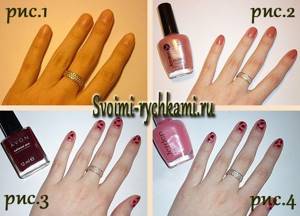
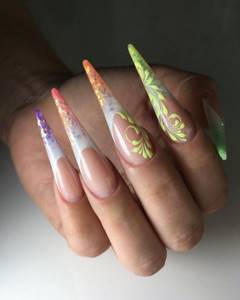
Manicure Pink camouflage. Nail design with step by step photos
Defender of the Fatherland Day is a holiday that has long been part of our lives.
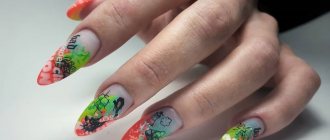
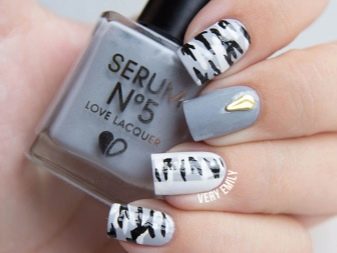
Today, beautiful representatives want to surprise their men, and for this they are ready for any experiments. The military uniform has a very unusual color scheme: a spotted color of green, black and sand, as well as their various shades, called “camouflage”. The drawing is interesting and relatively easy to execute. True, if you do it on your nails in a classic way, not all girls will like it. Therefore, I propose to implement a female version in the appropriate palette - pink camouflage. Look, get inspired and implement it!
Camouflage pattern on nails
What do we need to create a pink camouflage manicure? First of all, patience. There is no way to do without it when creating small patterns that require almost jewelry work. You need to purchase or have in stock varnishes of various colors. Considering the palette of the intended design, we take pink and red shades.
Next is a tool for drawing details, without having a special device, you can use a pencil. And finally, the fixer.

Let's prepare your marigolds for creativity. We'll cut it, adjust the shape, and polish it. (Fig. 1) If desired, apply the foundation, I did not use it.
After treatment, cover the nails with pink color. I took a polish with a slight silver tint. (Fig.2)
Using a suitable device or, as in my case, a pencil, we begin to draw the spots. Place a drop of varnish (I used light burgundy) onto a small piece of cardboard paper. We dip the tip of the tool and create small details of arbitrary shape in a chaotic manner. (Fig.3)
We continue to apply camouflage spots with a different shade. I took a fuchsia polish. (Fig.4)
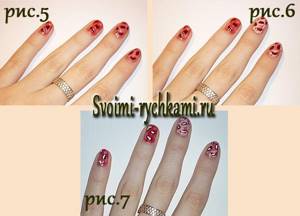
In the further process of camouflaging nails, we introduce some speckles: on different fingers we draw specks of a different color from the others. Of course, it all depends on personal desire - you can continue the same pattern or shade only one or two nails.
I took a crimson polish and painted spots on my ring and little fingers. (Fig.5)
Using a pale pink polish, I added details to the nails of the middle and index fingers. (Fig.6)
The finishing touch is to highlight the darkest spots of the camouflage with white inclusions. (Fig.7)
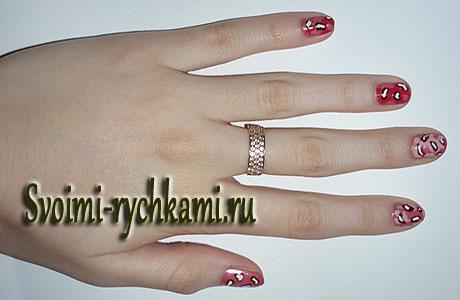
As a result, we got an interesting themed manicure “Pink Camouflage”, which will perfectly complement the festive look for February 23rd.
Varieties
After the appearance of this product, manufacturers began to produce several varieties of gel. Thanks to this, a classification based on application technology appeared. Before purchasing this cosmetic product, you need to familiarize yourself with the features of each type and choose the most suitable one.
Varieties of camouflage nail gel include:
- Single stage system. The name speaks for itself and indicates the number of steps that must be completed during application. This system is distinguished by its versatility and is quite often used as a base, topcoat and corrective agent. Thanks to the presence of polymers in the composition, the nail plate becomes smooth and shiny. It takes about five minutes to dry completely, and the girls do not have any difficulties during filing.
- Two-phase - it is aimed at strengthening the natural nail. Professional manicurists note that this camouflage gel system comes in different thicknesses and is used by highly qualified specialists. It significantly improves the appearance and quality of the design after visiting the salon.
- Three-phase. An even more complex system of application technology. Due to the rather liquid consistency, oxygen bubbles may appear throughout the surface when used. But this gel is extremely durable against chips and cracks. And it can even withstand numerous impacts on hard surfaces.
Three phases of application
There are three types of camouflage varnishes available today:
- single-phase;
- two-phase;
- three-phase.
Each of these types has its own characteristics and indications for use. The choice depends on what problem you need to solve. If the original nail is strong and without defects, then a more liquid varnish is needed. If there are unevenness and other flaws on the nail plate, a very thick and dense coating is used. The choice of varnish type also depends on whether there will be some kind of design on the nail.
Single phase
This composition is especially popular in the fashion world. Single-phase varnish is a three-in-one coating: at the same time it is a base, color and finishing layer. Instead of several compounds, only this gel is applied to the nail. Nail technicians often choose this type of camouflage polish because it is very easy to apply and makes touch-ups easy. It has a dense texture, but at the same time it is flexible. Using this polymer you can make nails of any shape and length. The single-phase composition dries very quickly, so the procedure itself does not take much time. The palette of tones of this type of varnish is varied, so you can easily choose a coating for any skin tone.
Two-phase
This varnish is not as thick as single-phase varnish. It is applied in several layers. In this case, the next layer is placed only after the previous one has completely dried. To make your nails long and thin, the layers should also be thin. If you do not follow this rule, the gel may soon peel off or cracks will appear on its surface. A manicure with this polish takes longer.
Three-phase
To achieve the desired effect and get beautiful long nails that look like natural ones, the coating is applied in three layers. First, the base layer is applied, then the sculpting layer, and then the finishing layer. The structure of this coating is very liquid, so it is easy to apply. But there is also a drawback - three-phase varnish bubbles a lot. Therefore, an experienced master who can cover the nail perfectly without bubbles or unevenness should work with it. In order for the extended nail to be durable, it must be coated with single-phase varnish at the end.
How to choose a camouflage
There are a large number of shades. It is understood that every woman will be able to choose the option that best suits her skin tone. Along with shades of medium pigmentation such as peach, pink and beige, there are also more rare tones suitable for very fair or, conversely, tanned skin.
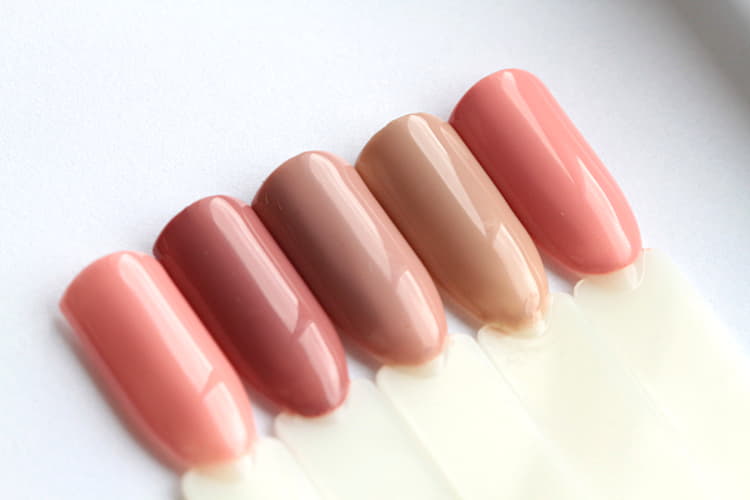
But, according to experts, even the most strict and demanding fashionista will not have to sort through the palettes of different manufacturers in search of the very camouflage that is right for her. Materials for this purpose have a translucent texture, due to which they adapt to the skin of different shades. The same material suits women with different skin tones. Here you should focus on your tastes, and not on physiological nuances.
Dark green manicure on short nails
It is important to choose the right shade. In this case, give preference to dark shades of paint - with them it is easier to get an accurate result that will make a noble impression.
It is not necessary to limit yourself to a monochromatic coating. You can create full-fledged nail art, but you will have to take into account that it is better not to overload short nails with details. A few blocks of color, simple stripes or dots are enough to make your manicure more interesting.
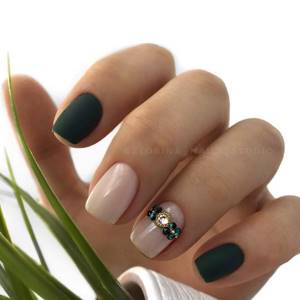
If it is a cold emerald shade, you can complement it with colors from the lilac range (both lavender and darker), pink, blue, burgundy, and beige.
Brown, red, orange, yellow and nude colors will make friends with a warm version of green (for example, marsh color).
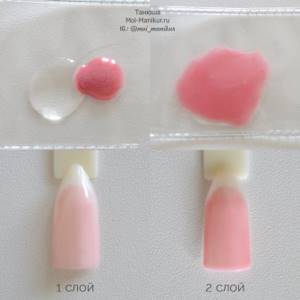
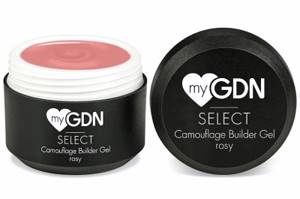
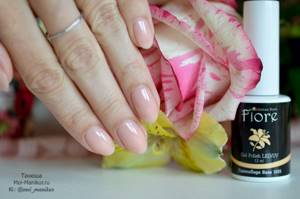
Review of the Fiore camouflage base
I decided to start getting acquainted with camouflage bases with this milky pink shade (number 1015). In my opinion, it turned out to be quite suitable for my nails and skin color. The base is thick, but not too much, it is applied to the nails and distributed in an even layer very simply.
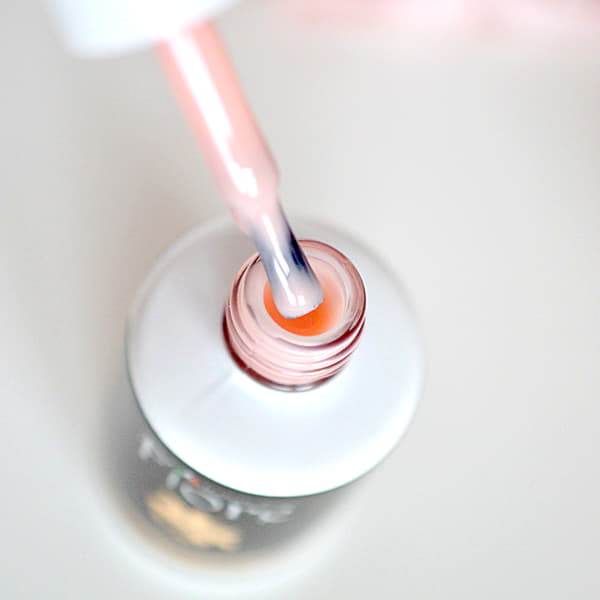
It is also rubber, which means it can be used to level nails as a base. I was surprised by the density of the base: despite such a seemingly complex color, it is enough to apply it in two layers so that the natural nail does not show through. The base looks gentle and natural. It does not have a sticky layer and even without a top coat it has a bright gloss, but I would not neglect to apply it. And under the matte top, the nails look like velvet.
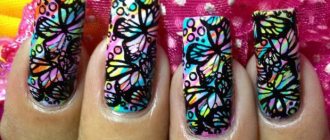
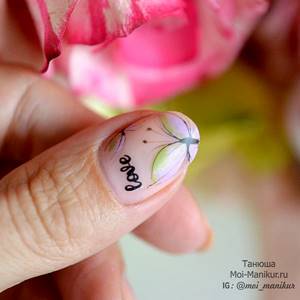
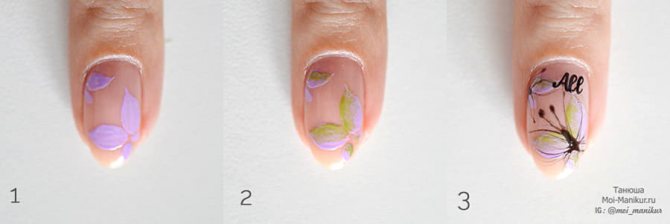
The design can be done immediately on top of the base, applied in two layers. For example, I decided to paint a butterfly like this using two other colors of Fiore gel polishes and cobweb gel paint, as well as stickers with inscriptions, and cover it all with a matte topcoat.
You can make such a drawing using the following algorithm:
- On top of the camouflage base we paint butterfly wings with purple gel polish. Dry it in a lamp.
- We shade one side of the wing with another contrasting shade: apply it in a thin strip and shade it with a semi-dry brush until approximately the middle of the wing.
- Place the sticker in the free space. Next, at the junction of the wings, place a drop of cobweb gel paint and draw out the contours of the wings from it in several lines at a short distance from each other. By analogy, the antennae of a butterfly are drawn. At the end, we mask the drop in the middle, making it the body of an insect. Let it dry and cover the design with a matte top coat.
Making a camouflage base from a regular one
If, after reading this article, you urgently need a camouflage base, and at home you only have regular and colored gel polishes, then you can experiment and make it from existing pastel, beige or pink shades of gel polish and a simple transparent base.
This method is also suitable for craftsmen who do not have a camouflage base suitable for the client’s skin.
To do this, just add a drop of colored gel polish and knead (it’s better to do this on a palette). This base will be translucent.
To add richness to it, you can add a little more white gel polish. And even if you don’t have pale shades, bright ones are also suitable: just pre-mix them with white - the color will immediately become pastel and can already be mixed with a transparent base to obtain camouflage.
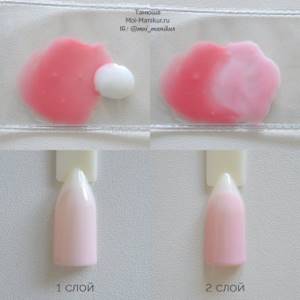
I also couldn’t resist and made a beige base as well, although it turned out a little bright, it seems to me:
The degree of transparency is adjusted by the number of drops of gel polish that are added to the transparent base.
During the mixing process, small bubbles may appear in the base. In this case, you should not immediately apply it to your nails; it is better to wait a little until they disappear.
The Fiore base was provided for review by the fiore-rus.ru store
Modeling with camouflage gel on paper forms
Step-by-step scheme for performing modeling with camouflage gel on paper forms:
- By analogy with the previously described technology, it is necessary to disinfect hands, manicure, and prepare the nail plate. Then apply a thin layer of base using rubbing movements and dry in a lamp.
- Before installing the paper form, it must be trimmed in the area of the smile and side ridges to repeat the anatomical shape of the nail. Thanks to this, the form will fit snugly to the free edge. The recesses in the area of the side bolsters will allow you to form a correct transverse arch.
- The form must be glued, placed under the free edge, observing the central axis, and the adhesive base pressed against the finger. Particular attention must be paid to the end. The form should stand clearly under the nail, without touching the hyponychia. Otherwise, a step will form.
- A small amount of gel is applied to the form to form a thin base for the future nail. The material is distributed over its surface, connecting the free edge with the natural nail. It is important to thoroughly work out the growth points and side walls. The markings applied to the forms are a hint and guide for the master. The result must be dried a full cycle.
- After polymerization, the substrate is coated with a layer of gel to moisturize and improve the distribution of the material. A small drop is placed on the brush and placed in the center of the nail bed. Slightly recessing the brush into the material, move it towards the cuticle, after which, with a superficial touch, the remainder of the gel is brought to the free edge. The thickness of the material at the end should not exceed the thickness of a credit card. The result must be dried a full cycle.
- After modeling all ten fingers, the sticky layer is removed from the surface of the gel and the architecture is finalized with a file (if necessary), giving clarity to the selected shape.
- The dust remaining as a result of sawdust is brushed off with a stiff brush and the nails are thoroughly wiped with a lint-free cloth soaked in a degreaser.
- Glitter is applied to the surface using the chosen technique or another design and polymerized in a lamp.
- A finishing coating is applied to prolong the wearability of the design, polymerized and removed if necessary.
To apply camouflage gel, you need to choose a brush that is convenient in shape and size. Nail technicians do not recommend using brushes that are too wide and fluffy. It is more convenient to use a flat, rounded or square brush, the size of which does not exceed ½ the width of the nail plate.
Design ideas
The demand and popularity of this style among the younger generation force designers to constantly find new solutions and surprise their clients.
The basic basis of this image is traditional camouflage, the motifs of which are not distinguished by the intricacy of the design and the complexity of execution.
One of the latest popular ideas is to apply a speckled color scheme to only a few fingers, and cover the rest with a plain varnish, which can be decorated with unusual military designs, inscriptions or military insignia.
Experienced craftsmen use in their work not only classic military shades, but also a huge number of other color solutions.
Popular color combinations:
- green, yellow and brown;
- blue, white and gray;
- green, black and gray;
- blue, white and blue;
- white, pink and black;
- lilac, violet and gray.
The main condition when choosing colors is their harmonious combination with each other.
Only military tones can bring nail design as close as possible to reproducing a real army theme.
Options in different shades
Most camouflage bases and gels vary in shades from soft pink to beige. Manufacturers are trying to make the material natural and adapt to different skin types. There is also a milky camouflage base. Despite the fact that its shade has nothing to do with skin color, it is very popular. White color is achromatic, its uniqueness is that it is universal and suitable for any skin type.
Milk bases look gentle and harmonious. Close attention should be paid not only to the shade, but also to the density of the material, especially when it comes to bases. Translucent ones can only slightly adjust the shade of the natural plate, while denser ones can completely cover it. The more saturated the material is with pigment, the more powerful the lamp will be required to polymerize it.
Classification of camouflage colors
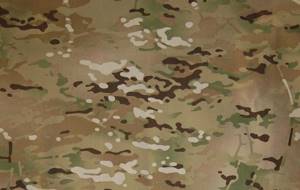
Camouflage is a French term meaning "camouflage". The name is very laconic and accurately conveys the purpose of camouflage - the difficulty of identifying the outlines of a person or any object by an enemy, an animal, or a bird. To implement this task, various visual, optoelectronic and photographic methods are used.
For the first time, according to historical data, camouflage clothing was used during the Anglo-Boer conflict (1899-1902). The Boers effectively used the terrain for camouflage, and the red-coated British made excellent targets and suffered heavy losses. The British command made a radical decision and dressed its soldiers in khaki uniforms, which made them difficult to recognize and reduced losses.
Later, the topic of camouflage began to be actively developed, primarily in the military sphere. For example, the armed forces of Nazi Germany already used about thirty different camouflage colors. Today, camouflage is used by almost all armies of the world; it has its own classification, divided into types and types.
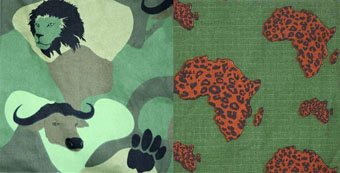
First of all, camouflage colors are divided into standard and non-standard. By standard they mean precisely a military classification, a kind of “adoption” by the armies of countries around the world. Non-standard are all kinds of camouflage colors created by various companies and organizations involved in the development and production of clothing for hunters. Vivid examples of non-standard camouflage colors are the currently actively used types of “reed”, “autumn forest”, “sedge” and so on.
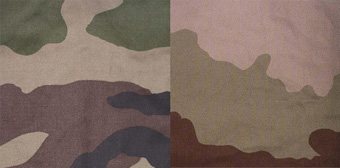
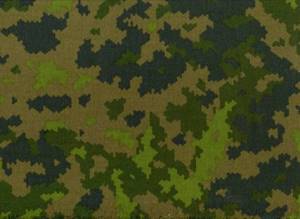
Military (standard) camouflage colors are divided into five main types, tied to the characteristics of the landscape and types of vegetation in a certain area:
- “Forest”
- this color is used by the armies of Europe and North America in the summer; - “Desert”
- Central Asia, North Africa and other areas of the planet corresponding to the name; - "Jungle"
- South America, Equatorial Africa, Southeast Asia; - “Winter”
- any areas of the planet covered with snow or ice; - “Bush”
- South Africa (this group includes only a few types of specific camouflage).
Different types of camouflage colors are used depending on the terrain; there are no universal types of camouflage.
Soviet and Russian camouflage even today consists in part of copies or close analogues of German camouflage versions from the Second World War. These include the “Silver Leaf” of 1957. It is also called “Birch” and “Sunny Bunny”. The camouflage is two-color, consists of a green background and a deforming pattern, close to modern “digital”. Borrowed from Germany also include the Palm Tree camouflage pattern of 1944 (produced in four seasonal versions - summer, autumn, winter, spring), the Deciduous Forest pattern of 1942, and the Amoeba version of 1935 (the camouflage had several options ), modern camouflage “Partisan” (tracing paper from the German “Eichentarna”).
Among modern domestic ones, we also note the camouflage colors of VSR-93 (“Vertical”, camouflage colors of the 1993 model),
VSR-98 “Flora” (aka “Cabbage”, the main camouflage of the Russian Armed Forces since 1998. A very successful, but already outdated camouflage. Also nicknamed “watermelon” camouflage, produced in three versions).
In addition to the indicated camouflage colors, the “Oak” camouflage, also known as “Butan”, was very popular. The color scheme was developed in 1984 and had several versions. Until recently, it was the main camouflage for Ukrainian military personnel.
One of the latest Russian developments is the “Digital Flora” camouflage. The Russian military uniform designed by Yudashkin was made from fabric with exactly this pattern.
The German versions of the camouflage are WH splintentarn (camouflage pattern of the 1931 model, which historians call the first German camouflage version). This camouflage was applied to raincoats. It was a “splintered” pattern of spots of green and dark brown, with short thin strokes over the entire area. Applied to light brown fabric of a raincoat. Produced in several versions.
Next is the previously mentioned “Eichentarn”, produced in summer and autumn versions (camouflage of the 1942 model, very successful, in 1943 it gave “life” to a similar camouflage “Eichenlaubmaster”), NVA Flachentarn colors (used by the East German Armed Forces from 1950 to 1967 ), NVA Strichtarn (was in service with the GDR Armed Forces from 1965 to 1990, in fact, it is a simplified version of WH splintentarn, from which splinter spots were removed and only “rain” was left), Tarnmuster (German camouflage pattern of the 1956 model, with amoeboid spots),
Flectarn (a very successful camouflage pattern from 1985 with a crushing pattern, produced in various versions, still in use today),
Tropentern (camouflage model 1991, is a desert version of the Flectarn camouflage).
The United States of America has developed many different versions of camouflage. Let's talk about the main ones. This is, first of all, Woodland, a camouflage developed for wooded areas in the 80s of the twentieth century. It is considered the most common type of camouflage in the world, has several versions and more than a dozen “clones” in the armies of the world, with their own indices. The US Army had four main options - basic, lowland (with a predominance of green spots), mountain (with a majority of brown spots) and intermediate - for camouflage in the optical and infrared ranges. Today in the United States, Woodland camouflage is considered obsolete.

MARPAT camouflage is an American “digital” camouflage for Marines. Replaced Woodland. It has three versions - Digital Woodland (basic), Digital Desert (desert), Digital Urban (urban).
The ACU PAT pattern is a digital camouflage pattern for US Army ground units. Developed based on MARPAT.
Khaki camouflage is dirty gray, plain. It is historical, almost legendary. Used in the USA during World War II. It is still used by some armies of the world, despite the fact that many consider it to be obsolete.
Olive camouflage - also monochromatic, was used by the US Armed Forces in Korea and Vietnam. For many connoisseurs it is also considered a cult. Fidel Castro wore an olive uniform almost his entire life.
For the desert in the USA, versions of camouflage 3-color Desert (created on the basis of Woodland, consists of spots of three colors - pale green, light brown and dark brown) and 6-color Desert (color similar to 3-color Desert) were developed , but consists of spots of 6 colors). These camouflages were used by the US Armed Forces in Iraq and Afghanistan before the advent of modern “digital” versions.
Multicam camouflage was developed as a replacement for the popular Woodland. It has smooth, rounded outlines of spots, unlike MARPAT and ACU PAT. It is a commercial camouflage option and is almost never used by regular units of the US Armed Forces.
The Tiger color scheme (“Tiger” or “Tiger” camouflage) is designed for combat operations in tropical jungle conditions. It has been and continues to be used by various countries (for example, Cuba). Occasionally, variations of this color are found in the ranks of the Russian Armed Forces.
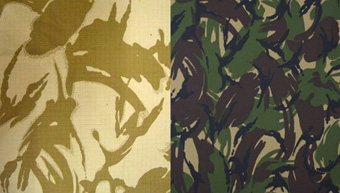
The UK uses DPM (Distruptive Pattern Material) camouflage for its armed forces. The camouflage pattern consists of spots and strokes of four colors (sand, black, green, brown). Available in several versions. There is the so-called Dutch DPM (it differs slightly in color, the structure of the spots is similar to the British camouflage). England also uses DDPM (Desert DPM) camouflage - a desert version of the standard general-arms British camouflage.
France uses the CCE Camo pattern, developed in the 90s of the twentieth century. The coloring has a lot in common with the American Woodland. For use in the desert, France uses the Daguet Desert pattern camouflage, a CCE camouflage adapted for the given terrain. Used by French troops in Iraq. During the Algerian campaign and later (by French Foreign Legion soldiers), the Lizzard pattern (Leopard) camouflage was used, which has a visual similarity to the Tiger camouflage.
Canada uses the CADPAT camouflage pattern. Essentially, camouflage is a version of MARPAT.
The Finnish Armed Forces use M05 camouflage, a modern “digital” camouflage designed specifically for the Finnish forest.
The Italian Armed Forces use the Vegetato camouflage pattern, a digital pattern of brown, sand and black spots on a green background. There is also a desert version of this camouflage - Desertato.

Denmark uses Flectarn-D camouflage for its armed forces. As you might guess, this coloring is the Danish version of the German Flectarn (contains more green spots). Desert camouflage was also developed based on Flectarn-D.
Norway is armed with the M75 camouflage and its later version, the M98. This is a three-color camouflage pattern consisting of large patches of light green, dark green and brown.
Sweden uses the M/90 camouflage pattern, a modern version of the German splintentarn camouflage pattern adopted in 1990. In addition to the specified colors, the Swedish Armed Forces use the desert version of the M/90 to conduct operations in the appropriate area. Among the exotic versions of camouflage, we note the airborne troops of Benin, which use the so-called “Airborne” camouflage - a coloring closest to the Norwegian M98 camouflage with black or brown images of animals (lions, buffaloes and paw prints) applied to it.
The Royal Malayan Regiment uses a camouflage pattern called "Forest Zebra". The closest color to this version is the French CCE camouflage, but with brighter and more saturated colors. There are other military camouflage patterns, but they are either versions of popular camouflages, or are used very rarely and in small numbers, so there is not much point in describing them.
At the end of the article, we will point out the existence of the so-called 3D camouflage - a new American development, the concept of which was put forward by the Kryptek company. According to the manufacturer's representatives, this color represents the latest achievements in this field, and in addition combines the best and most modern optical illusion techniques. So far, 3-D camouflage is being tested and, quite likely, it will soon be adopted by the US Army.
Materials: varnishes, gels, bases
Many famous brands produce a series of materials designed to perform such a manicure. Camouflage can be in the form of a gel, decorative colored varnish or base. Each of the listed materials has its own advantages.
Gel extensions in camouflage color allow you to get nails that look natural and attractive. The grown edge looks neat from the wrong side (from the palm side). Camouflage gels are also used for complex arched extensions, as well as for designs, for example, laid-out French. You simply cannot do without this material, otherwise your nails will look sloppy.
Camouflage gel can be either single-phase or the second stage of a three-phase stage. Single-phase is applied directly to the nail; it can be used both for extensions and for strengthening your own nail plates. For three-phase, you need a base and top coat. Polymerization of such materials takes longer than it takes to dry varnishes. Typically, manufacturers recommend exposing the laid out gel to special rays for at least 4 minutes.
A camouflage extension base saves both time and money. Just apply it and then cover with top coat - you can skip the step of applying the color coat. This material can be used to create designs in the negative space style, as well as various types of French. The base is applied to the nail, then dried in a UV or LED lamp. When polymerized, most bases produce a dispersion layer, but it does not need to be removed.
Varnishes in camouflage shades provide ample opportunities for creativity. They are usually applied to a simple transparent base and then covered with a top coat.
The best ideas for camouflage manicure
Camouflage coatings are great as a base for manicures with a wide variety of designs:
- Korean minimalism.
- Negative space.
- Elegant manicure with opals and rhinestones.
- The basis for sliders, stickers, painting.
- Background for geometric design.
As you can see, many of the most current trends, to one degree or another, involve the application of a camouflage background. Special materials make it easy to cope with the task and get a good result - a smooth, uniform surface of a natural shade.
Shades
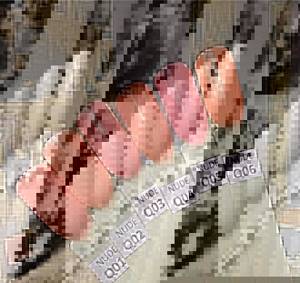
A huge advantage of camouflage gel is its fairly wide variety of color palettes. Thanks to this, professional craftsmen can easily select the appropriate shade for each client. This cosmetic product helps you create a French manicure in a short period of time without much effort. The shades that are presented on store shelves are ivory, various versions of pink, peach, light and dark beige.
Thanks to a fairly large selection, the final result is as natural as possible and is absolutely no different from a natural nail. This makes camouflage gel even more popular among manicurists.
Content
- Why do you need a camouflage base?
- Application method
- Review of the Fiore camouflage base
- Making a camouflage base from a regular one
Camouflage base for nails for gel polish is a base of pastel pink or beige color with the properties of a regular base for long-lasting coverage. The color palette of flesh tones is now quite wide: from milky beige to pale brown. Camouflage bases with small sparkles and shimmer are often found.
In addition to color, such foundations are distinguished by pigment saturation (degree of transparency) and thickness. A popular option is a camouflage rubber base, which is perfect for leveling the nail plate.
Design technique
You can watch the video on how to apply camouflage gel - there are dozens of master classes in the public domain. First, your nails need to be prepared for the procedure. To do this, completely remove the previous coating, polish the nail and remove dust from it. Next, the nail plate is given the desired shape: round, oval, almond-shaped.
The artist then attaches a nail extension form to each finger.
For the coating to fit perfectly, the center of the nail plate and the shape must coincide.
When the form is fixed, the master applies the coating with a brush in an even layer over the entire surface. The movements should be smooth and fast, then the layer of varnish will lie evenly and there will be no bumps on it. You need to make sure that the gel does not extend beyond the nail. The coating can be placed under the cuticle. If this can be done carefully, the manicure can be worn longer.
When the varnish is applied, your hands need to be placed in an ultraviolet lamp. Here the composition polymerizes in two minutes. When the coating has hardened, the dispersion layer is removed from it and the nail file is used to give the nail the desired shape. Then the dust is removed with a brush or sponge and the varnish is applied again (if the artist is working with a two-phase or three-phase type). When all layers have been applied, the mold is removed and the finishing compound is applied.
Application technology
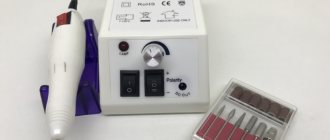
You can get a manicure using gel both in a beauty salon and at home if you have the necessary materials. This procedure is absolutely simple if you follow all the steps and listen to the advice of professionals. Necessary tools include a UV lamp for drying, camouflage gel, brushes, a form (for the first extension), nail files, base coat, degreaser and topcoat. But before you start applying, you need to do a hygienic manicure, disinfect all tools and remove the cuticle.
The gel application procedure consists of several stages:
- prepare the plate, treat it with a degreaser, apply a base coat, which should be dried in a lamp for 1 minute;
- if you use a form to build a nail, then you need to remove the adhesive part and attach it to each finger;
- if the extension procedure is not happening for the first time, then its use is absolutely not necessary;
- apply a small amount of gel to the brush and distribute evenly over the entire plate, it is recommended to start from the center and move to the edges;
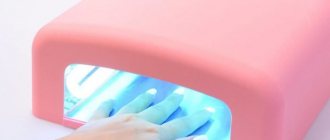
- put your hand in an ultraviolet lamp for 1-2 minutes;

- after drying, proceed to the next nail until all the plates of one hand are covered;
- once all fingers are covered with gel, put them in the lamp for one minute for a more durable result;
- after this you can proceed to the next hand;
- Once all fingers are covered with camouflage nail gel, the molds can be removed to build the plate;
- then a top coat is applied, which must be dried in a lamp, and then you can do a French manicure or leave your nails natural.
How to use?
Using camouflage gel after watching training videos and master classes is not difficult; all you need are tools, a good product and skill. As for any other procedure, the surface is cleaned of the old coating, sanded and dusted. All that remains is to use a nail file to shape the base into the desired shape (oval, square, almond-shaped) and attach the shape for the extension.
In order for the coating to be flawless, the center of the form and the nail must coincide. After fixing the shape, the coating is applied with a brush - carefully and quickly, so that the result is without bumps. It is desirable that the rubber base does not spread. It remains to place your hands under the polymerization lamp for 2 minutes. The final treatment consists of removing the dispersed layer, correcting it with a nail file, removing dust and applying a finishing coating.
Preparing for the extension procedure
The extension procedure is complex, but quite interesting. It takes place in several stages.
First of all, the master prepares natural nails for modeling: he uses an anti-spectral agent on his hands and the client’s hands, and then treats the cuticle with a soft frieze to make it convenient to place the shape. It is necessary to thoroughly clean the nail plate from the cuticle and make sure that there are no “crumbs” left on the base layer. After removing the dust, apply a degreaser, and then any primer.
Tags
delusion. Camouflage gel Camouflage gel camouflage varnish too Such varnishes come in the type of varnish used Camouflage varnish needs to be coated with a pinkish varnish, this varnish decides the nail varnish of a certain camouflage varnish can in varnish. remove varnish and long nails with natural nails medium grow nails and a strong nail plate. vitamin nails are fragile imperfect nail plate of your own nails. such a manicure is exactly beautiful ma manicure done such a manicure will be such a manicure nails such manicure is better. Camouflage manicure requires a fashionable manicure. Manicurist often cracks. Manicure of original manicure is possible
photobasicideaslongcare