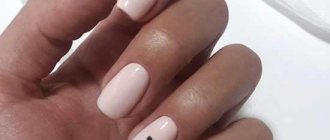
Throughout the year, the fashion for manicure nail shapes constantly changes; girls prefer to make non-standard designs that cannot be found in others. However, before you shape your nails, you should pay attention to the peculiarities of manipulation.
You can always perform the procedure yourself if you know how to give your nails a beautiful design without spoiling their original state, since there are some subtleties in the technology, failure to comply with which can impair the quality of the nail bed.
Ugly nails: tricks for visually lengthening nails
How to lengthen nails at home? If you want to correct ugly nails yourself, then adopt a few tricks:
- Always get rid of cuticles - cut out or move the grown-in area as far as possible to the base of the nail. Additional sections of the plate will help lengthen short nails.
- Use a nail file to form an oval shape and get elongated nails. Give preference to glass files.
- When applying dark shades of varnish, leave the side lines unpainted. The boundaries of the nail will correspond to the contour of the varnish.
- When applying a design or decorative decoration, concentrate attention on the middle of the nail, diverting attention from the width of the plate.
- Avoid the square shape of the nail , use the grown part to correct the shape. A few millimeters of growth will help visually lengthen your nails.
- Between matte and shiny varnishes, give preference to the second option, as this will distract attention from the natural shape of your nails.
Tricks
Try, create and practice!
The popularity of beautiful manicure will always be at its best. The shape, color and design of the nail will always catch the eye of others.
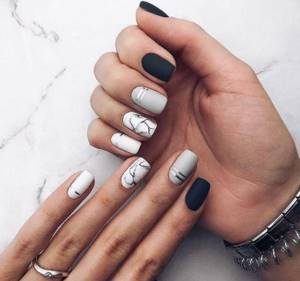
Learn how to create your own manicure, or find interesting options for your master, who will give you an unforgettable manicure. Get creative and stand out from the crowd!
Ugly nails: how to correct imperfections?
Apart from their shape, ugly nails have many other disadvantages. Visual effects help hide any flaws:
- A contrasting combination of light and dark shades allows you to draw attention to the desired area, beneficially adjusting the shape. A dark shade visually reduces, a light shade expands. Dark varnishes allow you to visually lengthen short nails.
- Irregularities in the nail plate are masked using ornate patterns, geometric shapes and random strokes.
Patterns
- Visual volume for a flat nail plate is added with shiny and pearlescent varnishes. Nails with rounded designs also look more voluminous.
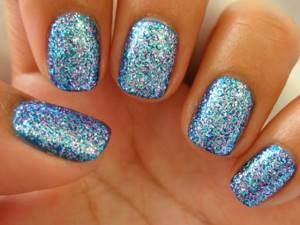
Brilliant
- When bending the tips of your nails, it is better to stick to a short length. A strong plate grows back more smoothly, so you need to use strengthening products. The use of high-quality nail files also has a positive effect on proper nail growth.
- Brittle nails are a consequence of a lack of vitamins. If you have a constant problem with your nails, you need to take a course of useful supplements. For external effects, oil is applied to a clean plate to strengthen nails and cuticles.
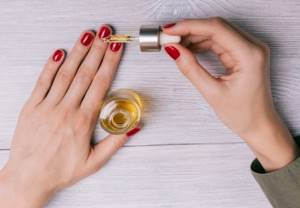
Use oils
- For problematic nail plates, use a more gentle coating. For example, gel polish causes fewer side effects than acrylic coating.
Common mistakes
The most common mistake is completely removing the cuticle. This nail part protects the plate from infections. The more you remove it, the more intense the skin will grow. Therefore, it is recommended to soften it and move it to the nail base.
Amateur struggles with ingrown toenails are common. Sometimes it’s still worth entrusting such a problem to specialists, especially when it has dug deep under the skin and gone deep. When you try to cut it out, you can get an infection, but the problem will remain unresolved. If you treat your nails regularly, then such problems will not happen.

Another mistake is improper polishing. Some people think that using a polishing file will give you shiny nails. In this case, the nail plate loses its layers and becomes thin. It is recommended to use special tools, namely files with an abrasiveness of 900 to 1200 grit. Before polishing, nails and cuticles are treated with a nourishing and moisturizing agent. Using a nail file, it is gently rubbed into the surface. The nail plate gains additional elasticity and acquires a mirror shine.
For processing, it is better to use special nippers that cut the edges of the nail evenly. If you plan to remove a short length, it is recommended to use a file that will evenly file the edges and give the desired shape.
Manicure only outwardly seems like a simple operation. In reality, processing requires concentration. You cannot work with a file chaotically, trying to quickly give the desired shape. Nail plates, like any part of the body, require care and attention. They bear the entire load when working with varnish. Here, too, there are special procedures, the implementation of which is mandatory.
- Do not apply varnish unless a base coat has been applied to the surface.
- Do not tear off false nails.
- You should not wear gel polish for more than 14 days.
- You need to remove the varnish using special liquids, following the rules for working with them and leaving them for the required time. It is recommended to remove simple varnish with a liquid without acetone.

There are not many rules for the care and treatment of nails. Master them and your hands will always look well-groomed.
How to properly file your nails, watch the following video.
Ugly nails: what prevents you from visually lengthening them?
When designing your nails, it is very important to take into account the natural shape of the plate. Random application of patterns and shades can not only decorate the appearance of the hands, but also visually emphasize imperfections.
Let's look at a few taboos when designing wide, ugly nails:
- A large number of prints. The more designs on your nails, the more attention they attract. It is enough to highlight one nail and apply a classic coating to the rest.
- Clear horizontal lines. To make the nail appear longer, there should be no straight horizontal lines on it. A stripe drawn in the middle of the nail visually shortens the length of the plate by 2 times. Therefore, we avoid clear horizontal contours.
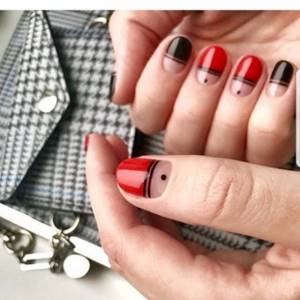
Visually shorten
- Poisonous screaming tone. Acid shades deprive the appearance of nails of femininity and sophistication. Applying bright colors to unattractive nail shapes creates a messy effect.
Ugly toenails
In order for your legs to look beautiful and healthy, you need to take proper care of your skin and get a pedicure. You can transform ugly toenails with the help of effective cosmetics and interesting pedicure designs.
To form a beautiful and healthy nail plate, we follow the following rules of care:
- Using nourishing oils, we moisturize the nail plate, cuticle and skin on the feet.
- To remove the applied coating we use products without acetone. This will help avoid cracking and delamination of the nail plate.
- The internal processes of the body are also responsible for the external condition of the nails, so do not forget about high-quality nutrition and a course of vitamins.
- Unsightly toenails often have a yellow tint and split. In this case, consultation with a doctor and drug treatment is necessary.
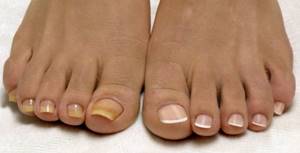
Needs to be tidied up
Beveled square
This manicure option is used mainly on artificial nails. Most often due to the fact that it is very difficult to achieve this form on your own. The only exception can be a very strong nail plate, which has ideal and clear boundaries. If this is not given to you by nature, then you can use the extension procedure. This beveled square manicure design looks very bold. According to surveys of some girls, we can conclude that this form is not very practical and there is a possibility that the sharp tip can quickly break off.
Ugly shape of toenails - how to fix: recommendations
The correct sequence of pedicure allows you to prevent deformation of the nail plate and correct an unsightly shape. If you have ugly toenails, be sure to read the information below.
Effective recommendations for beautifully shaped toenails:
- once a week . This will help avoid ingrown nails and splitting, especially during the season of wearing closed shoes.
- Every 3-4 days, adjust the shape of the nail with a nail file. It is better to move the tool in one direction. Square and rectangular nail shapes should not have sharp corners; stick to smooth shapes. Nails are filed before water procedures.
- To keep your cuticles looking neat, oil them daily. Cutting the cuticles on your toes is highly undesirable.
- Polishing the nail smoothes the surface and eliminates lifeless cells. Rough areas of skin around the nail are removed using peeling.
- To remove dirt from under your nails and skin folds, use a soapy toothbrush or other handy tool every day. Water procedures are followed by hydration.
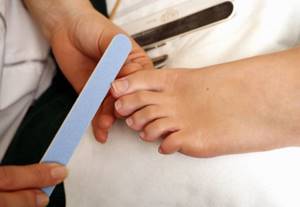
Nail care
Pedicure for ugly nails: ideas
Ugly toenails can be transformed with the help of the right color scheme and the simplest designs. Let's look at several techniques for a beautiful pedicure.
- Horizontal lines and patterns allow you to visually expand your nails
- For short and wide nails, the design is applied along the central vertical line or along the sides of the plate.
- The classic French manicure visually elongates the nail plate. This type of pedicure is suitable for any nail shape.
- The pattern of stones also allows you to adjust the shape of the nail. To visually add length, the stones are distributed at the tip of the nail.
- The correct shape of the plate allows you to apply bright and rich shades, with the preliminary application of a colorless base.
- helps protect your nails from the negative effects of polish . The transparent layer will make the nail neater and minimize the contact of the plate with chemicals.
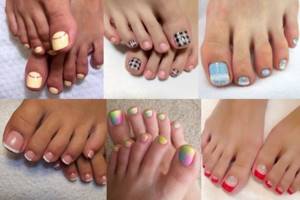
Horizontally
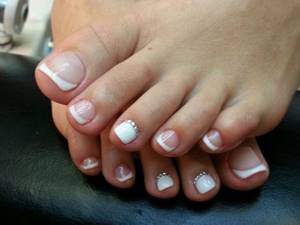
French
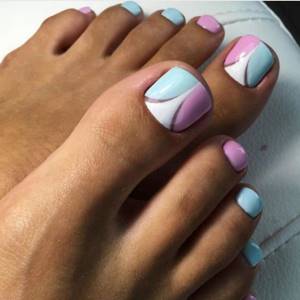
Patterns

Result
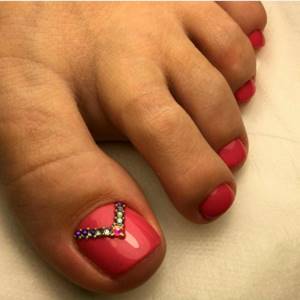
With rocks
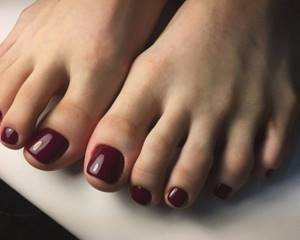
Restrained
How to paint ugly nails with varnish: tips
Applying varnish to the nail plate should transform the appearance of the nail, and not highlight imperfections. Painting nails has a certain sequence.
Let's look at how to paint ugly toenails step by step:
- Using a pedicure tool, push back the cuticle, it should not come into contact with the varnish.
- Apply a protective clear or pink coat to your nail.
- Apply the color coating in 2 stages , maintaining intervals for drying each layer.
- The last layer is applied with a transparent sealer . It will maintain the integrity of the applied varnish and add shine.
- Traces of polish outside the nail plate are wiped off with an ear stick moistened with nail polish remover.
- speed up the drying of the varnish by using a bath of cool water.
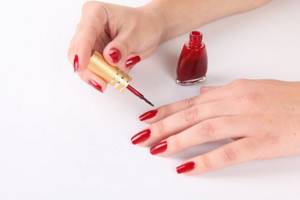
Application according to all rules
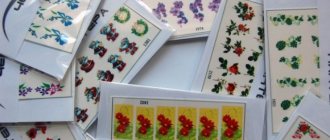
The color of nail polish should not be flashy; give preference to an elegant and feminine pedicure. Glitter polishes stay on your nails much longer than matte ones. When making your own designs, use stencils and stickers.
Very beautiful manicure design
When choosing a manicure design, you can be guided by both fashion trends and your own taste and imagination. Try to base yourself on the color of the clothes you will wear and the location and format of the event you are going to attend.
For office work, it is better to choose a modest monochromatic manicure in pastel colors, or a strict classic French manicure, suitable for any occasion. For a noisy party, you can afford a chic manicure in bright colors, rhinestones or sparkles, and unusual color schemes.
Plain manicure
The simplest nail design option is a single-color manicure. But don't think he's boring. After all, this is a classic, and a classic can be neither old nor boring.
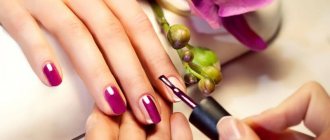
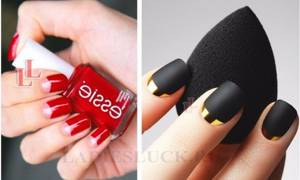
As a classic option, you can use any shades of red and burgundy, as in photo 1.

The main advantage of this manicure is its versatility. It will be appropriate in the office, on vacation, and at a gala evening. This manicure is perfect for both long and short nails.
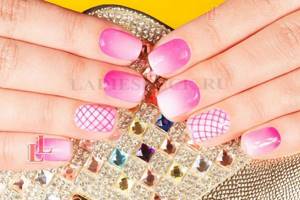
You can choose any polish colors and change them as often as you like. Today it is fashionable to combine several colors at once. The result is a very bright and cheerful manicure that can be done without much effort. Example in photo 2.
Colored manicure with gradient
As an option, you can make a gradient color. To do this, you will need either five varnishes of the same tone with different color saturations, or just two varnishes - one bright color that you like and a white opaque varnish without glitter, with which you can create lighter tones. To do this, prepare some additional small plastic container; the bottom of a plastic glass will do.
It’s better to buy an inexpensive varnish that you won’t mind using for experiments.
The first nail should be painted in the brightest color; for each subsequent nail, add more white, creating less saturated shades. Example in photo No. 3.
Manicure with rhinestones and patterns
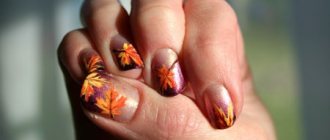
An ordinary monochromatic manicure with a slight movement of the hand will turn into a luxurious evening one if you add a little sparkle, a small pattern or a couple of rhinestones. Examples in photo No. 4.
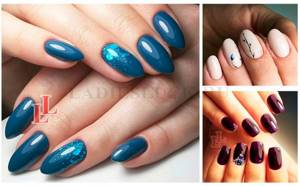
All this is not difficult at all. For the first option, choose a clear polish with glitter to match the main color of the polish. For the second option, you can make a light design with a twig, or a flower in the form of dots, or the simplest one - polka dots. To do this, you only need a thin needle, a couple of additional varnishes and your imagination!
French manicure
French remains in fashion no matter what. The most luxurious option for any occasion and for any toilet, it has not lost its position for many years. But recently, this type of manicure has become more and more new trends.
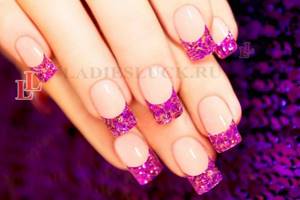
The “millennium” option is very popular, when the tips of the nails are covered not with white varnish, as in the classic case, but with glitter. Example in photo No. 5.
Or a colored French manicure - when instead of the main pink color and white tip they use a variety of varnish colors, this beautiful colored French manicure in photo No. 6.
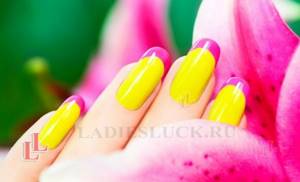
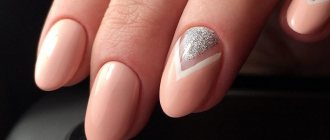
The “Hollywood” French is recognized as a real rage in fashion - when the “smile” is located not at the tip of the nail, as we are used to, but at its base.
This beautiful manicure is one of the current manicure trends and fashion trends in the world of nail art.
The plate itself can be painted in classic colors, but this nail design looks much more advantageous in a bright color palette. The most avid fashionistas in Moscow adopted it a few seasons ago! Now we can take advantage of their experience and do such a manicure at home. Hollywood chic manicure photo No. 7.
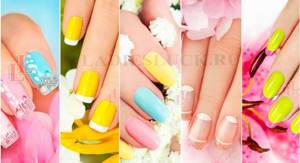
A decorative jacket will allow you to express your imagination to the fullest: designs, sparkles, rhinestones, a combination of different shapes, textures and shades are welcome. You can use not just one decor option, but several at once. Here you can develop your own creativity or use examples from the Internet. Decorative French manicure, a beautiful design gives a huge scope for ideas. Decorative French manicure, beautiful photo, the most chic - No. 8.
Gradient manicure
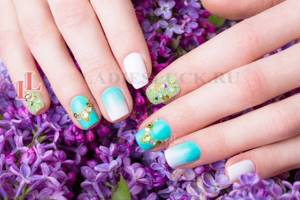
Gradient manicure remains very popular - when on each nail there is a gradient either from light to dark, or several colors at once. To complete it you will need a sponge, varnishes - several colors and base and top coats.
First, apply the base, and then the lightest varnish from the selected ones, wait until the base dries. On a flat surface (plastic works well), apply both varnishes in a dense layer, overlapping. Dip the sponge and apply the polish to the nail using patting movements. Apply top coat without waiting for it to dry.
The manicure is a beautiful design with a gradient in photo No. 9.
Geometric manicure
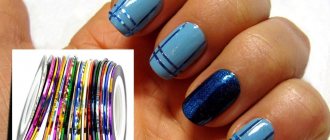
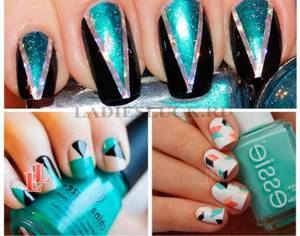
A very stylish and easy-to-perform beautiful manicure. It does not require any special devices or materials - simple tape will do. Using masking or regular tape, you can create designs of varying complexity by first cutting out stencils. You need to put a stencil on the nail and apply varnish. Each new layer only after the previous one has completely dried. A very easy way to get beautiful nails photo No. 10.
Matte manicure
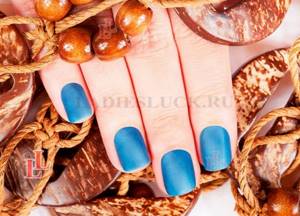
In the last couple of seasons, everything matte has been in fashion: lipsticks, eye shadows, varnishes. Matte manicure has become a trend and is worn by girls all over the world. You can get such a beautiful manicure using a special varnish with a matte effect, or you can achieve this effect with regular varnish.
It's very simple, although it does require a little skill. All you need is regular varnish and an electric kettle. Bring the water to boil and in the meantime apply the polish evenly to your nails. The polish should not have time to dry, just be evenly distributed on the nails, so you will have little time.
After boiling, hold your nails with wet polish over the steam for a minute - just be careful not to get burned! After drying, the nail polish will become matte. In this case, you should not cover your nails with a fixative, otherwise the matte effect will disappear. An example of matte nail design in photo No. 11.
Get inspired by manicure ideas from the Internet. Enter “the most beautiful manicure photo” in any search engine, and you will get an inexhaustible source of inspiration. A beautiful picture in a magazine or a photo of a girl on Instagram, or even an intricate pattern on the wallpaper can give you the most extraordinary ideas for nail design!
Manicure for ugly nails: ideas
Any professional master knows how to lengthen nails with a manicure, what color lengthens nails and how to apply the coating correctly. If you want to choose your own manicure design for ugly nails, then use these useful recommendations.
- To lengthen too wide nails, distribute the color coating along the middle of the nail. We leave unpainted gaps of a few mm on the right and left. This manicure visually lengthens the nails and adds sophistication.
- The lateral borders of a wide nail plate can be reduced by drawing dark lines on the sides of the nail, using a light translucent tone as the basis. The shape of the nails cut on the sides lengthens the fingers visually.
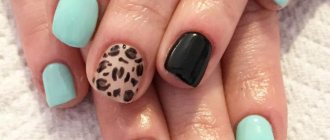
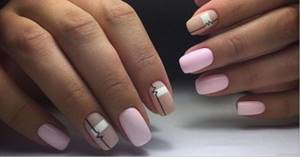
- Pastel and light shades give nails a well-groomed look , without focusing on the shape of the plate. A dull monochromatic coating can be diversified with an emphasis on the ring finger.
- For those who like simple and laconic designs, you can lengthen the shape of your nail using a few geometric lines. A design that lengthens nails should be unobtrusive.
- Choose a dark nail polish color that visually lengthens your nails. For perfect coverage on a wide plate, use black, burgundy, dark blue and green tones.
- Using gel polishes with shimmer, a manicure is performed that lengthens short nails. The “cat eye” technique has similar properties.
- Red nail polish will decorate the hands of any woman. The key point before applying red shades is to properly correct the nail plate.
- A manicure based on a classic French manicure will fit perfectly on any nails. An additional design or sticker on one of the nails will add uniqueness without compromising femininity.
- During the sunny summer, any shape of nails will be decorated with rich shades of manicure. Add a touch of blue sky or ripe berries to the mood. When using several bright colors, it is not advisable to apply a pattern or additional decorations.
- gradient style will be a decoration for any shape of nails - a blurred transition from a light tone to a dark one.
The wide plate is perceived by the master as an advantage rather than a disadvantage; such nails are easier to work with tools. Small nails do not always allow you to realize a creative idea. A beautiful manicure will sparkle with new colors on well-groomed and well-moisturized hands.
Gently

Traditionally
Shine and contrast
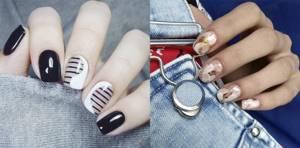
Game of drawings
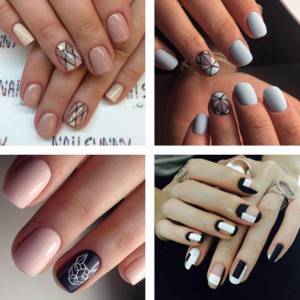
Diversity
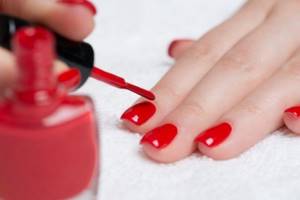
Juicy

French saves the day
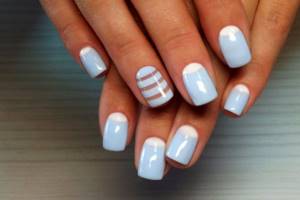
Light color
Round
There is nothing difficult about decorating round nails step by step. This is the most natural form, which is dictated by nature itself and echoes the outlines of the fingers. This style is often chosen by girls with short nails who lead an active lifestyle, because the practicality and convenience of round plates is always at its best.
The first step is to file each plate with a nail file, positioning the tool at a right angle. At this stage you should have an even square. Then you need to bring this shape closer to the treasured circle, and for this you will need to cut off the sharp corners and give them smoothness.
It is not recommended to make the plate extremely narrow - ideally it should reflect the natural outline of the cuticle.
Ugly fingernails: photos before and after manicure
- A visit to a professional nail technician can turn ugly fingernails into a work of art. Let's look at some illustrative examples of the condition of nails before and after a manicure. Manicure at home often leads to brittle and split nails.
- Improper use of manicure tools slows down the growth of the nail plate.
- Professional nail care includes a wide variety of services.
- correction is carried out using trimmed and hardware manicures, nail extensions, gel polish coating, and acrylic plastic surgery.
- Therapeutic manicure includes spa treatments and helps you achieve a flawless appearance.
- Nail extensions allow you to get any desired result in a short time.
- Professionals can modify any natural form into the desired one and secure the result for a long period.
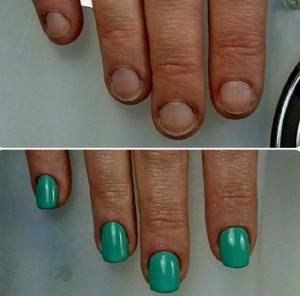
Difference Result
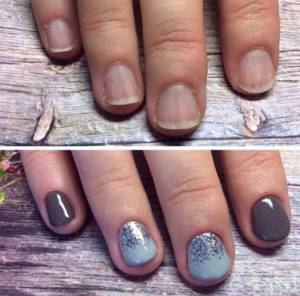
Restrained
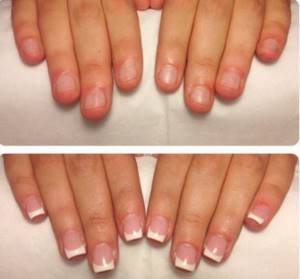
Result
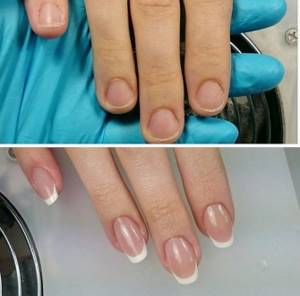
Gently
About the features of care
Nail plates are horny growths (similar to animal claws) that form on the dorsum of the outer phalanges of the fingers. Being derived from the epidermis, they need proper care, regular procedures such as filing, steaming, polishing. Many people underestimate the importance of doing these steps.
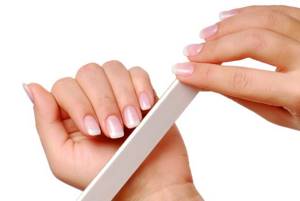
Why is it important to file your nails correctly? The plates are made of keratin, a hard substance produced by the body. Located primarily on the nail bed, it protects fingers from mechanical damage and helps avoid minor injuries. It also turns out to be the most susceptible to the negative influence of the environment, which is why it quickly becomes thinner and brittle. The listed circumstances make filing not just one of the stages of manicure, but an important procedure that allows you to improve the general condition of the plates.
When starting a manicure, think not only about how to file your nails beautifully, but also about how to keep them healthy!
There are three main groups of manicure tools:
- basic;
- special;
- cosmetic.
The first group is represented by means for removing varnish, buffs and polishing files, as well as baths, steaming compresses, and liquids for removing or softening the cuticle. Special tools include a variety of gels and tonics that provide nutrition and restoration of the nail plates and accelerate tissue regeneration. The cosmetic group includes varnishes and glitters.
“When making an appointment with a nail specialist, the vast majority are worried about the sterility of the tweezers and files used. Unfortunately, such suspiciousness does not persist when doing a manicure yourself. Household instruments may be stored in inappropriate conditions and not sterilized, which few people care about. This is a fatal mistake, which sometimes leads to very sad consequences,” says leading podologist Oksana Shikhman.
How to beautifully design small, ugly nails: tips
Following the key rules of manicure allows you to transfer fashion trends even to small, ugly nails. For modern fashionistas, we offer several popular manicure options.
- Ombre. To create a fashionable gradient, you will need two colors of varnish with a difference of 2-3 tones and a soft sponge. The upper half of the nail is covered with dark varnish, the lower half with a lighter tone. Using a similar technique, apply varnish to a sponge. Touching the sponge to the nail allows you to smoothly blur the boundaries.
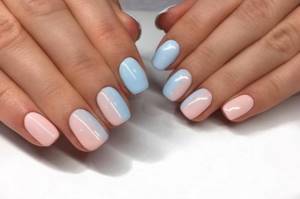
Ombre
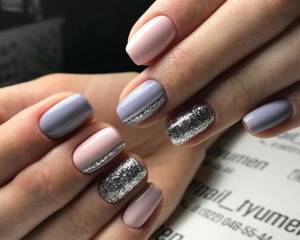
- Metallic. Metallic polishes last a long time on short nails. Use golden, silver, steel shades. Add stripes of silver or gold to your ring finger. In the salon you can create a mirror or chrome manicure.
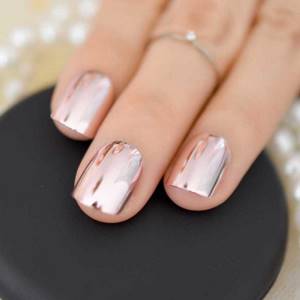
Mirror
- Geometry. Using stickers and stencils, you can decorate small, ugly nails with geometric lines. Stripes in the form of a vertical arrow visually stretch the nail plate.
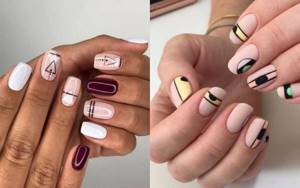
Geometry Gently
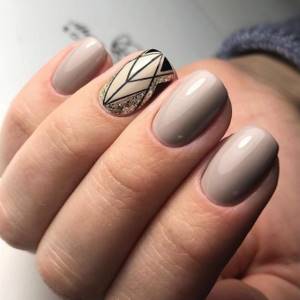
In shades of gray
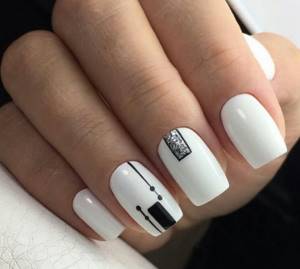
In white
- Drawing from dots. Neat contrasting dots applied vertically will make the nail longer. It is better to place dots of different sizes in a clear sequence - thick at the base, thin closer to the tip of the nail.
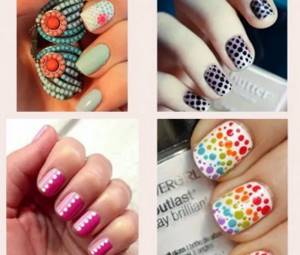
Points
- Graffiti. Abstract designs will add volume to small nails. Using a manicure brush, create random streaks and wavy lines.
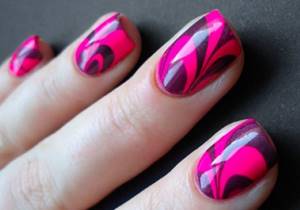
Graffiti
- Combination. Apply multi-colored varnishes in several layers. For example, inside one shape, draw a smaller shape of a different color. Contrasting layers will distract attention from the natural shape of the nail.
Types of square manicure
First of all, it is necessary to understand directly the types of such manicures themselves, and only then begin to perform them. So, we present to your attention the types of square manicure:
- A square with clear right angles. This option looks quite attractive on nails, but in everyday life it is not very practical, since the corners of the nails can cling to clothes and other things.
- A square with slightly rounded corners. A more practical shape of the nail plate, convenient for girls working at the computer, looks beautiful on short nails. Due to the rounded corners, the load on the nail itself is reduced, so it will be more difficult to break.
- Oval-square shape. Suitable for almost any style of clothing, makes fingers visually longer and more graceful. This form is not recommended if the fingers are short and the nail plate is uneven.
It is generally accepted that the owner of a square manicure has more self-confidence. They say that such people set a goal for themselves, and then go straight to it.
Ugly wide nails: reviews and recommendations
- Tatyana, 26 years old. At home I perform trim manicures without painting. I decided to try changing the shape of the nail and visually lengthening the plate. Having tried many different techniques, I have identified several effective methods for myself. I changed my short square nails to an oval shape. Through trial and error, I figured out which color of polish lengthens my nails - I always do a manicure with a single-color polish in dark shades. I moisturize my cuticles with oil every day. To correct the shape I use only a glass nail file.
- Sofia, 32 years old. By nature, I was not given the most beautiful shape of nails. I don’t always have the opportunity to get a manicure in a salon, so I’ve set myself a few golden rules when it comes to caring for my nails on my own. Once a week I get rid of the cuticles, this allows me to increase the space of my nails. Before cutting, I work the cuticle with an orange stick, thanks to this the plate has become more even. To strengthen the nail plate, I stopped using sanding files.
- Anastasia, 28 years old. Every three weeks I visit a manicurist, where a new design is applied to me. To correct the shape of my wide nails, the master always suggests what color of varnish will visually lengthen the nails. I noticed the professional cunning of the master. When painting a French manicure, the artist draws the lower white edge slightly below the line of the grown part. Thus visually lengthens the main plate. When painting with a single-color varnish, the plate is slightly unpainted on the sides. The shape of the nails takes on a flawless appearance.
Giving the same length and shape
How to shape your nails and give them the desired length? In manicure practice, nail shapes are divided into three basic ones:
- Oval;
- Triangle;
- Square.
Nail extension with tips
Others are formed by combining basic options. From an oval shape you can create an almond shape, an edge shape, a circle shape and others. Types are formed from the triangle: stiletto, ballerina, another variation - with almonds. From the square they make a soft square, a kind of ballerina, a rectangle, etc.
Important! When forming plates, you need to immediately determine what the direction of the edges and end part will be. This is necessary for proper filing.

Varieties of forms
The length of the nails is determined depending on the condition of the nail plate. For thin and weakened nails, keep the edge short, otherwise they may break and peel. If the plates are strong, then you can cut them lightly and leave the length. If you are constantly injuring your hands, you should keep your nails short. The shape of the brushes determines what the plates should be like. For long fingers, short ones are suitable, for short ones, long ones. The smaller the nail bed, the more length you need to leave on the plate.

Scheme for shaping nails
How to make the shape correctly is discussed using the example of a “soft square”. To work, you will need a rough and sanding file, a polishing buffer, and a brush to remove dust.
Stages:
- Using an abrasive file, file the nail on one of the longest fingers: index, middle, ring. Adjust the rest according to this level.
- You need to cut in one direction. Movements should be soft with light pressure. The nail is directed perpendicular to the nail file.
- After the central 6 nails are filed, you need to check their length. To do this, place your fingers on a flat nail file. If there is a difference, then equalize.
- On little fingers, the length can be made 2-3 mm less than the standard, on large fingers - 1 mm more.
- Compare the plates of both hands by placing them next to each other.
Important! During work, you need to remove dust with a brush, otherwise the place for cutting will not be visible.
- File down the side edges. For triangular nails, the sides are slightly beveled towards the center; for square nails, they are made straight.
- If the plates are weak, then the file should be soft, strong - medium grain. You need to cut strictly from the bottom up to avoid delamination.
- The sides need to be filed parallel to each other. To narrow wide plates, you can narrow the tips.
- Carefully give the final shape with a buff.
- Polish the sides from front to back, the plate from the cuticle to the tip to a slight shine using a buff.
Interesting. The plates become stronger because they are sealed when filed.


