Fairytale magic dust for nails - glitter - is now at the forefront of fashion. To get a shining manicure, you don’t have to spend a lot of money at a beauty salon. It is enough to figure out on your own what it is, what types it is and consider the application features of each, and then simply study the proposed design ideas from the masters and choose the appropriate one.
What is glitter
Glitter is the name for decorative sparkles that are widely used in cosmetics. Outwardly, it is a finely chopped crumbly metallized substance. The particles can be of different sizes, shapes and colors.
The widest range of materials is used for manufacturing: from plastic to foil.
Sometimes it is called shimmer. But this is not entirely true, since shimmer is very small luminous particles that are indistinguishable on the surface with the naked eye.
Glitter on nails: how to make beauty with your own hands
Before the invention of gel polishes, manicure was a frequent and rather tedious task, since just a few days after the procedure the coating lost its attractive appearance, became cracked, dulled or chipped. With the invention of shellac, everything changed; caring for and maintaining pens in an attractive condition is no longer such a frequent and labor-intensive process. By creating the perfect coating for yourself just once or twice a month, you don’t have to worry that it will be ruined tomorrow.
Need to know
When figuring out how to apply glitter to gel polish, you need to understand that such a permanent coating will last even longer than without glitter. Glitter strengthens the manicure, making it not only attractive and original, but also more durable. If usually gel polish does not require correction for 2-4 weeks, then with glitter applied it can last for a month and a half without changes in appearance, with timely adjustments in the cuticle area.
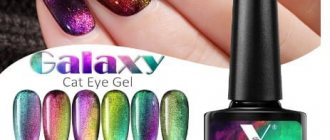
Types and types of glitter for gel polish
In order not to mislead you, let us immediately make a reservation that almost any sparkles are pieces of ordinary metallized foil film cut into small pieces. They can be colored and transparent, silver and gold, as well as a wide variety of, sometimes absolutely unimaginable, shades. Glitter can consist of tiny circles, squares, triangles and even more complex shapes, and the size of one such sparkle can be absolutely tiny (it will), or it can reach 3-5 millimeters in diameter (glitter).
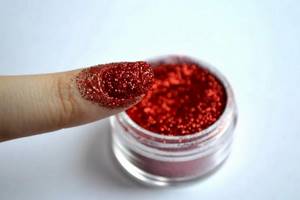
- The most common type of glitter and dust are the dry types, which are sold in tiny glass flat jars. In this case, applying glitter to shellac is very simple, which is why the popularity of such material is constantly growing. Essentially, these glitters are fine powder of different colors, which is applied to the sticky layer of gel polish before the top coat.
- The second option is liquid glitter, which is a mixture of colored powder and transparent gel polish. You can purchase this option in bottles, exactly the same as for regular varnish. The disadvantage of this glitter is that its density in a transparent base is predetermined and if you want to make the glitter more saturated, you will have to apply several layers, which can be dangerous for durability due to the thickness of the coating.
When planning to apply glitter to your nails, be sure to wash well, then dry and dry your hands. They should not be greasy, dirty or wet, otherwise the glitter will “spread” everywhere and will be extremely difficult to wash off later. In order not to cause yourself unnecessary trouble, it is better to take precautions in advance and work very carefully and carefully.
Types of glitter
For manicures with glitter, specialized outlets offer a wide range of glitter. Manufacturers even manage to produce particles of a certain shape and combined colors. Conventionally, glitter is divided into two types - liquid and dry.
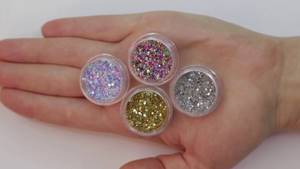
Dry
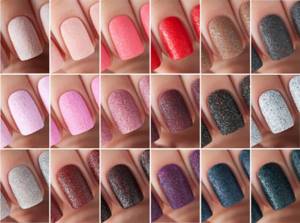
Dry or crumbly glitter looks like a light powder made up of particles of different sizes and fractions. Having several jars in different colors and shapes allows you to easily arrange them to create a new design. With the help of fine powder, trendy “metallic” and “rubbing” are created. It is also added to an existing gel, creating new and unusual combinations.
However, dry glitter also has disadvantages:
- they spray easily, staining everything around;
- during application there is an increased consumption of material;
- To work with them, you need to purchase a whole set of tweezers, applicators and sponges.
But all the problems are more than offset by the opportunities that these materials provide.
Liquid
The liquid version is a transparent or pigmented varnish mixed with glitter. It needs to be applied to the base.
The number of particles can be any, as well as the shape. To get a beautiful effect, you will have to apply several layers. But it will not be possible to create a thick metallized coating here due to the low density of the arrangement.
Where to buy glitter
The answer to this question is quite predictable and obvious - in specialized stores with tools and materials for manicurists. The second option is cosmetic stores that provide a large assortment of glitter for decorating the body and eyes. The third “secret place” is stores with hairdressing paraphernalia and stationery stores. In the first case, such sparkles are bought to decorate curls, in the second - to transform applications.
Don't be afraid to shine and attract attention, collect compliments and use glitter not only for an evening out. And, of course, shine brighter, illuminating the dullness of everyday life!
How to use it correctly
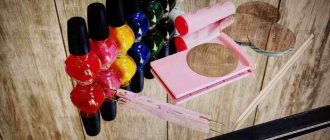
The glitter is quite easy to apply. The glitter is very easy to use. To create a simple manicure with a shining effect, all you need to do is purchase a fixer and a clear varnish. For interesting tints, a few colors will be enough, which can be mixed with each other.
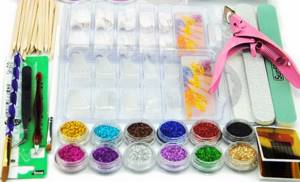
For more complex work you will need to buy:
- brushes of different thicknesses;
- sponges;
- lamp for drying nails;
- a set of gels and varnishes;
- tweezers;
- wooden stick;
- foil;
- stamps.
Additionally, you will have to learn some tricks for creating patterns on your nails.
We must remember that dry glitter is a very light substance and do not allow sudden air movements in the room when the jars are open.
The most advantageous combinations of nail polish shades with glitter
For a more effective manicure, it is recommended to follow the rules of color combinations.
- Yes, varnishes red, yellow and white colors and their shades are in harmony with black glitter.
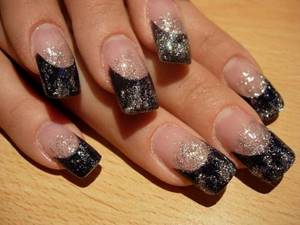
Sparkling black and white jacket with glitter - The classic combination is white shimmer plus varnish of any color, such as blue or red.
- Varnishes in sunny shades (red, yellow, orange) are perfectly complemented by brilliant blue decor.
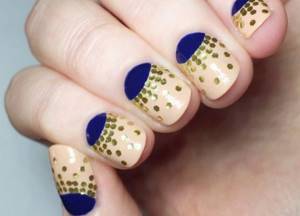
- Gold glitter goes well with all colors and is the most win-win option.
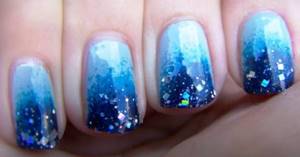
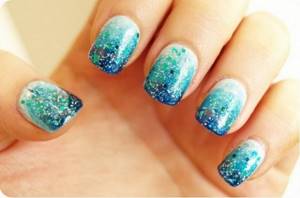
Shiny manicure in blue and white tones
Blue moon manicure with yellow sparkles
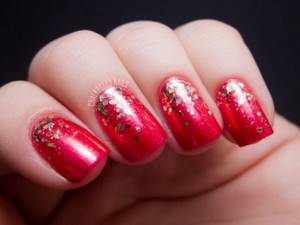
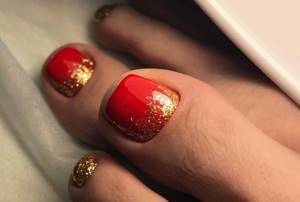
Red manicure with gold glitter
How to do a glitter manicure
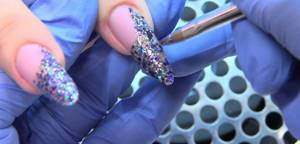
To create a manicure, the design should be thought out in advance. The most basic technique for beginners is to apply a continuous glitter coating to the nail.
Step-by-step description of the work:
- Applying base coat and varnish. In this case, the color of the latter does not matter, since it will not be visible due to the covering particles.
- The nail is carefully lowered into the container with glitter in a smooth movement. To ensure that the glitter is evenly distributed over the surface, you need to lightly wiggle it with your finger.
- Using a dry brush, shake off excess coating from the cuticle.
- Applying a fixative.
Each layer of decorative coating must be dried in a lamp. Drying time is indicated in the instructions.
A little trick: if patterns are created, then after the base coat has dried, the varnish is applied with a brush only in the places necessary for this. And then they are covered with glitter using a dampened brush.
After mastering the initial technique, you can begin more complex work.
Large glitter
Creating a manicure with large particles is most popular at home. You can even use a gel with a large filler, removing glitter from the jar one at a time with a special wooden stick.
The beginning is standard: base, varnish and each layer is dried. Then a pattern is laid out on the surface, which is covered with a fixative.
We must remember that large sparkles look very bold and defiant, so you should not overdo it with them.
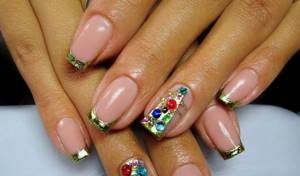
You can make an interesting composition with one or two rhinestones, sprinkling small shimmering substances around. They can be in tone or contrast, emphasizing the shape of the main part.
“Aquariums” and “waterfalls” are very interesting, but the technology of execution will be difficult for a beginner. You need experience working with certain materials - gel and acrylic.
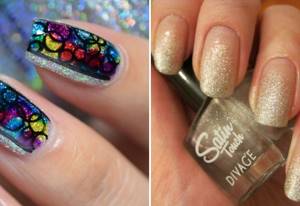
Glitter sand
A few years ago this type of coating was a hit. But it is still used today because this liquid composition is easy to work with and does not require additional equipment. A glitter varnish called “sand” is available for sale. All you need to do is purchase a bottle of the desired shade. The main advantage is that the coating is very thick and can be applied in one layer.
Salons have gone further and offer nail designs with velvet sand. But if you look at it, the technology is quite simple. Instead of “sand”, you can take small rhinestones, acrylic powder or even scrapbooking.
Step-by-step instructions for decorating:
- Preparing the nail and applying the initial layer. It is best if it is colorless. Drying.
- Cover with a second layer and thickly sprinkle with sand. It needs to be pressed down slightly. For the coating to dry completely, you need to wait 15 minutes.
- The remains of the decorative coating are swept away, and the nails are covered with shellac and a fixative.
These are the basic actions that are necessary when working.
It is not necessary to make a thick coating; you can simply draw interesting patterns on the glossy surface and scatter sand over them. But after pressing, they will not have a clear shape.
Bright “suede” or “shaggy” nails are very fashionable. The technique for applying the topcoat is the same.
Glitter powder
Using glitter powder, they create a full coverage with a very bright mirror shine. There are translucent options that shimmer with mother-of-pearl; they are also called “rubbing.”
Dust particles are thickly applied to the prepared base coat and polished with a sponge. Then it is dried and coated with a hardener.
How to make glitter with your own hands
If you do not have the opportunity to visit a specialized manicure store in order to acquire the coveted jar of glitter, then do not rush to despair. It can be replaced by ordinary stationery glitter, which is often bought for schoolchildren to design appliqués and crafts. Don’t forget about cosmetic glitter used in eye makeup or body decoration. It is also suitable for decorating your fresh manicure. If you are a big fan of evening styling, then you can probably get a bottle of hair glitter from your bins, which looks just as appropriate on your nails. In other cases, you need to use patience, ingenuity and manual dexterity in combination with the maneuverability of scissors. The coveted large sparkles can be easily obtained by cutting a sheet of culinary foil or metallized strips for nail art. Is this option not suitable for you? Then it’s time to resort to extreme measures and get a box with Christmas tree tinsel and toys from the mezzanine. Have you guessed what needs to be done with them?
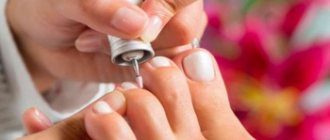
Pedicure with glitter
Before making a decorative coating on your toenails, you need to perform a hygienic pedicure with treatment of the skin of your feet.
It includes:
- removal of corns;
- prevention of cracked heels;
- softening and exfoliation of rough skin.
Only after this the nails are given length and shape. The nail plates on the toes need to be treated with soft and non-traumatic files. Then the irregularities are polished with a buff. This is done so that the shiny coating lays flat and does not emphasize the roughness of the nails.
Stages of applying decorative coating to toenails:
- Degreasing. This is done with an acidic or acid-free primer.
- Base. For such nails, it is better to take a compound with rubber that has a self-leveling effect. Polymerization under UF or LED lamp.
- Colored gel polish in one or two layers. Drying.
- Glitter.
- Top coating.
When making a simple glitter nail design yourself, you can first drop some glitter onto a foil palette and transfer it to the nail. Then take a thin brush and apply more glitter on top.
But with dry material you will have to tinker. First, all the points outlined above are completed, right down to the color coating. The varnish dries, but the stickiness is not removed.
Then you need to sit comfortably and place your feet on a sheet of paper. The brush or applicator is dipped into a jar of glitter, the pigment is transferred to the nail and gently rubbed in. When there is enough shine, polymerization is carried out.
If the color coating is done with a simple varnish, then you can resort to a little trick: the brush is dipped first into the varnish, and then into a jar of decor. The resulting mixture is applied to the nail.
Coverage options
- Regular varnish .
It can be plain or contain glitter. The second option is the most convenient, since you just need to apply the varnish to the nail plates. But if you only have varnish and glitter, you can mix them. You'll get the same effect. - Shellac or gel. Before applying shellac, nails are filed, polished, and cuticles are removed.
After this, a base is applied to the surface of the nail plates and dried under a UV lamp.Next, the nails are covered with gel polish and dried again.
To apply glitter, they are mixed in the required amount with shellac in a separate container, after which the resulting mixture is applied to the nails and dried.
The glitter layer is covered with a thin layer of gel polish and dried again. Finally, remove the sticky layer and cover the plates with gloss.
- Acrylic. Now you can find acrylic powder with glitter in the composition, which is very convenient.
To do a manicure, you need to remove the cuticle, file your nails and degrease their surface. Apply primer to the finished nail plates and attach the forms.Next, acrylic is applied to them. To make an acrylic mass with glitter, you need to dip the brush first in the liquid and then in the powder.
After nail extensions with a shiny manicure, the forms are removed and the nails are processed.
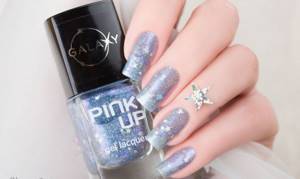
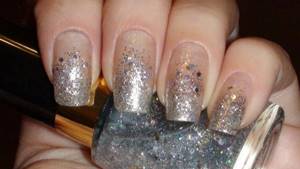
Shiny manicure using glitter polish
Example of nail design with shellac and glitter
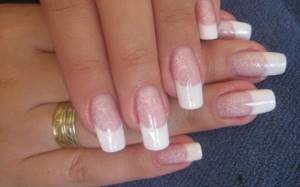
Neat French manicure with glitter on extended nails
Nail design with glitter
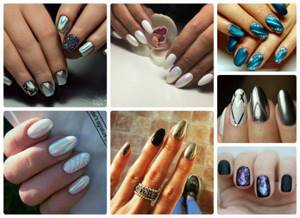
The popularity of glitter continues unabated. Every season, manufacturers produce new versions of varnishes with shining inclusions, and nail designers and nail service professionals offer new interesting ideas.
It is not necessary to go from one extreme to another. All you need to do is choose a few suggestions that suit your nail type and style. From time to time it is worth trying new things or slightly modernizing your favorite ones.
Patterns
Beautiful and well-executed patterns on the nails give your hands a well-groomed look. And the small and large sparkles covering them make the manicure elegant and solemn. Almost everything is in fashion now: ethnic, graphics, lace, 3D. Miniatures and thematic original images are highly valued. For example, New Year's or summer. Simplicity and perfection are also in trend.
If you have certain skills, you can apply the pattern yourself. But the perfect image can also be created using stamps.
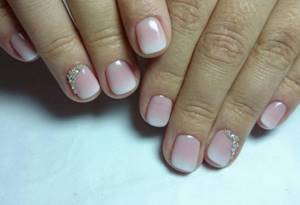
French manicure
Today, French has many varieties. Now it's not just a pink plate with a white rim. From a universal neutral “nothing”, it has turned into the most fashionable look with many options.
It happens:
- Colored, with a bright, eye-catching rim. The border can be emphasized with glitter or shimmer.
- In the “millennium” variety, foil, sparkles and rhinestones are actively used at the tip.
- Decorative allows you to cover part of the nail with crazy patterns.
- “Lunar” makes a rim on the opposite side; there may even be two of them, tending towards each other. The plate itself can be covered with unusual designs, while the background is made transparent or colored.
Incredible avant-garde models and “oblique French”, which combine matte, glossy finishes and shine.
Ombre
Ombre or gradient is characterized by smooth transitions between colors. It can also be colored sparkles of different shapes. A combination of textures, colors and fine sparkling grains also look good. The color palette, direction of drawing and texture are not limited in any way.
With drawings
Drawing is the most common type of nail art. An illustration of any subject is applied to a prepared colored background using acrylic paints. Accents can be placed with sparkling details. There is also a special foil that can be used as a background or for individual details.
The image is made on one or more nails. Other nail plates are designed differently, but maintaining the general style. Then the work takes on a finished form.
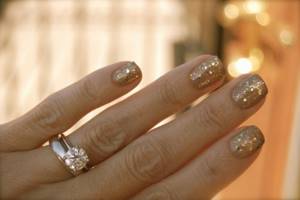
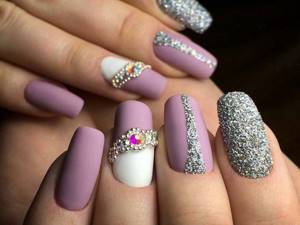
For short nails
For short nails, glitter designs are an ideal option. The uneven shiny coating perfectly masks imperfect nail shapes, uneven surfaces and even chips and scratches. There is no vulgarity.
With the help of sparkling details, specialists can even change the shape of the nail plate, placing accents in the right places.
With sparkling inserts, you can safely use matte and shiny varnishes, play with color, add rhinestones, patterns and modeling. French and ombre will look great. The latter has the ability to visually lengthen nails.
What is nail glitter used for?
With glitter, any manicure looks stylish and attractive. To be on trend, many fashionistas use dry or liquid glitter for nails. The new decor provides unlimited possibilities for creating an original design. The main situations in which this part is used are:
- for placing accents;
- as an original addition;
- adding bright colors to manicure;
- creating festive nail art.
Glitter – different forms for nails
The starting material used to make glitter is metallized polyethylene terephthalate film. Sequins of any shape and size are cut out of it. They can be large or dusty, which create a mirror effect. Large particles are often released in the form of stars, sticks, and geometric shapes. Such an original option as glitter coating on nails can be used on nail plates of different shapes. The following variations of their application can be identified:
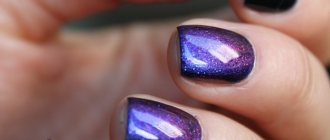
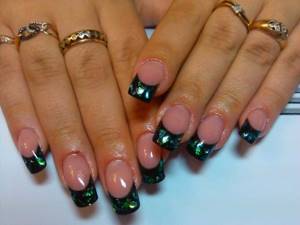
- Blue, emerald, brown, purple shades look great with glitter on long and short nail plates.
- With a golden dust-like element you can draw leaves on thin stems. One pattern can be made on a clear varnish, and the other on a matte blue base.
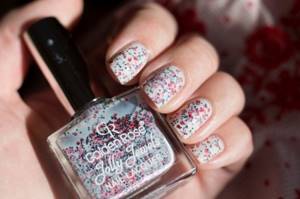
- Nail art masters never tire of experimenting and coming up with new types of designs. For short nails, they offer a combination of glitter and plain polish in soft pastel colors.
How to remove glitter
Glitter coating is beautiful, spectacular and reliable. But it is very difficult to remove it.
There are three ways to remove glitter:
- Special nail polish remover for glitter. But here everything is not so simple. First, the composition will have to be applied to the cotton wool, then applied to the coating and held until it is saturated. The operation will have to be performed several times for each nail. To make things go faster, you need to wrap the nail with cotton wool in foil or purchase special caps.
- “Liquid Skin” or Peel Off. This is an innovation from manufacturers of manicure and pedicure products that makes it easier to remove particles from nails. Apply at the manicure stage as a base layer under glitter. Later it is removed together with the coating using a wooden spatula.
- PVA glue. They cover the nail plate before applying glitter and allow it to dry. Later, the decorative layer is removed with a wooden stick.
The last two methods turned out to be so convenient that they are now used as a base for any varnish. And glue is used to cover the skin before manicure to protect it from varnish and make the coating more accurate.

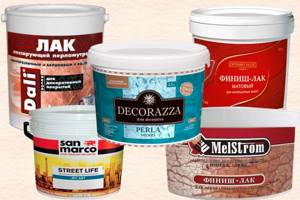
What varnish to cover the walls with?
Glazing varnish is a water-based acrylic solution + targeted additives. Available in 2 options:
- colorless - used unchanged or tinted independently;
- colored - completely ready for use; you cannot add paint or dye to it.
The composition may contain glitter, and the surface covered with it becomes pearlescent.
Glazing varnish, depending on the type, can be matte, semi-gloss or glossy.
Almost every manufacturer of decorative plaster also has a varnish for coating it. But it is not necessary to use materials of the same brand; you can choose any, for example, VGT, San Marco, Perlacheo, Tex, Poliver, Dali, Bayramix, etc.
Recommendations
To ensure that working with glitter only brings pleasant sensations, and the design does not have to be constantly remade due to carelessness, you need to pay attention to the advice of manicurists.
They recommend:
- For large particles, use special tweezers.
- Apply clear varnish or a special fixative to the finished design. This way it will last longer.
- Apply glitter powder with a special sponge onto the still wet varnish. This creates unparalleled mirror and holographic effects.
- Glitter sand should be worked with a special plastic spoon. The most interesting designs are obtained by combining sand and gel polish.
- Excess particles from the nail plate should be removed with a brush.
- It is better to draw patterns with a thin brush. There is a very simple technology: first, an ornament is applied, which is immediately sprinkled with glitter on top.
In order not to cover your interior with glamorous and expensive glitter of all colors and sizes, you need to get an A4 sheet of Whatman paper and perform all the procedures on it.
This method has one more important advantage: after work, you can collect all the crumbled “glitters” and carefully return them to the jar.
How to properly attach glitter to gel polish
Glitter applied to regular nail polish requires a fixative, otherwise it will not last long. The shine lasts well on gel polish if you follow the technology. Before applying it, the nails need to be covered with a base, color and secured with a top. To prevent chips and cracks from appearing prematurely:
- do not allow gel polish to get on the cuticle;
- Before manicure, file down the nail plate with a buff to remove the glossy layer;
- degrease your nails, paying attention to the area near the cuticle and side ridges;
- Treat the wet nail plate with a dehydrator;
- apply the base, color and finish in a thin layer, sealing the end (paint the cut);
- dry each layer thoroughly, maintaining the time according to the gel polish manufacturer’s instructions;
- use strengthening agents for soft and thin nails - gel, rubber base, acrylic powder;
- use a high-quality base and top.
Most often, chipped sparkles can be observed in paintings and graphic drawings. In this case, for strength, it is recommended to add a thick consistency base to the gel polish used for design in a 1:1 ratio. Paint the design with the mixture and sprinkle with glitter. This nail polish needs to dry twice as long as it takes for gel polish. After drying, carefully remove everything that has not stuck in place and cover the surface with a thin layer of topcoat. Now your glitter will last a very long time.
Helpful Tips for Applying Glitter
Three effective application methods:
- A colorless varnish and a jar of shimmering dust are used. The varnish is applied to the area of the nail where the glitter will be. While it is not dry, the finger is dipped into the jar. The excess is blown off.
- Apply shimmer to a flat dry brush and shake it onto nails covered with a transparent base. The brush should not touch the varnish.
- The brush is dipped into transparent varnish, then decor is applied to it from a jar. After this, the varnish is applied to the nail plate.
A shiny manicure looks romantic and beautiful. It looks especially impressive on round and square nails and is suitable for all occasions. The tips for applying glitter given in this article will allow you to quickly and easily create a bright manicure.
More interesting articles: