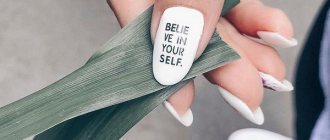
The top design of this season is marble manicure. It has won the popularity of many fashionistas with its unobtrusive and versatile look. This manicure is a flight of fancy for your nail artist. Marble manicure can be rich, light, and at the same time airy, but it will always look stylish and elegant. Even a beginner in the nail industry can imitate natural stone. The uniqueness of this design is that it cannot be done the same way, each time it will turn out differently.
How to do a marble manicure
To create a marble manicure, you must first prepare the client's nails. First of all, the manicure itself is performed, edged or hardware. After this, the main color of the varnish is applied to the nail plate in two layers and dried. After drying, use a brush to carefully apply small drops of polish of different colors onto the nail. For example, black, gray, white. Using a needle or dots, mix fresh drops of varnish all over the nail, in those places where voids will form, carefully finish the design with a brush. When the varnish dries, apply topcoat, dry, and that’s it - the design is ready.
Alcohol solution
Tools and materials:
- gel polishes in black and white colors;
- base and top;
- alcohol solution. It is better to take pure alcohol rather than tincture;
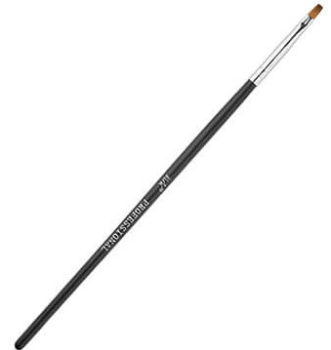
- brush. The brush should be densely packed and with not too long bristles, for example, “Column” No. 01 from Irisk.
Manicure brushes - types, purpose, how to choose and care
Preparatory stage
- Do a manicure, degrease your nails, apply a thin layer of base and dry;
- Cover your nails with white gel polish and dry as well. If necessary, repeat the color application.
Creating a Pattern
- Moisten a sponge or lint-free cloth with an alcohol solution and wipe the nail thoroughly;
- Using black gel polish on the alcohol surface, draw a thick line diagonally - from the right corner of the cuticle to the left corner of the free edge. When applying a strip, do not press the brush too hard - do it with light pressure, as the varnish immediately “floats” on the alcohol surface;
- Take a brush and lightly press it onto the liquid black gel polish, blot the stain;
- Remove unnecessary details of the design from the surface using a brush dipped in alcohol;
- In the other corner of the nail, make one small streak with black varnish and repeat blotting with a brush;
- Dry the design in a lamp and cover with top coat.
Be careful, the method using alcohol dries the skin very much, so after finishing the procedure, be sure to moisturize the cuticle and periungual area with oil.
Marble manicure design for short nails
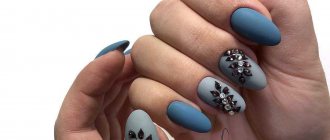
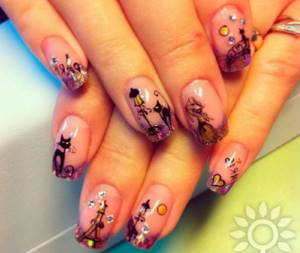
Despite the huge variety of designs for short nails, more and more women prefer marble manicure designs. In addition, an indisputable fact is the popularity of short nail lengths. White and black varnish colors are usually taken as the basis for marble manicure. But nail art masters believe that a bright color palette has a right to exist on short nails. Marble can be applied to all nails, or you can decorate just a few nails with this design. You can add rhinestones, foil, and sparkles to the marble manicure design. Bright shiny accents will make your manicure festive and unusual.
Varnish and acrylic paints
- nail polish of any color;
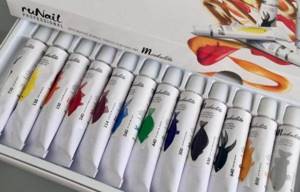
- black acrylic paint, for example, from the Runail set;
- a thin brush, for example, the same Runail Nail Art Nylon No. 000/3;
- small container with water.
The varnish can be used without additional means - a fixative and a base, but their presence will help preserve the design a little longer.
- Prepare your nails - do a manicure, apply color and wait until completely dry;
- Squeeze a couple of drops of black acrylic paint onto a small piece of foil or plastic;
- Wet the brush with water and pick up a little dye, wiping off the excess on the foil;
- With light movements, begin drawing a marble pattern on your nails. A mixture of paint and water allows you to make not clear lines, with minor stains;
- If desired, add a little sparkle to the pattern and wait for the marble to dry completely in the open air.
Painting with gel paint and pigments on gel polish
Marble manicure 2022: current ideas
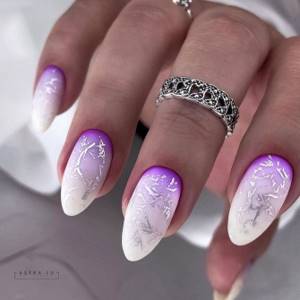
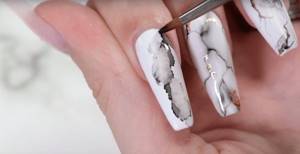
For several seasons in a row, one of the popular designs of 2022 is marble manicure. What color is hot this season, what are the fashion trends for marble on nails? Many girls ask these questions when choosing a marble manicure. White color is considered classic marble; this design looks calm. A nail design with the effect of a marble coating with holes will look original and impressive. The combination of red and white, pink and burgundy, black and gray will add a unique charm to your nail design. To make your nails look elongated and elegant, marble veining is best applied vertically. You can achieve the desired effect in different ways, which are actively used by nail technicians.
Additional veins
You can place drops of only two colors on the surface, creating a blurry image, and add veins of marble with a thin brush, using black or golden varnish.
You can do a matte marble manicure using the same method. In addition to the pink coating, highlight one or two fingers with a different color. In the photo above you can see what marble looks like on matte varnish. They convey the structure of the stone with a thin brush, drawing veins across the entire surface. Then, using a thick dry brush, gently blot the varnish in several places, creating the illusion of a smooth transition of shades.
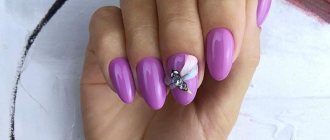
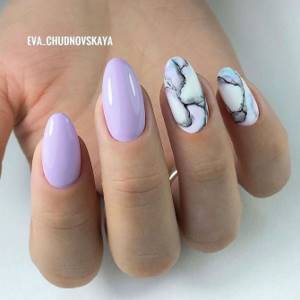
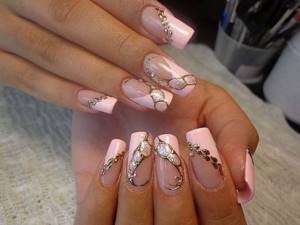
Marble pink manicure
Having many creative ideas and rich imagination, you can come up with a huge number of different designs with a combination of different shades of varnish. Marble pink manicure attracts special attention with its tenderness and lightness. The combination of pink marble with shiny pink varnish will look original and festive. Colors must be matched to make the combination look beautiful. Pink can be decorated with rhinestones; this marble is suitable for special events. Pink marble manicure looks great on both short and long nails. If desired, the marble manicure can be complemented with a matte top. Knowing the technique of performing marble manicure, the result will definitely be excellent.
Step-by-step algorithm for working with gel polish for beginners
For beginners, it is better to consider step by step a simpler way to create a design with the effect of natural stone:
- Nails are properly prepared by manicuring, removing cuticles and pterygium, degreasing and applying primer.
- The base product is applied as the first layer and polymerized in a lamp.
- The main shade of gel polish is chosen dense enough to hide the free edge.
- After application it is dried.
- Next, the nails are covered with top coat and also polymerized.
- Place 2 drops of top and 1 drop of the second shade on the palette, which will be used to draw the veins.
- You need to mix them so as to get lighter and darker tones of the additional flower bed.
- Lines are drawn on the dried topcoat using a light mix of the second shade.
- Then they do the same, but using a darker tone.
- In the finale, accent lines are drawn with a second color in its pure form.
- The drawing is dried in a lamp.
- All that remains is to cover it with finish and polymerize it.
With this method, the means used to create veins do not spread, as they are applied to a dry surface. To make the drawing look natural, you should use a fairly wide brush at stages 8 and 9, and the thinnest at stages 10. Lines made in different shades can intersect, but they should not “clog” each other.
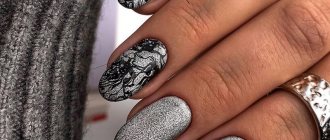
Black marble manicure
This season, black marble is the favorite choice of many fashionistas; it has some extraordinary appeal that attracts the eye and attention. Marble in black can be done on all nails with the addition of rhinestones or sparkles. Also an interesting combination of a matte top with a glossy one. Black perfectly conveys all the beauty of marble stone. White veins randomly located on the nail combine perfectly with the black base color. And if black is complemented with gold varnish, you can get a truly royal design. Black marble will complement your everyday outfits. This elegant manicure tends to look beautiful and is quite versatile.
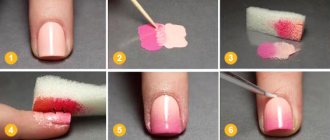
Making marble in lumps
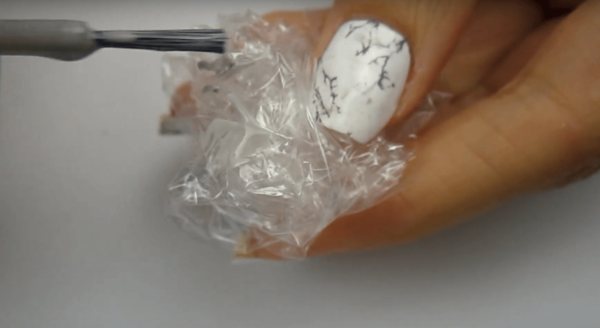
You can create another version of the pink marble manicure by using lumps of crumpled plastic film. Drops of different varnish are placed on glass or other suitable surface. Then, with cling film crumpled in your hand, blot the resulting colored spot several times. If there is too much varnish, first place the smeared lump on a napkin, getting rid of all excess. Only then touch the surface of the nail several times.
All that remains is to wipe the stained cuticle and the skin around it and dry the marble coating under the lamp. Additionally, strengthen with top varnish and finally dry everything under ultraviolet rays. This season, the combination of pink marble manicure with black polish is fashionable. These can be simple inclusions or painted veins.
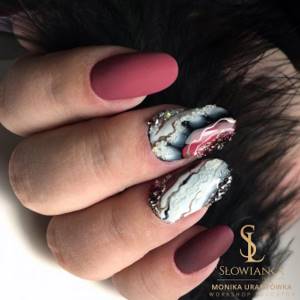
White marble manicure
The marble effect looks very beautiful and elegant in white colors. White marble is currently a trend in the nail industry. This design is suitable for every day, and even as a wedding manicure it will be excellent. For a unique design that will attract the attention of others, you can choose bright notes on white marble. White marble under a velvet covering also looks attractive. White is a classic color that will never go out of style. White goes perfectly with other colors. And of course, rhinestones, kamifubuki, foil, mica and much more will help add zest to a white marble manicure.
What other types of stone manicure are there?
Above we have listed the most popular types of stone designs, but this is not the limit. For example, you can make nails with the effect of malachite. This green pebble with smooth dark and light tints is created quite simply, just remember the water technology with stains.
Also a popular solution is stone manicure with aventurine. It is loved for its bright shine, namely many small shimmering particles. If you add a cat's eye magnet to a nail polish with small sparkles and stretch the shiny strip almost over the entire plate, you get the effect of polished aventurine that has softly enveloped the nail.
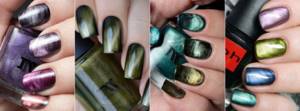
Two stone manicures that are similar in effect and beauty are related to stones such as crystal and opal. Both have a characteristic holographic shimmer, look festive, gentle, and create the feeling of jewels on your fingertips.
A malachite manicure can easily turn agate if you use orange, yellow or adjacent shades of varnish rather than green. The execution is literally the same, but the result is an agate effect.
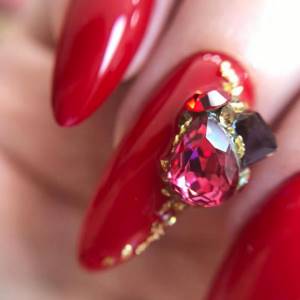
Manicure “liquid stone”
“Liquid stones” on nails is a manicure technique that is not new, but still common. It is mainly used to create evening and New Year's designs. If you make a small “liquid stone” and use a light base, then this option can be easily worn on weekdays. It could be a classic French jacket with a stone on one finger.
Design technology with beautiful “liquid” stone
In order to create this unusual beauty on your nails, do not forget about the very first steps. We put the nails in order: apply the base layer as the first layer and dry this layer, apply color with the second and third layers. Next, we apply the top coat, preferably without a sticky layer at once, so as not to degrease the nails again later. Let's move on to the most interesting part.
Creating a manicure with “liquid stone”
- Take black gel paint and a small thin brush. We take a small amount of paint onto the brush and draw the outline of the stone, it should be oval. Then dry for about 2 minutes.
- Next, take a small piece of colored foil and degrease it on the back side so that it can be better imprinted on your finger.
- Then we apply the back side of the foil to our finger, press it tightly and tear it off. The result is not yet a voluminous stone.
- In order to add volume to our stone, we take any extension gel. We collect the gel on a thin brush and place it evenly on the surface of the foil, first carefully filling the edges, and then adding a large drop for volume. You can also turn your hand over and hold our stone down for a more voluminous shape and even distribution. Dry our pebble for 2 minutes.
Framing the stone with rhinestones
- We prepare the rhinestones and pour them into the lid.
- Take the base and apply a drop of the base onto the foil or palette.
- Next, we take a thin brush and carefully move along the perimeter of our stone with a brush with a base on which we will plant our rhinestones.
- Next, using a stick or pencil, we begin to lay out rhinestones around it. And between the rhinestones we add silver broths. Dry for 1-2 minutes (depending on the type of lamp you have).
- The final finishing touch is to apply top coat to the decorated finger. Place a drop of topcoat on a thin brush and coat the space between the rhinestones. The rhinestones themselves cannot be covered with a top coat, as the edges of the rhinestones will merge and they will no longer sparkle so beautifully. Just as carefully, with a thin brush, coat the stone itself with topcoat and polymerize it, a little longer than usual. We use the top without stickiness!
An important point: Before creating a “liquid stone”, the surface of the nail must be thoroughly degreased, since the technology uses transfer foil, which during the process must be transferred only to a given part of the nail, and not to its entire surface.
With the help of such simple manipulations, you can create a beautiful French manicure decorated with stones yourself. It can be easily done even on short nails, only the pebble itself will need to be made smaller, and the smallest rhinestones or just broths will need to be used for framing. Also, a liquid stone can be cut by casting - a design made with thick black gel-color with an imprint of metallized foil in gold or silver.
The step-by-step photos below briefly show the technology for making a design with stones.
Nail design “moonstone”
At the beginning of this year, another no less beautiful design appeared with imitation of natural stone. It was called moonstone manicure. The essence is almost the same as in the previous design creation technique, but with minor innovations. The moonstone is slightly cloudy, and instead of a backing, metallized kamifubuki are used instead of foil. This design is best combined with light shades of gel polish: beige, light pink, peach and pale blue.
The stones themselves on the nails can be laid out both vertically and horizontally (see example in the photo). Translucent stone also goes well with broths and modeling.
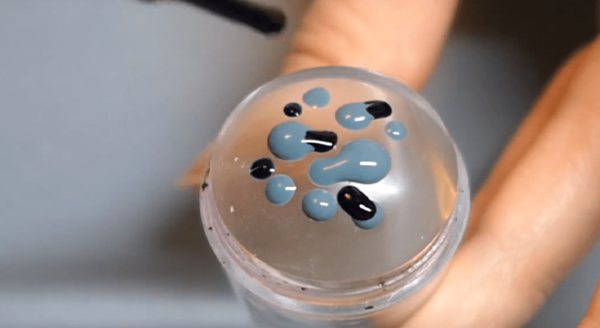
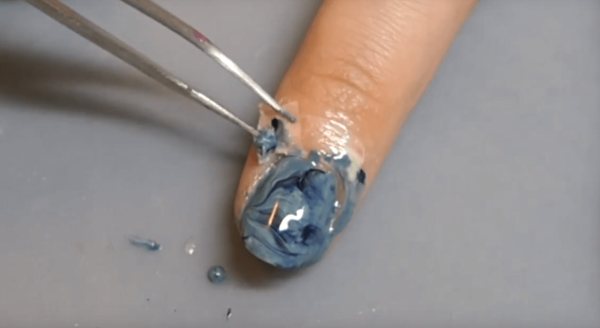
Technology for creating a “moonstone” design
- We prepare the nails in the standard way. We apply a top coat to the already finished color coating, but do not dry it, but lay out golden kamifubuki and only after that send it to the lamp.
- To create the pebbles themselves, you need to mix the material. Composition: a very thick rubber top coat, a little white gel polish and a very small drop of blue or dark blue.
- We spread the resulting mass on kamifubuki. You should get round pebbles. If the top is still not very thick and does not hold its shape well, try making the pebbles in 2 stages with additional drying. Or take a base or any gel to strengthen your nails.
- Once the moonstones are ready, use a thin brush to apply topcoat to finalize the design.
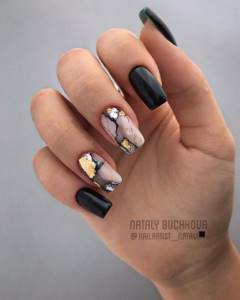
Marble or quartz manicure
This gorgeous deep stone pattern has replaced the classic marble manicure. It is already done in several layers for greater realism. This delicate and truly nude design is in demand at any time of the year.
It can be combined with gold stripes or some small flat metal decoration (for example, diamonds or quadrangles from Artex).
Let's see how to create a stone effect on your nails.
Quartz design technology
- Apply a thin layer of light pink camouflage base to pre-treated nails. It is better to use a thin flat brush for this. Next, directly over the wet camouflage layer, we apply a texture in the form of wide chaotic stripes using translucent milky camouflage. The pressure on the brush can be varied so that the line is “alive”. Let's dry it.
- Apply a second thin layer of camouflage and draw the stripes in the same way. We’re just giving them a different direction.
- The third thin layer of camouflage already comes with thinner and brighter veins, which we paint with a thin brush dipped in white gel polish.
- At the end, we cover the resulting pattern with the texture of the stone with the thinnest, almost rubbing, layer of camouflage. Let's dry it. We finish traditionally with a top.
- The result is very stylish stones on your nails, which you can wear to the office or to an event. They look great on almond-shaped and oval nails. Also, this translucent pink manicure with a light texture will suit absolutely any fashionable outfit.
Manicure with stone texture
This is another new design of bright summer nails, which is done on a wet layer. In general, textures have become very popular. They do not require much time, which is important in the work of any master, and do not require special artistic painting skills. These designs are a real find for beginners in the nail industry.
Check out the simple technique for doing manicure with stones and feel free to offer it to your clients.
Technique for creating stone texture on nails
These stones look most impressive on a white or black backing. It is also recommended to use camouflage. You can cover the nail completely with the design, or you can only partially, as shown in the photo above. In the latter case, casting, chromatic gel polish or thick glitter are suitable for framing the stone.
- To create a stone-colored manicure, you need to choose the appropriate shades. To do this, find an illustration of a stone cut on the Internet and select several shades of gel polishes.
- Drop the main color onto the palette, then drop all the previously prepared colors into the center of this drop, one by one. You will get color circles. Take a toothpick and swipe randomly over the colors several times to create a pattern.
- Using a flat brush, scoop up the resulting mixture, moving from right to left. A brush is like a “spatula”. The gel polish should be on top of your brush.
- Place the brush on the nail so that the gel polish is on top and, using light pressure, transfer the colors onto the nail. Help them spread out and complete the design with a thin brush, moving it over the wet color layer so that the design looks like a cut of stone.
Important point For convenience, we recommend using a gradient brush. Make sure that the “color mass” is transferred from the brush evenly and that the layer does not turn out to be too thick. Let this design dry a little longer than usual.
Manicure with large stones and rhinestones
Volumetric 3D manicure with large stones and cone rhinestones is very popular in the summer months and in December, when New Year's evening designs are in demand. In autumn and most of winter, fingers decorated with stones and rhinestones are not relevant due to the fact that they simply do not allow you to put on gloves freely. A large stone can get caught on clothing and come off.
But in the warm spring and summer, when our hands are “free,” such a luxurious design comes in very handy. Pebbles with an interesting cut shimmer very beautifully in the rays of the sun and attract attention.
The photo shows a luxurious red manicure inlaid with stones of different sizes. Additionally, you can use broths and pieces of tear-off foil.
In order for such a design to please its owner for a long time, the stones on the nails need to be well strengthened.
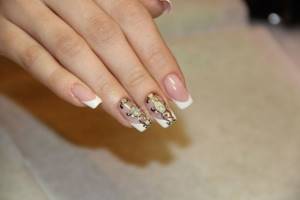
Marble manicure with foil
One of the new products of the season is nail decorations in shades of silver and metallic. If you want to achieve the ultimate effect on your nails, add some gold or silver accents using foil. Marble manicure with foil will satisfy the needs of most fans of the original manicure. Marble with foil looks impressive and unforgettable. This manicure does not require any additions; it looks quite good on its own. The color scheme of marble manicure with foil can be varied: from a nude color palette to bright saturated colors. Each master, when performing such a manicure, should remember a sense of proportion in bright accents.
Stamp for stamping
Using this method, you can create an imitation of malachite or amethyst on your nails. At the same time, special skills and abilities are not needed to implement such a manicure. This method can be used both at home and in beauty salons.
- base and top coat;
- gel polishes in three different shades, close to the colors of the selected stone. For malachite, for example, two dark shades of green and gray are used;
- stamping stamp with a silicone pad;
- liquid tape.
Before creating a pattern, do a manicure, cover your nails with a base and color.
- Cover the skin around the nails with liquid tape;
- Place a few drops of different gel polishes on the stamp. Don’t be afraid of mixing them - this is what will allow you to create a pattern close to the natural color of the stone;
- Stamp the polish onto the nail, but not as in the stamping technique, but with short pressing movements, as if you were dabbing the nail plate. The varnishes will mix with each other and create a realistic stone print;
- Remove the adhesive tape and dry your nails in a lamp and seal with topcoat.
If streaks have formed under the nail, remove them with an orange stick before polymerization.
Overview of stamping technology
Red marble manicure
Red nail design fits harmoniously into almost any look; it will suit any age category. The most important thing is to choose the right shade of red. Red marble manicure goes well with black polish. Small black stains on a scarlet background look perfect, and with the addition of a little decor it’s simply chic. The combination of red and white adds elegance. With gold or silver it looks bright and festive.
A chic manicure is always the center of attention. Manicure is a whole system of hand care that we trust to our masters. Well-groomed hands are not uncommon today, and at the same time, it is the dream of every woman. A fashionable manicure will always help complement your look and make it complete.
Possible mistakes in marbled nail design with gel polish
Marble nail design with gel polish, despite its simplicity, may not work out for several reasons:
- when using the water method, the liquid is too hot or cold;
- flower beds have a viscous texture, which makes them difficult to spread (medium density products are needed);
- the top for mixing with auxiliary shades of gel polishes is also too thick;
- The acrylic paint was not allowed to dry, which is why the design was smeared when applying the finish.
If you are aware of these mistakes, it is easier to avoid them. It’s also worth having before your eyes a photo of the design that you would like to make. And if possible, practice drawing it on tips.
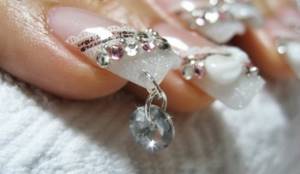
What are liquid nail stones?
Manicurists call the “liquid stones” technique casting. So, what are liquid nail stones?
This technique involves the use of special polymer particles, which are made from gel or varnish, but of a certain composition. In addition to these materials, to create a masterpiece of manicure art, you will need foil to create a luxurious design, and a UV lamp, which allows the materials to dry quickly.
What are liquid stones?
The essence of this technique is to reproduce patterns using special materials. Experienced manicurists use them to achieve a true resemblance even to jewelry.
White French with liquid stones

White French manicure with liquid stones
An openwork and delicate white manicure is performed to create a unique image of the bride. Wedding nails are distinguished by decor that personifies purity, lightness and femininity.
White French with liquid stones:
Delicate white jacket with liquid stones Simple white jacket with liquid stones
Openwork white jacket with liquid stones
Luxurious white jacket with liquid stones White jacket with liquid stones - different patterns
A woman should be beautiful in everything, from her hair to her fingertips. Nails play a huge role in creating an image. They complement the overall silhouette and speak of the lady’s well-groomed appearance. Therefore, learn how to do a beautiful manicure so that you can create masterpieces of manicure art yourself.