What is a nail rub?
By rubbing we mean a finely dispersed powdery pigment that gives a shiny effect.
Its texture resembles weightless powder or finely ground sand. The size of the glitter varies. It is recommended to use smaller ones for the first layer, and larger ones for the second and subsequent layers. If desired, you can use pigment not only of different sizes, but also of different shades. A brilliant gradient with a smooth flow from one tone to another always looks non-trivial.
The finer the rub, the more densely it is applied and the more uniform the effect.
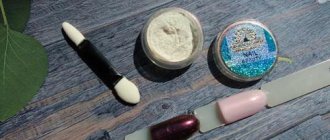
The rub is sold in miniature jars, just like glitter. The kit often includes a special foam applicator for easy removal of the contents and application to the nails.
The pigment owes its name to the method of application. It is literally rubbed into the surface of the nails. Thanks to its fine dispersion, the pigment adheres perfectly to the base coat. His role is played by:
- regular varnish;
- gel;
- shellac;
- acrylic.
Rubbing in requires the mandatory application of a top coat. Otherwise, the pigment will only last until the first hand washing.
Useful tips when using the rub
- Naturally, the main advice when performing any manicure is to use only high-quality materials, otherwise it may turn out like the well-known saying “the miser pays twice.”
- If you use a brush when applying the rub, then it is better to choose a natural one with soft bristles, so the pigment will lie directly on the artificial surface and will not drag along with the brush.
- The smaller the pigment particles, the better it adheres to the nail; a manicure with such a rub will always look chic. When applying two layers, use rubs of different sizes (1 mm and 2 mm), such a manicure will also look more interesting.
- Before starting a manicure, prepare all the tools at once so that the process of creating “beauty” will be easier and without annoying troubles!
Benefits of rubbing
The rub quickly gained success, which is well deserved. Its main advantages include:
- a more spectacular result in contrast to gel polishes with a metallic effect and foil;
- ease of use - the desired manicure can be done at home;
- resistance to water, solvents and sun;
- easy removal from nails;
- wide variety of designs;
- wide selection of colors;
- low cost;
- economical consumption;
- harmless to nails, since it is applied to the base coat.
The rub is used on both long and short nails. In the first case, it looks more impressive due to the larger area of the nail plate. Long nails allow you to see the play of light in all its glory. When using the rub on short nails, it is important to avoid flashy shades. The ideal option is pastel colors. In any case, rubbing draws attention to the manicure, so it must be flawless.
Selection of materials
For a manicure to look harmonious, the rub must match the color of the main background. On different bases, the external effect of the pigment will be very different. A dark gel polish will help you create a bright, rich manicure. For a gentle romantic look, a pastel or transparent base is suitable.
Before using a rub on gel polish, you need to make sure that it is of good quality. It is advisable to choose powders from trusted manufacturing companies. Cheap material may lie unevenly and not give the desired effect.
In addition to pigment powder you will need:
- brush or soft applicator for application;
- a large fluffy brush for brushing off excess powder;
- tools and devices for treating nails and cuticles;
- base coat for varnish;
- gel polish of a suitable shade;
- glossy finish.
To fix the layers you will need an ultraviolet lamp.
How to choose a rub
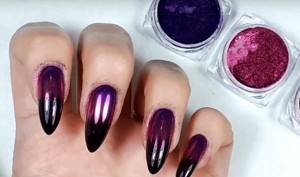
The rub is available in a wide variety of colors. The choice depends on personal preference. Popular shades of the rub are: pearl, red, blue, mother-of-pearl, rainbow, chameleon, gold, pink silver.
It is recommended to match the color of the rub to the base varnish. They must harmonize or complement each other. The rubbing manifests itself differently on each color.
To create a bright and rich manicure, use a base polish in dark shades. In this case, the applied rubbing will give greater depth. And, conversely, for a delicate design, give preference to calm colors, or do not use a substrate at all.
Popular and well-established brands that produce nail rubs are:
- Masura;
- Zoo Nail Art;
- Nika Nagel.
The range of each brand is quite diverse, and prices vary.
Before purchasing, pay attention to the quality of the pigment. Cheap rubs can ruin your manicure by creating unsightly stains of unclear color.
Varieties
The nail industry offers many options for rubbing. Each of them can create a special effect on your nails. The most popular and in demand are:
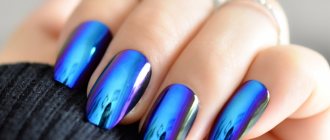
- Mirror. This is a pioneer. It was with her that the mass “promotion” of the powder into nail salons began. It comes in several shades: silver, lightly gilded, bronze. The particles are very small, thanks to which a dazzling shine is created throughout the nail.
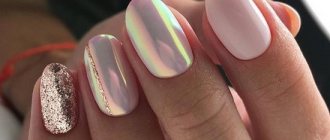
- Holographic. It is also called a prism or rainbow. Creates an unusually festive design with an impressive deep three-dimensional pattern. A similar optical effect can be observed with gasoline spilled on a smooth surface.
- Pearl. It produces a gentle and feminine manicure. The powder imitates the pearlescent shimmer of natural pearls.
- Melange. Nail experts call her “sugar.” The particles are quite large. This decor is usually worn in the summer, coupled with bright shades of varnish. The nail becomes voluminous, creating the impression of a “soft” coating.
There are many more types of rubs: “northern lights”, “chameleon” (or “chameleon”), gold, diamond, etc. All of them are interesting and help to create an incredible design.
How to use rubbing: important rules
Applying the rub is usually not difficult. The procedure does not require special skills, but has nuances that are important to know. Even a small deviation from the rules can lead to unexpected results.
Nail preparation
Thanks to its shiny effect, the rub accentuates the manicure, so it must be flawless. You cannot steam your hands in water or do a trim manicure. The optimal solution is to use a special product to remove dead skin particles and remove cuticles only with an orange stick.
The nail plate should be perfectly flat. Otherwise, the pigment will rub in poorly, and roughness and unevenness of the nail will be noticeable. Polish your nails thoroughly, remove dust and apply a good base coat to avoid bald spots. If there are any unevenness or kinks or kinks from the extension, do not apply the rub yourself. Contact a specialist who will do micromodeling. Otherwise, the pigment will simply slide into the creases of the nail plate.
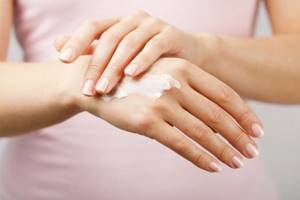
It is also important to monitor the condition of the skin of your hands. It should be smooth and moisturized. On unkempt hands, a manicure with rubbing loses its attractiveness.
How to apply the rub
There are no strict rules here. It is allowed to rub the pigment in either with your fingertips or with a special manicure rubber hoof. You can use eye sponges or a brush. The latter should be loose, but soft. This allows the pigment to immediately adhere to the nail in one go.
The choice of application tool depends solely on personal convenience. It is important to distribute the rub evenly over the entire nail plate, including areas near the cuticle and side ridges. It is often difficult to do this with your fingers, so it is still advisable to use a special tool.
How to choose a varnish for rubbing
It is necessary to check the expiration date of the product and its consistency. It should not be thick and viscous.
The color of the polish does not matter when it comes to mirror manicure. It will be completely blocked by rubbing.
How to apply the rub
An important condition is that the rubbing is applied to sticky drying varnish or shellac that has not undergone polymerization. To create a mirror manicure, the top layer, on the contrary, should not be sticky, otherwise there will be no shiny effect.
It is important to apply the base coat as thinly as possible and do not forget to “seal” the nail. To do this, just walk the brush along the cut of the nail plate. Gel polish also needs to be applied thinly. Even gaps and stripes in the coating are acceptable, since the pigment will cover them anyway.
The rubbing must be coated only with a glossy topcoat. Matte finish is on trend today, but in combination with rubbing, it makes nails unattractive.
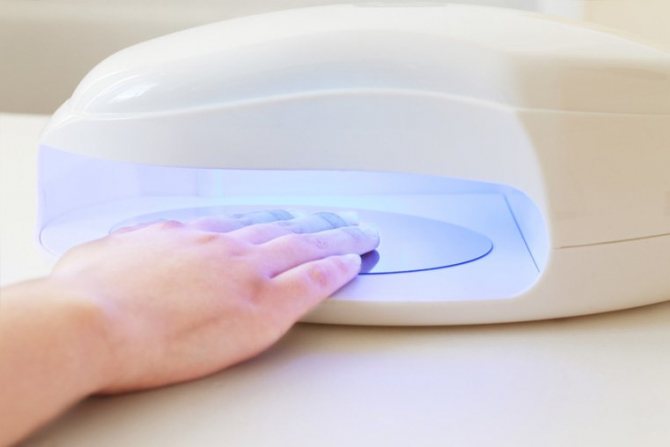
It is important not to dry out your nails in the periods between applying the base polish, top coat and rubbing. In case of overexposure in the lamp, the pigment simply will not rub in. The mirror rub is applied immediately after drying in the lamp, otherwise it will not fit well on the nails.
Shellac coating care
Providing proper care for a shellac manicure involves following a few simple recommendations:
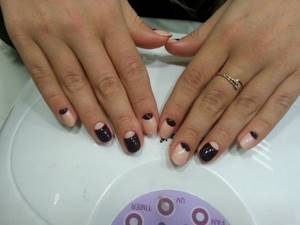
Shellac coating
- During the first four days after applying the shellac coating, you should avoid visiting the sauna. It is also not recommended to take a hot bath. The limited contact of the varnish coating with hot steam is due to the peculiarity of fixing this composition, which requires a certain amount of time;
- Before performing household chores, you should wear rubber gloves. Shellac coating can be adversely affected not only by contact with household chemicals; tap water is also dangerous for manicure, as it has a drying effect on the skin of the hands and the condition of the nails;
- You should not file your nails yourself. The penetration of small abrasive elements of the file can contribute to the creation of cracks in the shellac, which quickly grow. The best option would be to visit the procedure again, where a specialist will correct the shape of the nail.
How to rub glitter onto gel polish
You will need:
- colored gel-based varnish;
- glossy top coat;
- fan brush;
- file;
- polishing buff;
- sponge;
- fine grinding;
- Ultraviolet lamp.
Execution technique
- Remove cuticles, file and polish your nails.
- Degrease the plate and remove nail dust.
- Apply a base layer of gel polish and cure in a lamp.
- Apply a second coat to your nails and dry again.
- Apply some rub to a brush and sprinkle it generously over each nail.
- Rub the glitter in with a sponge and dry your nails.
- Shake off excess pigment and apply top coat.
Nail treatments
Caring for your nails and hands at home is simple. Minimal daily procedures will help a girl have well-groomed hands. Any artificial coating lasts longer on healthy nails:
- Every day the dermis on the hands is treated with a nourishing cream. It is best to purchase a product that is designed not only for skin care, but also for strengthening nails.
- To keep your nails strong, you shouldn’t go on diets or limit yourself to eating healthy foods. Nails reflect the condition of the entire body. Therefore, it is necessary to eat well and drink vitamin supplements.
- You should apply cuticle oil to your nails several times a day. It moisturizes the skin around the nail plate and strengthens the nail cells.
- You should definitely pamper your nails with salon treatments. Paraffin therapy and Brazilian manicure have a special healing effect.
How to properly rub in “mirror shine”
You will need:
- fan brush;
- file;
- polishing buff;
- colored gel polish;
- glossy top coat without a sticky layer;
- black varnish base;
- mirror rubbing;
- drying lamp.
Execution technique
- Perform a hygienic manicure: remove the cuticles, give the nails the desired shape and polish. The last procedure directly determines how well the rub will be distributed.
- Degrease your nails, apply a thin layer of base varnish and dry under a lamp.
- Cover your nails with gel polish and dry again.
- Apply top coat and dry your nails.
- Take a little rubbing onto a brush and spread over the entire plate. It is important not to leave any gaps.
- Brush off any remaining pigment and coat your nails with two coats of a glossy finish, allowing time to dry in between.
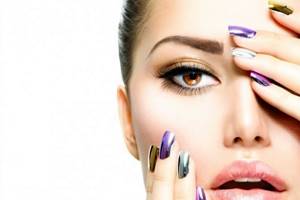
To enhance the mirror shine after the first coat of finish, repeat the rubbing procedure. After this, apply another layer of finish. Mirror rubbing can be done even with a top coat, but masters still recommend following the technology to obtain a long-lasting, high-quality manicure.
Work on mistakes
It happens that the rub does not stick to the nails and immediately peels off. This indicates that the application technique was violated. To avoid this, I suggest you familiarize yourself with common mistakes that even pros make:
- Wrong size of fine particles. The rubbing can be different - from small “sugar” grains to weightless dust. Therefore, it is necessary to choose the right size. In this case, it matters: large particles do not attach well to the nail surface, and very small ones take a long time to dry.
- Poor choice of gel polish. If this product has a poor-quality sticky layer, then the fine powder is unlikely to adhere to it. It will immediately fly off and sadden the owner of a shining manicure.
- Before applying a glossy base or topcoat, the gel polish must dry thoroughly. Otherwise, the powder will cling to the brush or sponge when applying the “top”. And this will lead to the appearance of bald spots.
These are the three most common mistakes, so be sure to pay attention to them. And then your hands will look great.
How to do a manicure with prism rubbing
“Prism” is one of the varieties of mirror rubbing. It is distinguished by a finer grind, which allows you to get a 3D effect on your nails. Quite often, a prism is confused with a holographic pigment. The difference lies in the size of the grains of sand. “Prism” has a texture reminiscent of homogeneous dust and looks like sparkling mother-of-pearl. Individual sparkles are clearly visible in the holographic rub.
The choice of substrate depends on personal taste. Its color affects the shade of the “prism”. The classic application option involves using black or white rubbing.
You will need:
- file;
- polishing buff;
- base and top coat;
- colored gel polish;
- sticky layer remover;
- rubbing;
- fan brush;
- drying lamp.
Application technique
- Remove cuticles, file and polish nail plates.
- Apply the first base coat and let dry.
- Cover with colored gel polish and dry again.
- Remove the sticky layer with a special product.
- Take the required amount of pigment onto the brush and apply it to the nail with light massage movements, distributing evenly.
- Shake off excess glitter.
- Cover your nails with a glossy topcoat in two layers and dry.
Rubbing “prism” gives nails a stylish and expensive look.
What is required for application?
In addition to the classic set of gel polishes, base, top, bonder and lamp, you need a brush or applicator. It is advisable to take special sponges. They allow you to scoop pigment from a jar and apply it to the nail. You can use a small spatula.
Rubber or silicone pushers and sponges are effective. They are soft, comfortable, and can be used for dusting or rubbing. Additionally, you need a cotton pad or swab to remove any remaining rub from the area around the nail and from the roller.
Nail design options with rubbing
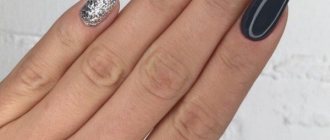
It is not necessary to cover all the nails with the rub. This manicure looks quite bright, so it may not always be appropriate. The optimal solution is to use the rub on one or two fingers. Shiny accents will make your manicure interesting and appropriate in many situations.
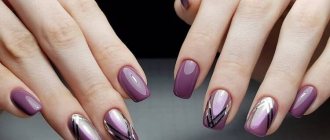
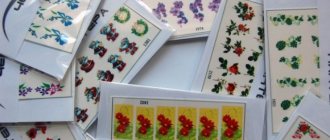
Another fashionable option is to apply patterns on your nails, leaving one or two for rubbing. A homemade option is to use stickers instead of drawings. This manicure looks interesting and stylish.
A kamifubuki manicure in a duet with rubbing looks original. This is a type of Japanese nail art that resembles confetti. You can make one of the nails using the kamifubuki technique, and cover the rest with a mirror rub.
The best ideas and new designs for manicure with rubbing for 2020
Fashion trends in manicure using rubs are now the most popular topic among fashionistas of any age. In the coming year, nail service workers do not plan to shock with radical decisions. But they want to make some small but important adjustments to nail art.
Nail design white with rubbing
The most delicate white, as well as its modifications, diluted with light peach, pink, beige and mocha shades, will complement the most delicate, but at the same time decisive and stylish image. A white manicure with rubbing will be relevant in both cold and warm periods. And so that the manicure does not seem boring, it will be harmoniously complemented by textured metallic pollen.
Red rub on nails
With the right combination of shape, shade and pattern, red will not seem provocative, but will emphasize the bright personality of the owner of such a manicure.
Advice! To create a festive nail design, combine bright red or burgundy with gold or shiny particles. This manicure looks expensive, stylish and very elegant.
Designs of red nails with rubbing, photos of which are presented below, will not only decorate women’s hands, but will also reveal the full depth and richness of the color.
White French on nails with rubbing
The French manicure, beloved by many, will definitely not be monotonous in 2022. French nail polish with rubbing will decorate your hands not only at a special event, but also every day. The best tops in this case will be pearl, mother-of-pearl and iridescent shiny.
French with rubbing on one nail
Despite the fact that the jacket is characterized by restraint and laconicism, you can not cover all the nails with matte dust, but highlight one ring, index or little finger. Broken glass, rhinestones, kamifubuki and holes will not be superfluous here.
Manicure with rubbing and rhinestones
Decorating details in the form of rhinestones will help add elegance and sophistication. They are compatible with all colors and textures. Together with the smooth transitions of the coating, the decor will create an ideal and very feminine design.
White rub and rhinestones
This duet is suitable not only for a wedding day, but also for many other events, and rhinestones can be selected in different colors. The main thing is not to overdo it with the “shine” and leave only a frame or a small touch in the form of pebbles.
Pink rub and rhinestones
Pink nails created using rubbing and complemented with rhinestones will become brighter. The “unicorn” effect is often made from just this shade. It is a multi-faceted shimmer of fine shimmer that changes depending on the combined shades. This trend will be at the peak of popularity in the spring of 2020.
Manicure with dust
Dust is the smallest dry particles of the rub, which when applied create a mega-shiny effect. You can use bright colors mixed with silver, and also create a pastel matte top, ideal for the winter period.
Advice! Using a light rub, they create delicate winter patterns in the form of snowflakes and monograms of various shapes and thicknesses. Smooth curls in 2022 will gradually replace the once fashionable “sweaters”.
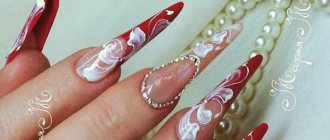
Rubbing with a pattern on the nails
You can create an original manicure using drawings or stickers. Ideal drawn lines can only be achieved with the high professionalism of the master. The variety and detail of modern drawings never ceases to amaze.
Iridescent manicure with glitter
Glitter is a transparent varnish with large sparkles. Often, particles of several sizes are grouped in the product so that the master can create the most natural transition from smaller grains to larger ones. Shimmering pigments together with glitter create an interesting and mesmerizing shimmer.
Manicure Northern Lights
Aurora resembles a pearl shimmer, but the main highlight is the most delicate translucent emerald green reflection, like in the northern lights. Looks harmonious on green, blue and various shades of beige nails.
