Features of metal manicure
The features of metal manicure include the following:
- it is suitable for almost any shape and length of nails;
- performed using different techniques, including regular varnish, metal foil or mirror powder;
- There is practically no additional decoration, but sometimes rhinestones, microbeads or adhesive metal tapes can be used.
Metal manicure (photo below) is performed using several techniques:
- varnish with a metallic effect;
- using transfer foil;
- applied tips with a metallic effect;
- performed using mirror powder.
Can be done in the form:
- gradient manicure;
- plain;
- French manicure;
- with lunula discharge;
- combined.
Metal design depending on the shape of the nails
Depending on the shape of the nails, metal manicure is performed in several versions. Metallic manicure can be done on nails of any shape, but the technique and overall appearance will be slightly different.
There are 8 types of nail shapes in manicure:
- almond-shaped;
- "ballerina",
- oval;
- square;
- pointed;
- rounded;
- stylet;
- pipe
The almond shape of the nail is considered classic. For such nails, any metallic design is acceptable: from French to ombre (gradient).
The ballerina shape is a transitional stage between the almond and square shapes. The name was received due to its resemblance to ballet shoes - pointe shoes. Nails of this shape are decorated with metallic glitter. The oval shape is one of the most familiar and discreet.
The end of the nail is carefully sharpened, but not sharpened. Almost any metal manicure design can be used for this shape. They use foil, powder, and glitter. The square shape of the nail is different in that the end of the nail is not rounded. According to manicurists, a metallic French manicure is the best design for a square shape.
To create a pointed shape, the end of the nail is sharpened a little sharper than for an oval shape. Manicurists recommend using the most discreet metal design for pointed nails, for example, a gold-colored coating without decoration.
A rounded shape is given to short nails. For this shape, manicurists recommend the simplest design.
The stiletto shape is performed on long nails. The end of the nail becomes very sharp. Due to the complex shape, I advise manicurists to abandon rich decor and perform manicures with a single-color varnish. A metal jacket is also recommended.
You can give your nails a pipe shape only with the help of artificial materials. In appearance, nails are similar to a pipe, because the C-bend of the nail is 50% or even more. Pipe is also considered a complex shape, so the simplest solutions are recommended for design.
Creative proposals for brown manicure from nail designers for this season
Modern fashion trends in the field of nail design open up a huge space for creativity and self-expression. The combinations are unpretentious, simple elements and techniques can look calming, calm or romantic, or delight with magnificent shine and unusual combinations.
Experienced designers advise not to limit yourself to classic brown-cream colors or discreet beige tones. The beauties have at their disposal all the possibilities of the nail industry, including a warm, sunny or turquoise palette, textured coatings, large and small crystals, different types of foil and coatings. You can complement rich brown or subdued light bases with any kind of decor and decorations, from the usual glitter to 3D modeling and delightful, naturalistic stickers. Imitations of snake skin and “edible” designs look especially relevant. And the recommendations of the masters with photo examples will help you find inspiration and create your own, incredibly attractive or bold image.
False acrylic nails
You can create a metallic manicure using acrylic false nails at home, but it requires some experience. The materials for such extensions are acrylic powder and liquid acrylic. These components are mixed, as a result of which a reaction occurs and a composition is obtained that hardens in air.
Before applying nail extensions, they need to be prepared:
- It is recommended to cut your nails short and/or carefully file them with a ceramic or paper file.
- Use a cuticle remover or remove it mechanically.
- Degrease your nails with nail polish remover containing acetone or alcohol.
- Make the composition according to the instructions and apply it to the nails.
- After the acrylic has dried, it is coated with varnish with a metallic effect/glued with foil/manicure done in another way.
Acrylic dries quickly and does not require drying under an ultraviolet lamp.
| Advantages of acrylic extensions | Disadvantages of acrylic |
| 1. sufficient strength of the coating; 2. quick drying of the material; 3. the ability to change the color of extended nails; 4. creating a variety of manicures; 5. Easily removed with a special compound. | 1. unpleasant and pungent odor of fresh solution during the procedure; 2. dullness of the coating; 3. the need for correction when the nail grows. |
How to do a mirror manicure at home: step-by-step instructions
There are quite a few ways to turn your nails into a mirror. They differ in time costs, list of necessary tools and execution technique, but each option is simple and accessible for independent work.
The main condition for a realistic chrome manicure is that the nails must be perfectly smooth and even. Even the smallest roughness will definitely be noticeable and ruin the futuristic look of the molten metal. Therefore, you first need to take care of your hands:
- remove old manicure, if any;
- make a hand bath. You can add sea salt, aloe extract, and herbal decoction to warm water;
- treat the softened cuticle with a remover or push it away with an orange stick;
- Use nail clippers to cut off burrs and strongly protruding edges of the cuticle;
- When the nails are completely dry after the bath, correct the shape with a file and polish with a buff.
Important! The ideal mirror surface of the nails requires ideal hand skin. If there are peelings, wounds or scratches on the fingers (especially near the cuticle and side ridges), then you should wait until the damage has healed with a manicure.
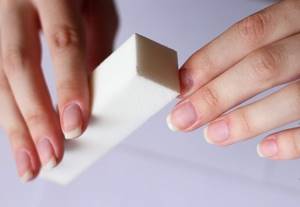
Before performing a mirror manicure, you need to get your hands in order, paying special attention to polishing the nail plate
Manicure with mirror polish
Using a special polish is the easiest way to get a shiny manicure. There are regular and gel polishes with a chrome effect, so you can buy any you like and paint your nails in the usual way. Such cosmetic products have only one drawback - brush marks are still visible on them up close. If you don’t look closely, the coating looks quite mirror-like.
How to make a chrome manicure using regular polish
Those who are more accustomed to working with conventional varnishes will need the following tools and tools:
- base for varnish. They come with different functions: strengthening, whitening, moisturizing, prolonging the durability of manicure. You can take any one, focusing on your needs;
- the varnish itself. Experts advise not to skimp on your health and choose those that do not contain formaldehyde, toluene, or phthalates. It is important not to mistakenly buy a product with a metallic effect. This is especially true for girls who order cosmetics online: shiny polishes even in bottles look very similar, not to mention the pictures on the store’s website. The main distinguishing feature of chrome is the presence of the “Mirror” mark on the packaging, which translates from English as “mirror”;
- top coating;
- correction pencil or cotton swab with nail polish remover.
When everything you need is collected, you can start creating a manicure. First you need to prepare your hands as described above, and then perform the following steps:
- Cover your nails with a base coat. It will make their surface even smoother and simplify the distribution of colored varnish.
- When the base product has dried, apply mirror varnish. The layer should be thin, even bald spots are acceptable. When it sets, add a second one, and if necessary, a third one. One thick layer is not recommended: firstly, bubbles may appear, and secondly, it will not be possible to distribute the metallized pigment evenly.
- Dry the varnish.
- If the product gets on the skin around the nail, remove the blemishes with a correction pencil or a cotton swab dipped in the removal solution.
- Apply a glossy top coat, but you can do without it.
Important! Before use, it is recommended to shake the bottle several times so that the pigment is evenly distributed throughout the entire contents, and then let it sit for 2-3 minutes. During this time, the air that got into the liquid during shaking will have time to escape, and the varnish will lie without bubbles.
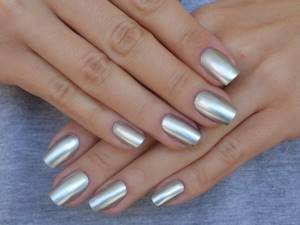
Mirror varnishes are easy to work with, but up close you can still see that they are not uniform.
How to make a chrome manicure using gel polish
Gel polish lovers will need a different set of accessories:
- buff file for polishing nails;
- dehydrator or degreaser;
- primer;
- transparent base gel;
- mirror varnish;
- finishing coating;
- lint-free wipes and a cleaner to remove the sticky layer;
- cotton swabs or clean manicure brushes for correction;
- UV or LED lamp for drying.
The process of performing a mirror manicure is no different from regular nail painting with gel polish and consists of the following steps:
- Sand the nail plate. This was done at the initial stage of preparation for manicure, but gel polishes are demanding in terms of polishing quality, so you need to make sure that the top glossy layer is removed.
- Wipe your nails with a degreaser or dehydrator. The latter remedy is usually recommended for those with sweaty hands, but if you don't have it, a degreaser will suffice as both products have similar functions. From this moment on, you can no longer touch your face, fingers, or other objects that may contain grease and dirt with your nails.
- Apply acid-free primer and wait for it to dry.
- Spread a thin layer of base gel over your nails, remembering to seal the ends. Place your hands in the lamp for the time indicated in the instructions, and then wipe off the dispersion.
- Paint your nails with a thin layer of mirror polish. If paint gets on your skin, remove it with a clean brush or cotton swab. Dry the product in a lamp, wipe off the dispersion. Repeat this step one or two more times until the desired result is achieved. Gel polish also cannot be applied in a thick layer, since when dried it becomes deformed and becomes covered with waves and bubbles.
- Paint the mirrored nails with a clear finishing gel, again sealing the ends. Polymerize in a lamp, wipe off the sticky layer.
Reference! Finishing gels without a sticky layer have now appeared, but their only advantage is that there is no need to remove the dispersion after polymerization. Such products also have to be dried in a lamp; in addition, they are less plastic compared to analogues that have a sticky layer. Masters recommend using them primarily on smooth and strong artificial nails, although you can also use them on natural nails if they are thick and strong.
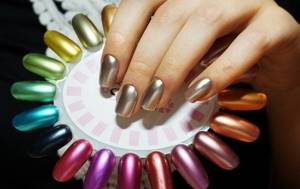
Gel polishes apply in a uniform layer, but look more matte compared to a real chrome surface
Manicure with transfer foil for nails
This method is good for its simplicity and is suitable for beginner fashionistas. The risk of making a mistake here is minimal, there are no problems even with the right hand, so for an excellent result you only need a little diligence.
The main tool is the so-called transfer foil - a thin layer of metallic paint on a film base. During the process, the pigment is transferred to the nails, covering them with an even mirror-like surface without streaks from the brush.
Transfer foil is similar to gift wrapping tape: it is sold in small rolls and comes in different colors and even patterns.
Transfer foil comes in different colors and allows you to get a real mirror finish on your nails.
What you need for work
Manicure with foil has its own specifics, so it requires some special devices. Fortunately, there are few of them, they are inexpensive and are sold in almost every department with goods for nail art. If there is no such store in the city, then everything you need can be purchased via the Internet, which will be even cheaper. The list of tools is as follows:
- varnish base;
- metallic varnish with a color as close as possible to the shade of the selected foil;
- the foil itself;
- special glue;
- orange stick or manicure hoof.
Sequencing
Having prepared your nails, you can start creating a manicure.
- Cut ten pieces of foil. They should be slightly larger in size than the nail plates.
- Cover your nails with base.
- Apply one or two layers of colored varnish. It is needed to hide bald spots if the foil lies unevenly.
- Next, lubricate one nail with special glue. This product is similar to PVA: in liquid form it has a milky tint, but when it dries, it becomes transparent, so you don’t have to worry about it being visible in the future.
- Wait a few seconds for the glue to begin to dry, and then place one of the pieces of foil, metallic side down, on the center of the nail plate. Using light pressure with the pad of your finger, press the material to the middle and edges of the nail.
- Then take an orange stick and carefully, but with pressure, smooth the foil over the adhesive nail so that there are no bubbles or folds. Work especially carefully in the area near the cuticle and side ridges, as the product does not stick well there.
- Finally, smooth the foil with your fingertip to squeeze out any remaining glue and tear off the rectangle by carefully pulling it by the corner. If everything was done correctly, the metal layer will remain on the nail. Bald spots are possible only in cases where there was not enough glue, the foil was poorly leveled or torn off too sharply.
- Repeat the procedure for each nail in turn.
- You don’t have to use a top coat, because foil has a glossy mirror surface even without it, but the wear time of such a manicure will be short.
Important! If desired, you can use not only regular manicure, but also gel polish. The sequence of its application is given above. You need to complete all the steps, including coating with a top coat, and then gluing the foil on top of it.
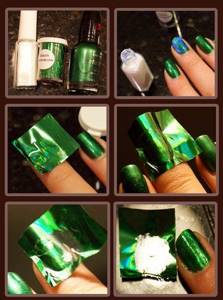
Transfer foil is glued to nails painted with a varnish of a similar color, and then the base is torn off
Video: mirror manicure with transfer foil at home
Manicure with thermal stickers
In this case, the main character is also foil, but it is applied in a fundamentally different way - the material has a special adhesive side, and before placing it on the nail, each sticker must be heated to soften it.
This manicure has many advantages: it is easy to do, it lies evenly even along the edges of the nail, the mirror finish is perfectly smooth, and the stickers can be applied to both natural and artificial nails of any length. To the list you can add an extensive palette of shades, low cost and availability.
Reference! A manicure with hot-melt stickers is also called Hollywood, as it was created in the USA and American celebrities were the first to appreciate it. Initially, the coating was not durable and was used only for special occasions, but many modern versions are not inferior in durability to gel polishes.
What you need for work
There was a time when such a manicure was done only in salons and this pleasure was quite expensive, but now the task is easy to cope with on your own. For the creative process you will need the following:
- leveling base in the form of regular or gel polish. If your nails are polished to a perfectly smooth state, then you can skip this step, since the stickers are harmless and can be attached directly to the nail plate;
- foil thermal stickers in the form of an elongated nail. You just need to choose the appropriate size and cut off the excess length;
- a special lamp or hair dryer for heating;
- nail scissors;
- file:
- orange stick.
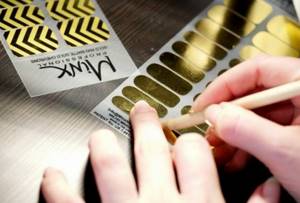
Each sticker is a ready-made mirror manicure that just needs to be transferred to the nails
Sequencing
Prepared nails must first be coated with a clear base coat or base gel, following all the steps preceding their application. If stickers are to be glued without backings, then thoroughly polish and degrease the nail plates. Next, perform the following steps:
- Cut out stickers from the base. If your nails are narrow, you can immediately remove the excess width, although it’s better not to overdo it and leave a little extra. The protruding edges of the sticker can be easily removed at other stages of work.
- Separate the foil from the base, pick it up with a toothpick or wooden stick and place it under a UV lamp to warm up. Some girls use a hairdryer for this purpose, but there is an opinion that the mirror shine fades after it.
- Apply the warm, softened film to the nail from the cuticle side and straighten it towards the tip so that it sticks properly. If the edges come off, warm the foil a little more together with your finger and smooth out the pliable material again.
- Remove protruding edges with scissors and file. You don’t have to cover your nails with topcoat or finishing gel, but if you plan to wear the manicure for longer than 2-3 days, then it’s better to do so. The protective layer will protect the mirror surface from dents and scratches.
Important! To remove such a manicure, hot water is used - you need to immerse your hands in it so that the stickers get wet and come off. This means that when wearing foil stickers, you must avoid contact with hot liquids and generally high temperatures.
Video: mirror manicure with thermofoil on gel polish
Manicure using rubbing
The name of the method comes from the word “rub” - this is how a special mirror powder made of tiny polyester particles is applied to the surface of the nail. For those who have never encountered anything like this, at first the idea may seem complicated and incomprehensible, but in reality this is the easiest way to create the most realistic chrome on your nails.
There are several fractions of powder. The finest has such a fine grind that it looks like dust and does not even shine, although it is with its help that it is possible to obtain an impeccable mirror surface. Powders of larger fractions look like matte powder, in which sparkles are noticeable - with them, chrome manicure acquires a sparkling effect.
The product comes in different shades, but it should be taken into account that the mirror pigment is applied to the nails with a translucent layer, so the final result depends, among other things, on the substrate, which can be a colored regular or gel polish. So, to create a silver or gold manicure, a black base is used - on it the mirror layer becomes especially distinct. If you cover a light background with powder, you get a delicate pearl effect, and colored bases add different shades of metallic shine.
Mirror pigments do not contain harmful substances or allergens, and the only limitation to their use is related to the presence of wounds and scratches on the fingers. If the smallest particles of the substance get there, you will get a kind of tattoo. Inflammation may even occur, so it is better to wait until the skin heals.
Rub-on pigments are sold in cosmetic stores and online; they are affordable and economical to use. In addition, working with them does not require any special tools, so all fashionistas who love chrome nails should add a jar of mirror powder to their manicure arsenal.
Reference! When buying powder, it is important not to confuse it with ordinary glitter - they are beautiful, but do not give a chrome effect. The packaging with mirror pollen should bear the inscriptions Chrome Powder, Mirror Powder, Chrome Pigment, etc.
The combination of different shades of powder and base allows you to get beautiful colored “mirrors” on your nails
Rubbing on regular varnish
Ordinary varnishes are rarely used as a base for mirror powder. The reason is that a sticky layer does not form on them, as during the polymerization of gel products, and many pigments are applied directly to the dispersion. However, there is a way to get around this condition and make a beautiful chrome manicure, having only the varnish of the desired shade. To work you will need:
- varnish base;
- colored varnish;
- paper napkin;
- mirror powder. It is important to choose the finest particle size - this is the main secret of manicure. The fact is that microscopic particles of pigment easily cling to a smooth surface and do not need a sticky layer;
- rubbing tool. It is best to take a soft fluffy brush: a special manicure brush or a regular one intended for painting. Eyeshadow sponges are also suitable - such a device often comes complete with pigment;
- top coating;
- a piece of foil, paper or other homemade palette;
- correction pencil or cotton swabs with nail polish remover solution.
The beginning of creating a manicure is described above. This includes preparing hands and nails, applying and drying the polish. When the preliminary steps are completed, you can begin the main work:
- Paint all nails with colored varnish, dry them, and remove any unevenness with a correction pencil or cotton swab.
- Then cover one nail with a thin layer of the same colored varnish. Allow the product to set a little, but do not dry completely.
- Check the “ready” stage. The varnish should be semi-dried, that is, viscous enough so that mirror pollen can stick to it, but at the same time hard enough so that a light touch with a brush will not leave marks on it.
- If the substrate is ready, you can start rubbing. Apply a small amount of mirror pollen onto the nail with a brush or sponge and blend with gentle touches. Add a little more and blend again. Repeat if necessary, but usually 2-3 dips of the sponge in the powder are enough. While working, it is advisable to hold your finger over a napkin or a jar of pigment, otherwise the entire table will then be covered in glitter.
- Paint the rest of your nails in the same way.
- Cover the manicure with a colorless top coat. To prevent glitter from getting into the bottle, pour small portions of the product onto foil or another improvised palette, and then transfer it to the nail. You can take a separate brush, but the one in the bottle with the top will also work. In this case, the bottle will need to be covered with something to limit contact of the product with air, and the brush will need to be washed in nail polish remover after use.
Important! Only the smallest mirror pollen adheres well to ordinary varnish. Powders with various effects (prism, holographic and others) contain larger particles, so they stick less well to the surface of the painted nail. They can also be applied without bald spots, but this will require experience and skill.
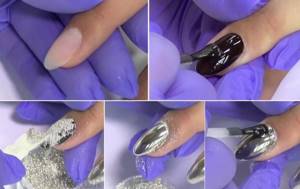
Mirror powder can be applied to regular nail polish. The main thing is not to miss the moment when the varnish substrate has just begun to dry out and has not yet had time to completely harden.
Video: mirror rubbing on regular varnish
Rubbing on gel polish
Gel polishes give more room for imagination, since any type of mirror powder is suitable for them. However, this variety has a small drawback: very often there is confusion about the method of application. A number of pigments are rubbed only into the sticky layer, but there are also those that adhere well to a solid base.
Usually such information is contained in the instructions, but if for some reason it is not available, then you should be guided by a simple rule: you can rub any pigment into the dispersion, and only the finest powder into a smooth surface.
For the creative process you will need:
- means and tools necessary when working with gel polishes;
- mirror powder;
- sponge or brush;
- homemade palette.
Creating a manicure, as usual, begins with removing the cuticle and filing the nails. Then you need to complete the steps that precede the application of the color layer, and then work with the mirror powder.
- Apply a thin layer of colored varnish to nails coated with clear base gel. Dry in a lamp.
- Add a second layer and dry too. If there are bald spots left, repeat this step again.
- Wipe off the sticky layer or leave it on - it depends on the powder you choose.
- Apply pigment to each nail in turn with a brush or sponge and blend to the desired result. If there is a sticky layer, rub it in very carefully so that it does not roll off.
- Use a fluffy brush to tap off excess powder.
- Pour a portion of the finishing gel onto the palette and cover each nail with it, sealing the ends.
- Polymerize in a lamp, wipe off the dispersion.
Important! Since gel polishes do not air dry, you can treat your nails not individually, but all at once - if you dry five fingers at a time in a lamp, you can save a lot of time.
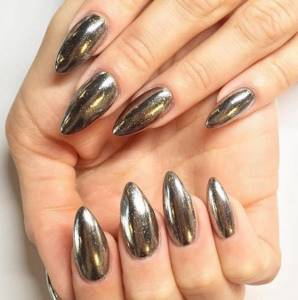
Gel polish is ideal for rubbing in, as its polymerization creates a sticky layer that holds even powder interspersed with large particles.
Video: mirror rubbing on gel polish
Metallic nails with polish
Metallic manicure using regular polish is very easy to do and can be done at home.
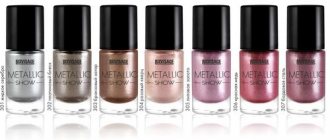
Manicure polish with a metallic effect comes in different colors, not only gold or silver, but also bronze, purple, blue and any other shades. In addition to a simple glossy effect, the coating can be pearlescent, with metallic sparkles (often this effect is called “star shine” or “sand effect”).
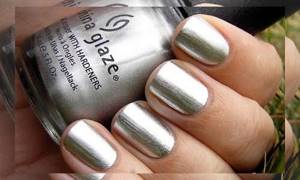
Before applying varnish, you should do a hygienic manicure (shape, reduce length). To make the polish last longer, it is recommended to degrease the nail plates polish remover with acetone and apply a base coat. Upon completion of the manicure, it should be secured with a protective coating.
An interesting idea for a metallic manicure with varnish is to apply varnish of a different color or with a different metallic effect to 1-2 nails.
Home option
Metallic nails, if desired and persistent, can be done without leaving home. Let's start with the simplest method.
- Pre-made false nails with mirror effect made of acrylic
Sold in any cosmetics departments and professional stores.
Application method:
First you need to remove the old manicure and degrease the nail plate. Everything else is easy and simple! Take a false nail and glue it to yours! The time is very fast! And it will last for two weeks! But the glue you choose plays a huge role here.
- Tips
If time is short and you haven’t found a ready-made design with a metallic effect, then you can make them yourself. Tips are sold in every cosmetics department, and paint in craft stores.
Application method:
You will need ordinary transparent tips and acrylic paint with the color you need. Cover the tips with paint and simply stick them on your nails. It takes a little longer, but everyone chooses their own path.
Metallic manicure using foil
Metal manicure (photo below) is performed using a special material - metal foil. In manicure, foil is also used as a small decorative element. It is attached in small pieces, creating a pattern. Or, using metal foil, they create a “lunar” manicure, highlighting the lunula with foil.
You can buy metal foil for manicure in nail shops and cosmetics stores. There is glue on the back of the foil.
The nail plate must be degreased. Place foil on top of the nail, shiny side up, sticky side on the nail. The foil is pressed tightly and smoothed so that it sticks. The excess is carefully trimmed off. A colorless varnish and/or fixing composition is applied on top.
To create a certain ornament, you first need to cut it out of foil and then carefully glue it onto your nails.
Metallic foil
The store sells special foil for manicure. It comes in different colors, but the most popular ones are silver and gold. Nails must first be sanded, given a square shape, and a base applied. Special glue is applied on top (it is sold where foil is sold) and a tear-off piece of foil is applied. You can smooth it over the nail with your finger, and use an orange stick or scraper to smooth it out at the very corners. Excess is removed with the same tools. The foil does not need an additional glossy coating, as it can ruin the foil. In general, these 2 means are not friendly with each other.
Metallic nails using powder or rubbing
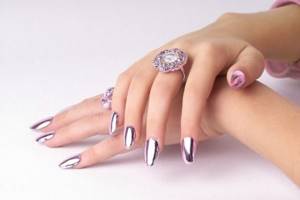
Metallic manicure using rubbing is performed using gel polish or regular manicure polish. Varnish (gel polish) of any color is applied to the nail. Dry completely. Then sprinkle the nail with mirror powder and rub it in thoroughly. Residues are removed with a dry brush or cotton pad. A colorless varnish and/or fixing composition is applied on top.
The interesting thing is that the powder looks brighter on dark varnish. Therefore, to create a good metallic shine, experienced manicurists recommend applying the rub onto dark varnish (gel polish). It is important to rub the powder in very carefully and tightly to get a metallic effect, and not just a shiny manicure.
The classic manicure with powder is the use of gold and silver colors.
Manicurists know that mirror powder is divided into several types:
- holographic powder;
- Maybug powder;
- mirror rubbing;
- Prism powder.
A distinctive feature of holographic powder is that the particles of this product are quite large in size and each can be distinguished with the naked eye. After application to the nails, the effect of “sparkling mother-of-pearl” is created. Powder “Chafer bug” is a rub-in with the effect of a beetle’s wing. Shades can be varied, but the base is purple.
Mirror powder, when rubbed into the nail, gives an almost perfectly reflective mirror effect. The most popular are copper, gold and silver shades.
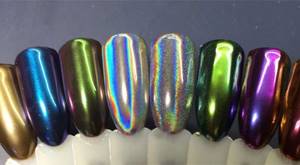
The distinctive feature of “prism” powder is that it gives not just a metallic effect, but a neon one. Blue-blue tints look very colorful on both dark and light varnish. The effect of “prism” powder is similar to the effect of holographic powder. But the “prism” rub has a finer texture and its particles are almost impossible to see.
Films
Another way to create a metallic manicure is to use film. They should be glued to the entire surface of the nail.
One of the advantages is that such nails are very smooth and also have a mirror tint, which will be the result. It is much more difficult to do the job well than using foil. The difficulty is that almost all films must be heated before use.
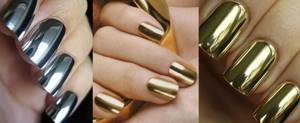
The difficulty of application is that if your hands are wet, then it is almost impossible to stick the film correctly.
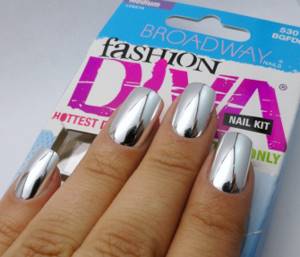
To create this type of manicure, such as metal, you need to prepare a number of tools:
- Manicure set;
- Buff;
- A liquid used to remove varnish;
- Cotton buds;
- Adhesive tape.
In order to get a metal manicure, you should perform a series of sequential steps:
- First of all, you should do a classic manicure;
- After selecting the sticker, bring it to a heating surface for a couple of minutes so that it smoothes out;
- The prepared sticker must be applied to the nail and pressed with your finger;
- The excess must be cut off using scissors;
- Sometimes a gel or fixative is applied to the sticker.
Metallic nails with glitter
Manicures with a metallic effect and a slight shine are popular. This is achieved through the use of glitter varnish or decorative glitter. A wide range of glitter varnishes are produced. Sequins can be large or very small.
A more realistic metallic effect is achieved by using varnish with fine glitter.
You can achieve a metallic effect with glitter varnish if you apply the varnish in several layers. The more layers, the greater the concentration of glitter. It's easy to do a manicure using decorative glitter. Gently sprinkle glitter onto the still wet varnish (gel polish). And they fix it on top with a colorless varnish or topcoat.
Metallic Nail Art Ideas:
Nowadays, manicure is a whole art; nails are not just varnished, but applied to them:
- various patterns;
- reliefs;
- glitter;
- rhinestones.
Create interesting smooth gradients or sharp color transitions. Metal manicure looks unusual and attracts attention.
Amazing monochrome brown manicure solutions
Not everyone likes catchy, complex compositions. In this case, nail designers recommend choosing attractive single-color options. Today fashionistas are offered a wide selection of shades, so choosing a polish based on your mood, color type and favorite style of clothing will not be difficult.
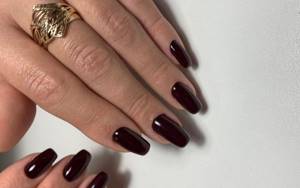
Classic steel metal manicure
Steel manicure in the classic sense is coating all nails with varnish of the same color, usually with a mirror effect. But popular and no less beautiful are manicure options with satin tints, mother-of-pearl or the “crumpled foil” effect. Satin and pearlescent varnishes with a metallic effect are presented in a huge assortment in stores.
It is less common to find varnish with a “crumpled foil” effect. But on nails this coating looks very unusual.
Nuances
- This type of manicure was in great demand in 2014 and today it is at the peak of popularity. In order for a girl not to look vulgar, she needs to refrain from jewelry and not wear accessories with her manicure. Such bright nails will attract the attention of people around you without any decorations;
- Metallic color looks best on square shaped nails;
- When creating a metal manicure, imagination plays the main role. Romantic girls can make themselves steel nails with a pink tint;
- It is worth considering that ordinary food foil is not suitable for performing a mirror manicure. This coating has a completely different composition.
Mirror manicure is a new type of manicure that is becoming more and more popular every day. This coating is sure to attract many admiring glances.
Mirror color manicure
Mirror metallic manicure (photo examples are presented below) is performed not only in classic shades (gold, silver and bronze), but also in other bright colors. In addition, they often combine several shades on one nail or on different nails. Such a decision looks very unusual. According to the spectrum, contrasting shades go well together.
Video selection of manicure with mirror effect:
Mirror manicure always looks bright and formal, so stylists recommend doing it for special occasions.
Popular color combinations for 2021-2022
Nature has given us a huge variety of shades. For each, there is “her” shade and combination in the palette. At the same time, each season gives lovers of nail art “crown” colors and shades, without which fashionable nail design is simply unthinkable.
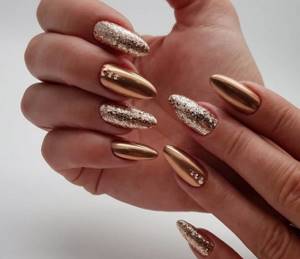
White with gold
The combination of white and gold is a tandem of purity and sophistication. As a rule, a white base is used in the design, and the decor is done in gold. The optimal manicure option is a golden French or moonlit manicure.
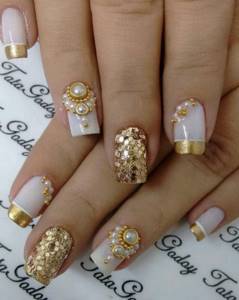
Red with gold
Bold bright color combination. This manicure will definitely attract attention.
Dark reds combine most effectively with a shade of noble metal:
- Bordeaux;
- cherry;
- Marsala;
- blood red.
There is a huge field for flight of fancy here - a red or golden base, highlighting the tip of the plate, the hole, applying a pattern - the design depends solely on the appropriateness of the manicure and the desires of the woman.
Beige and nude shades with gold
Gold is not necessarily used to complement contrasting bright colors. You can make your manicure more noticeable and sophisticated, but discreet, by combining gold with beige or delicate nude tones of varnish. Any manicure technique is suitable for design here.
Tip: to dilute a natural nude manicure, you should highlight one finger - cover it with gold foil, rubbing powder, or apply a design.
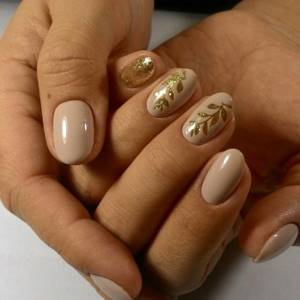
Pink with gold
This design option actually combines two shades of gold - the usual yellowish and noble pink. The first will be a good way to diversify your everyday manicure or make it more festive if necessary.
Black and gold
By combining the color in question with black, you can get a truly chic nail design. Gloomy black will be the perfect base for any type of decor. You can take any base - shiny gloss, matte field or flock coating.
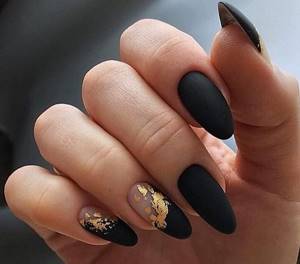
Blue and gold manicure
The combination of deep blue and gold is a royal design. Choose dark shades of blue and your manicure will definitely attract all eyes. The coating can be anything - matte or glossy.
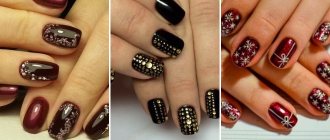
Burgundy manicure with gold
It is worth highlighting this shade of red separately. In combination with it, the gold design looks very elegant, expensive and stylish. Rubbing, foil, drawings, rhinestones are suitable for it.
Tip: glitter in this version should be used with caution (we’ll include kamifubuki here). There is a great risk of making tasteless and rustic nail art.
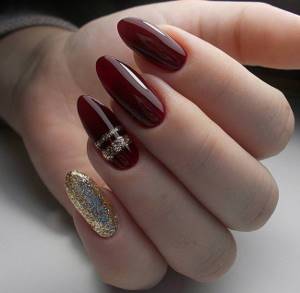
Blue shades with gold
A palette of heavenly shades combined with gold motifs will allow you to achieve a wide variety of effects:
- ultramarine and other bright colors - for summer and parties;
- dusty blue (and other pastel shades) - for everyday manicure;
- deeper muted ones - evening and formal design.
Green and gold
Natural shades of green in combination with gold are one of the best nail design options for the 2021-2022 season. Bright colors are pleasing to the eye and suitable for summer and spring. In winter, with the help of this tandem you can bring to life a New Year's nail design.
Tip: for everyday manicure, you should dilute this combination with another varnish - transparent, white.
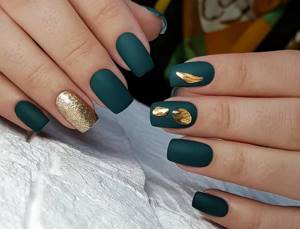
Gold with silver
Two bright shades of metal can be combined in one nail design. This is especially true if you need a holiday manicure. It is important not to overload the nails, so use transparent, white, black or another color as a base.
Raspberry with gold
Another option for a juicy and amazingly beautiful color. The raspberry hue is brightness, berry summer and sun.
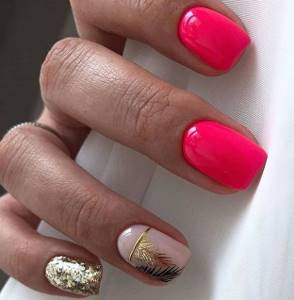
Combined metal manicure
Metal manicure (example photo below) is performed in different styles. Masters combine several techniques and create a combined manicure. A manicure looks interesting, in which only one nail is coated with a metallic effect varnish, and the rest of the nails are covered with a neutral-colored varnish.
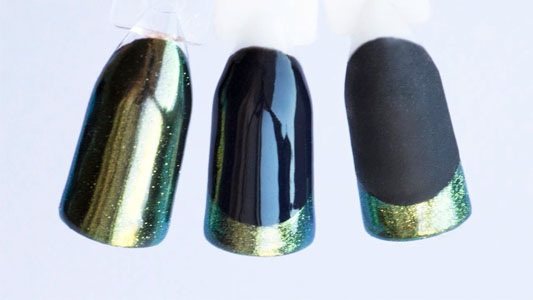
A great solution would be to combine a metallic varnish with a mirror effect with a varnish with a foil or sand effect. This combination looks stylish. Metallic manicure often combines metallic varnish with glossy or matte. Metallic varnish is used to create patterns or decorative lines on top of another varnish.
Stylists consider this manicure acceptable for every day.
Salon mirror nail services
In salons where masters help in creating our image, they offer several types of techniques for applying it. Let's look at which ones and where you can buy them for independent work:
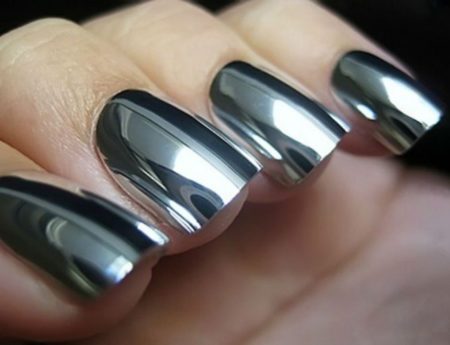
- Metallic nail polish
This varnish is also called liquid foil. You can find and buy it in professional stores or on the Internet.
- Thermal film
Or metallic stickers. For independent work, you can purchase them there.
- Thin foil for casting
Working with her is very painstaking. It will be difficult for a beginner to master it. Therefore, it is better to trust the professionals. And you can buy it in the same departments.
In beauty salons, perhaps, these are all the services, but there are a couple more that are suitable for a newcomer to work in this environment. Let’s also figure out what kind of material is mentioned above and how to use it.
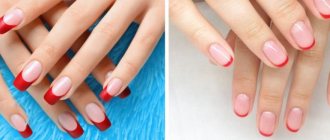
French metallic manicure
A French manicure done using metallic polish or another material looks fresh, new and stylish. A manicure without additional design and decoration, according to stylists, can be used for every day. A manicure in bright colors is perfect for celebrations and celebrations.
The idea of the French metallic manicure is that the white part of the nail is covered with varnish (gel polish, foil) with a metallic effect, instead of the classic white (beige, light pink) color. Sometimes, French metal manicure is additionally decorated with small rhinestones.
Office style in brown manicure
Along with black and white classics, nude and neutral gray tones, brown manicure goes well with business style. To create an image, they use a French or lunar technique, complementing the monochrome range with laconic, minimalist designs. It is acceptable to use a small amount of sparkles and single crystals.
Gradient metallic manicure
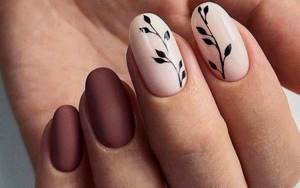
Metallic manicure, photos of which are presented below, is often performed using a gradient technique. Typically, 2 or 3 colors are used to create a gradient manicure. There are many options for applying colors, one of the simplest is to mix varnishes in a separate container and apply the color to the nail with a sponge.
There is a secret to such a manicure: the smaller the pores of the sponge with which the varnish is applied, the softer the transition between colors will be. A protective coating or clear varnish is always applied over the gradient.
Classic gradient - a smooth change in color in the horizontal plane. But a new fashionable trend has become the creation of a vertical gradient. This transition looks unusual, and if the manicure is done in bright colors, it can be an excellent option for a celebration. An interesting version of the gradient is a transition made with a brush, when you get a sharp transition in the form of diamonds.
This technique requires special skills and abilities; it is very difficult to perform such a manicure on your own.
Decoration with rhinestones and microbeads
In manicure, rhinestones and microbeads are used for a long time. Using these decorative elements, you can create a bright holiday and everyday manicure. Beads are small (up to 4 mm) material made of glass and used for decorating nails.
Beads are made of glass or metal. Glass microbeads are used to create a beautiful, bright manicure. It is applied completely to the entire nail or an ornament is laid out from microbeads. Steel microbeads can be used to create a metallic manicure.
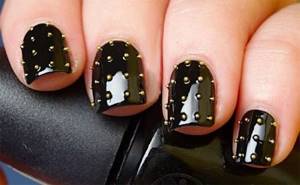
Metal manicure: photo of an option with microbeads
Such beads look unusual, but you need to glue them especially carefully so that the manicure lasts as long as possible. To glue beads, use any manicure glue. It is recommended to apply a protective coating or colorless varnish over the microbeads. Microbeads can be used in manicures with regular polish or gel polish.
Attention! For better attachment of microbeads to a nail without varnish, it is recommended to degrease it.
Rhinestones are a long-known and widely used material for manicure. There are regular shiny transparent rhinestones, but colored rhinestones are also produced in different sizes. For short nails, small or medium-sized rhinestones are the best option. Large rhinestones are suitable for decorating long nails, but you can also combine large ones with small ones, creating interesting patterns.
To create a metallic manicure, metal rhinestones are used, which are called rivets. There is a wide range of rhinestones made of white and yellow metal, and rhinestones are made in various shapes. They can be round, square, oval. Colors are also not limited.
Rhinestones are colored:
- in blue;
- green;
- violet;
- red;
- brown;
- orange;
- yellow;
- pink;
- lilac.
Stylists recommend decorating manicures with rhinestones to create bright, festive looks. For everyday wear, it is better to make a neat, modest, discreet pattern or completely cover one fingernail with rhinestones or microbeads. Among the interesting original ideas for manicure, one can note the decoration of gradient metallic manicure with rhinestones.
A neat ornament will become a beautiful and unobtrusive accent.
Small beads create the effect of shining metal. This manicure looks very festive. As a decoration, it is better to use microbeads that contrast the color of the varnish or gel polish. This combination, according to stylists, gives a sophisticated and noble look to the manicure.
Metallic manicure is a great nail design idea for holidays and for every day. On the Internet you can find many photos of manicure options using a variety of techniques. Therefore, you can find a nail art idea to suit your taste.
Article design: E. Chaikina
Application of varnishes
This is the easiest way to achieve the desired effect. Mirror varnish or gel can be used as a varnish. You can paint your nails quite quickly and easily with it. However, in terms of the degree of specularity, this coating cannot be compared with foil or false nails.
A similar varnish is produced by a large number of companies. Some have coverage that meets specified standards, while others do not. As a result of even simple application of varnish, small grooves appear on the surface, which can be seen if you look closely. In addition, some manufacturers add glitter to the varnish, which makes it even more metallic.
