When choosing a manicure option, women face a lot of difficulties. If previously there were a lot of strict restrictions and bright colors were looked at askance, now the main thing is not to overdo it.
In addition, in order to create an original design on your nails yourself, you need to know how to properly apply glitter to gel polish.
Benefits of glitter manicure
Manicure with glitter stubbornly holds a leading position among the most popular nail designs. Craftsmen are diligently developing new bright options that are appropriate in any case and in any setting.
Benefits of sparkling nails:
- If you don't overdo it with shimmering details, then this is a great everyday option. The accent is made with sparkles; they are the highlight of the decoration.
- It is the best holiday decoration. There are tons of designs for parties, weddings, guests and other important events.
- At the moment there are no restrictions on the use of shimmer and glitter. They can decorate any design to varying degrees. They also look great on both short and long nails.
- The technique is easy to learn. Even a beginner can handle this coating.
- The glitter adheres perfectly to the surface of the nail.
By experimenting with the density of the coating and the combination of sparkles of different colors and sizes, nail designers create a variety of coating options.
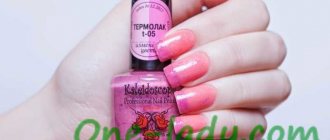
Choice
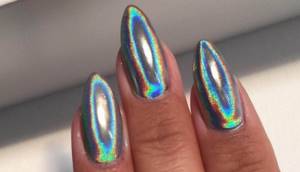
Sequins have different colors and sizes. Their application technique may differ. Jewelry can be purchased with varnish or separately. Glitters come in different sizes and shapes, for example, in the form of stars or hearts. There may be holographic coating. If dry glitter is chosen, then the top of the nail is covered with transparent varnish so that the decorations do not fall off.
The choice depends on personal preference. The main thing is that the glitter is from a trusted company. It is also necessary to take into account the shelf life of varnishes and decorations. Thanks to the right glitter and the right procedure, you will get an excellent result.
Flaws
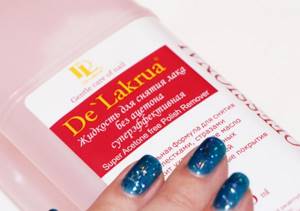
Oddly enough, one of the advantages of glitter polishes is also their biggest disadvantage. This is resilience. When removing old manicures, they are very difficult to remove. There is even a special nail polish remover sold for these purposes. It must be applied to cotton wool or a special swab, and then kept on the nail for some time to soften the coating.
To attach round decorative parts you will have to purchase special glue. In addition, they still need to be able to fix them correctly.
Liquid coating with decor does not always provide the opportunity to realize your ideas. Working with dry glitter will require additional costs.
You will need to purchase:
- tweezers with thin working edges;
- applicators;
- sponges;
- wooden stick.
Fine shimmering dust can easily be found in hair and clothes a little later; you still need to learn how to work with it.
Types of glitter for gel polish
Specialized points of sale offer a wide range of tempting glitter particles. But understanding this diversity is not at all difficult. There are two main types of glitter.
To create a sparkling coating use:
- Gels with glitter. Whole series of compositions with glitter of different sizes and shapes are now arriving in stores. It can be simply a transparent gel or a composition with pigment. All that remains is to distribute it over the surface of the nail plate.
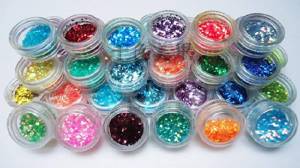
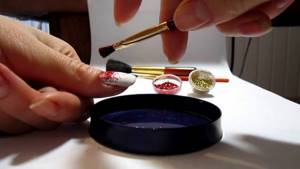
- Dry glitter. They are sold in small jars. Shape and colors are different. They are coated with special glue or varnish that has not yet dried. A special type of fixative must be applied on top.
Glitter comes in the form of fine shiny dust and in the form of fairly large particles of various shapes. The diameter of the latter starts from 1 mm. They can be mixed to create your own colors and textures, and dry ones can be added to gel or varnish.
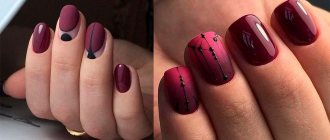
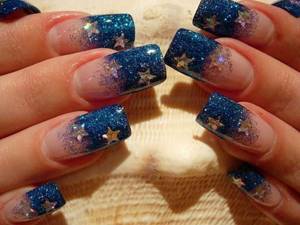
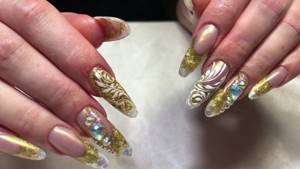
Volumetric monograms in silver and gold
Volumetric monograms look equally good on any length and shape of the nail plate. A silver and gold pattern should be applied in contrast. These two shades go well with the entire color scheme. White, black, red, blue, burgundy, emerald are considered the most suitable colors for creating such a design.
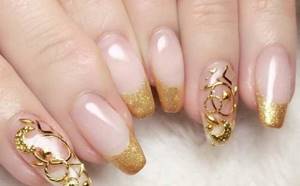
You can decorate each nail with monograms, but highlighting one or several nails looks more harmonious.
Combination of sparkles with other decor
Sliders, rhinestones, kamifubiki, foil, and broken glass go well with a shiny coating. Glitter is a great addition to most nail decorations. It is important to stop in time when decorating a design. The most important thing is not to overdo it when choosing the number of decorations. Manicure should be sophisticated and elegant.
Fashion trends 2022 recommend a large assortment of nail designs with shiny decor in jars. With stretch, with geometric shapes, with a matte finish and glitter - such nails will become the finishing point of any look.
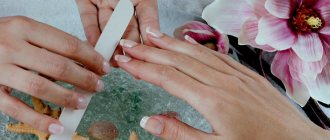
How to Apply Glitter
Working with different types of decorative coatings requires certain skills and tools. There are also some tricks: you need to know how to properly apply glitter to gel polish.
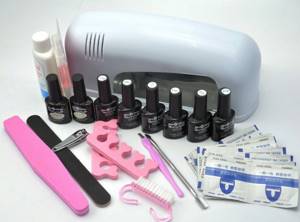
Required tools and materials
In order for a sparkling manicure to look good and hold securely, you need to purchase the necessary equipment and materials.
To work you will need:
- Primer. Its purpose is to provide better adhesion between the nail plate and gel polish.
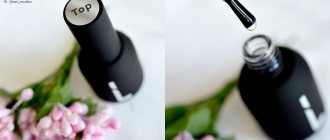
- Shellac is a colorless coating, a base for applying colored gel polish.
- Brushes with synthetic bristles. For applying glitter - fan-shaped and flat. To make a drawing you will need a thin one. There may be a need for a few more for other types of work.
- Glitter.
- To remove the dispersion sticky layer, you should purchase a special liquid.
You will also need manicure tools. And for drying the coating - an ICE structure or a UV lamp.
Small and medium glitter
Glitter can be applied to gel polish in a variety of ways. It is not necessary to cover the nail plates completely.
You can emphasize small details, complement the drawing, focus on the beauty of the nail or an interesting detail:
- Drawing. The sparkles are laid out so that they themselves form a pattern on the main coating.
- Image decoration. Bright sparks highlight the details of the sculpting and create highlights on the surface of flowers and figures.
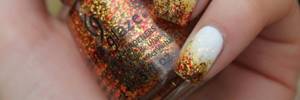
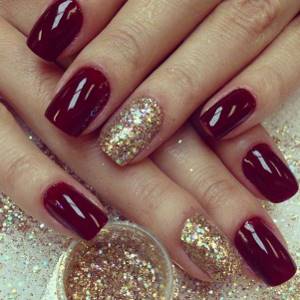
- Full coverage. Glitter polish is applied to the entire nail. You can paint selectively: all fingers have a matte finish, and one or two sparkle brightly.
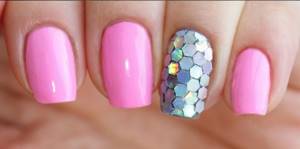
- Polka dot or spot coating. Take medium sequins and place them on the surface, imitating the popular “polka dots”. Or these same polka dots are formed from a scattering of small sparkles.
Such motifs can be easily performed independently at home. You don't even need any special skills. If the drawings were made with varnishes, they take a long time to dry. Therefore, it is better to coat the surface with a special hardener, which will speed up the process.
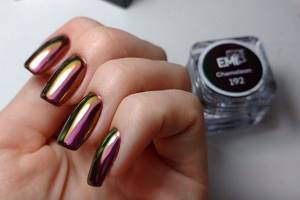
Large sparkles
Working with large glitter requires a few different skills. They are sold only in dry form.
Technique for applying large shiny parts:
- General nail preparation: shaping, polishing, applying base and varnish.
- The glitter is picked up with tweezers and carefully placed on the surface of the gel polish that has not yet dried.
- A colorless coating is applied to a completely dry nail.
Large plates themselves can serve as a decoration for a manicure. They can be used to lay out a drawing or make the main accent in the design. Sometimes special foil is used.
The following options are possible:
- Snake print. Meticulous work. The nail is completely covered with diamond-shaped details. Usually done selectively on one or two fingers. The rest are coated with matte varnish.
- Aquariums. Large, mysteriously shimmering sparkles are placed under the transparent layer. They are combined with fine shimmer, twigs, patterns, feathers.
- Main focus. It is made with a large shiny detail, and small shimmer of different colors is laid out around it.
- Mixture. A chaotic combination of small and large sequins. They can be applied along the edge of the nail, along, across, to emphasize curls or decor, or to create a hole.
These are the basic and most popular techniques. If you wish, you can create a new composition each time - the range of incoming jewelry is so diverse. For example, the French manicure is quite interesting, the edges of which are decorated with puck-shaped large sparkles.
Manicure with glitter and clear gel polish
Even a person who has never dealt with gel coating can cope with this task. The work uses a colorless liquid base with glitter. This option is also the most popular.
Step-by-step working method:
- A manicure is being done. Primer and base coat are applied on top. Dries in a lamp.
- The base is applied. Two layers are made, each one is dried. They must be completely dry.
- The surface is covered with glitter gel, the top dispersion layer is not erased.
- Top coating. It makes the nail surface smooth and glossy.
- All layers must be dried under a lamp.
There is one drawback to this manicure: this simple technique of attaching glitter to polish does not allow your imagination to run wild. There are very few design options here. But it is suitable for beginners. Once mastered, you can move on to more complex techniques.
Applying dry glitter to polish
Dry glitter goes on sale in a much larger assortment than liquid glitter. Due to the fact that they are not placed in the gel in advance, it is much easier to create the desired design with such sparkling powder or large parts.
They look like records without varnish in a jar. They are made of metal, plastic, paper, glass. Shapes - square, round, rectangular, polygonal and others.
Particles are divided:
- Large (from 1 mm), they can be used to create spectacular mosaics.
- Sand. The grain size is from two microns. It is from such particles that the iridescent velvety surface is obtained.
- Powder - mirror dust. It creates patterns and gradients.
- Pigment with a holographic effect. Most suitable for creating 3D patterns.
Dry metallic particles create a lot of room for creativity and even make your manicure more durable.
But this decor has its drawbacks:
- most of it goes to waste during operation;
- They need to be fixed immediately with a special coating, otherwise they will quickly crumble.
To work with such particles, special tools are required.
To apply dry decor you will need:
- dots - a wooden stick with a characteristic cut at the end;
- brushes - thin and fan-shaped;
- tweezers.
If necessary, sparkling particles can hide all defects and unevenness of the coating and hide chips. Working with them is not difficult even for an inexperienced beginner. Sprinkling is carried out on a non-dried sticky layer that has not yet been covered with topcoat. Hands must be dry.
Step-by-step method for sprinkling with small and medium dry glitter:
- Place a dry and clean napkin under the hand being treated - particles tend to sprinkle everything around.
- Using a dry fan brush, pick up a small amount of sprinkles from a jar.
- The brush is brought to the painted surface, but cannot be touched.
- Glitter is sprinkled in the desired place by lightly tapping the brush handle. If you need to save materials, you can work with a soft flat brush.
- After treatment, the surface is covered with a transparent gel.
If the coating should be very shiny, then you need to add more material. Sometimes the nail is dipped directly into a jar of glitter.
If you are working with large particles, then use a dot stick. The sparkles are taken out carefully, one at a time, and laid out in the desired pattern.
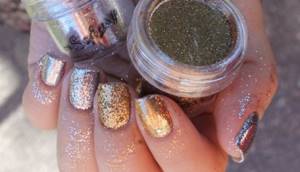
Rubbing in glitter
Rubbing is one of the simplest and most effective techniques for creating a manicure. You can work with both large and small particles.
It includes the following steps:
- treated nails are covered with two layers of gel polish;
- The layers are dried in turn in a lamp for two minutes each;
- glitter is collected on a soft brush and sprinkled evenly, from the cuticle, onto the surface of the nail plate;
- With light finger movements, the particles are rubbed into the coating;
- drying in a lamp (a few seconds);
- Apply top coat and dry (one minute).
Using this technique, a metallic effect is created on the nails.
Stretch application technology
Despite the complex name, stretch application technology is one of the simplest. With its help, gradients or play of colors are created.
It is almost identical to rubbing. Only sparkles of different colors are applied alternately, starting from the edge and ending with the cuticle. This is “stretching”. The finished design is dried and covered with topcoat.
French manicure
This manicure option has long been a classic. But nail designers create new samples for execution, adding rhinestones to it. At the same time, it can be elegant and modest or flashy and solemn.
Classic French - white nail tips with a neutral base. The execution technique remains virtually unchanged, but a slight deviation in shades and details completely changes the result.
New French options with shimmer and sequins:
- With black tips. Available in a bright or neutral base. There is an option with two contrasting sides.
- Red. It is not challenging, but at the same time emphasizes individuality.
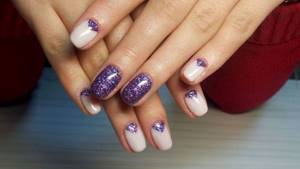
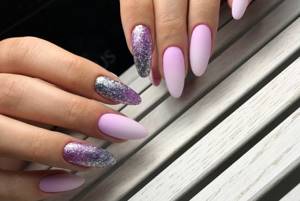
- Pink and purple.
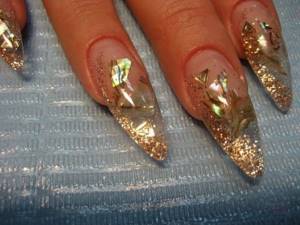
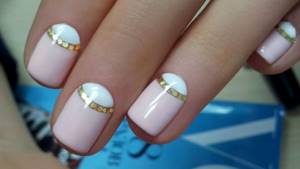
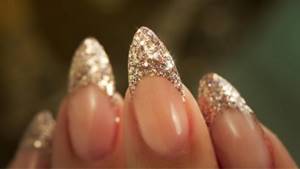
- Gold. Painting and rhinestones are added to the shimmer. Front option.
- Neon. Reminiscent of the wild 70s, when bright plastic jewelry was in fashion. More suitable for young girls.
- Dark base. This is a kind of confrontation with the classics. The base can be made with a matte surface, and the ends can be made glossy.
- Reverse French. The emphasis is on the cuticle, where a bright stripe is placed.
- Oblique. Any bend duration can be set on the nail and any slope can be set. Shimmer and rhinestones are designed to soften this asymmetry.
Most of these techniques are difficult to master and require skills and special tools. Beginners should try a simple gel method, without unnecessary details.
A simple French manicure method with glitter
There are a lot of rather complex techniques for making French.
At home you can make a very simple and interesting one using liquid glitter with rhinestones of different sizes using the following method:
- Preparing the nail, applying and drying the base.
- Applying the selected base color.
- Then the brush picks up as much glitter as possible and makes three shiny stripes along the entire length of the nail.
- New application of glitter on brushes and painting of the plate in a horizontal direction, starting from the second third (a U-shaped movement is made).
- Apply a third layer of sequins to the very tip of the nail. This can be done with smaller particles.
- Finish coating.
If you are not happy with how the sparkles lay down, you can touch them up with an orange stick before drying. You can also make the glitter more saturated with sparkles if you buy additional sparkles and simply add them to your favorite coating.
Lunar French
Moon manicure is also called reverse French. When making it, the area of the nail at the base, called the lunula, is painted. It is shaped like a month. For ease of work, a special semicircular stencil is used.
Step-by-step instructions for using shellac:
- Nail treatment and removal of oily layer, polishing.
- Apply base coat and dry.
- Covering the nail plate with the main color. It will also be the color of the lunula. If you need a more saturated color, then do two layers. Each is thoroughly dried.
- The lunula is covered with a stencil.
- A second color is applied to the uncovered nail plate. After drying, the stencil is removed and a top coat is applied.
These are the main stages of work. You can also add accents with small sparkles or shimmer to the ends and cuticles. To make the lines clearer, a stencil is used.

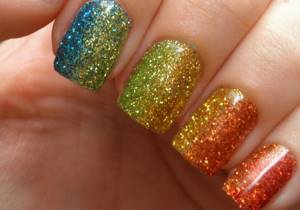
Ombre
Ombre, stretch or degrade also refers to decorative French-type coatings. It is suitable for those who do not like clear lines and geometry. This type is good because it perfectly hides nail imperfections.
Ombre with shimmer and sparkles is ideal for any age and style. Reflective elements highlight the smooth transition of one shade to another.
This design is considered simple, adds length to the nails, and matches any outfit. The main task is to achieve a smooth transition between colors. Degrading with gel polish is most conveniently done using a comb brush.
How to make your own coating:
- Prepare your nails.
- Apply and dry the base.
- Next, the lightest shade of the future ombre is applied in one layer and polymerized.
- A dark color is applied to the lower third of the nail (near the cuticle). Since such tones have the ability to absorb light ones, they are applied to a smaller part of the nail.
- A lighter shade is applied to the larger one.
- Stretching. It is done with a brush. It consists in the fact that a darker color is “stretched” with strokes onto the border of a light one. They are mixed. After the dark has stopped shrinking, polymerization is done.
- Paint is applied again and stretching is done again. And so several times until the desired effect is achieved.
- The finished gradient is sprinkled with glitter, polymerized and covered with a top transparent gel.
Small sparkles can also create a gradient. Stretching over a colored substrate is done in the same way as described above.
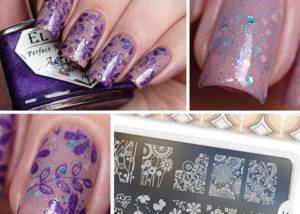
Stamping
Stamping, or stamping, is an opportunity to decorate a manicure with a spectacular design without making much effort. This is especially true for those who are not very good at drawing, but want to have beautiful and original nails.
The design is applied to the coating using specially made stamps. They are purchased separately. At the moment there are whole sets of different styles and trends.
Stamping process:
- A small amount of highly pigmented shellac or varnish is applied to the stencil.
- Excess is removed with a scraper. It is necessary that the drawing be clear. Therefore, you need to make sure that only the pattern is filled in.
- A design is imprinted on the prepared nail (with base and color).
- The fixative is applied.
All layers are dried as they are applied. More experienced craftsmen can even make colored patterns. To do this, you will have to arm yourself with a brush and carefully paint the plate with the desired shades.
When choosing color solutions, you need to remember that contrasting shades will look great. Before applying the top coat, you can add accents with glitter and sparkles.
Waterfall
The “waterfall” manicure is so called because the image on the nails looks three-dimensional. There is a feeling that the details or image are hidden behind a wall of water.
The peculiarity lies in the combination of acrylic and gel materials. Particular attention should be paid to finding a specialist, because not everyone can skillfully work with two different technologies at once.
Brief method of waterfall manicure:
- First comes the usual hand treatment and degreasing of the nail plates.
- Any design can be made with acrylic powder. Nail designers use special ones with sparkles. Paints and rhinestones are also popular.
- The final stage: coating with a transparent modeling gel. Once dry it gives a waterfall effect.
This manicure has an undoubted advantage: it eliminates alkaline and acidic primers and natural nails are less damaged. In addition, such a manicure is much more time-efficient. As the nails grow back, the contour of the connection between the artificial and natural nails is less noticeable, and correction procedures are required less frequently.
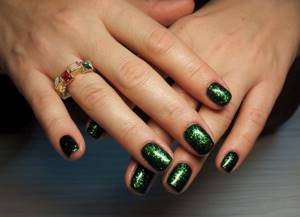
Rub method
- We do not wash off the dried colored layer of varnish so that a sticky coating remains.
- Pick up small glitter with a dry brush and apply it to the nail, patting it gently. It is necessary to cover the entire surface of the plate.
- Once the entire nail is covered, rub in the glitter and at the same time remove any excess residue.
- Brush off unnecessary particles with a dry brush.
- Dry in the lamp for a few seconds, and then apply the finish and dry thoroughly.
This method is used if you want to cover the entire nail or create a gradient using different colors of the material. Masters use gold or silver tones for rubbing.
Glitter manicure options
With glitter, nail design becomes more interesting. With them you can achieve different effects, create complex applications and compositions, or simply add a slight mysterious shimmer.
Manicurists offer luxurious ideas that will be easy to reproduce yourself.
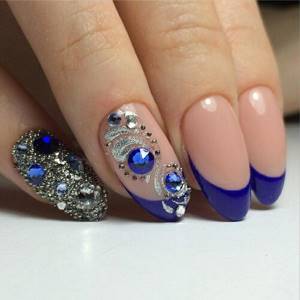
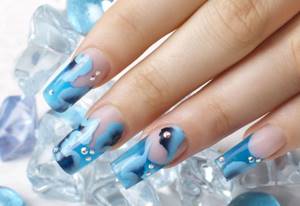
For the “aquarium”, large and small sparkling particles are carefully attached to the nails, and then covered with a thick layer of transparent coating. They can be diluted with plants, flowers and even feathers. All this is presented in a wide range at specialized points of sale.
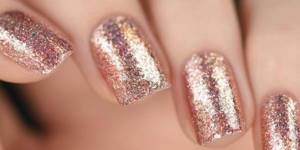
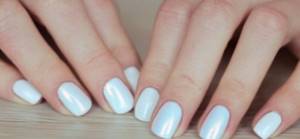
A transparent shimmering coating is made with glitter or powder. The design is unobtrusive and suitable for everyday wear.
Lunar manicure can be neutral shades with glitter at the junction of two colors.
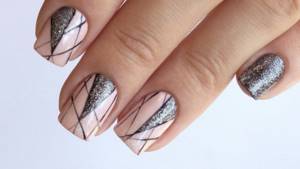
Patterns of fine shimmer are applied with a thin brush onto a contrasting color.

You can make a multi-colored manicure with glitter patterns.
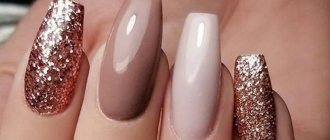
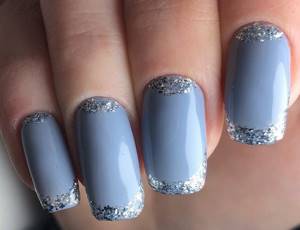
For a jacket with glitter at the ends of the nails, glitter can be applied in bulk or large particles can be attached in detail.
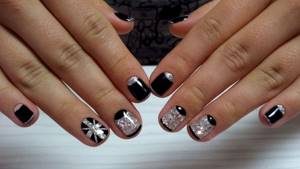
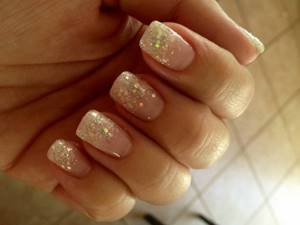
White with rubbed glitter creates the effect of moonstone, if you take the delicate pink, blue and light green colors of the particles. You can make it black in the same way by choosing the appropriate decor for the base.
Multi-colored chaotic designs are still popular. This includes amber and French. Varnishes are colorless and colored, with decorative particles included.
These are just some of the ideas that give room for imagination. Nowadays fashion does not make strict restrictions. The main thing is that they are appropriate and suitable for the specific case.
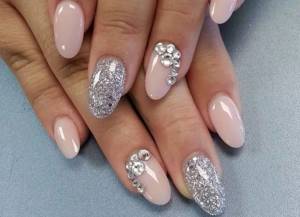
Hole decoration
A beautiful and stylish design is considered to be a lunar manicure, in which the hole can be drawn with glitter. Camouflage coating in beige, white, pink and transparent colors looks good in a duet with silver, white, soft pink, and gold sparkles.
When decorating the hole with shimmering particles, you should pay attention to the condition of the cuticle, since the main element is located next to it. Before coating, it is recommended to do a combined manicure.
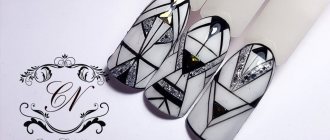
Strict geometry
Geometry is included in the list of trendy designs for 2022. Strict and clear details border on the “minimalism” style.
| Geometric figure | Description |
| Lines | They can be located vertically or horizontally on the nail plate, and also vary in thickness. |
| Circles | This can be one shiny dot in the middle of the cuticle line, or it can cover the entire nail. Accurate and even circles are obtained using dots. |
| Square | You can paint it with a thin brush or use glitter stickers. Often there are designs in which a square is drawn within a square. Thanks to this design, a 3D illusion is created. |
Triangle, cell, and “color block” technique also belong to the elements of strict geometry. And thanks to the glitter, this manicure looks more delicate.
Recommendations from professionals
To make your manicure look more impressive and neat, experts give a number of tips for working with glitter on gel and regular polishes.
The shine on the gel will last longer if you follow the technology when attaching it. When working with regular varnish, a fixative is required.
To prevent chips and cracks:
- you need to purchase high-quality top and base;
- if the nail is wet, it needs to be treated with a dehydrator;
- Before manicure, the nail plate needs to be filed down with a buff - it removes the glossy layer;
- when degreasing the nail, you need to pay attention to the side ridges and the area near the cuticle;
- the gel coating should not get on the cuticle;
- the base, color, finish should be applied in a thin layer, the cut should be painted over (sealing the end);
- for soft and thin nails you need to use a rubber base, acrylic powder, gel - these are strengthening agents;
- Each layer must be dried thoroughly; the exact time is indicated in the manufacturer's instructions.
If the glitter chips ahead of time, you can restore it without having to change the entire coating.
To do this, mix the colored gel with the base (proportion 1:1). The resulting mixture is used to paint over the damage and sprinkle glitter on top. Then - drying, which takes twice as long as usual. Then all excess that is not fixed is removed, and the surface is covered with topcoat. The last layer should be thin. Then dry again. Restored decor lasts a long time.
Nail preparation
For a perfect manicure, nail preparation is required:
- Hands should be placed in a bath with a decoction of herbs, sea salt or essential oils.
- Removal of cuticles and application of moisturizer is required.
- Excess skin is carefully removed with tweezers or nail scissors.
- Use a file to give your nails the desired shape.
- The first layer is applied with base varnish. It covers the entire plate.
- Sequins and tools should be placed nearby.
- Excess glitter is removed with a brush after the varnish has dried.
It is important not only to decorate your nails with sparkles, but also to choose them correctly, as well as perform a high-quality manicure. Judging by the photo, the result is beautiful. The main thing is to carefully apply jewelry, following all the rules of manicure.