The nail industry is constantly improving, so the fair sex will be able to try new solutions and ideas to create a flawless manicure. Drawings on shellac add variety to the usual nail coating. Girls are given unlimited opportunities to experiment.
Shellac is the varnish of the American brand CND, which released the original Shellac collection. They have a gel texture and increased resistance to damage. The product is odorless and dries quickly in a special ultraviolet lamp. Nail art shimmers beautifully in daylight and looks great in photos.
Thanks to the wide color palette, girls will be able to choose a polish for any look and special event. The coating will last for several weeks and will delight you with its impeccable appearance. It is necessary to apply the drawing only after the base layer has thoroughly dried.
Shellac: what is it?
Shellac is a natural resin excreted by female chickweeds. This substance is used to make a special gel polish, which is then used in the manicure industry.
Today shellac is a unique and only hybrid of varnish and gel.
Reasons for the popularity of Shellac
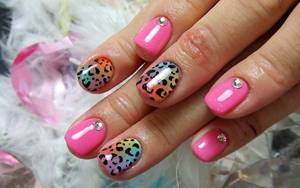
Beautiful shellac designs on nails are one of the reasons why this manicure technology is at the peak of its popularity today. Marigolds coated with this product acquire a pleasant varnish effect.
It is easy to apply on nails, so any girl can perform this manicure. This technology is easy to apply. With a little practice, a nail art lover will paint her nails no worse than any professional manicurist in a beauty salon.
Another advantage is that it is easy to remove. It is enough to “soak” the polish with a false nail remover and it will be removed within ten minutes. Remaining varnish can be removed using an orange stick.
The reason for its popularity is also that this varnish is indicated if for some reason a girl cannot have a manicure with acrylic or gel.
Benefits of Shellac
This coating has a lot of undeniable advantages. In particular, this manicure:
- long-term;
- dries instantly;
- has no smell;
- hypoallergenic;
- does not chip;
- does not lubricate;
- strengthens nails;
- does not contain dibutyl phthalate, formaldehyde and toluene;
- does not require mandatory polishing, as is necessary with other manicure techniques;
- does not require the use of special primers.
When is it better to hold off on coating?
It is better to wait with a coating such as Shellac if there are problems with hormonal levels. Also, do not rush with such a manicure if the girl is undergoing treatment for cardiovascular diseases. In both cases, Shellac may not adhere well to the nails and may peel off.
- The main nail coatings are gel polish and shellac - what is the difference? We'll tell you the differences right now!
- Is it possible to remove shellac at home? Of course! Read how to do this in the article.
Shellac application technique
The technique of applying gel polish is quite simple and consists of several stages.
- Initially, the nails are given the desired shape, the cuticle is processed;
- The nails are sanded a little, which allows the coating to firmly adhere to the nail;
- Afterwards, a nail degreasing agent is applied;
- Then a base coat is applied, followed by 2 coats of color and finally the nails are covered with a top clear coat that gives amazing shine and protection. Also, you need to cover the end of the nail with a base, colored varnish and top;
- Use a degreaser to remove the resulting sticky layer on the surface of the shellac from the nails;
- Apply a special skin-softening oil to the cuticle;
Each layer is dried under an ultraviolet lamp (36 Watt) for 2 minutes or an LED lamp for only 30 seconds. This varnish lasts up to 2 weeks, maintaining the original color saturation and shine. Thanks to multi-layer application, nails become thicker and stronger. To remove shellac, use a special liquid (or regular nail polish remover with acetone) and foil.
Self-coating your nails with shellac
It’s not difficult to make simple shellac designs on your nails yourself. To do this, it is important to purchase all the necessary materials and know the step-by-step operating technology.
What do you need to buy to cover your nails with shellac?
To make shellac designs on your nails at home, all you need to do is purchase a home kit with an LED lamp. You also need to purchase the Shellac gel polish itself.
What files are best to use for polishing your nails?
It is best to use a glass nail file to polish your nails. It's universal. Suitable for both natural and artificial nails.
Step-by-step instruction
Do not forget that the pattern created with shellac, once fixed in the lamp, will no longer be correctable. But if you have a complex design, you can apply the pattern in parts and fix it in the lamp after completing the missing parts.
The technology is very simple and any girl can do it:
- The nails are filed. The cuticle is removed.
- A napkin is moistened with a fat-free substance and each nail is thoroughly wiped with it.
- Then the base is applied in a thin layer to four fingers (index, middle, ring and little fingers). After this, the fingers are immediately placed in the LED lamp for one minute.
- Four nails are painted with Shellac gel polish. At the end, each nail is “sealed”: the brush must be held near the outer “side” of the nail plate. After this, the fingers are placed back into the LED lamp for up to three minutes. Then “Shellac” is applied in a similar manner with a second layer.
- The nails on the thumbs are painted according to the described scheme.
- Finally, the nails should be wiped with a napkin with a fat-free substance applied to it.
Tools and materials you will need
To easily start painting on your nails with shellac , you need to purchase the following materials:
- main or base layer;
- several shades of shellac;
- finishing coating.
To dry shellac, it is important to use an ultraviolet lamp and additional tools:
- a product with an antibacterial effect;
- spatula or orange stick;
- file;
- bondex;
- softening cuticle oil;
- sanding file.
Thinking through the design
Coming up with a manicure design is always interesting. To do this, just use your imagination and come up with an original pattern.
We choose colors depending on the time of year
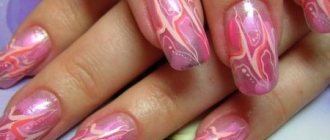
The color of your nails can be selected depending on the time of year. For example, in winter it is a cold range. These are all shades of blue, blue, gray and white. In spring these are delicate colors. Peach nails with a shellac pattern look good in spring - they are both elegant and sophisticated.
In the summer, you can do a bright, catchy manicure in rich colors: bright yellow, crimson, emerald, aquamarine, orange. In autumn, you should stick to warm colors. Marigolds can be painted cherry, orange, scarlet.
Which fingers are best to draw on?
Professionals recommend starting to paint your nails from your index finger. It's best to finish with your thumb. This is technically convenient to do. In addition, the thumb is actively involved in work. If you paint the nail on your big toe first, the varnish on it can quickly smudge and ruin the design.
Learning to use accessories
When doing your own manicure, you need to learn how to use auxiliary accessories. This greatly simplifies the work. First of all, these are all kinds of thin brushes for design, orange sticks. You can also use manicure dots. A palette for mixing gels will come in handy.
French with a pattern at home
A beautiful French manicure is the dream of many modern girls. His “secret” is impeccability – clear lines and neatness. Any woman can paint the tip of her nail in the shape of a crescent or a “smile” at home. It is not so difficult.
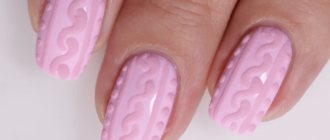
Drawing lace: step-by-step instructions
The “Lace” nail design is original, catchy and festive. To make this design, you will need shellac and a thin brush.
- To begin with, the nails are covered with a base gel polish.
- Dry in an LED lamp.
- Then one arc is drawn on the nails, a second one above it, then a third.
- A small mesh is drawn inside the first arc.
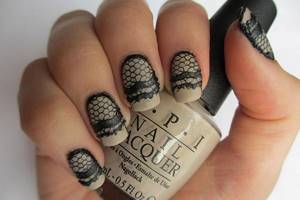
For a beginner in nail art, painting with a thin brush is not an easy task. Especially if the girl is not patient and painstaking. Lace shellac can be made at home in another way. You can cut a piece of lace to the shape of the nail of the desired size. First, the nails are covered with gel polish, then a piece of lace is applied to the varnish layer and the nails are covered with colorless varnish on top (to consolidate the result).
There is another way to make lace shellac, for example, on short nails. To do this you need a stamp and a stamping disk. The nails are coated with base varnish and the coating dries. Then a varnish of a different shade is applied to the stamping disc (this will be the color of the lace), the design is printed on the stamp and on the nail.
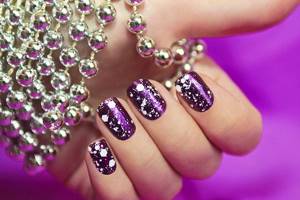
The finishing touch: rhinestones
Summer nail designs can be decorated with cute rhinestones. Beautifully iridescent pebbles on your nails will make your manicure festive and royally luxurious. You can make “wave”, “moon”, “pyramids”, “shirts”, “double French” from rhinestones. Rhinestones allow you to experiment and create unique designs on your nail plates.
- Feminine, beautiful French nails with a pattern - treat yourself. And we will tell you how to do it even at home.
- The main causes and methods of treating peeling and breaking nails. Every woman needs to know this. Details here.
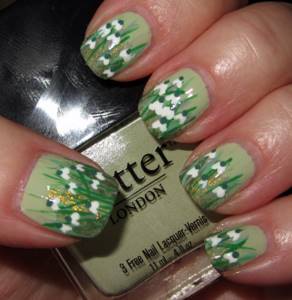
Spring landscapes on nails
During the period of awakening of nature, the soul wants to sing. We are pleased with the first rays of the warm sun, flowers breaking through the melted snow, as well as emerging greenery. To always have light in your soul, use the motifs of March, April and May in your images.
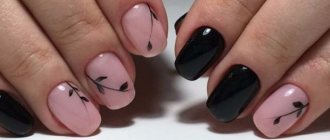
- The first messengers are snowdrops. They are tender and small. Add lilac, blue, pink and light green to diversify the palette. Any vegetation looks incredibly romantic in pastel shades.
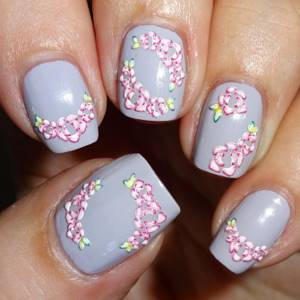
- Think about peonies. Large petals charm and emphasize maturity and femininity. Decorate the center of the blossoming bud with a sparkling crystal.

Exquisite
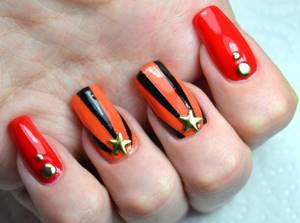
- Themed prints are suitable for the May holidays. For example, the number nine entwined with poppies or the St. George ribbon as a reminder of Great Victory Day. With a thin brush you can reproduce the camouflage on the plate.
Always think about your image in advance. Business women with emoticons may lose authority in the eyes of their subordinates and business partners. At the same time, at a fun party there is no need to emphasize your modesty.
Advice! Remember that even an artistic drawing will look ridiculous if the overall tone is not respected. Also pay attention to your wardrobe. Nails should harmoniously complement the style.
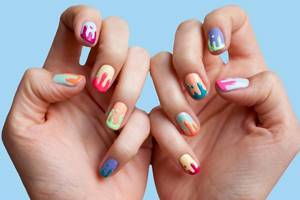
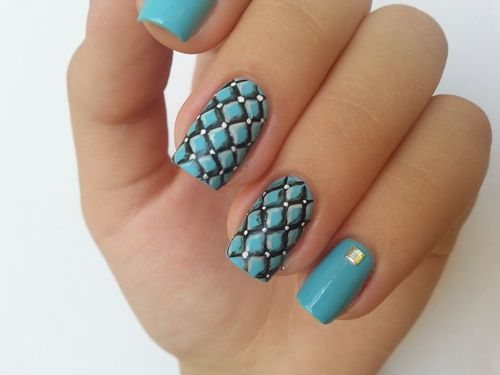
Geometric shellac manicure
The idea of geometric manicure is not new. Geometric nail art has been trending for several years. With the help of ornaments, checks, stripes, lines and polka dots, you can interestingly adjust the shape of the nail, highlight the advantages of the manicure and hide its possible shortcomings.
What is geometric manicure?
Geometric design is always original and stylish. This version of nail art involves experimenting with color, shape, and patterns. This manicure technique does not involve any restrictions. You can combine texture and color shades in any way. The main thing is not to overdo it so that the manicure does not turn into a jumble of patterns and shapes.
The main advantages of nail “geometry” are uniqueness and brightness.
Interesting and simple designs
It is not difficult to create light geometric designs on your nails. There are many options for this nail art. You can come up with any design, for example, you can experiment with a linear trajectory or divide the nail plate into asymmetrical or equal geometric segments. A good idea is to draw contrasting lines.

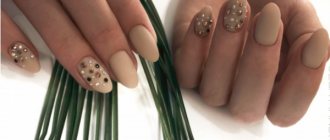
The best option for nail designs with a brush for beginners using shellac are polka dots or droplets. In beauty salons, experienced manicurists offer to make geometric shellac in the form of cells, triangles, diamonds, and rectangles.
In general, drawing with shellac on nails is not so difficult. This manicure can be done both in beauty salons by professional manicurists, and independently at home. This is a feasible task even for beginners in the art of nail art.
Work details
If you don't know how to draw a complex pattern on short nails, start with the simplest designs. Let these be asterisks or regular lines, arranged in any way. If the pattern is applied with shellac, it is important to thoroughly dry each applied layer in a UV lamp.
When working with acrylic paints, frequent drying is not required, since acrylic promotes rapid drying.
In conclusion, novice manicurists are recommended to watch how to make shellac patterns in the video. Detailed information will allow you to do the work step by step, using all the secrets of professionals. For the first works, you should choose simple drawings that do not require special knowledge. More complex patterns can be started after gaining minimal experience.