To correct extended nails means to “repair” the nail covering on an artificial basis. The purpose of this event is to change the color of the nail, shape and give it a fresh and aesthetic look. The adjustment procedure is indicated every 2 weeks. How is the adjustment made? Here are the step-by-step instructions.
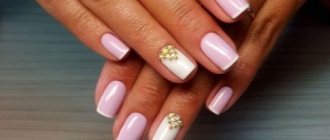
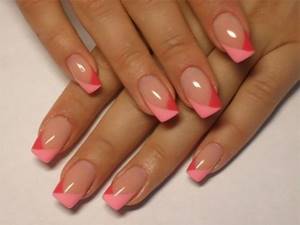
Nails in need of correction
Features of extended nails
Artificial turf requires special care:
- Over time, air penetrates between the nail and the coating, so detachment occurs, and the beauty of the manicure is lost.
- An indentation appears between the cuticle and the extension material, which spoils the overall appearance.
- Without proper care, not only the aesthetic appearance is lost, but also the natural nail cover is damaged. To do this, you need to know how to properly adjust your manicure.
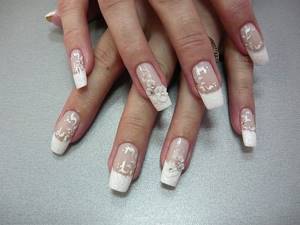
Acrylic nails
It is not necessary to take expensive paid lessons, the main thing is to follow simple instructions.
What materials will be needed for correction?
Before you start, don’t be lazy to visit a specialized store and buy:
- Acrylic remover
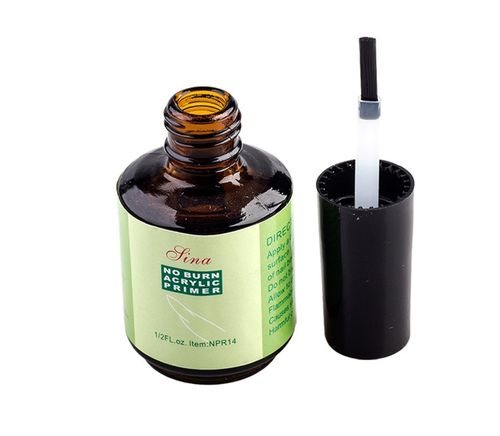
- Coupling agent (primer)
- Acrylic
- Degreaser
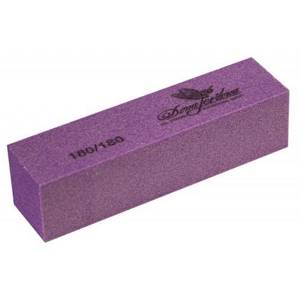
- Set of files for polishing nails
- A brush.
These materials can be purchased either as a set or individually.

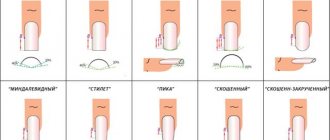
Type of nail adjustment
Manicurists note that the difficulty of manicure processing does not depend on whether it is acrylic or gel. The general appearance of the nail and its shape play a role.
There are several types:
- For small damage, small chips, detachments - minor correction.
- Medium correction is needed for larger problems. It is done after 4 weeks to hide the overgrown natural nail.
- Large corrections are made when changing shape, breaking nails, or peeling. A step-by-step guide to correcting nails is presented below.
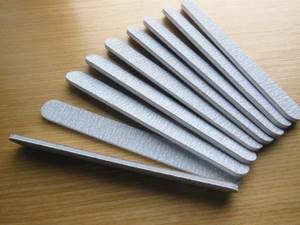
Nail files
Signs of poor quality correction
If all the conditions necessary for correction are met, no peeling or removal of the material will be observed. On the contrary, peeling indicates either that this material should not be used, or a violation of the technological process. A detachment of 1-1.5 millimeters is considered normal. Possible reasons for this problem may be:
- Careless handling of nails
- Free edge length too long
- Consequences of antibiotic treatment
- Aggravated chronic diseases
- Exposure to household chemicals
- Failure to comply with technological rules during expansion or correction.
Acrylic nails: how to make adjustments
Correction of extended nails at home is possible, although a specialist will do it better and faster.
Important! Do not use baths before extensions and corrections and do not apply oil-based cream, as there is a high risk of nail detachment.
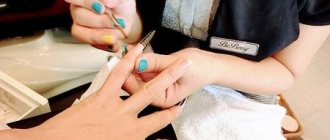
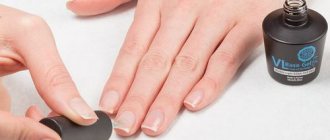
- Hand disinfection with antiseptic agents is a must. If the procedure is done in a salon, then the master must also treat his hands.
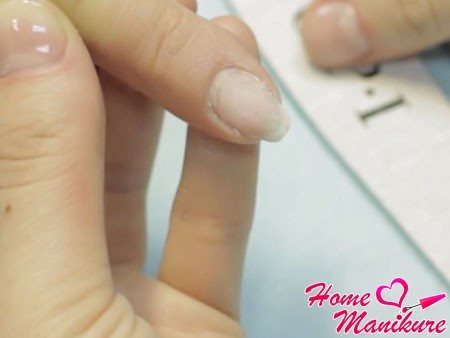
- Remove any remaining nail polish. Gently push back the cuticle.
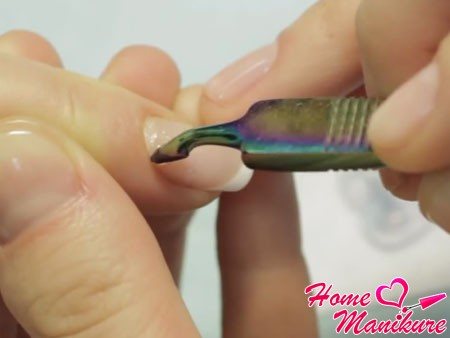
- The photo shows that the pockets (minor peelings) are cut out with a router, then the material is cut down with a nail file.
- At this stage, you will need a sanding buffer that will remove shine, and using a nail file (180 grit) you will file the natural nail between the cuticle and the extension material. Then you need to remove all the dust.
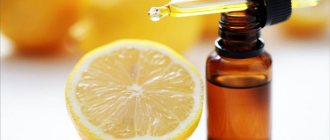
- A composition is applied that degreases the surface. It will take a few minutes to dry, and the nails are ready for further work.
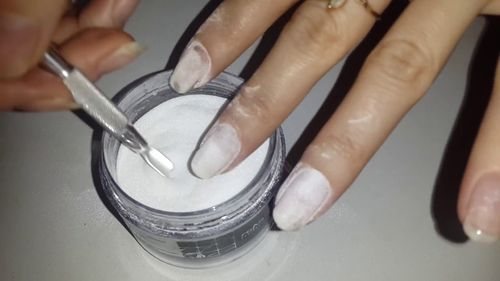
- A sufficient amount of acrylic powder is placed in a separate bowl, rolled and applied carefully to the regrown area of the nail. The cuticle remains unaffected, otherwise the manicure will peel off. Acrylic is applied to the surface and smoothed from the cuticle to the extended nail until the entire space is filled.
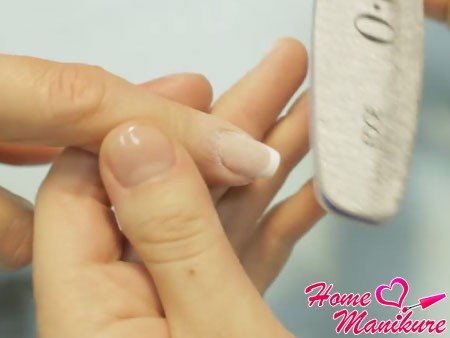
- After application, excess material is removed with a nail file and given the desired shape.
- The buff removes all defects and polishes the extended nail.
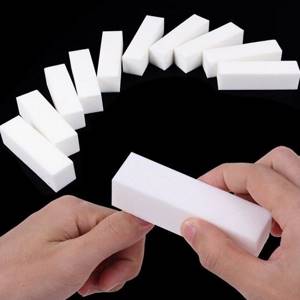
Sanding buff
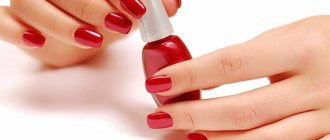
Now you can design your nails. The whole procedure lasts no more than an hour if done in a salon, but at home it will take more time.
You can learn how to tidy up your nails at home step-by-step using both online lessons and courses.
Nail polishing
Correction with acrylic
Always fashionable and attractive, the French jacket is still relevant in 2014. We offer you step-by-step instructions for correcting snow-white ends. Photos will help you better master extension lessons, with the help of which you can create the perfect manicure yourself.
Correction of acrylic nails consists of the following stages:
- After disinfecting the hands of the master and the client, it is necessary to treat the cuticle and remove skin particles from the natural nail.
- Using a 150-180 grit file, treat the area where the artificial ends are peeled off from the natural plates and remove excess length. Now, using a file or a manicure machine with a special attachment, you need to remove 2/3 of the thickness of the artificial ends.
- Next, the acrylic nails are directly corrected by applying a new layer of artificial material, while all stages of extension are followed.
- Using files from 150 to 180 grit, the hardness of which increases during use, a perfectly smooth and shiny nail surface is created.
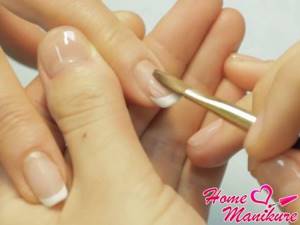
- Next, you need to lubricate the cuticles with oil and, if desired, decorate your nails with a design that is fashionable in 2014.
Watch an interesting video tutorial on how to recreate snow-white tips using acrylic material.
Gel nail correction
Correction of gel nail extensions is a little different. It is better to make baths with salt for your hands on the eve of the procedure and perform all the cleansing and strengthening manipulations. Before starting, treat your hands with an antiseptic and remove the old coating.
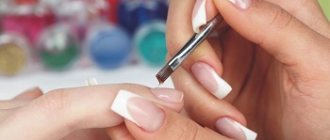
- Carefully push back the cuticle using a wooden stick. Use only an orange stick as shown in the photo.
- File all exfoliated parts with a file (120 grit); treat the area of the natural nail between the cuticle and the extended coating with a file 180 grit. A manicure made from artificial material requires proper treatment, since incorrect treatment leads to thinning of the living nail cover.
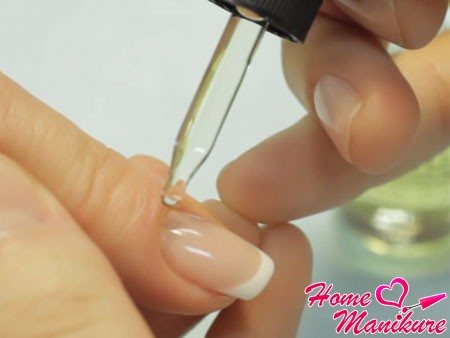
- Before applying the gel, clean the entire surface from dust particles, degrease, and apply a primer to the natural nail plate, which is mandatory for correction. The composition degreases and dries the natural nail well, making the attachment of the gel more reliable.
- After the primer, apply the correction gel to the natural nail, then dry the composition in a UV lamp, which makes the gel hard. Apply a layer of material to the entire extended material. Dry for 3 minutes. After this, you can proceed to a full adjustment.
- At this stage, a design is made and a special oil is applied to the cuticles. Many salons offer lessons in correcting extended nails. You can learn and understand the essence of manicure adjustments by watching a video with a master class.
Bright ideas for French extensions
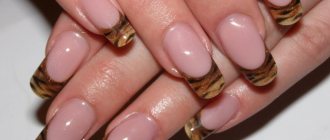
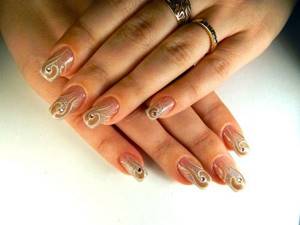
In the presented master class, we looked at the classic design of a French manicure - a soft pink base of the nail and a white free edge. Not all girls are fans of the classics, and many want brighter and juicier options. In the case of French extensions, this is not a problem: you can choose a gel coating of any color that you want to color your smile line. In the photo below you can see the French design in different color variations.
Of course, you can decorate your nail art in many different ways. Your design of French extensions will be perfectly complemented by all kinds of drawings, stickers, rhinestones or glitter. The good thing about extensions is that you choose the length of your nails yourself, which means you can plan in advance the future composition that you want to implement in your nail art. We present to your attention a collection of photos with elegant and stylish options for extended French manicure.
In conclusion, we have prepared another useful video lesson for you, in which Victoria will demonstrate to you the second method of French nail extensions - using laying out. The technology is somewhat different from the option proposed in the master class above, but many masters prefer this method. Evaluate which method is clearer and more convenient for you. The choice is yours. Don’t be afraid to experiment and explore new horizons - you will succeed!
Nail correction using tips
When carrying out the procedure, the question arises: should I remove the base glued layer or leave it? It all depends on the condition of the nail. Sometimes, if the regrowth is strong, it is better to grow the nail again, but if the regrowth is small, then an adjustment is made.
Correction on tips is no different from the usual one. The master looks at the general condition of the nail. If there is no severe detachment, then reconstruction is possible; if the damage is severe, then it is easier to completely remove the old layer, because treatment with tips is more traumatic for the living nail. Grinding and sawing deprives the tips of their strength.
Correction occurs quickly; it is enough to remove the slightly free edge from the extended material with pliers. Before using them as a substrate, you need to shorten the length in advance. The layer of glue between the natural nail and the substrate is not very strong. For good contact, extension technology must be followed. Before work, apply a degreaser to your nails - this will eliminate the need to press the tips tightly to the surface of the nail.
When the tips are glued, they need to be cut to the desired length and slightly processed with a file. Remove dust from the surface, cover the nail with a modeling compound. Treat with a buffer against unevenness, and then begin applying gel or acrylic. Making corrections on tips is much easier than it seems. In general, it is not very difficult to correct extended nails at home, but it is still better to trust the professionals.
In what cases is it necessary
Correction of gel nails involves a technology that consists of a complete or partial renewal of the previous effect. The need to perform it is due to the fact that any natural nails grow over time - for some faster, for others slower, which is why a small gap forms between the gel polish and the cuticle area. It spoils the visual condition of the manicure and puts them at risk of damage.
Correction of nails after extensions or application of decorative coating in the form of gel polish is usually carried out once every 3-4 weeks. However, many girls neglect the master’s recommendations, preferring to update the work much later.
You should not wear the same coating for too long, since as the nails grow over time, the risk zone and the mechanical load on the free edge increase. This increases the risk of spontaneous nail breakage or premature removal of gel polish.
Before you make a nail correction, pay attention to when it is applied, there are four main cases:
- If more than three weeks have passed since your previous visit to the salon, and the nail has grown sufficiently.
- If you don’t like the visual state of your manicure, you want to update it, change the style or design method.
- The gel base has chips, cracks or other defects that look untidy and increase the risk of continued damage to the surface.
- The gel polish has peeled off from the nail bed. Then correction of gel nails is mandatory, since the resulting space creates favorable microflora for the development of pathogenic bacteria, which is associated with increased humidity in it. Because of this, there is a risk of fungal infection.
It is not recommended to do the procedure too often, since any mechanical impact on the plate during removal of previous work negatively affects the health of the stratum corneum. Because of this, the optimal time to update the methodology is 3 weeks.
Girls' gel polish always lasts for different periods of time. For some, the work can remain in the same state for up to a month and a half, and some clients complain that the result fades after just 2 weeks. This is not always related to the quality of the procedure performed by the master, because there are other factors that affect this, including the individual characteristics of the nails and the girl’s compliance with the master’s recommendations. Despite this, you need to choose the frequency of correction after consulting with your specialist.