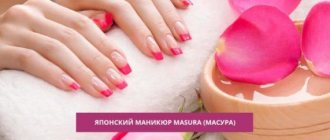
Combined manicure (or combi manicure) has recently become one of the most popular types of manicure among masters. It received the name “combined” due to the combination of different types of manicure, usually two, in the process of performing it. Thanks to this, we ultimately get an aesthetic appearance of nails, well-groomed and healthy hands.
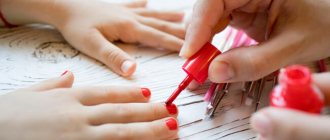
After performing a combined manicure, it is much easier to apply a coating. The most popular now is gel polish coating under the cuticle (close to the cuticle) with or without a design.
It is possible to do a combined manicure yourself at home, but to do this you will need to have a device that costs a lot of money, and learn all the intricacies of using milling attachments. Therefore, this article is more likely for manicurists who are going to work in the combination manicure technique, as well as for those who just want to know whether they should trust her with their nails. Here you will learn about the pros and cons of a combined manicure, its types and stages of implementation.
Peculiarities
A combined manicure combines three nail and cuticle treatment techniques with some differences:
- Combined, unlike hardware manicure , allows you to remove most of the cuticle with an even cut, and only polish it with a cutter. The result is a smooth and aesthetic cuticle, barely noticeable on the back roller;
- Trimming manicure involves removing growths on the side rollers with nippers. After this intake, the skin becomes rougher, and the rate of formation of roughness increases. A combined manicure involves using scissors or nippers only in the area of cuticle growth, and the side ridges are simply sanded with a cutter, remaining smooth until the next procedure;
- European manicure is the most gentle and safe treatment option, but unlike a combined manicure, it will not be able to cope with strong cuticle growths and rough skin.
Combined manicure incorporates the most effective methods of each technique.
Components of variation
Of course, the master decides what components his work will consist of only with his client. But for now we will consider exactly those same components.
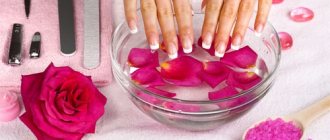
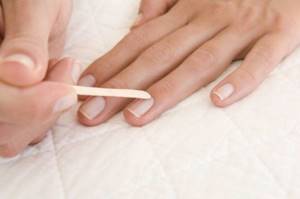
Classical. The most popular method in our country. The skin of the hands is steamed in a warm bath, the cuticles are removed mechanically, and the nails are corrected with a nail file.
European version. Initially, the cuticle is treated with products that contain acids, then they are pushed back with a special stick. After which nourishing creams or oils are rubbed into the hands.
Japanese version. It has a healing effect on the hands and nail plate.

Hardware. It uses a device with special attachments - cutters. Hands are kept dry at this moment.
Spa manicure. Most suitable for women over 30 years old. This is a set of procedures consisting of cuticle removal, chemical peeling, special baths, masks and relaxing massage.
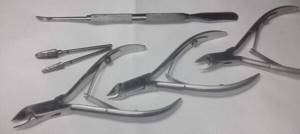
What tools do you need?
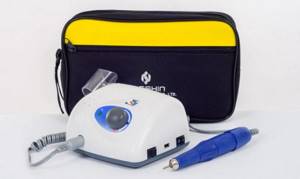
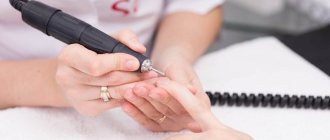
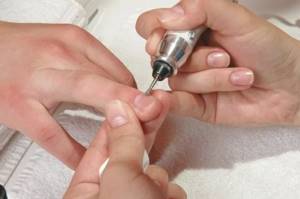
The device is a milling cutter. It is important to pay special attention to the manicure cutter, since the final result depends on its quality. Do not give preference to cheap models - even at high speeds they are inferior to their quality competitors. The minimum power of a good device is 60 watts. For example, the Strong 210/105L milling cutter has 64 watts of power and is equipped with all the modes necessary for a combined manicure.
Top 7 models of devices for manicure and pedicure: select and evaluate
Key rules for working with a router:
- Do not move the nozzle over the same place. As a result of friction, heat is generated, which causes significant discomfort;
- Don't work with your arm suspended. The hand must have a stop in the form of your own finger or the client’s finger;
- Work intensively, but carefully. Slow movements can also cause an increase in temperature and further delay the process;
- Don't be afraid of high revs. The device must be set to at least 17 thousand revolutions. With the correct positioning of the hand and the inclination of the nozzle, high speeds will not cause any unpleasant sensations.
Milling cutter The “Flame” cutter with a red abrasive ring with a diameter of 23 mm is ideal for a combined manicure. This attachment is universal and suitable for working with cuticles and treating periungual skin. All manufacturers conventionally mark the hardness of the nozzle with a corresponding colored ring under the tip:
- The yellow cutter is very soft;
- Red – soft;
- Blue – medium;
- Green – rough;
- Black is very rough.
When choosing a cutter for a combined manicure, pay attention to the shape of the tip. The same cutter from different manufacturers can differ in shape and length, while still having the same diameter.
Milling cutters for the device: types, purpose, how to choose and use in manicure and pedicure
The tip itself can be divided into three parts:
- The belly is the most convex part of the nozzle with the largest diameter. Depending on the shape of the cutter, the belly can be exactly in the center or shifted to the base of the tip;
- The nose is the narrowest, pointed part;
- The cheek is the transition of the cutter from the belly to the nose.
The most convenient and safe cutter has a symmetrical shape without displacing the widest part of the tip towards the base. The tip of the cutter should be pointed.
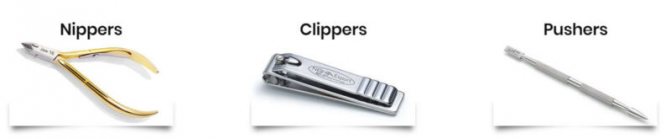
Pusher. When choosing a tool for a combined manicure, pay attention to its overall length - a base that is too long makes work difficult and forces the hand to take an unnatural position. It is better to give preference to shortened options with a blade that is not too wide, for example, Mertz.
Types of pushers - comparison, characteristics, operating rules
Nippers or scissors. What to give preference to – decide for yourself. Pay attention to the Nghia brand, which offers high-quality tools with good factory sharpening.
Nippers for manicure and pedicure - types, brands, selection criteria and operating rules
Nail scissors - types, proper use, choosing the best
Result
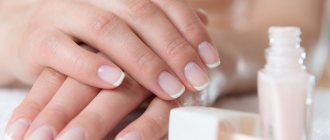
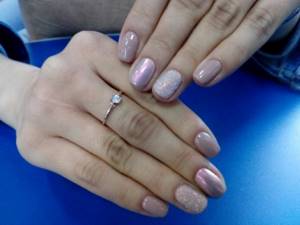
The result is beautiful and well-groomed nails, which you can cover with varnish or leave as is in their natural form.
Precautionary measures
- Regardless of where you perform the procedure, at home or in the salon, use an antiseptic before starting work.
A combined manicure involves working with clippers, which means it is necessary to minimize the risk of infection. How and with what to disinfect, sterilize and clean manicure instruments - Perform manicures only on healthy nails. The work of a cutter, pusher and nippers is relatively safe, but still affects the nail. When a gash forms or a wound appears, it is unknown how the disease will react;
- Do not use tools after they are dull and do not neglect their treatment. The only exception for sterilization will be paper-based files, which, in fact, are a disposable instrument. Cutters, nippers and pushers must be processed, even if used for home combined manicure.
Advantages and disadvantages
A combined manicure has undoubted advantages and has a number of disadvantages.
pros
- Gives you the opportunity to choose individual care .
If a girl is against having her cuticle cut, but all other cutting manicure techniques are acceptable to her, then, in this case, the master can offer a combined manicure, in which the cuticle will be treated with fruit acid, which softens it. An experienced master can develop an entire individual program suitable specifically for the nails of a particular client. Conventional manicure options cannot provide such opportunities. - Has a wide degree of variability . Allows you not to limit yourself to any one technology, but to take the best from several at once.
- As a result of a combined manicure, your nails receive exactly the care they need , and therefore look their best. Moreover, the result of care lasts for a long time.
Minuses:
- In order to do such a manicure at home, you will have to purchase more products and tools than when choosing one standard type of manicure.
- You will need to try several different options before finding the perfect one. Perhaps the first few may not be entirely successful.
- A full-fledged combined manicure takes more time than a regular manicure, especially if you do it yourself.
Execution steps
Working with the cuticle
For work, a pusher is used to separate the pterygium from the nail plate and form a small pocket under the cuticle.
- Place the pusher on the nail, resting its tip against the layer between the cuticle and the nail at an angle of 30-40 degrees;
- With light pressure, push the growth towards the base, slightly lifting it from the nail plate;
- Check for a pocket. A gap should form between the nail and the cuticle;
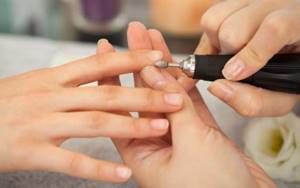
- Take the handle of the manicure machine with the “Flame” attachment and set it to at least 17,000 revolutions. The lower the number of revolutions, the more effort you will have to put in;
- Place a cutter into the gap between the cuticle and the nail. For comfort and safety, the cheek of the nozzle should fit snugly against the nail and be parallel to it. At this stage of manicure, the main task is to clean the pterygium from under the cuticle. Perform all actions not with the tip of the cutter, but with the cheek. While moving inside the gap, monitor the position of the cutter - from one edge of the base to the other, the nail bends in an arc and the nozzle of the device should exactly repeat this bend;
- Brush off any accumulated dust and check the gap for any remaining build-up. An ideally cleaned pocket should be shiny and pinkish;
- Smoothly move from the base of the nail to the lateral sinus. It is located at the junction of the roller and the nail towards the ingrowth point. In this case, the cutter must turn along with the nail, otherwise a cut is inevitable in the sinus area.
Lateral sinus
- Place your hand on the table, palm down. With the thumb of your free hand, pull the side cushion and check the lateral sinuses for the presence of non-standard growths;
- If you detect deviations and extensions of the nail plate towards the side ridges, clean them with a cutter, in the same way as you file down the length of the free edge. Don’t try to thin out this growth - in 90% of cases the attempt ends in uneven thinning and cuts. The ideal result is smooth edges of the nail plate, clearly parallel to the central axis of the nail. The central axis of the nail plate is an invisible line running from the base of the nail through its center to the end of the free edge. Visual separation by such a strip divides the nail into two symmetrical parts.
- Having eliminated the growth, check for the presence of ptegria in the sinuses and, if found, clean it with the cheek of the cutter and remove the remaining residue with a brush. Be sure to check the junction between the cuticle area and the lateral sinuses - there should not be any skin residues there.
- Use the flat of the cutter to carefully, barely noticeably move across the area of the nail plate to remove any remaining growths.
Side bolsters
In this zone, forget about the orientation to the cheek - the removal of the stratum corneum from the skin of the side ridges is carried out with the belly of the cutter, while the nose hangs in the air and does not touch the surface. First, all 10 nails on the right side are processed in the “Forward” mode of the device, then all the left sides are processed in “Revers”.
- Place the cutter on the right side roller at the base of the free edge and work the skin with light dotted movements towards the base;
- Remove the “dry path” that appears with the same cutter, moving in the opposite direction;
- Change the direction and angle of the nozzle, again moving across the surface with light movements. Repeat this step several times, constantly changing the angle and direction. Since everyone’s skin pattern is individual, there is no universal technology for removing the rough layer;
- Finish all 10 fingers on the left side, switch the machine to reverse mode and repeat the steps for the left rollers.
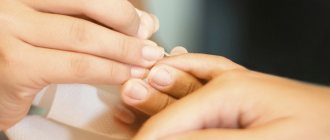
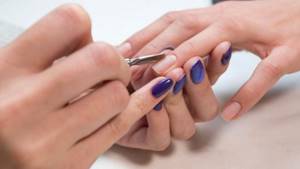
cuticle cut
You can cut dry cuticles with scissors or nippers. Both options are equally effective and acceptable in a combined manicure, so give preference to the tool that is more convenient for you.
- Place the nippers at the edge of the cuticle, placing the blades so that the cuticle is between them;
- Check that the closure line of the cutting part is clearly parallel to the nail plate. Otherwise, you can leave uncut pieces or provoke the appearance of burrs;
- Close the blades. After making a cut, do not open the cutting part and take it out of the zone when closed;
- Using the thumb of your free hand, make a circular motion at the cut site to lift the already separated cuticle;
- Place the tool so that the end of the previous cut becomes the beginning of a new one and repeat the procedure;
- Repeat these steps until you have treated all your nails.
Grinding
Use the same “Flame” cutter to process the cut areas. The most important thing is not to press the nozzle. The movements should be barely noticeable, tickling. Any pressure on the tip will result in a bleeding wound. As with the processing of side rollers, all right sides are sanded at “Forward”, and all left sides at “Revers”.
- Place your hand at face level to clearly see the area under the cuticle and with a light, tickling movement, sand the base of the nail and the cut line;
- Move to the right side roller and lightly treat the skin and the area of the lateral sinuses;
- Don't forget to pay attention to the area under the free edge;
- Repeat the steps for all 10 fingers, switch the mode and process the left side rollers.
After sanding, remove the dust with a brush and proceed to coating; if it is not planned, lubricate the cuticle with oil.
Hardware manicure with one cutter: how to do it, choice of attachment
Manicure for neglected hands: how to quickly get them in order
Dry, cracked cuticles, rough skin and broken nails of varying lengths look extremely unattractive. In addition, this condition of the hands can be dangerous to health; small wounds become open gates for infection. An express method that combines the best techniques from classic edged and European manicure can help.
Before you start treating your skin and nails, you need to prepare everything you need:
- ceramic or glass files of various grain sizes;
- cuticle nippers;
- liquid for softening periungual ridges;
- hydrogen peroxide;
- metal pusher;
- polishing block;
- nail polish remover;
- hand bath;
- any essential oil;
- shower gel or liquid soap;
- nourishing lotion.
To achieve optimal effect, you need to act step by step. First, remove any remaining polish from the nails using a liquid that does not contain acetone. The hands are then placed in a bath of warm water, a small amount of shower gel and a few drops of lemon, rose, sweet orange or tea tree oil. After 5 minutes, wipe the brushes with a soft towel.
An acid-containing liquid is applied to the cuticle area. After 1 minute, the skin is moved with a metal pusher, and the excess is cut off with pliers. Burrs are carefully removed, and accidental cuts are disinfected with hydrogen peroxide.
You can avoid painful tears by cutting the cuticles in one confident motion and holding the tweezers at an angle.
The nails are shaped using nail scissors, and the final finishing is done with fine-grained files. The surface is thoroughly polished with a polisher, then a portion of moisturizing lotion is applied to the brushes and thoroughly rubbed into the rough areas.
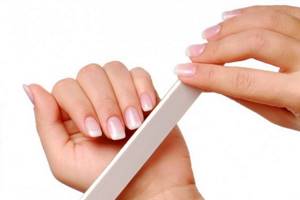
You can shape your nails with a fine-grained cardboard or ceramic file.
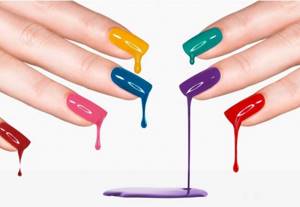
The final stage is coating. Those with perfectly smooth nails of a pleasant pink color can limit themselves to polishing or transparent colorless varnish. However, many people like a more refined finish. The classic option is red varnish or gel, suitable for any plate shape. The drug is applied in 2-3 layers, drying each layer thoroughly. A layer of top coat with a glitter effect will help preserve your manicure for a week or longer.
Common mistakes
- When cleaning the pterygium under the cuticle, it is strictly forbidden to tear the cheek of the cutter from the nail. The slightest change in the angle can cause a groove in the plate to be cut, which will grow together in about 6 months.
- Be careful when checking the pocket under the cuticle for remains of the pterygium. The resulting gash, which you might not have noticed, as well as the skin growth, will have a whitish tint. When you try to file down what appears to be a growth, you risk filing down the nail even more and deforming the nail plate.
- If at the grinding stage a large uncut piece of cuticle is discovered, it is better to remove it with scissors or nippers. Grinding with a milling cutter will be long and not very pleasant.
Hardware manicure - answering frequently asked questions
Combined manicure, the procedure is not as complicated as it might seem - the most important thing is to find your tools and a comfortable position for your hand.
The result of the treatment will be a clean, shiny nail, neat cuticle and velvety skin on the side ridges. Which manicure do you prefer? Comment
Benefits of a combined manicure
The growing popularity of combined manicure is explained by the fact that it allows you to create brighter, new, unique images that will definitely be different from many others.
It should be understood that several shades and materials can be combined in combination on the nail plate.
- In fact, the more shades and materials, the better and more unique the design will be.
- However, in practice it is clear that too many elements on the plate have a detrimental effect on the overall appearance of the nails, so it is necessary to think through the design in advance.
- Using a large number of shades and materials is only possible if very little space is allocated to each of them individually, and together they represent a kind of puzzle. In this case, they will look harmonious and beautiful.
And if you simply use a lot of colors, placing them one on top of the other, you will not be able to achieve a beautiful appearance of your nails, and besides, this will have a detrimental effect on their health, which also needs to be taken into account.
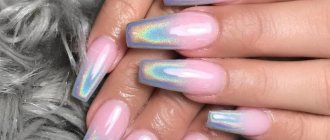
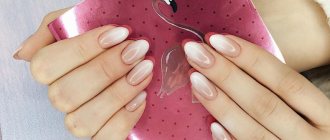
Photo selection of manicures with a combination of different decorative designs
Modern nail design is replete with a variety of decor and patterns, from the simplest to the technically complex. We hope that among the selected new designs you will certainly find your ideal manicure option for everyday and spectacular holiday looks.