There has been a discussion among nail service professionals for quite some time about how to properly do a manicure - with or without scissors (video lessons of the first type of manicure will be given in this material). It is believed that the traumatic nature of classic manicure is extremely high. However, it looks much neater and more durable than the European one. In addition, trimmed manicure is the choice of hygiene connoisseurs, since it is guaranteed to remove old epidermis and other dirt from under the cuticle. Whereas the unedged one simply moves it all off the plate.
[yandex1] [google1]
What is a classic edged manicure?
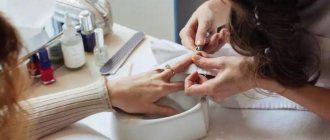
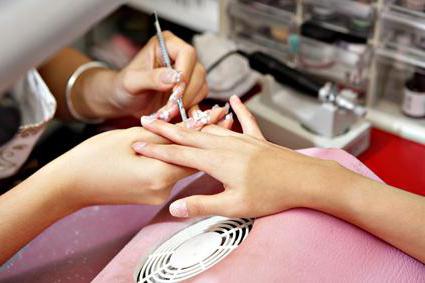
Trim manicure is a classic type of nail care that involves removing the cuticle from the surface of the nail folds. The procedure is carried out with preliminary steaming of the keratinized layers of skin around the nail in warm water, which is why this method is called “wet” manicure.
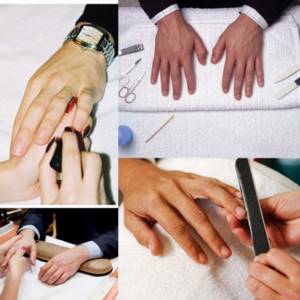
Classic trim manicure is done in the same ways for both men and women.
A classic manicure prepares your nails for further application of any coating. Trim manicure is carried out even when the nails are in poor condition. Treating your hands with nourishing products after a session is comparable to spa treatments, because it has a positive effect on the surface of the nail and cuticle.
Advantages of the method
Trim manicure is a classic manicure method.
Compared to other types of nail care, it has many advantages:
- Efficiency. By trimming the cuticle, your nails retain their presentable appearance much longer.
- Execution speed. The complete classic manicure procedure takes no more than 30 minutes.
- Versatility. Trim manicure has no contraindications. It can be done by both men and women.
- Additional hand care. The use of baths with beneficial ingredients has a positive effect on the skin of the hands and strengthens the nail plate.
- Manicure can be combined with other caring procedures , such as paraffin therapy or peeling.
- The procedure is carried out not only in salons, but also at home , subject to mastery of the technique.
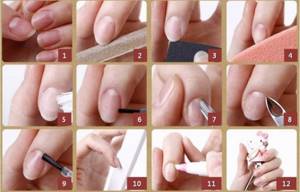
Step-by-step instruction
There are instructions on how to properly perform a trim manicure.
1. Shape your nails:
- Excess length is removed, nails are trimmed to a harmonious size.
- The side edges of the nails are filed according to the chosen shape (square, oval, almond-shaped).
- The corners are smoothed and sawdust (irregularities under the nails) are removed with a brush.
2. Add liquid soap and, if desired, bleaching salt to the bath and place your hand in it.
3. Take out your finger and dry it with a towel:
- The proximal ridge is deviated.
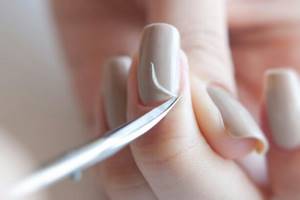
- The pterygium is cleaned with a scraper, carefully removing it from under the cuticle. A “pocket” should form, that is, the skin does not stick to the nail plate, but covers it.
4. Cut the cuticle with scissors or tweezers. In corners where the bead is rounded, lift the tool vertically to make small cuts without causing damage.
Then the operation is repeated with other nails.
Flaws
The main disadvantage of trimmed manicure is the possibility of skin damage during cuticle removal. In this regard, many clients abandon the classic manicure in favor of the European one.
Improper handling of instruments can lead to HIV or hepatitis infection. Therefore, some people prefer to perform trimmed manicures themselves in order to monitor the quality of disinfection of manicure accessories.
Nail service specialists do not recommend getting a manicure if:

- inflammation of nails and nail folds;
- fungal diseases;
- wounds and cuts;
- decreased blood clotting;
- diabetes mellitus
Differences from hardware manicure, European
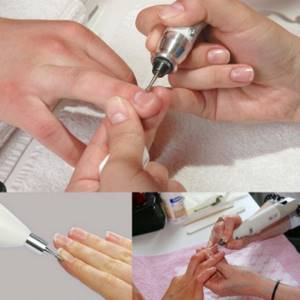
Hardware manicure is performed with a special device with a set of various attachments designed to treat the nail and cuticle. This device is used in beauty salons, since working with it requires professional skill.
It is suitable for various types of coating, including gel polish. A manicure takes less time, and the speed of cuticle regrowth will allow you to schedule the next session no earlier than in 2 months.
When performing a hardware manicure, you do not need to soften the cuticle in the bath in advance, but only lubricate it with a special gel, and then remove it with one of the attachments of the device. Polishing the nail plate and length correction is also performed by the device in a few seconds.
The disadvantage of this method is its pain. Due to the high speed of the mechanism, unpleasant sensations are possible due to the nearby nerve endings in the nail. Therefore, you should not purchase a device for hardware manicure to use it at home.
European manicure is a method of nail care without the use of scissors and clippers.
When executing it:
- The length of the nail is adjusted using files;
- the cuticle is not removed, but softened, and then pushed to the edge with a pusher or an orange tree stick;
- The possibility of infection from a poorly processed instrument is practically excluded.
Its main disadvantage is that to maintain a presentable appearance, it is necessary to constantly moisturize the cuticle with cream or oil. For this reason, the service life of European manicure is short. It needs to be updated after 5-7 days. Trim manicure is considered the most universal method that allows you to quickly and painlessly give your hands a well-groomed look.
How to choose a manicure set?
Trim manicure can be performed either with separately purchased tools or with tools from a set.
Basic recommendations for choosing a manicure set:
- You should purchase sets of proven brands - low-quality tools have a short service life and can cause injury.
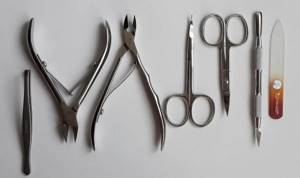
- Sets of 4-7 items are preferable. They must include the following tools: file, pusher, nippers, manicure scissors, scraper. With experience will come an understanding of which tools need to be purchased individually.
- It is preferable to set the components of which are made of medical steel.
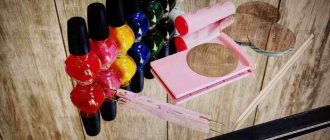
Required Tools
Trim manicure, the classic version of which involves removing dead skin from the nail folds, requires a certain set of tools. They are used to polish nails, shape them and trim cuticles.
Basic accessories for trim manicure:
- scissors or tweezers;
- wire cutters;
- cuticle pusher;
- buffs for polishing;
- files with the required level of abrasiveness;
- brush for removing dirt;
- steam bath.
The hardness of the file should be selected depending on the thickness of the nail and the desired functional use. To correct the length, a tool with an abrasiveness of 200-400 grit is suitable, and for polishing a hardness of 900-1200 grit is sufficient.
It is best to choose ceramic, plastic or glass files. They carefully file the nail without damaging the plate. You should not purchase metal files, which lead to delamination and brittleness of the nail.
To apply drawings and create nail designs, you will need additional tools:
- Dots are a metal or plastic stick with a spherical tip for depicting dots and circles.
- Brushes of different thicknesses - for drawing details and performing a French manicure.
- Stamps and plates with designs (stamping kit) – for applying ready-made images to the nail.
Covering the nail involves applying varnish of one or more colors, a base for the varnish and a fixative. Sometimes a liquid is used to quickly dry the varnish, but in the case of a regular coating it may not be useful.
It is also necessary to have acetone to remove any remaining polish from your nails. To care for the skin of your hands after completing the procedure, you will need cream and cuticle oil.
Let's get to the main point
The preparatory work is over and we begin to create beauty on our hands.
First, let's apply the base. The base layer strengthens or vitaminizes the nails (depending on which one you use). In addition, it provides an even coating.
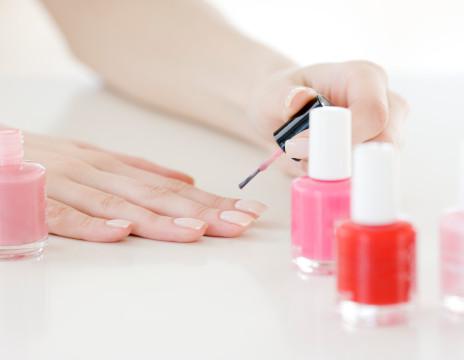
We begin to apply varnish. It's better to paint the nails of your dominant hand first. And that's why. If you are right-handed, then painting your right hand will be awkward. As a rule, in this case the layer turns out to be thick, and the color, accordingly, is more saturated. Starting with your dominant hand, you can adjust the layer thickness with your second. Thus, the manicure on both hands will not be different.
It is advisable to start painting your nails from the little finger. This way you won't smear the polish on the rest of your nails.
Finally, you must apply a sealing layer to your nails. In this case, the manicure will please you longer. And don't forget to apply cream and moisturizing cuticle oil to your hands.
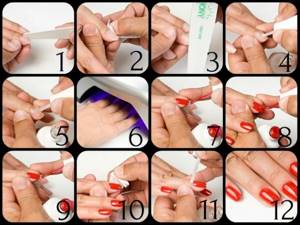
Execution technology: step-by-step lesson for beginners with photos
Those who decide to master the technology of classic manicure should remember that practice is important to achieve the desired result. After the 5th session, the skill will be developed sufficiently so that you are not afraid of damaging the nail plate.
It is important to study in detail the sequence of each step and be extremely careful when working with tools. A trimmed manicure done at home will not only save money, but also eliminate the risk of infection.
Before you start working, you need to organize your workspace. It is enough to lay out a towel or napkin on the table, and also take care of good lighting.
Even if one person uses a set of manicure tools, it is necessary to disinfect it with alcohol or an antiseptic before the session. They should also treat their hands, especially the cuticle area.
Step 1: Removing the Coating
Depending on the type of coating, various manicure removers are used. Regular varnish can be removed with acetone or its mixture with glycerin.
Some people prefer to use removers that do not contain acetone, but they do not always cope with thick coatings or varnish with added glitter.
Step 2: Creating a Nail Shape
Correction of nail length is carried out using scissors and a file. The movement of the scissors should be sharp and clear in order to remove the overgrown edge in one movement. This technique does not violate the integrity of the nail plate and does not lead to delamination. Nails should be filed at an angle of 90°, without chaotic movements. The tool should be directed in one direction - from left to right.
It is better to start the process from the edges of the nail, and finish it by filing its middle. First you need to treat the nails of the little fingers, gradually moving towards the big fingers.
After adjusting the length, you should place the file under the nail and make a few more movements with it to remove possible nicks.
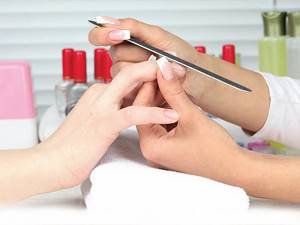
When the desired shape and length of the nails have been selected, the plates should be treated with a polishing buff to give them shine and shine. This step also helps the varnish finish smoother. It is important to perform these steps on completely dry hands, otherwise your nails may begin to peel.
Step 3: Steaming
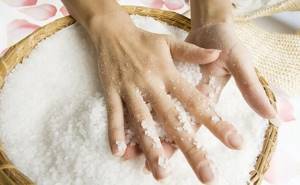
To soften the cuticle, you need to make a nail bath. Sea salt or other components that strengthen the nail plate are dissolved in warm water. If there is dirt, you can add a little soap.
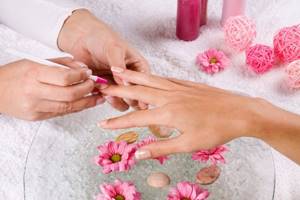
The steaming procedure should not last more than 5 minutes, as this time is enough to soften the skin . When the cuticle is steamed, you should treat the surface of the nail, as well as the area under it, with a brush. Dry your hands with a cotton or paper towel so that no moisture remains on them.
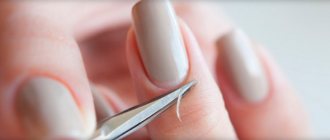
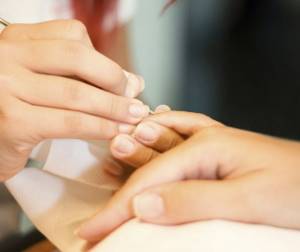
Step 4: Cuticle Work
Before trimming the skin, you need to push back the edges of the cuticle with a pusher. This is a double-ended instrument with a round and sharp tip. The round side is used to treat the skin below the nail hole, and the pointed edge pushes the cuticle away from the side ridges of the nail.
You need to work with a pusher extremely carefully, without pressing on the nail, as the tool can damage its surface and lead to scratches and microcracks.
When the cuticle no longer adheres to the nail, it needs to be trimmed with clippers. To avoid damaging the skin, the movement of the instrument must be continuous and confident. If you do not follow this rule, hangnails may appear. To avoid cuts, do not grab too large an area of the cuticle with the nippers.
Don't miss the most popular article in the section: How to draw monograms on nails step by step for beginners. Instructions with photos.
Step 5: Nail Covering
To protect and even out the nail, you need to apply a base before applying varnish. Next, varnish is applied. You need to start coating on the left side of the nail, and with 3 strokes of the brush, completely paint the entire area of the plate.
Finally, a fixative is applied to give the nails shine and protect them from chipping. The last stage of a classic manicure is the application of hand cream and cuticle oil.
What should be on hand
First of all, these are sharp manicure scissors and a nail file. No woman's cosmetic bag should be without them. Try to choose a glass or plastic file; they are less damaging to your nails.
For trim manicure, metal tweezers are simply necessary. With their help we will subsequently remove the cuticle
When purchasing, be sure to pay attention to what material they are made of. Surgical steel will remain sharp for a long time
How to choose a tool for manicure and pedicure
We will need a metal spatula to push back the cuticle. Some people use an orange stick instead.
We will also need various bath products. Which ones specifically are up to you to decide. These can be various oils, sea salt and much more.
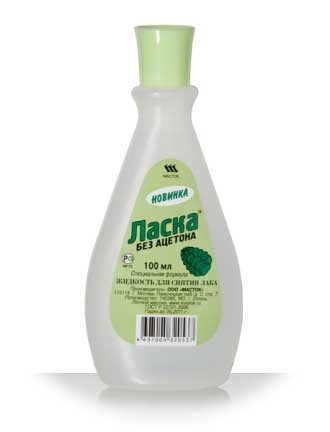
Choose nail polish remover without acetone. This way we will damage the nail plate less. You can add a little glycerin to a regular liquid containing acetone and save your nails from dehydration.
Cotton pads (balls, just cotton wool) are indispensable assistants when removing polish from the nail plate and around. For more “jewelry” work, you can use cotton swabs. In stores you can easily find a special correction pencil. It's a pleasure to use.
We will also need cuticle remover, cuticle oil, hand cream, base coat and nail polish fixer.
Classic dry manicure with gel polish: features, technique
Trim manicure is a classic method of nail care, in which the skin of the hands is pre-steamed in warm water. This technology is not always used before applying gel polish. Instead of softening the cuticle with water, use a gel to remove it.
It is applied to the nail folds and after the specified time, the cuticle is pushed back to the edges of the nail with a pusher or an orange stick. Therefore, this method of manicure is called dry. Compared to a regular product, gel polish (or shellac) lasts from 2 to 4 weeks, and the technique of applying it has its own characteristics.
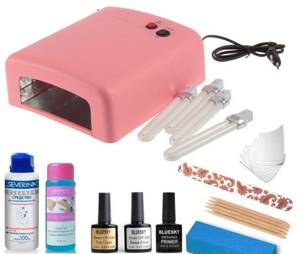
Set of tools for work:
- fine-grained buff;
- cuticle pusher or orange stick;
- cuticle softening gel;
- lint-free wipes;
- degreaser;
- primer;
- base;
- gel polish;
- gel polish remover;
- finish(top);
- foil;
- sticky layer remover;
- cuticle oil;
- Ultraviolet lamp;
- cotton pads.
After shaping the nails and processing the cuticles, it is necessary to sand the nail plate with a buff.
Then the nails need to be degreased using a lint-free cloth, primer and base coat are applied. After applying each layer, dry your nails under the light of an ultraviolet lamp.
When choosing a lamp for baking gel polish, you need to pay attention to the features of UV and LED devices. They differ not only in the sealing time of the varnish, but also in other characteristics.
| Lamp type | UV | LED |
| Power | 36 W | 3 W |
| Drying time | 180 sec | 60 sec |
| Gel polish drying time | 2-3 min | 30-60 sec |
| Life time | 6 months (lamp replacement) | 50,000 hours |
Cover the nails with colored varnish in 2-3 layers, also drying each of them with ultraviolet light. Typically, drying takes no more than 2 minutes, depending on the manufacturer of the gel polish. It is important to lubricate the end parts of the nail well so that the manicure lasts longer without peeling or chipping.
The coating is fixed with a finishing agent, and then the sticky layer is removed using a napkin. This step promotes adhesion of all applied layers to each other. The last step of the session is to oil the skin around the nail. If handled correctly, a manicure coated with gel polish will last about 3 weeks. This period also depends on the speed of nail growth.
During manicure correction, the previous coating is removed, which is also done differently than with the classic trimming method. To do this, you need to thoroughly moisten a cotton pad with gel polish remover, apply the disc to the nail and wrap each of them with foil.
After 15 minutes, massage the nail plate and remove the foil and cotton wool. The remaining coating is carefully removed with a pusher.
Criteria for choosing a device for manicure at home
So, you have decided to purchase a router for home use. How to choose the right option?

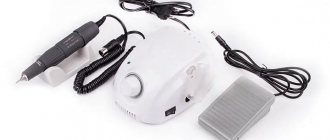
Professional device for performing hardware manicure
Don't go for professional devices. While you are just starting out and you only need to purchase a machine with a speed of 20,000 rpm and a power of 40 W
If you are planning to do a pedicure, then you should pay attention to machines with a power of 40 - 60 W and a rotation speed of 30,000 revolutions. When purchasing a router, focus on the average price range. Expensive models are intended for professional use, or contain many unnecessary functions and attachments
Cheap models can quickly fail. And even more so, under no circumstances purchase manicure machines from Chinese websites. As a rule, they are all of low quality, they have poorly secured cutters, which are also poorly processed, such machines do not have switching modes - all this can cause harm to your nails. When choosing a machine, pay attention to the convenience of the tools, how the router fits in your hand, whether it is too heavy or, on the contrary, light for you. Based on your personal feelings. Don't chase too many cutters. As a rule, 5 attachments will be enough for you.
You will learn more about the main types of cutters for performing hardware manicure from the video training.
French manicure with shellac
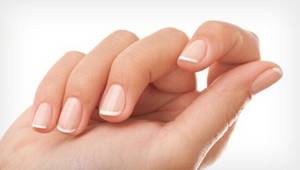
French manicure is one of the most popular types. This is a classic manicure and will suit any situation. French involves painting the tip of the nail with white varnish, and applying a neutral shade to the remaining nail plate: beige, pink or clear varnish.
The processing of plates is carried out in the classical way. It is not necessary to use a buffer for this type of coating, since shellac has excellent adhesive properties. Apply a thin layer of primer and base to oil-free nails, and then dry them under a lamp.
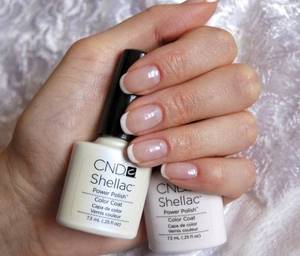
Then apply the colored coating and bake it for 1 minute. Use white shellac to paint the tip of the nail. This should be done in 2 layers, not forgetting to dry the nails under ultraviolet light. A top coat completes the French manicure procedure.
Don't miss the most popular article in the section: How to extend nails with gel polish. Nail extension instructions for beginners. Photo.
How to avoid hangnails
Hangnails are particles of skin that have peeled off on the surface of the nail fold.
They can appear for several reasons:
- Dry cuticles caused by overuse of harsh chemicals found in detergents.
- Incorrect technique for performing trim manicure. Cuticle removal should be done smoothly and continuously to avoid ragged edges.
- Filing nails from side to side, as well as using metal files.
- Poor circulation caused by aging processes.
Hangnails bring discomfort, and often inflammation and abscess appear in their place.
Following several important rules will help prevent their occurrence:
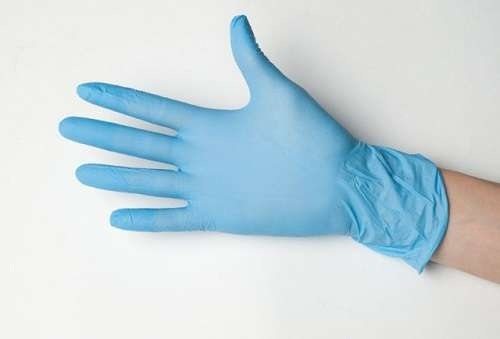
- It is mandatory to use rubber gloves when working with any types of household chemicals.
- Technically correct execution of trimmed manicure with a well-sharpened tool.
- Using oils and creams to moisturize the skin around the nail.
- Massage cuticles and nail folds to improve blood flow. You can do it yourself.
To achieve a positive effect, self-massage should be done 2-3 times a day. It will take no more than 3 minutes. The massage should begin with light stroking of the hand, and gradually move on to kneading the fingers. It is enough to repeat this action 4-6 times.
Rubbing the phalanges of the fingers is the main element of self-massage. To do this, you need to clench your hands into fists and alternately rub the phalanges against each other. The massage ends with the application of nourishing cream.
Regularly performing this procedure has a beneficial effect on the appearance and health of the nails, and also prevents the appearance of hangnails.
Advice from experts on hand care after a manicure
A manicure will last much longer if you properly care for your hands after the procedure.
Nail service experts advise following a few simple recommendations that will help maintain the beauty of your nails:
- On the first day after a manicure, if possible, you should avoid contact with warm water and steam. Therefore, it is better to avoid visiting a bathhouse or sauna, as well as washing dishes.
- To avoid chipping or peeling of the gel polish, all housework should be done with rubber gloves. Household chemicals and too hot water dry out the skin of your hands, which negatively affects their appearance.
- It is not advisable to file coated nails yourself. This opens the sealed end of the nail, which will certainly lead to a violation of the integrity of the manicure.
- Removing gel polish yourself must be done extremely carefully. You need to use only a specialized product that softens the coating well. Excessive pressure with a pusher while removing polish residues leads to damage to the nail plate.
- Manicure correction should be done every 3-4 weeks as the nail grows.
- To soften the skin of your hands, it is better to choose nourishing creams containing fatty oils. Light fluids do not sufficiently moisturize the skin and evaporate quickly. You need to renew the cream after each hand washing.
- Before going to bed, you need to lubricate your cuticles with oil. This will help prevent dryness and improve blood circulation.
- Regular exfoliation of dead skin particles using peeling or scrub will give your hands a well-groomed appearance.