Beautiful ladies have long appreciated the unique feature of French manicure - it can universally adapt to any look. French looks great on nails of any length and shape, looks sophisticated, elegant and is constantly being improved. Today in the nail industry there are dozens of varieties of French, including the classic version, colored French, French with decor, with glitter, wedding, twist and many other ideas. Depending on the technology of execution, manicure is divided into two types: drawn and laid out, and the latter option will be the topic of discussion in our review today.
Features of the laid-out jacket
The laid-out French also has the name “joint to joint” and characterizes this design with a very neat nail architecture. The essence of the French manicure technique is to model and lengthen the nail bed using special materials and then create an even smile line with a nail file or a router. The camouflage gel, paste or powder used in the process perfectly hides all flaws in the form of cracks, bumps and deformed areas of the surface. The shape of the nail and the line of the smile are selected individually to suit the thickness and length of each lady’s finger, which makes this type of manicure universal.
Video tutorial on how to do nail extensions and the perfect French design at home
The master tells how to make French nail extensions using acrylic and special forms for a perfect smile. Yes, they exist, reusable metal molds that fit every nail size perfectly. A few practiced movements, and from under the hand of the master comes the perfect blank for a French jacket . Such informative lessons with videos for beginners are an ideal guide for those who want to master French nail extensions in the shortest possible time.
Which type of French manicure do you like most? Perhaps you have your own favorites? Write comments, we will be grateful to you.
Benefits of manicure
French manicure has a number of convincing advantages that only strengthen its popularity among clients of nail salons. After completing the procedure, your nails remain quite strong and retain some flexibility, which allows you to confidently withstand average mechanical loads. French is universally suitable for any shape and looks great on natural and extended nails. The time between corrections depends entirely on the natural growth rate of the young lady’s nails. When performing a manicure, in addition to the classic version, the master can design an art jacket or beautifully complement the design with decor or a pattern.
Photos
Preparation
Girls or women who come to a beauty salon for the first time to get their hands in order very often do not know how such an extension procedure as creating a French extension goes.
That’s why they “prepare” their nails at home on their own, so as not to “disgrace themselves” in front of the master. This is their biggest mistake! After all, only a professional manicurist can determine the correct shape and length of nails, ideal for nail extensions .
Therefore, at home, before going to the salon, you don’t need to do anything with the nail plate or cuticle; you just need to get rid of the dirt under your nails and soften your hands a little with cream.
How to create a laid-out French jacket
It is perhaps difficult to identify several other types of manicure, besides the laid-out French manicure, which, like it, are universal and suitable for everyone without exception! After all, young girls can rely on length, unusual shape and bright design . For example, they can paint the tip of the nail black and give the nail plate a “stiletto” shape.
Middle-aged women can focus on strict shapes and medium length . For example, any office worker will appreciate a neat white jacket that decorates square or almond-shaped nails.
And women from the “50+” category will definitely like a royal and laconic manicure based on a minimum length and white color.
How is a laid-out French jacket created?
At the request of the client, the master can decorate the nails with any type of nail art until the final stage. In particular, sparkles or rhinestones can be glued to the nail plate or a design can be applied.
A laid-out French manicure is not the type of manicure that you need to “shake” over all the time. When done correctly, extended nails are strong enough , which allows them to withstand average mechanical loads.
At the same time, the duration of wearing this type of jacket directly depends on the growth rate of the nails of a particular representative of the fair sex and on her ability to take care of her hands. But most girls wear this “decoration” for at least 3-4 weeks .
Source
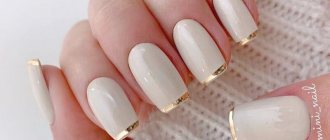
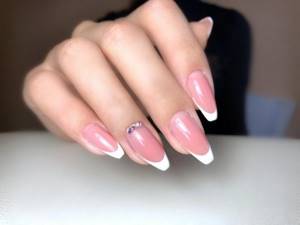
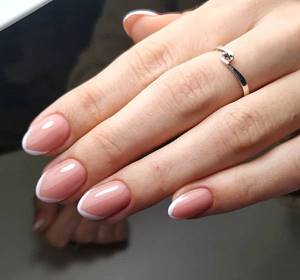
Classic French manicure
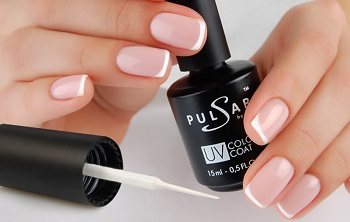
The design of a classic French manicure is an elegant combination of a snow-white tip on the nail plate and a base coat close to the natural shade. A laid-out manicure allows a young lady to independently choose the length of her nails and not doubt that it is perfect. A classic French jacket ideally complements both strict and romantic looks and, if desired, can be complemented with a neat pattern or decor.
Setting up the form
The form is set. Ideal modeling is only possible with the correct setting of the template. The template plays the role of a pattern for a future manicure. Since everyone's nails have different shapes, the template needs to be adjusted to the specific type. From the application form, you need to cut out a template that best suits the shape of the nail type. It is inserted under the free edge of the plate, tightly adjacent to the skin. A correctly installed template resembles a tube sticking out slightly upward. This installation will allow you to simulate a thin but strong nail. The longer you plan to grow the nail, the smaller the angle of inclination of the form should be.
Reverse French
This type of design is characterized by the reverse location of the smile line, which originally moved from the tip of the nail plate to its base. For decoration, shades identical to the classic French jacket are usually used, but variations of brighter colors look no less attractive. Many masters also often use shiny varnishes to highlight the reverse French manicure or combine both smile design options in one manicure.
Spicy
Despite the fact that the classic shape is more preferable (square, oval, almond), some fashionistas choose a sharp one. This form has been popular for several years. The sharp form is preferred by many singers and public figures.
A sharp French jacket attracts attention, showing the eccentric and slightly daring character of its owner.
But for everyday wear it is not very comfortable. Nails often break and it is inconvenient to do household chores with them. Design variations give room for imagination: white varnish can be combined with black, or any other colors. It is also possible to apply various patterns or decor.
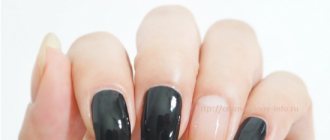
Matte design
Thanks to their velvet texture, matte nails always look chic and remain very popular. To design a French design, you can use not only shades of the pastel palette in addition to the white tip. Bold and bright colors also combine very uniquely with French technology and look very stylish. Matte nails can be complemented with small designs, placing them on the accent nail, neat decorations in the form of patterns made of small crystals, or drawing a smile line with shiny glitter.
What tools and materials will be needed
For the technology of French nail extensions on a natural nail, you will need the following materials:
- camouflage gel in pink or beige depending on preference
- thick white gel
- gel remover
- primer
- dehydrator
- finish coating
- nail files and buffs
- pusher
- forms or types
- cuticle care oil
- gel drying lamp
Special gel for drawing the “smile” line
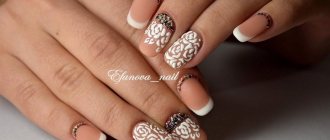
Openwork French
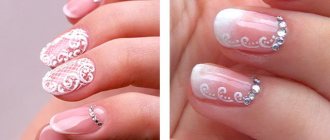
Marigolds with openwork monograms and patterns look incredibly delicate. Drawings of this type can be placed on any part of the nail plate and, at the request of the young lady, decorate all nails or highlight only accent fingers. The designs are applied to the plate using a thin brush or stamping technique. Very impressive are images of this nature, decorated on a glossy surface with white acrylic powder, which harmoniously complements the snow-white tip of the nail. Also, the smile line itself is often decorated with monograms and patterns.
Manicure with foil
Decorating nails in the form of foil has been used in nail design for several years now. Varieties of this material allow you to create very interesting manicure ideas, and a French manicure with foil looks simply amazing. Use pieces of shiny or translucent foil to decorate the design, using the decor to form a French smile line. The shiny foil elements look no less interesting at the base of the nail.
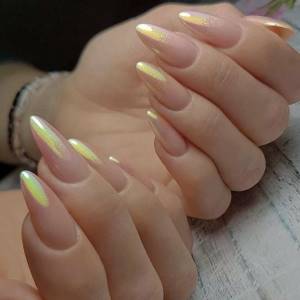
French lay-out with rubbing
Fine acrylic powder - rubbed in, thanks to its tiny sparkling particles, can add a magical shine to any design. When using this material, nails can shimmer with a holographic, pearl, mother-of-pearl or mirror shine. The rub can be applied to the entire nail or to a separate area. You may ask, how does this relate to a laid-out French jacket? The most direct. In the process of creating a smile line, use not varnish, but one of the types of powder, carefully creating a shiny stretch on the tip of the nail. The base can be transparent or colored, as you like. The result is simply amazing!
Application technology
Only an experienced craftsman can create a high-quality laid out jacket. The application technology is complex and takes more time. It is worth noting that this is very painstaking work.
Main stages of application:
- Preparatory stage. Like regular extensions, this stage involves treating your hands with an antiseptic, pushing back the cuticles, polishing the nail plates, degreasing and coating the nails with a primer - a special product that makes the adhesion of the nail plate and gel very strong.
- The next stage is shaping and modeling future extended nails. This is one of the most important stages of manicure, because... the correctly chosen form is the key to its long service life. It must be selected as accurately as possible for the client’s nail plate.
- Next, several layers of camouflage gel are laid out (only on the nail plate), and the finger is dried in a UV lamp.
- The next step is filing and polishing the nails. Having finished, the master begins to work on the “smile”.
- It is necessary to apply several layers of material of the required color, for which you can use special paints, gel polishes, permanent gels. Each layer is dried for two minutes in a UV lamp. Next, a transparent gel is applied and dried for a few more minutes. During the process of nail formation, it is necessary to periodically give the tip the required shape. Tweezers or special tweezers are ideal for this. A laid-out French manicure, the photo of which is presented below, is a very impressive manicure.
During the final stage, each nail is carefully processed with a nail file to give them the same thickness along the entire length. After treatment, each nail is varnished with a finishing coat and dried under a lamp.
If desired, even a novice craftsman can make a laid-out French jacket (a photo describing each stage step by step will help with this), following the instructions given above.
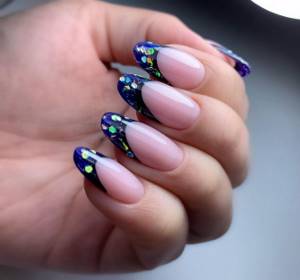
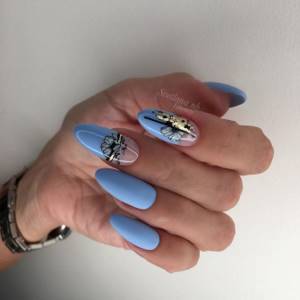
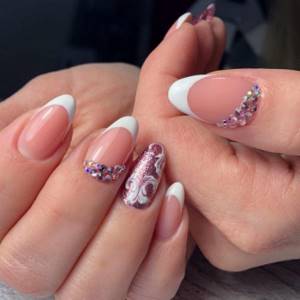
Rhinestone design
A manicure using rhinestones looks very beautiful and a little solemn, which allows you to radically transform the design with just a few stones. Rhinestones reflect even the smallest reflections of light very beautifully and are guaranteed to attract attention to your hands. When decorating a French jacket, it is better to give preference to rhinestones of the same size and type. The most current option would be Swarovski crystals. Small pebbles magically highlight the smile line or lunula, participate in the creation of patterns and can decorate each nail with a single crystal.
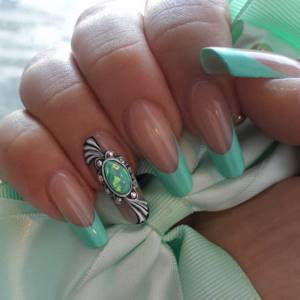
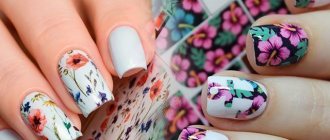
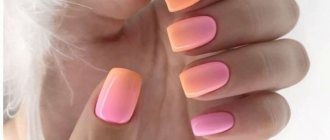
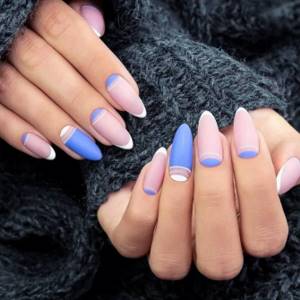
Multi-colored French
The laid-out French technique allows you to create a manicure using a variety of colors. The smile line can be made in one of the shades of a cold, warm or neutral palette. The tip of the nail can be monochrome, multi-colored, shiny, with streaks and tints. Floral arrangements, abstract compositions, a smile lined with sequins or kamifubuki, plain designs on a transparent base and many other ideas look simply incredibly chic.
French is always a stylish and beautiful addition to any look. The laid-out French is distinguished by the correctness of its shape and requires the master to have experience and certain skills. If you incorrectly install the template for modeling the free edge, then the laying out of the gel will be uneven. Trust your fingers to an experienced master and always stay on top!
What determines the ideal smile line?
1. From the material. It should be a thick gel that holds the desired height of the side for a long time and dries well even in the thickest layer.
ADVICE! When laying out the extension, use gel jelly or gel soufflé.
This is a modern material that will allow you to extend the nail bed on several nails at once, it will be well pigmented and at the same time polymerize well over the entire thickness. 2. From lengthening the nail bed. French is designed to improve the natural nail plate and visually lengthen it. Not all clients have model nails, so extension in a French manicure is mandatory if natural nails do not allow you to do without it (Fig. 1).
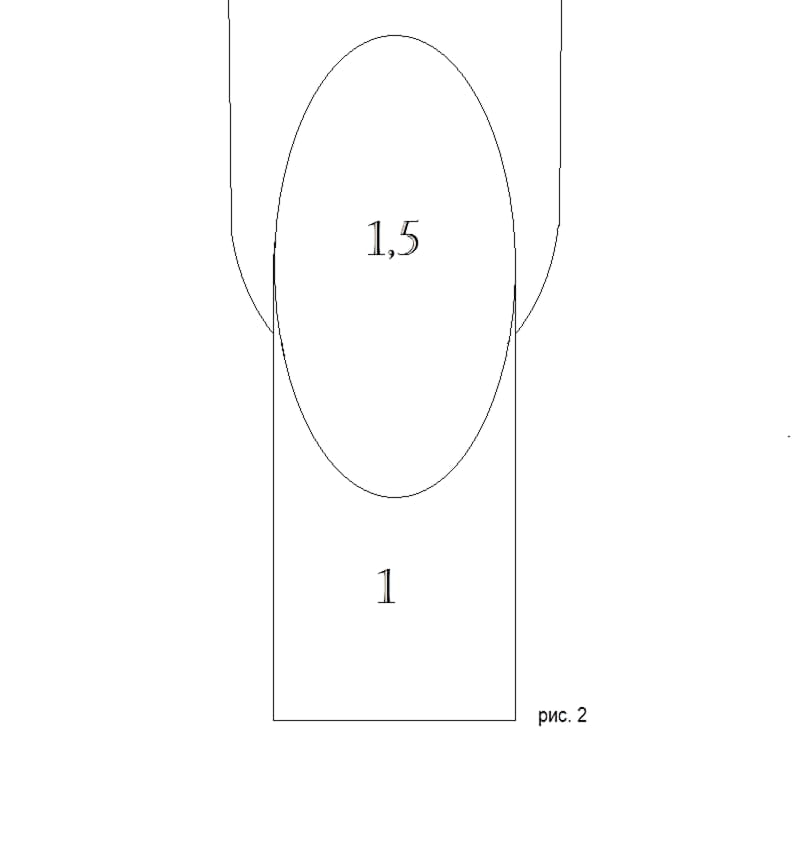
The ideal ratio of extension length to free edge is 1.5:1, a ratio of 2:1 is also possible. And the width of the white material in the whiskers should be 0.5 mm on each side and smoothly fade away at the points of growth (Fig. 2). Also, do not forget that the length of the extension and its height should be the same on all ten nails.
Shape of nail bed extension. When finished, the extension should look like an almond stone, but depending on the shape of the free edge of the modeled nail, the shape of the extension will be slightly different. For example, with a square shape, the extension will be more oval than almond-shaped.
If you narrow the smile line too much, then when viewed in profile, the white edge will look massive. In this case, the smile line should follow the cuticle line. With an almond shape, the extension narrows and stretches out. In general, the type of extension should resemble the edge of a ballerina's pointe shoes, be graceful, and visually lengthen the client's toes. In an oval shape, the extension should be somewhere between the extension for a square and an almond - oval with a slightly elongated center. For the Edge shape, the elongation will be triangular (Fig. 3).
3. From the clarity of the edge. The optimal height of the extension side at the central point is 1.5–2 mm, in the mustache – 0.5–1 mm.
It is also important to remember that the extension should seem to “hang over like a balcony.” ADVICE! When working with thick gels, try not to lift the brush from the material and smooth it out using a zigzag motion, keeping the brush vertical.
In order to perfectly lay out the edge of the extension, the master needs to be “friendly” with the gel and be able to control it. Layout can be done in several ways.
A) Modeling with the angle of a flat brush. Using a standard working flat square brush No. 4 (6), place the corner of the brush in the left tendril and use spiral movements to form a smile line (Fig. 4).
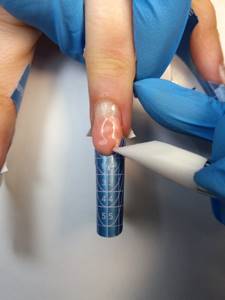
B) Layout in two stages using a linear brush. First, we lay out the side of the extension in a strip and polymerize it in a lamp. With the second layer, we complete the height of the extension and the apex with a regular working brush (photo 2).
C) Layout using dots. Having placed a drop of gel at the central point, we use a dot to stretch the material into a mustache, after which we use a regular brush to complete the height of the side and the apex (photo 3).
D) Extension using a silicone brush with a beveled edge (photo 4).
4. From the correct sawdust. There is a golden rule: with proper filing you can correct even the most awkwardly modeled nails, but the wrong technique will ruin the most careful work with the material.
ADVICE! Do not remove the templates before filing to lengthen the nail bed.
If you suddenly damage the substrate, you can easily restore it and not waste time setting up a new form. In order to properly file the side of an extension, it is important to remember a few rules:
- The file should be 100 grit abrasive and have a sharp edge. The angle relative to the side is 45 ̊;
- Before sawing the edge, you need to slightly file the surface of the extension. This will make it easier for the specialist to see the clarity of the smile line and correct it in time;
- to control the symmetry of the smile line, it is necessary to periodically turn the client’s palm over with the back side facing you;
- The thickness of the side of the mustache is very important. They should not be sawn, be careful about this;
- when working with cutters, you do not need to put pressure on the substrate, otherwise you will easily break it or make holes in it;
- Use a carbide reversible drum attachment and a needle to file the edge of the extension.
Sequence of sawdust
A) Sawing with a reversible drum. On left rotation (Forward) at a speed of 10-12 thousand rpm, from left to right, with the sharp edge of the cutter we give clarity to the smile line without touching the substrate (photo 5).
B) Creating the depth of the “balcony” using a needle-shaped cutter. On left rotation (Forward) at a speed of 10–12 thousand rpm. we go deeper into the side by about 0.5 mm, and also correct the antennae area. Subsequently, the white gel will fall into this recess, and we will have a clear, beautiful smile line and sharp mustache (photo 6).
B) I sawed it with a file. By placing the sharp edge of the file under the edge, we bring the smile line to perfection. After these steps, the nails are ready for laying out the free edge.
Most women, when getting a manicure, choose the classics. And French manicure is rightfully considered the king of nail art! It is chosen for both everyday wear and celebrations. I hope my tips for creating the perfect smile line will give your clients a flawless French look!