Greetings to all. Today's article is dedicated to manicure in honor of All Saints' Day, that is, Halloween . To be honest, I don’t understand and don’t like this holiday, but there is such a request, so I’m writing an article on this topic. When creating a nail design for Halloween, it’s worth understanding a little about the essence and meaning of this holiday. The very name of the Halloween holiday comes from the abbreviated English phrase “All-Hallows-Even” (Russian: Evening of All Saints).
This holiday is associated with death and everything supernatural, which is why it is traditionally celebrated on the night of October 31 to November 1. In our country, this holiday is more of a commercial nature.
The main themes of Halloween are death, evil, the occult and monsters. Traditional colors are black and orange.
Halloween manicure master class
For a DIY Halloween manicure we will need:
• black, white, lilac, yellow or orange nail polish;
• varnishes with lilac and steel sparkles;
• special nail art tool for drawing circles on nails;
• nail base;
• sponge for applying varnish;
• nail fixer with glitter effect;
• a very thin brush for painting on nails;
• silver stars for nail decoration;
• nail polish remover solution or a special product in a pencil to remove excess nail polish.
Preliminary stage of work
It is advisable to decide on a design before starting work. But whatever it is, you need to start working with preparing your nails.
Degrease the nail plates, carefully move the cuticle with an orange stick or a sharp cutter. Remove the pterygium, cut and sand the cuticle. Give the nails the same length, if necessary, extend the broken corners. Make sure the shape is the same. Polish your nails with a buff or soft file. Apply primer and let it air dry. Cover your nails with a base, trying to form a smooth surface, and dry in a lamp.
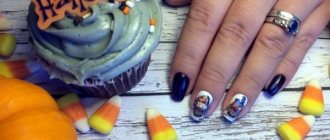
Step-by-step Halloween manicure with photos
Step 1
We process the nails and apply a matte base.
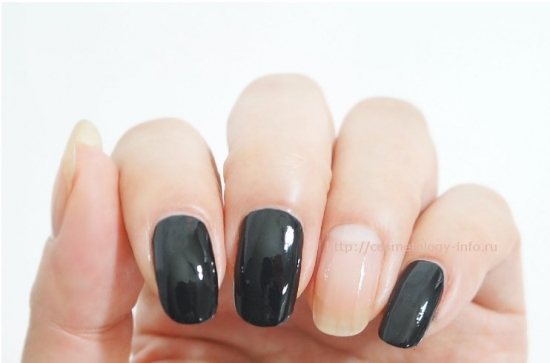
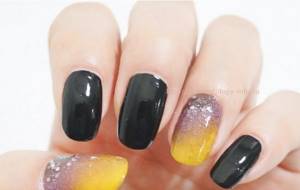
Step 2
Paint the second, third and fifth nails with black polish.
Step 3
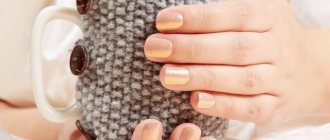
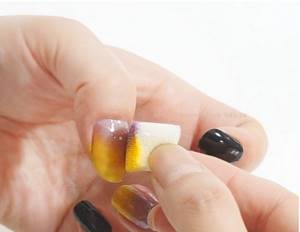
Apply yellow, lilac and silver glitter varnish to the sponge.
Step 4
Using a gradient technique, cover the remaining nails with a sponge.
We'll get it like this:
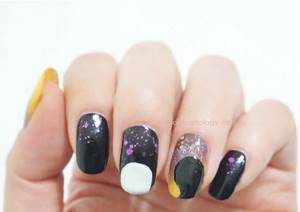
Step 5
We paint black nails at the base of the nails with varnish with lilac sparkles.
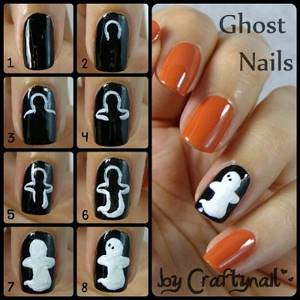
Step 6
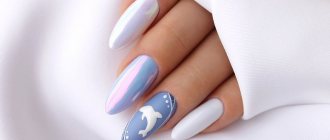
Using a brush, paint the outlines of ghosts on the middle nails with white and black varnish.
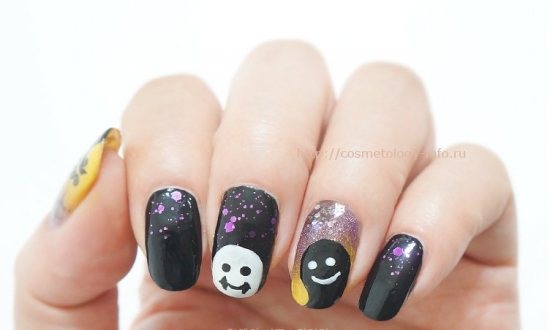
Step 7
Draw a white smile on a black background, and a black smile on a white background. Using a special tool we make the eyes of the monsters. We should get two cute faces.
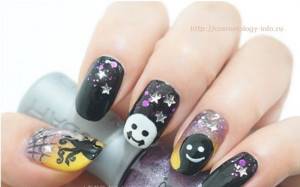
Step 8
Using a thin brush, paint a cobweb and a spider on the thumb using black varnish.
Step 9
The final stage will be applying decorative stars and covering the nails with a fixative.
You should have a simple Halloween manicure that will go with many outfits.
The ideas for Halloween manicure are inexhaustible, it all depends on your imagination and costume.
Drawing
This is a complex technique that requires drawing skills, a thin linear brush, a round or flat brush, and black and white gel paints.
It is better to draw a skull on a contrasting background, for example, on black. First, the so-called underpainting is done - the outline of the skull. Draw the base and paint. White paint is used for this.
To get a three-dimensional image, you will need several shades. It is better to cover the skull with a light gray translucent color. To do this, mix a small drop of black and white paint and dilute with a base (or top). You will get a material similar to watercolor varnish. Cover the skull figurine with it.
Use black paint to draw the eye sockets and mouth cavity. Use white to add highlights, clarify the outline of the teeth a little. Select the cheek bones.
Add shadows with black paint: under the cheekbones, in the nose, under the brow ridges.
You can decorate a black manicure with a skull with gold leaf, opals or rhinestones. Using black velvet sand can highlight some nails.
Halloween manicure ideas
1. First, decide on the look and choose a suit for it. Depending on the costume, do appropriate makeup and manicure. We have a separate article on how to do makeup for Halloween on our website.

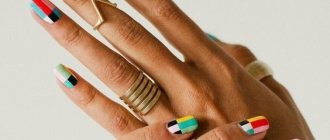
2. Halloween manicure should be bold and provocative; you can use any colors and any nail design. Although the color scheme for Halloween manicure involves the use of black, orange and white, you can dilute these colors with any other colors (red, pink, lilac, green, yellow, etc.). Nails can be decorated with rhinestones, sparkles, stickers, pieces of fabric, etc. The designs do not have to be symmetrical.
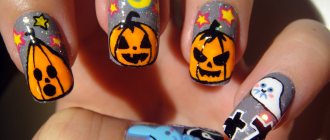
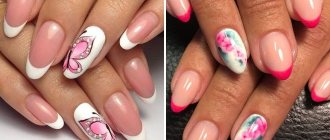
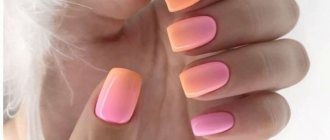
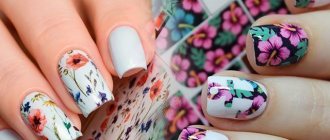
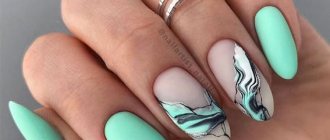
3. The designs on the nails are made in Halloween style - these are pumpkins, witches, monsters, ghosts, spiders with cobwebs, bats and all other evil spirits. But don't forget that your manicure should match your appearance. If you, for example, are in the form of an angel or fairy, then the colors and designs on your nails should be joyful, bright and airy. These can be intricate patterns or smooth transitions using gradient techniques or water manicure techniques.
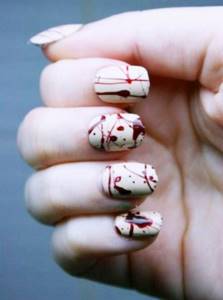
4. In your Halloween nail design, you can use makeup elements, such as bleeding nails, bloody nails, “zombie nails” or the effect of no nails.
Zombie manicure step by step
5. For a Halloween manicure, you can use false nails with pointed or curved ends, as well as nails with a finished coating.
6. Mystical nails can be made even if you have no talent for drawing; to do this, you should stick stickers on the painted nails, and apply a fixing varnish on top. Stickers can be completely covering the nail plate or in the form of a separate design. You can also make a stamping manicure for Halloween using stamps. It’s very simple, choose any design and print it on your nail.
7. Use UV polish that glows in the dark. You won't go unnoticed at any Halloween party.
8. It will be easy for you to do a DIY Halloween manicure if you look at the options using different techniques, a wide range of colors and with different levels of complexity.
Real trend
Gone are the days when only informal teenagers rebelling against stereotypes could decorate clothes, hair, accessories and their own nails. Today you can see skulls in the everyday collections of fashionable youth brands (for example, Zara and Pull-and-Bear).
You may be interested in: How to level a nail plate with a base: technique, description, tips and photos
This element has even conquered the world of high fashion. For example, Alexander McQueen, a true art hooligan and a big fan of the gothic style, decorates clutches and belts, gorgeous shoes and ankle boots, and even evening dresses with sparkling grinning skulls. However, he is not the first who decided to take an idea that once seemed gloomy and unpleasant in a new direction: Vivienne Westwood, whom he adored, did this at the end of the last century. There are a huge number of similar examples.
You might be interested in: Manicure and pedicure courses: training with a certificate. The best manicure and pedicure training school
The sugar skull, which Mexico gave to world culture, deserves special mention. The celebration of the Day of the Dead in many Latin American countries is a real carnival, colorful and joyful, with luxurious costumes and sweets. Sugar skulls decorated with flowers and sparkles are a constant attribute of the festival.
It's no surprise that nail aestheticians have also fallen in love with this trendy idea. When the skull first began to come into fashion, everything had to be done manually, but today manufacturers of nail art materials offer many ready-made solutions that can make the work much easier.
Halloween manicure for short nails
For short nails, any Halloween manicure with a small pattern or a face, as well as an abstraction, is suitable.
Using sliders and stickers
This is a great solution for those who are not confident in themselves as an artist. Just choose a ready-made design.
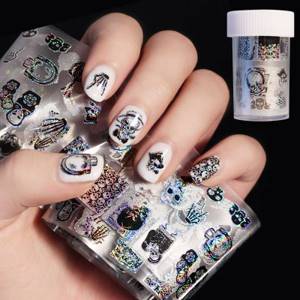
Cover your nails with colored gel polish and dry in a lamp. Cut out the picture, leaving as little background as possible, and place it on a cotton pad moistened with water for a few seconds. When the backing gets wet, the slider will easily detach from it. Pry the picture with tweezers and place it on the nail. Level and press, smooth the surface. To do this, you can use an orange stick or a silicone brush. Remove any water droplets with a lint-free cloth and cover the skull slider with a thin layer of base. After baking, evaluate the result: are there any folds sticking out or any bulges? You can remove small errors using a buff.
All that remains is to cover the design with a top coat – glossy or matte, as you prefer.
Manicure for Halloween: photo
Horror nails
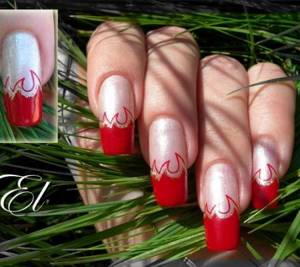
Fire on the nails
Spider on nails
Halloween manicure: pumpkin on nails
Casting on nails
Step-by-step photo of manicure: casting on nails
Skull on nails
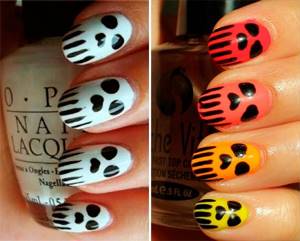
Step-by-step photo of a Halloween manicure: skull on nails
Manicure: blood on nails
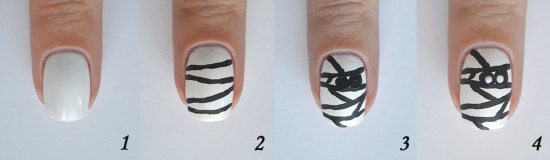
Mummy on nails
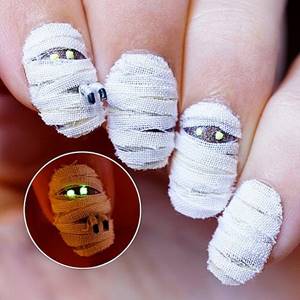
Step-by-step photo of a Halloween manicure: mummy on nails
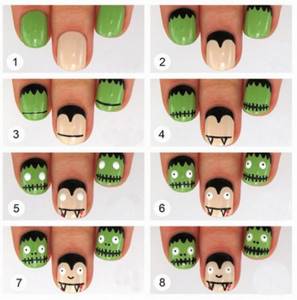
Monsters on nails
Step-by-step photo of Halloween manicure: vampire
Step-by-step photo of manicure for Halloween: witch on nails
Cobwebs on nails

Step-by-step photo of a Halloween manicure: cobwebs on nails
Bat on nails
Step-by-step photo of a Halloween manicure: bat on nails
Halloween manicure: video
Tags: nails
Market Analytics
- Top 10 Best Beauty Products in 2022
- Global cosmetics market 2022: an unprecedented test for the global cosmetics industry
- Top 10 Cosmetic Research and Development of 2022
Convenient search for beauty salons on our website
Beauty salons in Moscow Beauty salons in St. Petersburg Beauty salons in Ekaterinburg Beauty salons in Novosibirsk
Latest blog posts on our website
- Naturecream / Properties of the “Sunny” oil itself
- Naturecream / “Sugar” wrinkles - or what glycation can do
- Naturecream / Esterified oils
- Naturecream / Arnica - the magical plant of alchemists
- Naturecream / Tremella Extract - Snow Mushroom Detox for Skin
- Prostye-sovety / How to visually enlarge your lips with makeup
- Naturecream / Apricot kernel oil for face
- Naturecream / MATRIXYL3000 - the best skin elasticity stimulator
- Naturecream / SPF in Natural Oils
- Naturecream / Geranium (Pelargonium) oil for skin health and beauty
Latest forum topics on our website
- Natalya / How to properly make a gelatin mask?
- Mrs._Smith / Badly sunburned! What to do?((
- Ice / Is it necessary to combine fitness classes with a diet?
- Antonova / What can be used for hair loss?
- Radio operatorKat / Who was on a protein diet?
Other articles in this section
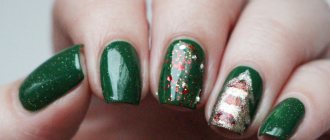
| New Year's manicure On the eve of the New Year's holidays, fashionistas study magazines and horoscopes in order to find out what outfit to choose, what color to prefer, and what to refuse. A mandatory addition to a spectacular look will be a New Year's manicure, which can be performed using different techniques. |
| Nail design Nail design is a modern type of aesthetic cosmetology that favorably emphasizes the beauty of women's hands, and also allows you to hide minor imperfections. The history of nail art dates back to Ancient China, where high-status fashionistas grew their nails up to 25 cm long and put tips on top to avoid damaging them. |
| Manicure with foil Nail design options are very diverse. One of the most original techniques with a wide range of design options is decorating nails with foil. This nail art is very impressive, noticeable and immediately attracts attention to its owner. And you don’t have to be a professional to do it. The necessary materials, instructions, a little practice - and you will succeed. |
| Combined manicure Every girl chooses the type of manicure depending on her personal preferences, but combined manicure is becoming more and more popular. |
| Manicure: apple (photo and step-by-step instructions) Today we will look at how to draw apples on your nails. This nail design is suitable for both summer and autumn. Apples can be made red, green or yellow, or you can draw a cut apple with seeds. So let's get down to step-by-step manicure: apple. |
| French pedicure (French) Beautiful, well-groomed legs are the dream of every woman. Delicate skin of the feet and neat, beautifully shaped nails are a real decoration, eloquently speaking about your desire for perfection in everything. Not even the most thoughtful look will be complete if you forget about the pedicure - unkempt legs will negate the impression of a beautiful outfit and spectacular makeup. This problem is especially relevant in the summer - the time for sandals and open sandals obliges us to carefully monitor the beauty of our feet more than ever. |
| Medical pedicure The beauty of your legs is achieved through a good pedicure, however, if medical problems arise, a regular pedicure cannot help. |
| French manicure French manicure is a universal nail design suitable for any outfit and occasion. French, like no other type of manicure, can make your hands well-groomed, graceful and neat. Read about the history of French manicure, its types and methods of execution in our article. |
| Moon manicure Nail design is performed using various techniques, of which there are many now. Back in the 30s, lunar manicure was invented, which is now at the peak of popularity. Christian Dior introduced this type of manicure at his fashion show. Performing this nail design at home is not difficult if you have some tools for a French manicure. |
| Manicure with the effect of broken glass Manicure with the effect of broken glass will allow your own imagination to run wild, since it has many options for nail design. Manicure “Broken glass” is now in trend. |
Skull made of rhinestones
If you want to do a rhinestone skull manicure, choose the smallest crystals you can get your hands on. Clear, silver or petrol ones will work, but all black ones might be a great idea. By and large, you can make a skull from rhinestones of any color.
The smaller the stones, the clearer and more detailed the image you can get.
First, coat the nail with varnish - contrasting or matching the rhinestones. After polymerization, lightly walk over the surface with a buff, then it will be easier to draw. Make a sketch - a sketch of the skull. You can use a liner or a simple pencil.
Paint the outline of the skull with a thick rubber base or clear construction gel. You can also use a liquid base combined with acrylic powder (transparent).
Using tweezers or a wax pencil, lay out the rhinestones starting from the middle of the pattern. If necessary, add small broths to match the tone. Dry the nail in the lamp for 1.5-2 minutes so that the stones set well.
Moisten a thin linear brush with topcoat without a sticky layer and carefully walk between the stones. Try not to get the top on the rhinestones themselves, otherwise they will lose their shine. Polymerize.