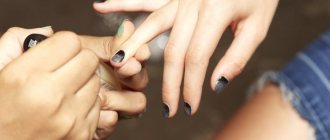
You can make an interesting and original nail design yourself, at home, using special manicure brushes.
With their help, you can not only create beautiful patterns and designs, but also decorate your nails with acrylic sculpting.
Although manicure brushes are very similar to regular paint brushes, you need professional tools to create truly stunning designs. It is the correct use of nail design tools for their intended purpose that provides half the success when creating designs on nails.
Types of manicure brushes
So, let’s look at the description in more detail: why which brush is used. Which ones are right for your work?
By purpose:
- Gel modeling is carried out using rectangular or square .
- Modeling with acrylic is done with an oval brush with long and hard bristles.
- To draw small details, use very thin brushes with long bristles.
- Sculpting small details from acrylic is ideally achieved using a special sculpting brush with a sharp tip.
- The area of application of flat or oval tools is Chinese painting. They make it convenient to apply a double stroke
- French is painted using large tools.
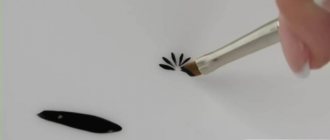
- A fan brush is ideal for working with glitter and other bulk design materials .
- brush (dotter) has balls of different diameters at the ends; rhinestones or paint are applied pointwise to the nail plate.
- A special pen for nail art is filled with special paint, which allows you to draw patterns of any complexity.
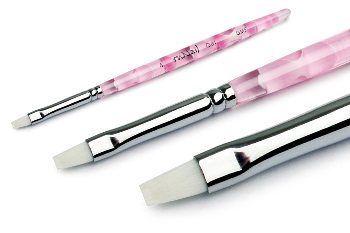
Rectangular brush

Dots brush
| Brush type | What is it used for? |
| Dots | Dots, straight lines, curls, application of rhinestones |
| Flat brush | Chinese painting, complex and voluminous drawings, smooth transitions |
| Round (spot) | Small details and patterns, lace ornament |
| Oval | Chinese painting, acrylic sculpting of small decorations |
| Fan | Shading, background, creating halftones, working with glitter |
| Thin | Fine lines, drawing contours |
According to the material:
- Natural. They are made from natural wool. The most commonly used wool is sable or kolinsky. If used correctly, these brushes will last a very long time. They have an excellent pile, which makes them versatile in using any type of paint.
- Artificial. They are made from special polymers, such as nylon. The service life of such brushes is significantly less than natural ones. But they have an affordable price, which makes them an ideal option for beginning craftsmen.
By thickness:
The tassels are numbered from zero to eight. The thinnest ones are numbered 0. They are used for drawing patterns with small details. The largest one is number 8. It is used to model the tips of artificial nails.
We perform stretching with regular varnish
The step-by-step instructions for creating a gradient design with regular varnish will be shorter. But the service life of such a design is, unfortunately, short.
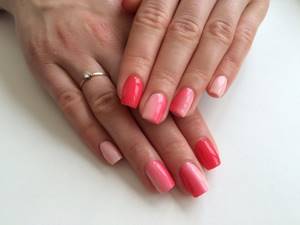
- Apply a base coat to the records.
- Cover half of the nail with one shade of varnish, the other half with a different color. Varnishes must be applied closely.
- With a clean brush you need to make strokes at the border of the colors. Soon the shades will mix, creating a soft transition.
- After drying, coat the plate with finish.
How to choose brushes
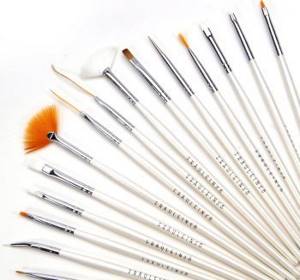
Set of brushes
It is advisable to give preference to brushes made from natural materials. They are more expensive, but they are of good quality and will last a long time. These brushes can be used to create patterns of any complexity.
Also pay attention to convenience. The brush should be the right size for you and fit well in your hand.
If you have no preferences in nail design, it is better to purchase brushes in a set. Typically, manufacturers offer an optimal selection of 3, 5 or 12 brushes.
Online stores offer a huge selection of nail design brushes. To ensure that you are buying a quality instrument, always check the quality certificates.
Stretching with gel polish: how to do it correctly
The gradient can be successfully created with gel polish (shellac). Step-by-step instructions for creating a design consist of eight points:
- After traditional treatment of the edges and periungual space, it is necessary to remove the gloss from the plate to improve adhesion to the gel polish.
- Disinfection and degreasing of surfaces using special means.
- Application of an acid-free primer to the nails.
- Apply the first layer of gel polish to half the surface. Apply a different color of gel polish to the second half of the nail.
- We stretch with a clean brush at the junction of flowers. With confident movements we move along the base, touching both shades. From time to time we wipe the brush with a napkin to avoid the formation of a “dirty” color.
- Dry the layer under the rays of a lamp.
- If necessary, repeat steps 6-7, applying a second layer of gel polish.
- Apply topcoat to your nails and dry.
Tips for using manicure brushes
- Use brushes strictly for their intended purpose. If the brush is used incorrectly, hairs may fall out of it and it may become deformed.
- Never leave tools in water or chemicals. This may cause the work area to become deformed.
- Do not leave paint on tools; wash them after each use.
- To prevent the lint from rubbing off, use only smooth materials for the palette.
After each use, lubricate the hair of the tool with cuticle oil. This will protect the brush from drying out and deformation.
Following these simple rules will lead to long-term service for your brushes.
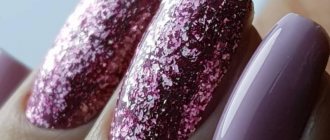
Glitter VS glitter gel polish
In addition to dry glitter, they can be found in many gel polishes, both colored and transparent, with large or fine shimmer. Let's figure out what the pros and cons of each of them are.
- Ease of application. Glitter loses in this regard, since additional brushes are needed to apply it. In addition, after use, glitter will be everywhere, and cleaning it up is not the most pleasant job. Total 0:1.
- Number of layers . Rubbing in glitter is done in one layer and immediately covers the nail with a thin layer and without bald spots. To obtain the same density of glitter, gel polish with glitter will have to be applied repeatedly, which, due to the volume of the glitter, will give a noticeable thickness to the nail. Total 1:1.
- Variety of uses . Gel polish with glitter is rarely used for drawing, but it is quite capable of creating stretching. However, glitter can be used for sprinkling, mixed with top coat and colored gel polishes - in general, it wins in this category. Total 2:1.
- Alignment. Both materials add a little volume to the nails or design, so it will need to be leveled. For example, if you apply glitter only to the French line or cuticle hole, then it will have to be compared with the rest of the nail plate in at least two layers. Therefore, here I will give each one a point – 3:2.
- Consolidation . Gel polish does not require fixing, just like glitter. However, when used as a topping, they may crumble a little over time. Total 3:3.
- Care . Gel polish with glitter does not require maintenance, like any other gel polish, but glitter without a top coat can get a little dirty, so you will have to clean it with a brush and soap to restore the color. This is especially true for light shades. Total 3:4.
- Price . The glitter is definitely a winner: one gel polish will cost as much as several colors of jars of glitter. Total 4:4.
In this duel, according to the totality of the criteria defined above, there is no winner. Therefore, I would advise making a choice based on what the material will be used for. Personally, I go for glitter because it's cheaper, there's more to choose from, and it can be used in more ways.
Caring for manicure brushes
After finishing work with brushes, they must be cleaned. You also need to clean it every time you change colors. It's very easy to do. If you used varnish to create the design, you must first wash it off the instrument using a solvent. And if you used special paints, it will be enough to wash the tools in warm water and soapy water.
Gel brushes can be easily cleaned with alcohol. You can clean acrylic using monomer. Keep the tool in the solution until completely clean, and then place it on a paper towel to dry. If the brush is very dirty, you can clean it with acetone.
Use acetone only in the most extreme cases, as it can damage the structure of the instrument.
After the instruments are dry, place them in a special case. It is advisable to store them horizontally.
Benefits of manicure stretching
- Stretching is done with a brush. Such a tool is always at hand; no other devices are needed.
- When performing a manicure step by step, the periungual ridges and cuticles do not get dirty. When performing ombre with a sponge, it is impossible to create a beautiful transition without touching the skin with your fingers. Removing varnish stains is not very convenient, and there is a risk of spoiling the design. A manicure with color stretching eliminates these unpleasant moments.
- By stretching the color transition, a smooth finish is created. When using a sponge, small roughness still remains on the surface of the nails.
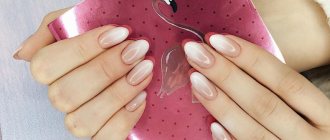
- Stretching is very convenient to do with gel polish. The eye-catching design will last up to 20 days, which is an incredible benefit for today's active women. Find out all the secrets of stretching with gel polish right now!
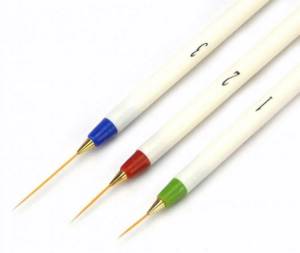
Thin and thick brushes
The thickness of the brush bristles is determined by the generally accepted numbering of brushes with values from 0 to 8. 0 or 00 is the thinnest brush, and 8 is the largest. Usually the largest brushes are used to model artificial nail tips.
You can use brushes of different shapes depending on your artistic intent. Come up with your own composition and decide which brushes are suitable for you to implement it on your nails. A thick brush will be useful for large elements, but for small strokes and subtle patterns you will need a more accurate and correct nail art tool. Drawings with paints on nails look nicer than designs with varnishes, because the structure of the paints is lighter and flowers, for example, look very delicate.
French brushes
A brush for a French manicure is most often round and quite thin, of medium length. In terms of numbering, it is similar, most often, to number three or four. It is important that the pile is elastic enough and soft enough to create a smooth and even smile line.
Also, a French brush can even be produced in a special type, in the form of a special handle. This pen most closely resembles a stationery bar-corrector. When you press on the body, white varnish flows into the brush at the end, which you use.
The French manicure brush performs a number of functions. She draws a perfect smile line, and also paints over the free edge. Therefore, it is very important that such a brush is comfortable and correctly selected.
Acrylic brushes

These brushes are designed to sculpt and top a new nail. It is important that they have sufficient absorbency to retain enough monomer to create a formulation of the required material consistency. For this reason, it is preferable to choose them from natural pile, which absorbs and retains liquid well.
Most often these are round brushes, as this is necessary in order for an even drop of material to form. Although sometimes flat instruments can be used. The pile must be chosen fairly hard for the same reason as with gel extensions. In addition, it is important that such a brush has a thin tip, which is convenient for applying powder to the smile line. However, some craftsmen buy an additional brush for a French coat.
Gel brushes
This category of brushes is very different from all others and most often it is labeled as such. They are intended for modeling the nail, giving it a bend, forming an arch, as well as the final coating. These are flat brushes in shape, which can be either square or rectangular, sometimes curved, which simplifies the process of operation.
The pile should be natural or artificial, but quite hard. The gel is liquid and viscous, and therefore it will simply pull with a soft brush. But even if the brush is very stiff, it should still be flexible enough to keep the nail lines smooth and the material placed evenly.
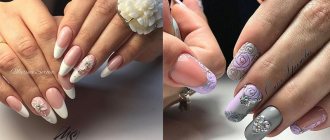
Decorating with stretching
Surely every fashionista knows the stretching effect that is created by ordinary varnishes. This procedure is considered simplified not only in terms of execution technique, but also in terms of the “life” of the manicure. After all, women understand how short-lived a manicure with varnish is. This is why gel nail designs are very popular.
To make nail art at home, you will need the following things:
- Basic gel polish.
- UV lamp.
- Gel polish in blue and pink colors.
- Thin brush.
- Napkins.
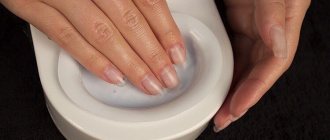
Before you start decorating your nails, you should prepare them - file them, remove cuticles and hangnails. A beautiful design will not look good on unkempt nails.
The first layer is applied with a base product and dried for about 1 minute in a UV lamp. A pink tone should be applied from the base to the middle. You can, of course, use other colors of gel coatings, the main thing is that they ultimately combine harmoniously.
Without drying the coating, apply a blue tint to the empty end, after which vertical thin lines should be drawn with a brush at the junction of the 2 colors. This is called color stretching!
All that remains is to dry the coating in the lamp for 2 minutes. However, experts recommend removing the sticky layer from the nails and repeating the procedure by applying and diluting 2 shades. This will allow you to achieve a more vibrant effect.