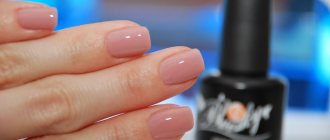
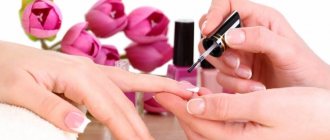
Without a manicure, as well as without the right accessories, it is difficult to create a truly worthy and complete look. Modern technologies for applying a coating to nails make it possible to extend the beauty of a manicure (for up to 4 weeks). This is not fantasy. Gel polish is an innovative solution that allows you to avoid the need for extensions. The technology for applying gel polish is quite simple, but requires compliance with certain rules.
Preparation
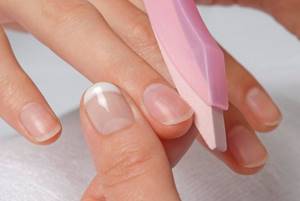
Naturally, first you need to get a manicure. This is the first rule. What type of manicure should I choose? It's up to you to decide. This can be a hardware manicure, edged or European. The technology of applying gel polish implies the absence of any cream on the hands, not only at the time of applying the material, but also on that day in general. After the manicure is done, you can proceed to the next stage. This is degreasing the nail plate. This can be done either with a special product or with simple alcohol. It is very important not to touch your nails after this.
Procedure
You need to file your nails during the manicure. If you neglected this, then you need to remove the length and shape it before degreasing the plates. The dust that is generated must be removed very carefully. If this is not done, then there is a risk that the material will peel off, lie unevenly, chip and peel. When all the manipulations have been completed, you can begin the procedure itself. The technology for applying gel polish requires you to follow all these steps:
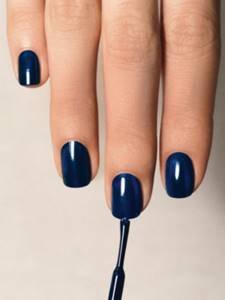
- first apply the base for gel polish;
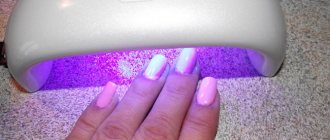
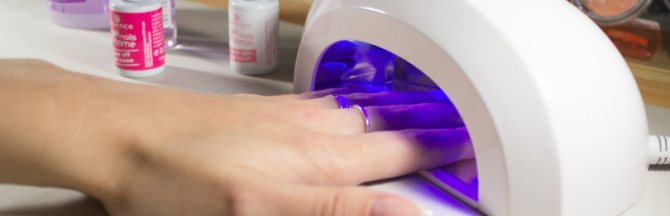
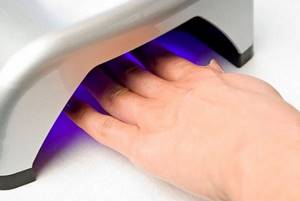
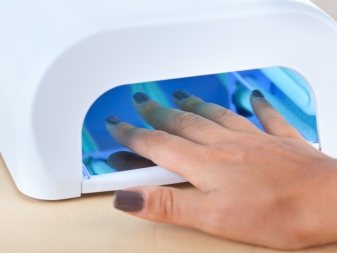
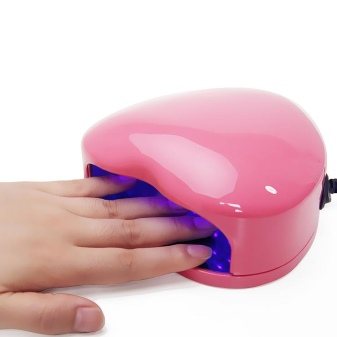
- dry it in a UV lamp or LED lamp for as long as indicated in the instructions on the bottle;
- then apply a thin layer of colored gel polish (the brush is carefully squeezed onto the edges of the bottle);
- dry the layer in a lamp for as long as the instructions require;
- if necessary, apply a second layer of colored gel polish;
- dry as much as the first layer;
- then apply a finish or fixative (indicated on the bottle: TOP COAT);
- dry it according to the instructions on the bottle.
It is noteworthy that the material from different companies has different consistency: from very thick to completely liquid. It is important to ensure that the gel polish does not flow onto the cuticle or side ridges. If this happens, then you need to remove the excess with a cotton swab dipped in nail polish remover, and carefully so as not to smear the entire gel polish. The application technology also implies a certain order:
- first, four fingers on one hand (except the thumb; if right-handed, then on the right);
- then four fingers of the other hand;
- then on the thumbs of both hands.
This is due to convenience. This makes it easier to dry your nails in a lamp. Even the simplest and low-power (9 Watt, for example).
Abundance of options
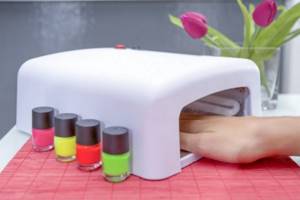
Modern companies producing materials for nail artists offer a huge number of options. One of the best, but budget-friendly, is Lidan gel polish. The application technology is no different from that described. Drying time in the lamp is 60 seconds. This is for a power of 36 watts. The LED lamp allows you to dry each layer in 30 seconds. Depending on what type of equipment you are using, the time may vary. The technology for applying gel polish is simple and does not require any special skills. Any beginner can handle this, even if not always the first time.
Clients of beauty salons often complain to nail designers that the manicure does not last long. This happens if you do not allow the coating to dry completely. To avoid such problems, a specialist must know: the process can be slowed down or accelerated by using different types of lamps.
Do I need to dry the base in a lamp?
To dry the base, use ultraviolet or LED lamps. It is recommended to read in advance the instructions that come with the bottle with the base about how much time it takes for complete drying. If this time is shortened, problems will arise with applying the top layer. If you expose your nails to a light source, the texture of the base will become deformed, and this will also negatively affect the quality of the manicure.
After waiting the required time, the master applies a colored coating to the nails. After this, the nails dry again. The rule here is very simple: the color coating dries exactly as long as the base.
How to apply pearl rub
Pearl rub gives your nails an elegant, noble look thanks to its soft, warm, discreet shine and elegant shades.
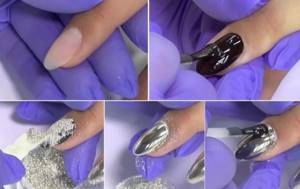
Applying pearl powder to nails follows the same principle as mirror powder: it is rubbed into the dried gel polish with a sponge and then secured with a top coat.
How to properly dry gel polish in a lamp
To ensure that the gel polish dries well, you must keep the following in mind:
- Some types of gel polish contain substances that change their structure under the influence of ultraviolet rays. Therefore, before placing your nails under the lamp, you need to carefully read the instructions.
- Before work, you need to carefully inspect the lighting fixture. If there is any external or internal damage, do not use the device.
- After each client, the lamp must be disinfected without fail.
- Once a light bulb has expired, it needs to be replaced, even if it still shines brightly. If you use a lamp that has expired, the coating will not be durable.
How to prepare your nails
Knowing how to use gel nail polish is not enough for a perfect manicure. The quality of preparation of nail plates for coating directly affects the appearance and lifespan of the manicure.
It consists of several stages:
- Cleaning nails (removing previous coating or varnish).
- Removing cuticles, adjusting the length and shape of nails using a classic trimmed or European manicure.
- Treatment of nail plates with a buff (sanding file): it is necessary to remove the shine for a more uniform distribution of the coating.
- Degreasing nails with a special substance or medical alcohol.
How long to dry the base?
The rules for drying the base depend on what kind of lamp is used. Therefore, different masters take different amounts of time to work.
How long to dry gel polish in an LED lamp
Drying time using an LED lamp depends on its power:
- 6 watts – the base dries in half a minute, the main layer will have to spend twice as long;
- 18– the base can be finished in 20 seconds, gel polish and top will dry 10 seconds longer;
- 20–same time;
- 48–5 seconds are spent on the base, 15 on the polish.
Such light bulbs are expensive, but they have a long service life.
How long to dry gel polish in a UV lamp
When using ultraviolet light source, the time will be as follows:
- 9 watts – 2 minutes for base, 5 minutes for gel polish and top;
- 18– 1 minute for base, 3 minutes for varnish;
- 36 – 1 minute and 2 minutes respectively;
- 48 – the same indicators.
Ultraviolet light bulbs are inexpensive, but they burn out frequently.
How long to dry the base in a 36 watt lamp
Not all masters know how long to keep their nails under a 36-watt lamp, since ice devices with such power are rarely used: 48-watt bulbs are more common on sale. If the master has a 36 W LED device, the time will be as follows: 10 seconds will be spent on the base, 15–20 seconds on the varnish.
How long to dry the gel in a 9 W lamp
Ice devices with 9 watts are the smallest in power. However, the drying speed of the coating will still be faster compared to a UV lamp of similar power. It will be: 30 seconds – base, 1 minute – main coating.
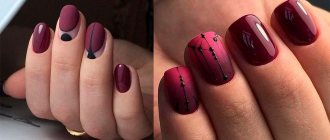
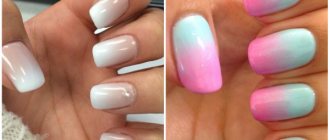
Additional decoration for your nails
With the correct sequence of applying gel polish to your nails, your manicure will delight you for many days. Therefore, you often want something “a little different” for a bright accent or an original look. The following materials are most often used as additional decoration for the nail surface.
Shiny thin adhesive tapes that are convenient for creating striped manicures. This can be one pasted line or a line, an interweaving of stripes. Such tapes are convenient because they have a sticky base, are easy to use and perfectly complement any background. They are glued to a dried colored layer of varnish and covered with a layer of top coat.
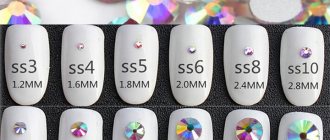
Rhinestones of any sizes and colors. They can be used to lay out various compositions that will shimmer with all the colors of the rainbow in the sun. For reliability, some craftsmen use special glue for reliable fixation. Despite their voluminous appearance, they are comfortable to wear.
Water-based or adhesive-based stickers and applications. This is a great alternative to painting with brushes. It’s quite convenient when you have a finished design on your nail in a couple of seconds. Good quality stickers are crisp, even realistic looking. The sequence of application is on gel polish and under the top coat.

Stencils for painting, when you use a varnish that is different from the background color. There are reusable and disposable ones, but the essence does not change. You don't have to draw every element of the pattern, thereby saving time and your nerves.
Something new and interesting is constantly appearing in the assortment to decorate your manicure. Therefore, if you are interested in the topic of nail design, try to keep track of new items and fashion trends.
Is it necessary to dry the top in a lamp?
Recently, special types of topcoat have appeared on sale: when it is applied to the nails, it speeds up the drying process of the color coating. It does not require special drying (and this will be mentioned in the instructions).
Other types of topcoat can be dried in the same way as varnish and base, using lighting fixtures of varying power. Since the topcoat is usually applied in a thinner layer compared to a color coating, low-power light bulbs can be used to dry it. The best option is an 18-watt ultraviolet lamp or a 9-watt LED device. In this case, the final layer of manicure will dry quickly and efficiently, and your nails will maintain a neat appearance for a long time. If the top coat contains glitter, it may take a little longer to dry. This time must be maintained, otherwise the structure of the sparkles will be deformed and they will lose their beauty.
Blue lamp
To dry light-sensitive gel polish, you can use a medical blue lamp, which is sometimes used for heating. The only thing is that it will take much longer than when drying using a special method. While the first applied layer is drying, you need to think about its thickness. Sometimes it may seem that the varnish is translucent. In this case, it is worth reapplying. In this case, it should be dried in the same way as the first layer of gel polish. Then you should let the coating dry for 20-30 minutes. Next, lubricate the cuticle with special oil and rub a little near the nail fold. Rubbing will help the natural ingredients absorb into the skin while softening it.
How long to dry the top
In domestic beauty salons, ultraviolet lamps with a power of 18–20 watts are usually used to process the final coating of nails. LED devices are used less frequently due to their high cost. A 20W UV light will dry a thin layer of topcoat in 3 minutes. Processing the top applied in several layers will take 4 minutes. Working with glitter may take 4.5 – 5 minutes. In this case, the master must warn the client that the final stage will take longer.
How long should you keep your nails on depending on the power of 9, 24, 36 and 48 Watts?
ultraviolet lamp
UV lamps are veterans on the market, in which the gel polish dries under the influence of ultraviolet radiation. But in the modern nail industry, such devices are being replaced by competitors - LED and hybrid lamps. UV lamps polymerize any material except that labeled ICE.
ON A NOTE! A significant disadvantage of UV devices is their short service life. After 2-3 months, the luminescent emitter will have to be replaced. The phosphor layer quickly becomes thinner, and it takes more time to dry the gel polish.
Depending on the power of the lamp, polymerization of gel polish takes a certain amount of time:
- 9 W – 4 min.;
- 24 W – 3 min.;
- 36 and 48 W – 2 min.
If we consider highly pigmented shades, such as white, black and beige, then their polymerization lasts 4 minutes in a 36 W device.
How long does it take shellac to dry in an LED lamp?
An LED lamp also produces UV rays, but their source is LEDs. They are durable and environmentally friendly, and can operate for up to 50,000 hours. With the help of an LED lamp, the material polymerizes 2 times faster. But the device with LEDs has one drawback - its high cost.
When choosing a lamp, you should pay attention to the location of the LEDs inside the device. In order for the gel to polymerize evenly, the diodes must be located not only on top, but also on the sides of the device. The touch switch function simplifies the work of the master. The lamps automatically turn on when the client inserts his hand, then a pre-set timer turns off the light.
In LED lamps, the polymerization time of the color coating is determined taking into account the brand and power:
- 9 W – 1 minute;
- 18 W – 20–30 seconds;
- 36 W – 10–20 seconds.
It is better to polymerize problematic shades, base and top for 60 seconds, and gel colors harden in 10–20 seconds.
Features of the procedure
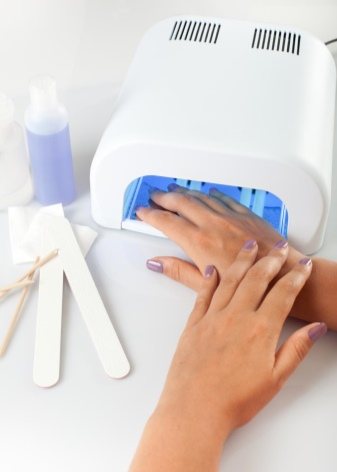
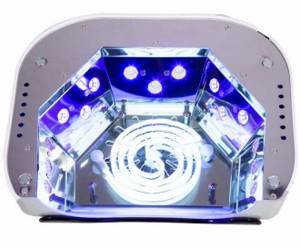
As noted above, the peculiarity of the procedure lies in the special conditions for drying the coating in a lamp. For this purpose, UV lamps, LED or combined type lamps are used.
Theoretically, it is possible to dry regular gel polish (if it is not a special non-photosensitive product) without a lamp, because the sun's rays also contain ultraviolet radiation.
This process will only take a lot of time, and the quality of the manicure will leave much to be desired - uneven drying in the fresh air will lead to peeling, swelling of the coating and staining of your natural nail. Therefore, it is better to use a special lamp - fortunately, there is plenty to choose from.
The lamp power determines the drying time of the coating. Basically, manufacturers produce UV lamps with a power from 9 to 54 W, LED devices with a range of 12-45 W and a hybrid with 36 W of power.
A UV lamp is perfect for drying shellac marked accordingly. In the LED model, it is customary to dry the product marked “LED”. The hybrid lamp is suitable for drying any gel polish.

Application errors
The main mistakes when using gel nail polish, which spoil both the appearance of the manicure and affect the duration of its wear:
- Insufficient preparation of the nail plate with a buffer - the coating does not adhere well to a smooth surface.
- Treating the cuticle with greasy products before manicure - this procedure must be performed after all layers have been applied and dried.
- Poor degreasing, including the use of cotton pads, which can leave lint on the plate.
- Uneven application of layers, as well as too much colored varnish.
- Shaking bottles of gel polish before use leads to the formation of bubbles.
- Cleaning the sticky layer between coats.
- Poor drying.
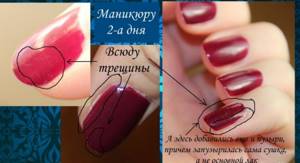
If you use and apply gel nail polish incorrectly, then after just a day such consequences are possible
Knowing such mistakes when using gel nail polish will allow you to learn how to do a neat and long-lasting manicure at home, like a specialist, in the shortest possible time.
Gel polish is an indispensable find for women who care about the beauty of their hands and nails. If until recently such a manicure was considered exclusively a salon procedure, today, thanks to the availability of the necessary means and tools, you can master it at home.
How long to keep
For home use, you can purchase a UV lamp with a small output of 9 watts; the drying time in this case will take 6-10 minutes. For professional use, you will need a 36 W UV device that will dry your nails in 2 minutes. Lamps with a power of 48 W and above are intended exclusively for use in beauty salons by professional professionals.
In the LED model, you only need to hold your nails for 10-30 seconds - during this time the coating will have time to polymerize and become hard and durable.
LED equipment is small in size, which is very convenient, and unlike a UV lamp, it does not heat up during operation. Moreover, the service life of LED lamps reaches 5 years on average, which is very economical in operation.
The main advantage of a UV device is its ability to dry any shellac, which an LED lamp cannot boast of.
A hybrid lamp can provide a short drying time - only 30 seconds. Such a device is suitable for drying absolutely any material: gel polish, colored LED coating, biogel.
In many ways, the choice of lamp depends on its purpose - for drying any shellac in a salon or a certain brand at home, as well as personal preferences.
It is worth noting that gel polish must be dried correctly - if it is not dried, the coating will be fragile and will quickly crack, peel off, in a word, become unusable . And most importantly, if you overdry the gel polish, nothing will happen. The product simply polymerizes and that’s it. No metamorphosis will happen to him. Take this into account when creating your ideal manicure.
Sometimes in the work of a nail artist or amateur, unforeseen difficulties with the quality of the coating may occur - the gel polish bubbles, wrinkles, and collects. Let's find out what to do in such cases and how to avoid them.
If you need a hybrid lamp
Now let’s talk about what you should pay attention to when choosing a hybrid lamp.
- Power . This is perhaps the main thing that people pay attention to when choosing any lamp for manicure. The higher this indicator, the faster the material will dry in the lamp. For hybrid lamps there are different powers ranging from 6 to 90 watts. The most popular are 36W and 48W, as they are optimally suited for all materials. Lamps that are too powerful can cause burning on the nails during the polymerization process. And low-power ones can poorly dry all layers.
- Timer . Agree, few people want to time the drying time using a clock, so almost all modern lamps are now sold with a timer and a display that shows the time.
- The bottom panel . It is convenient if it is removable, then the lamp can be easily used to cover the legs. It's also easier to change light bulbs. In UV/LED hybrids, it is better for the panel to be reflective to effectively diffuse ultraviolet light. But in LED/CCFL hybrids, the presence of a bottom panel is not at all necessary.
- Size . For home use, lamps of a more compact size are usually taken, but for the salon, you can take a slightly larger hybrid to make it more convenient for the client.
- Location of light bulbs. In a good lamp they are located on different sides and across the entire surface of the upper lamp body. This is done to distribute the light more evenly.
As for such parameters as price, design, color, the presence of sensors and other “goodies”, then this is a matter of your taste and wallet.
Among the latest innovations that seem useful to me are:
- portable lamps without wires that require only periodic charging. I think they are the future
- choice of light mode : only ultraviolet, only LED (LED) or both together,
- drying power control button,
- built-in ventilation.
Read about how to choose a lamp for gel polish here.
Why does it collapse?
If you are confident in the quality of the gel polish itself, then the reason why it curls is due to insufficient polymerization of the coating.
Some, in particular, colored types of shellac have a denser and thicker consistency, as a result of which they require additional drying. When applying such gel polishes, carefully follow the application technology - dry each layer in a special lamp for the amount of time required specifically for this model to completely dry the product.
You should also reduce the amount of gel when applying each coat for highly pigmented polishes to avoid a wrinkled film on the surface of the nail.
A faulty drying lamp can also cause the gel polish to not dry and collect. In this case, it is necessary to replace the broken part or purchase a new lamp.
All the steps to a perfect manicure
Coating your nails with gel polish is a procedure in several simple steps. By performing each step in turn, you end up with a neat manicure and a great mood from the result of your efforts.
The entire sequence of applying gel polish comes down to the following steps.
1. Process the cuticle and create the ideal nail shape for you with a file. This is a fairly important step, since the appearance of the final result will depend on your thoroughness and accuracy. Don't forget, gel polish can be worn on your nails for about a month. To ensure that your manicure remains presentable as your nails grow and does not peel off, pay enough attention to this point.
2. Polishing the surface of the nail plate with a special stone. This does not mean that you will cut off the entire thickness of the nail; a couple of movements with the bar are enough. This is done so that there is better adhesion between the natural nail and the artificial coating.
3. Degreasing the nail plate. Nails, like our entire body, release particles of fat to the surface; this is a natural process of the body. To prevent the coating from peeling off, do not forget to treat each nail.
4. Apply primer and natural drying. You have already read about this tool above. If you purchased it, then use it before the next steps of manicure.
5. Applying bonder. As in the previous paragraph, it is not worth repeating. Just use it and dry it in the lamp for enough time.
6. Base coat, or base. Serves as a barrier between the living nail and the gel polish so that the coloring pigment does not penetrate the structure of the nail plate. In addition, the base levels the surface. Apply to the nail plate and seal along the open edge of the nail. For perfect application, many artists use an additional thin brush. It is more convenient to distribute the base to fully cover the entire nail. Apply and dry in a lamp.
7. Queue of colored gel polish. The application procedure is exactly the same as the base coat. If you decide to make several layers, then each of them is dried in a lamp separately.
8. You can decorate the colored coating in various ways. Rhinestones, water-based, adhesive or other stickers, special adhesive tapes, glitter and many other materials are great for this.
9. The final stage is applying the top coat. It is no different from applying the base; the ends of the nails are sealed in the same way. The top coat serves as a protective top layer from external influences and keeps the visual appearance of the manicure ideal for a long time. Today there is a glossy and matte topcoat. Combining them to create interesting gel polish manicure options is quite popular.
The sequence of these steps will lead you to excellent results for a long time.
Popular chemical dryers for varnishes
- Seche Vite is a gel polish dryer. Polymerizes varnishes of different structures in 3-6 minutes, depending on the number of layers applied. Among the disadvantages, one can note that it works poorly with liquid gel polishes - the product slightly pulls off the coating from the beginning of the nail plate.
- Essie Quick-e Drying Drops are an oil-based nail polish dryer. A pipette is used to apply the product to the surface of the nail. Among the advantages, one can note the softening of the cuticle; among the disadvantages, there is the lack of properties of the top.
- Orly - will cope not only with the top layers of varnish, but also with the lower ones. The product has the properties of a fixative, which provides the manicure with additional durability. For the best effect, the composition should be applied to the nails twice.
- Insta-Dri-Anti-Chip Top Coast - drying in the form of a varnish with a brush. Polymerizes the coating within three to five minutes, protects gel polishes from cracks and chips. Some masters note that the product thickens quickly.
- Smart enamel is a product with safflower oil. Comes complete with a pipette. Advantages: does not have an unpleasant odor, has a beneficial effect on the cuticle, moisturizes the nails. Among the disadvantages, it is worth noting the liquid consistency, which reduces the possibility of saving money.
Some tips
If you are left-handed, then manicure should start on the left side and vice versa. Cover the thumb first, dry it, then all the other fingers, and so on for each hand. When drying, you need to place your fingers evenly in the lamp so that the “light” falls evenly, and not twist your thumb. The entire manicure process should take you half an hour or a little more. In addition to quick application, shellac manufacturers assure that they last not up to two weeks, but even up to three without chips or cracks. To achieve this effect, you need to use components from a single manufacturer (base, top, primer).
After several manicure procedures, you need to take a break for at least a week; during this period you need to take care of the health of your nails and cuticles.