Nail pigment today is quite actively used by manicurists, but ordinary girls still don’t know everything about how beneficial it is to use it. The unique material significantly expands the possibilities of nail art, allowing you to create interesting and unusual models of spectacular nails, even at home, not inferior to those that we all admire when looking at the covers of fashion glossies.
Interesting! The unique qualities of the material allow it to be used for evening eye makeup, thus harmoniously completing your look, thought out to the smallest detail.
What are pigments?
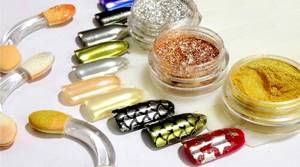
Nail pigment is a fine powder, similar to powder, the particles of which are very small - only 5 - 180 microns. Due to this, the pigment lies on the nails in a very thin layer, without creating additional volume.
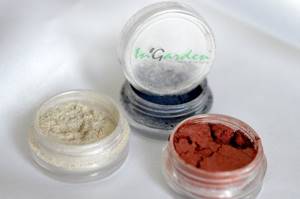
If you touch the pigment with your fingers, this powder is somewhat reminiscent of starch. A dye is used to change the color of a surface or material. It does not dissolve like a dye in water, but interacts with the material, changing its color.
Depending on the method of production, pigments are:
- Of natural origin. They are obtained by grinding natural rocks. This method has been used since ancient times to obtain a dye. But now it's too expensive.
- Synthetic pigments. They are obtained chemically and are the most common at the moment.
- Metallic ones are obtained from various alloys and metals.
Pigments are also sometimes called rub-ins because the main way they are used is by rubbing into the surface of the nail.
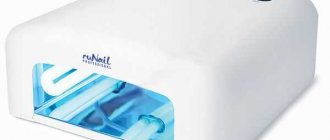
The best neon polishes
A set of neon manicure polishes can consist of different brands. In order not to be mistaken with the manufacturer, we have identified several popular series for you:
- Ciate Corrupted Neon Summer (300-350 rubles). These are luminescent varnishes made using new technology. She makes the manicure shiny and glowing at night. You can also choose colors in the palette for a bright jacket.
- Orly colorful gel polishes (460-580 rubles). The company offers 6 neon colors.
- Revlon pencil (300-380 rubles). They create monochromatic versions or draw ornaments, figures, flowers.
- Varnishes from LiaNail (320-470 rubles). They cover the nail plates with a rich shade in one layer.
- Budget series Limoni (120-170 rubles). This new brand doesn't offer a lot of colors, but for the price these polishes are of good quality.
Types of nail pigments
You will be surprised at how wide the variety of pigments and design options are. There are:
- Neon pigments of bright colors,
- Cat eye pigments that can imitate the effect of cat eye gel polish,
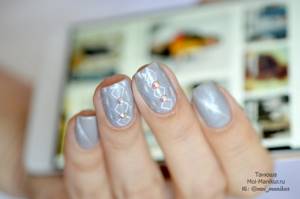
- Mirror rub or silver and gold pigment, once at the peak of popularity for creating the effect of mirror nails or a metallic surface,
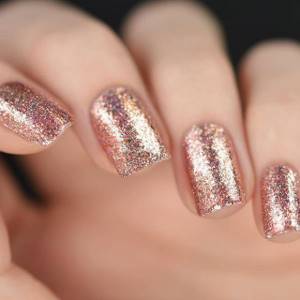
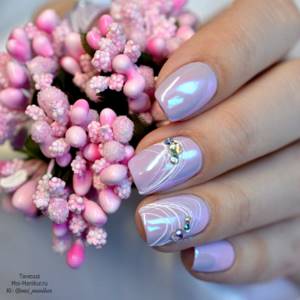
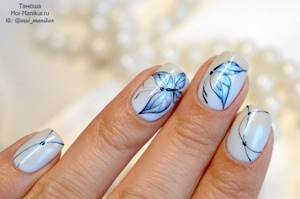
- Rainbow pigments (pearl rub or Unicorn rub, northern lights, mermaid tail - whatever they call it) with delicate shimmers,
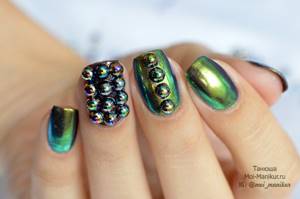
- Chrome rub or chameleon pigment (chameleon rub) with multi-color tints,
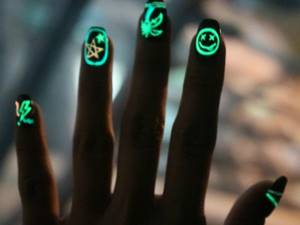
- Reflective pigments that are visible in the dark thanks to the quartz particles they contain,
- A pigment with a prism effect that creates brilliant holographic shimmer.
And that is not all. Combinations of effects are also possible, for example, neon chrome pigment.
Color spectrum
The following colors are suitable for neon manicure:
- green - classic option;
- pink – for a feminine look;
- yellow – attracts attention, like an acid marker in the text;
- lilac – stylish and fashionable;
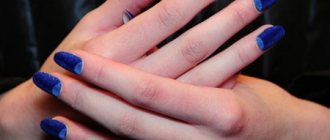
- blue - for those who do not want to stand out;
- peach is an unusual shade for neon;
- orange – glows not only in the dark.
All these colors are in trend now.
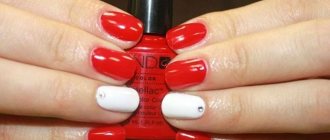
Neon varnish on a white coating looks brighter than on a transparent one.
Neon rubbing is very popular today; for originality, you can even make your nails multi-colored.
Nail design using pigments
There are many options for how to use nail pigment. Next we will look at 11 types of designs and several application methods.
1 – Rub in pigment
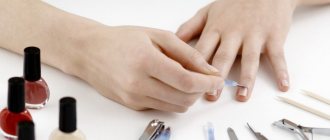
This is the most common way to use pigments, which is why they are called rub-ins. Suitable for all types of pigments. You can do the rubbing step by step like this:
- Nails are coated with gel polish according to the following scheme: base + 2 layers of gel polish + top or base.
- The pigment is applied to the surface of the nail using rubbing movements. You can do this simply with your finger, a silicone hoof, or an applicator if it came with the pigment. The rubbing does not apply equally smoothly to all surfaces. For example, if you rub it on top of the sticky layer, the material will simply roll into lumps. Therefore, here it is better to use, for example, a fan brush: first sprinkle the pigment over the entire surface, then carefully shake off the excess.
- It is recommended to immediately after rubbing the pigment into the lamp for a short time so that it sets better.
- We thoroughly clean the skin around the nails (near the cuticle and in the lateral sinuses) of pigment using a stiff brush so that it does not later provoke detachment of the material.
- We apply a fixing layer of topcoat; if leveling is necessary, then two layers.
It is recommended to rub in on top of colored gel polish of the same or very similar shade: if there are small bald spots, this will help disguise them.
The rub looks beautiful on black and white colors - they give additional saturation to the pigment. Some artists even recommend using gel paint: it is more pigmented and its dispersion is more convenient to work with pigment. The colored rub can be applied directly to the base, then it must be done in two layers: base + rub + base + rub + top.
Rubbing can be done not on the entire surface of the nail, but only on the design (monograms, geometry, and even into the web).
This method of application is also often used to imitate gold casting.
There are many more nuances of rubbing in pigments and they deserve a separate article. I have already written a lot here.
2 – Mixing with gel polish
This way you can easily enrich your palette of gel polishes by adding interesting effects and shimmers.
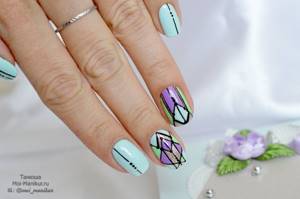
By mixing the pigment with the base or top, you can get a stained-glass translucent color. In this case, the pigment concentration should be no more than 5%. If you add pigment to colored gel polish, then the permissible pigment content is only 1%.
It is worth considering that adding pigment increases the polymerization time of the material in the lamp.
3 – Gradient pigments
Many believe that this is the easiest way to create a gradient transition on your nails from one color to another. It’s really not difficult to do and, most importantly, quickly. To do this, you will need a soft brush (a hard one can leave marks), for example, a fan brush.
- We cover the nails with a base and colored gel polish.
- Apply one gradient color to a third of the nail near the cuticle, rub it in and slightly stretch it down. Clean the brush.
- We apply a pigment of the second color to the part of the nail at the free edge and do the same, only stretching it in the opposite direction.
- We send the gradient to the lamp for a while to set.
- We clean the periungual surface of excess pigment.
- Apply top coat.

In this article of my blog there is a MK video showing how this design is performed.
4 – Stamping with pigments
Believe it or not, it is also easier to do than regular stamping with gel polish or varnish. And the drawing itself can be done not just in one color, but in the form of a gradient. The only negative is that stamping with pigments may not look as bright as if it was done with a special paint. Here is a step-by-step algorithm:
- Apply a base and two layers of gel polish to the nails.
- Using a fluffy brush, apply pigment to the selected design on the stamping tile.
- We remove excess pigment with a scraper in the same way as when stamping with regular varnish.
- We transfer the design to the stamp, and then from it to the surface of the nail.
- Let's dry the pigment a little in the lamp (otherwise the top coat may smear it, since the brush in it is quite hard).
- Now you can cover the pattern with a top coat.
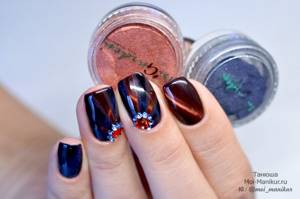
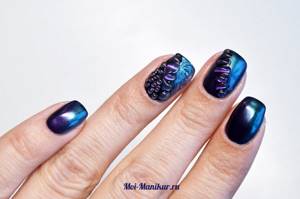
5 – Cat Eye Design
A special magnetic pigment is used for this. To get the cat eye effect with pigment, you can use two methods:
- Mix the pigment with the base or top (or you can use colored gel polish) on the palette. After this, it can be used as a gel paint for painting on nails, only magnetized before drying to obtain a highlight.
- Sprinkle the pigment directly on the nail over the undried top coat. Here you should be careful so that it doesn’t turn out that one place is empty and another is dense. If necessary, you can correct it with a thin brush. This method is more appropriate for covering the entire nail plate, rather than for a pattern with a cat's eye effect.
I recommend learning more about all the intricacies of working with magnetic pigment in this article.
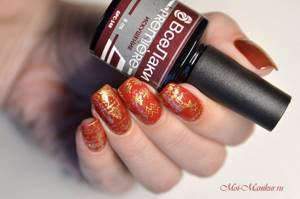
6 – Neon nail design
Neon pigments can also be mixed with the material or rubbed in. In terms of brightness, they are slightly inferior to neon gel paints for nail design, but they cost significantly less.
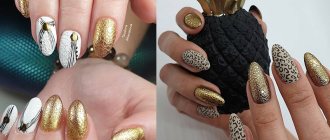
7 – Mirror nails
The easiest way to create a mirror-like surface on your nails is to use pigments. The same goes for getting chrome and holographic effects on your nails. Previously, transfer foil was used for this, but it left cracks where the nail curved. Pigments turned out to be much more effective in this regard.
8 – Volumetric design
The 3D effect is created, of course, not by the pigments themselves, but by a transparent gel pattern on top of the rub. This voluminous design looks especially elegant with iridescent iridescent pigments.
9 – Textures
Using pigments, you can imitate textures on your nails by stretching them over a wet top coat or colored gel polish.
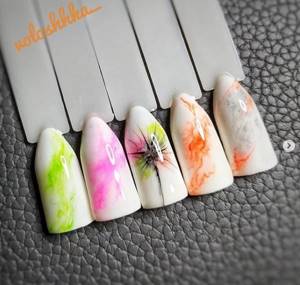
Author @voloshhka
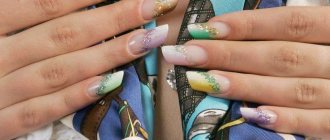
10 – Watercolor effect
Yes, and such beautiful watercolor smudges can also be made using only nail pigments.
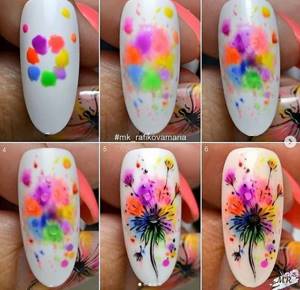
Author @rafikova_nailart
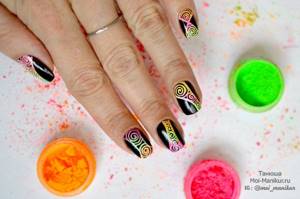
11 – Decorate with pigments
Pigments are often used to add color to black and white gel paint designs. It is especially easy to create a multi-colored background this way.
Features of manicure
The main distinguishing feature of neon nail polish is its dazzling brightness.
It’s better to do this manicure when you’re going on vacation—it’s unlikely that anyone in the office will appreciate your originality.
By decorating your nails with jellyfish, fish and other sea creatures, you will get a themed design.
This option is also suitable for young girls, she will definitely be the center of attention. Neon nails will make any look catchy and memorable.
There are several more features of acid manicure:
- choose it for short and medium length nails;
- do not overdo it with makeup - it will look vulgar;
- monitor the condition of your manicure, avoid chipping and use oil to soften the cuticle;
- Carry a bottle of varnish with you so that you can touch up problem areas at any time (if shellac was used, this is not necessary).
Find a balance: choose either an acidic manicure or flashy outfits. Together these will work against you. Contrasting nails go well with clothes in light blue, soft pink, beige and white tones.
Secrets to perfect application
When working with each type of pigment there are subtleties. This also applies to a certain method of using the rub. I have already mentioned some nuances in each paragraph about types of design with pigments. What else can I recommend:
- Thoroughly clean the nails after rubbing to remove any remaining loose material. To do this, use a hard brush or even a lint-free cloth soaked in liquid (the main thing is not to wash off the pigment on the nail). Even small specks of dust can lead to subsequent detachments.
- To be safe, always cover the pigment with two layers of top coat. If you apply the finish too thinly, then even when removing the stickiness, you can remove some of the pigment.
- When mixing with base, top or gel polish, do not overdo it with the amount of pigment, otherwise it simply will not dry on the nail.
- Mix the color on the palette; do not do this in a jar, as this may cause bubbles to appear in the gel polish.
- When rubbing in pigment, it is better to first look at the tips to see how it works with different materials, since it is not always possible to create a bright and beautiful effect.
I hope I have convinced you that the flight of thought when choosing a nail design with pigments can be simply unlimited! If you have more ideas or photos of manicures with pigments, write in the comments under the post, we will put together a collection!
Advantages and disadvantages
The clear advantage of this product is its resistance to drying out while work on the nail design is still in full swing. Also, the ease of use is also captivating. And many more “positives”:
- when covering the entire surface of the nail with several layers of gel paint, a minimal layer is formed that does not thicken the nail;
- the ability of the nail to “breathe” under a layer of such coating;
- optimally used for various design techniques: Chinese painting, aquarium design, for a “smile” or “moon” in French and lunar manicure, casting technique, etc. Ideal for use in a unique planar design;
- no need to intensively file the nail (remove its shiny layer);
- While the gel paint is drying, you can adjust the design;
- It is possible to mix different colors to obtain a unique shade, just like real artists do.
But besides all the positive qualities of the product, there are also minor disadvantages:
- It will not be possible to remove gel paint with special liquids; you need a mechanical solution to the problem: files, a router;
- It is inconvenient to use on thin nails, since gel paint does not provide them with additional strength.
Once you get the hang of using gel pigment to design your nails, you can create real masterpieces. And your inner sense of style will only help you create an organic tandem of gel paint and other auxiliary accessories: foil, mica, rhinestones, stones, etc.
How to choose materials
If you want to do everything right, purchase only high-quality pigment. Cheap polyester dust can leave streaks and reduce the life of the coating. If you don't know which manufacturer produces first-class powder, check out the reviews.
The most popular mirror pigments are gold and silver. For a pearl effect, choose light shades. For those who want a rich design, it is better to use dark gel polish as a base. To create a more delicate look, opt for pastel shades.
If you use a brush, choose a very soft one so that the particles stick to it and do not fall off.