New original manicure techniques change each other at such a speed that it is difficult for even the most attentive fashionistas to keep track of them! Beauty salons invite you to try all the new techniques, and girls try to reproduce them at home, using the means at hand! A new feminine trick for creating gorgeous designs on your nails is using tape! It would seem that the object that is used for gluing paper has absolutely nothing to do with the original nail design. A manicure using tape is not that difficult! Even beginners who have just started learning the art of manicure can do it at home!
Manicure ideas
You can cut out any pattern from tape and paint it in any shade by gluing it onto your nail. Plus, if you don’t like something, you can easily delete it.
There are many ideas for manicure with tape:
- geometric;
- French;
- lunar;
- manicure for short nails;
- with different prints and patterns.
Let's look at some of these types of manicure in more detail.
Manicure technique with tape
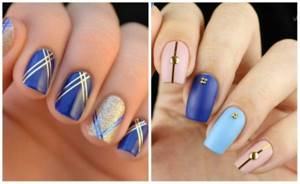
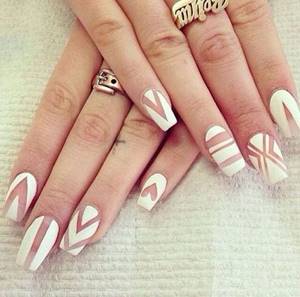
A manicure using adhesive tape follows the same pattern. The only difference is in the chosen design, which may require two, three, four or even five instead of one straight line. But we will not go that far, but will learn only the basics. If you perfectly perform a simple manicure with tape, then soon you will be able to create complex geometric prints (and more!).
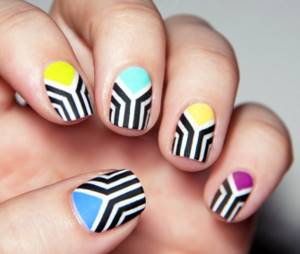
A manicure using adhesive tape follows the same pattern. The only difference is in the chosen design, where instead of one straight line, two, three, four or even five may be required
If you perfectly perform a simple manicure with tape, then soon you will be able to create complex geometric prints
The main set of tools differs from the usual only in the presence of adhesive tape
The main set of tools differs from the usual only in the presence of adhesive tape. That is, in your arsenal there should be several colored varnishes, a base for them and a fixative, and optional decorative elements.
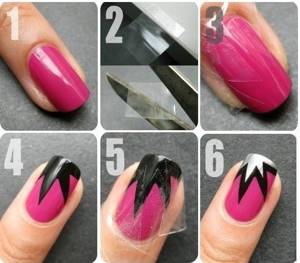
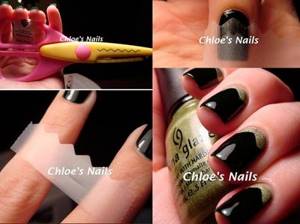
Step-by-step instructions for a basic manicure with tape:
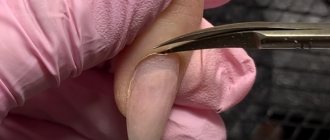
- Treat your hands. Bend the cuticle so that it is not too long, give the nails a shape (in our case, the contours of a soft square look better).
- Apply a clear base coat to your nail plates and wait until it dries completely.
- Apply one of your chosen colored polishes to all nails and wait until dry.
- Take the tape and carefully cover half of the nail diagonally.
Take the tape and carefully cover half of the nail diagonally.
- Paint the part of the nail not covered with tape with a different colored polish. You can use a brush to go over the tape, carefully outlining an even strip. When each nail is processed, you need to wait for the varnish to dry.
- Carefully remove the tape from each nail.
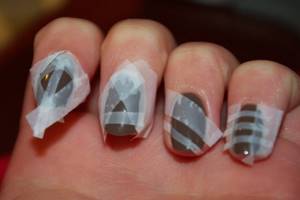
Carefully remove the tape from each nail
- Cover the top with clear sealer and take a photo of your work.
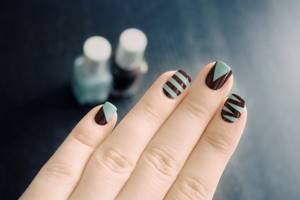
In fact, the tape can be placed in any direction. Diagonal is the most common and simplest option. Using tape, you can create an amazing design for your nail plate if you give freedom to your imagination. Don't forget that you can use multiple adhesive tapes in one design.
In fact, the tape can be placed in any direction.
With the help of adhesive tape you will make an amazing design of the nail plate if you give freedom to your imagination
Don't forget that you can use multiple adhesive tapes in one design.
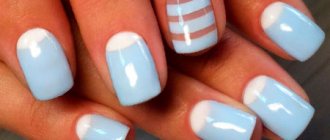
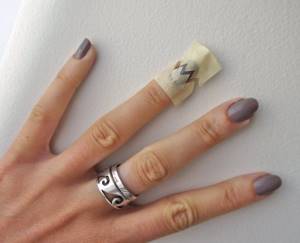
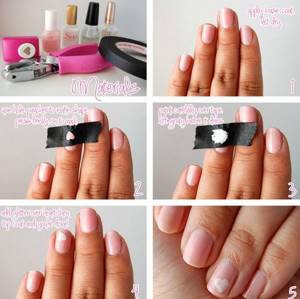
On short nails, a simple but at the same time interesting manicure with a stripe looks harmonious. To do it, you need to first apply the background color to the nail. Wait for it to dry completely. Then glue pieces of tape on both sides so that there is a vertical stripe in the middle. It needs to be painted over with another color of your choice. After this step, also give the polish time to dry, and sharply tear off the tape from your nails. You will get a straight line of a different color. To secure the result, apply a fixative or regular clear varnish on top.
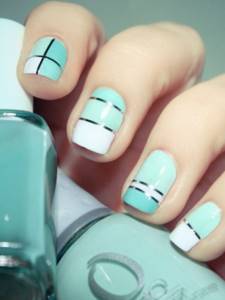
A simple but at the same time interesting manicure with a stripe looks harmonious on short nails.
Before each decorative design of your nails, pay due attention to the condition of the skin of your hands, shape, length and cuticle
Marigolds should be identical and well-groomed - this is the key to success
Advice! Before each decorative design of your nails, pay due attention to the condition of the skin of your hands, shape, length and cuticle. Marigolds should be identical and well-groomed - this is the key to success. If everything is completely wrong, even first-class design will not save the situation.
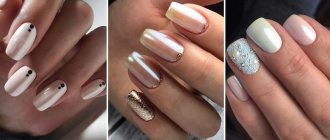
Manicure using adhesive tape and adhesive tape
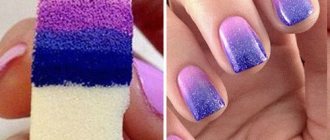
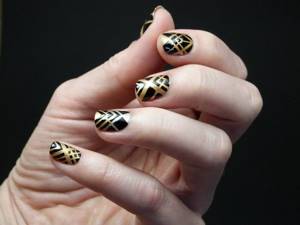
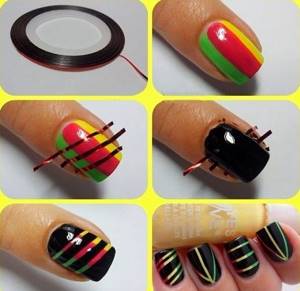
First you need to think about the color palette in which you can perform a manicure. For example, we will have a dark varnish - black, brown, purple - and on it there will be several multi-colored rays made of tape.
special adhesive tape - it is made just for manicure.
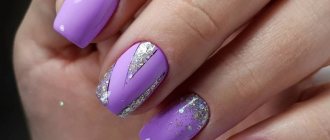
How to make multi-colored rays.
- We take three varnishes of different shades: for example, yellow, green and red.
- We draw three lines on the nail: first in yellow, then in green and finally in red. We are waiting for the varnish to dry.
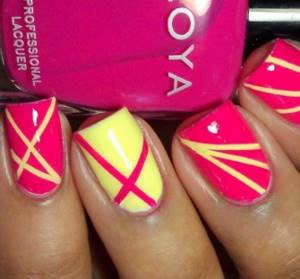
- Cut out rays from tape. First, to avoid excessive stickiness, apply the stencil to your hand and then to your nail. We apply this stencil over all nails. You can cut out different rays: parallel, intersecting, you can glue two, three or four rays - this way the design on your nails will look impressive.
- Paint the nail with dark varnish. Waiting for it to dry
- We remove the stencil - you get an original manicure in a geometric style!
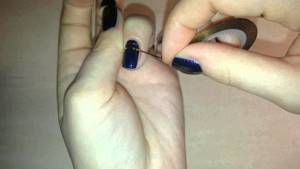
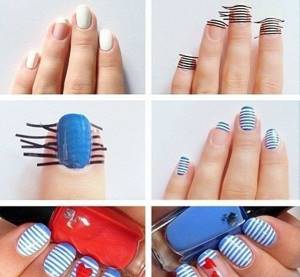
For this manicure we will need: white polish, blue polish and tape .
- Apply white polish to one nail and wait for it to dry completely.
- Take the tape and carefully stick it on the nail. The pattern may be different, and so can the number of ribbons: the main thing is not to overdo it. It would be good if the tape was blue.
- Cut off the excess with nail scissors.
- We cover the remaining nails with blue varnish and secure the coating with a base. Manicure with tape is ready!
Scotch tape or special nail design tape: what to choose
A manicure with tape takes a long time due to its cutting. There are bits of glue left on the scissors, and your patience is only enough to design several nails.
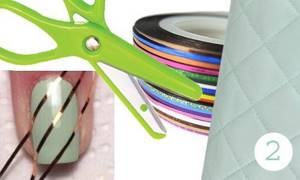
Adhesive tape for manicure. As you can see, it is very thin and can be used to quickly create neat lines.
Scotch tape for nail design solves the problem of preparing thin strips in no time! You just have to purchase the necessary colors in the store and use them to create a perfectly even manicure. Using ready-made thin strips, you can make a manicure of any complexity. Scotch tape, by the way, can be left on the nails - such a manicure looks incredibly beautiful, and most importantly, your nails will always shimmer in the sun due to the shiny surface of the tape.
What can happen if you don't remove the tape from your nails? Click on the photo to take a closer look.
Experiment and make diagonal, vertical, oblique patterns. The tape must be secured with several layers of clear varnish or Top Coat. This way it won’t come off and will stay on your nails for several weeks. Despite all the obvious advantages of tape, adherents of traditional manicure tools will never go wrong if they remain faithful to tape. This material is much cheaper and allows you to create strips of any thickness and shape. By the way, you can make shaped stencils from tape, for example, a heart, as shown in the photo:
Below, watch two videos showing how to use nail tape. The first one is more sensible, but the second one can also be useful if you are serious about it!
Lunar manicure
This manicure has become fashionable and is now one of the most popular styles.
It should be done like this: paint the nail plate with varnish, and leave a light hole near the nail to paint over it with another, contrasting varnish or cover it with glitter. This manicure looks very impressive, and it’s quite simple to do.
- We paint the nail with a dark-colored varnish, leaving the nail hole unpainted. We are waiting for the varnish to dry.
- We take tape and cut teeth on the tape. You can use special serrated scissors - it will be easier and faster. You can cut an oval hole - it all depends on your imagination and desire.
- We glue the tape with teeth onto the hole.
- Paint the hole with light varnish or cover it with glitter . Lunar manicure is ready!
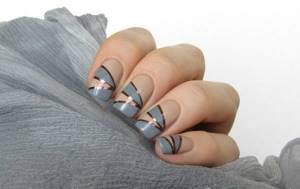
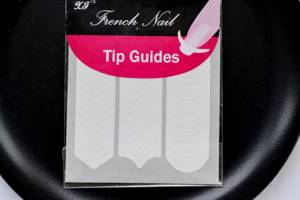
Types of stripes
Strips for French manicure always look like paper stickers located on a paper base. Rarely, they can be made not from paper, but from film. Based on the manufacturing principle, all such stencils can be divided into two large groups:
- Factory-made strips;
- Homemade stencils.
Of course, homemade stencils are usually less convenient to use. But the result obtained with their help does not differ from that guaranteed by purchased strips.
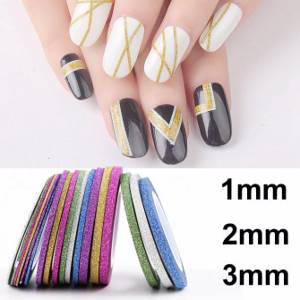
Factory-made stencils can be of different widths. This is purely a matter of convenience. Some people cannot use wide strips because they do not adhere well to the nail, which makes it impossible to obtain a clear line. Others, working with narrow strips, can cut beyond their aisles and thereby spoil the manicure. Typically, the width of the strip ranges from two to five millimeters.
[yandex2] [google2]
In addition, their shape may be different. They can have an acute angle or be straight. Recently, stripes for French jackets with wavy outlines have begun to appear. In addition, these stencils can be asymmetrical and have varying degrees of curvature. This is done taking into account different lengths of nails, because, usually, the longer the free edge, the more the smile line should be curved towards it. Whereas for short nails it can be almost straight.
In terms of how to use strips for a French manicure, everything is limited only by your imagination. They can be moved and rotated, creating an asymmetrical smile line, re-glued several times, making a striped manicure and much more. For example, this type of manicure using the discussed stencils is popular, such as reverse French. In this case, the strip is turned over and glued closer to the cuticle, forming a thin strip next to it, covered with a contrasting color. Another popular option is a lunar manicure, the meaning of which is also to form a zone of contrasting color near the cuticle, but it will not have the shape of a strip, but an elliptical one.
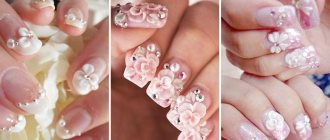
Manicure with fabric
It’s very stylish to mix geometry and romance in a manicure: for example, draw two lines and a heart on one of the nails. Let's try to do this manicure:
- Let's take this palette for manicure: pink, gray and white. We paint our nails with pink polish, leaving one of them unpainted - for example, the middle one.
- We paint the nail on the middle finger with three colors: draw a line of pink, gray and white. Let the varnish dry.
- We make a stencil from adhesive tape : cut out three strips with a diameter of 3 millimeters and glue them to the nail.
- Now you need to make a fabric stencil . To do this, take a piece of material and draw a heart on it. Cut out the heart and place a piece of fabric on the dried nail. Draw the shape of a heart through the stencil and let the varnish dry.
- After the painting procedure, you can fix the polish with a nail base so that the manicure lasts longer and your nails shine very beautifully.
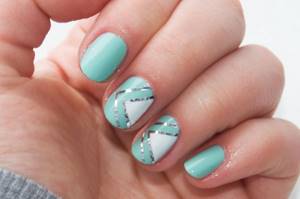
Bright mosaic manicure
Mosaic is a very bright and effective design that will look great on nails. For this manicure we will need two varnishes: black and white.
- We cut out a stencil from tape in the shape of one fragment of the mosaic - we think everyone knows what it should look like.
- Paint the nail with white varnish.
- Glue the cut out stencils onto the nail perpendicular to each other.
- Paint the area of the nail where there is no stencil with black varnish. There is no need to be afraid to “drive” the brush onto the stencil - we will remove it in the future anyway.
- As soon as the varnish has dried, remove the stencil from the nail - you get a spectacular mosaic manicure!
You can go the other way: if it’s difficult for you to cut out a fragment of a mosaic from tape, you can simply cut out small rectangles, and paint on the circle with a brush later, after removing the stencil.
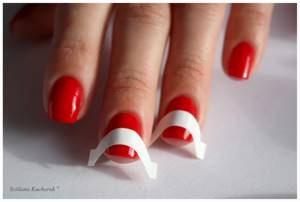
French manicure
It is also quite possible to do a French manicure using adhesive tape - it will even be easier and more convenient!
- Apply base coat polish to the nails; We are waiting for it to dry completely.
- Take the tape and cut out a small ribbon from it.
- Glue the cut tape to the top of the nail.
- Apply varnish of the chosen color. It must be remembered that for French manicure light beige or pink shades of varnish .
- We cover the space left from the stencil with white varnish, traditional for French manicure - a stylish manicure is ready!
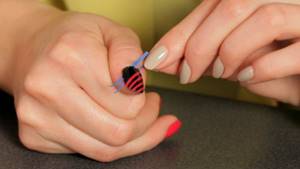
Bold manicure with a predatory print
A predatory print always adds confidence and attractiveness, and a manicure in this style will definitely not leave you unnoticed.
- We take two varnishes: dark brown and light brown.
- Paint the nail plate with light brown varnish.
- We cut out a stencil from tape: on one edge of the tape we cut the spiky teeth characteristic of the print.
- Paste the stencil onto the nail.
- Paint the nail along with the stencil with dark brown varnish .
- We fix the result with a nail base - a daring, predatory manicure is ready!
Advantages
There are a number of advantages to designing stripes on your nails. If the strip is chosen correctly, then such a manicure will become an effective addition to both office and casual attire. You don't need any artistic ability to draw.
Specialized stores offer a huge assortment, so you can experiment with colors, types, and textures of stripes.
You can do a striped manicure at home, because it requires few accessories and tools. For this type of nail design with gel polish, the stripe is a laconic print that visually corrects minor imperfections in the surface of the nails.
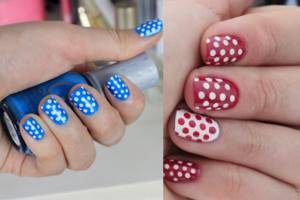
Manicure for short nails
To do this, let's take one of the fashionable solutions - a polka dot manicure . Polka dots are another fashionable print that must be not only on clothes, but also on nails.
- Paint the nail with black polish.
- Cut out round stencils from tape.
- We paste stencils on the nails.
- Paint the stencil with white varnish - almost done! One of the nails can be made different from the others - for example, place a heart on it for greater beauty. We discussed in detail how to do this above.
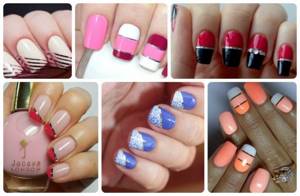
So, we have outlined the most popular manicure ideas with tape. As you can see, with the help of this material you can create a bright, stylish and most spectacular manicure.
We advise you to work with special tooth-shaped scissors - this will be especially useful when creating a moon manicure.
Don't be afraid to paint over the stencil itself when you apply the varnish coating - you will remove it later anyway. It is better to choose varnishes that are durable and those that dry as quickly as possible. And, of course, don’t be afraid to fantasize - everything is in your hands and only you can give yourself an original, unique manicure.
Necessary materials
You can get a stylish manicure with a ribbon in a salon, or experiment with an original design at home. After all, you can buy consumables at any store specializing in decorative cosmetics.
The tape comes in different sizes and looks like tape. The most common and popular option is a thin colored strip, no more than 1.5 millimeters wide. Using such decorative material is very simple, and the result exceeds all expectations. The manicure turns out not only stylish and original, but also aristocratic and sophisticated.
The thing is that on one side the stripes are colored, and on the other they are equipped with a sticky layer that adheres quite firmly to the nail. All you need to do is cut off the desired piece of tape from the skein and carefully stick it to the nail plate.