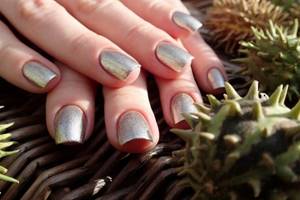
The hands of a real woman should look well-groomed, otherwise they are not hands, but the paws of Chewie from Star Wars, and the owner of neglected nails herself turns from a mystery girl into a slob from work who is used to washing with her hands, not arousing any sexual interest.
Therefore, you should not be lazy and look for excuses for yourself, you need to learn to be beautiful and natural. For starters, you can at least paint your nails. The manicure procedure takes an hour at most, even using gel polish at home it will take two hours.
You can devote two hours a week or two to your nails, because they signal to the whole world about a woman’s attitude towards her beloved. But the world doesn’t need to know that a girl walks around at home disheveled, cooks only in the presence of a man and often forgets to wash off her makeup before going to bed - in short, that she doesn’t really love herself very much...

How to properly apply gel polish to your nails at home
What tools and supplies will we need?
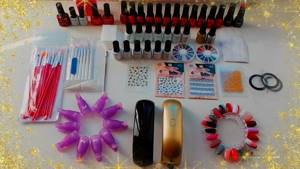
Before starting the procedure, you should make sure that you have all the tools and accessories for manicure or that an equivalent replacement has been found. Which materials are definitely needed, and which can be neglected? To get a manicure, you need everything from this list (what’s missing can be put in, and what’s superfluous can be put aside):
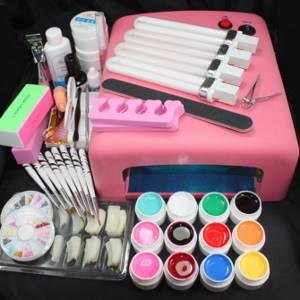
Manicure set
- standard manicure set (files, pusher, buff, scissors, grinder, tweezers, brushes and nippers of different shapes and sizes, so that you can remove all unnecessary);
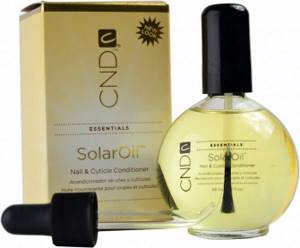
- oil for removing cuticles (castor, burdock, almond or jojoba);
- spatula or orange stick (by the way, so named because these manicure sticks are made from orange wood, it is soft but durable, injures the nail plate and has anti-inflammatory properties, it is convenient for removing excess gel);
- primer (it is best to choose a degreaser without toluene and formaldehyde);
- brushes for application (allow you to make nails with an unusual design);
- bondex;
- cuticle trimmer and burr;
- UV lamp (or any other device with ultraviolet radiation - the only manicure equipment at home);
- lint-free wipes (allow you to adjust your nail manicure);
- clinser (solvent of the liquid layer, it can be prepared even at home: you need to mix 70 ml of water and 30 ml of alcohol);
- cotton wool;
- gel polish remover (Santera, De Lacroix, Cody, vinegar, hydrogen peroxide and even extraction gasoline, if we are talking about washing off the coating at home);
- foil (needed to cover the nails during softening);
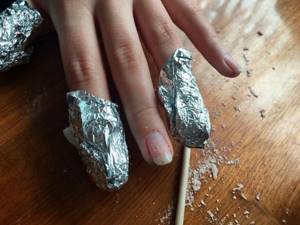
An example of using foil for manicure - varnish of the desired color;
- thermovarnish (for water manicure);
- finishing and base shellac (to seal the color).
If all the manicure products are ready, you can begin the application procedure itself. Below it is discussed step by step. The application sequence must not be violated.
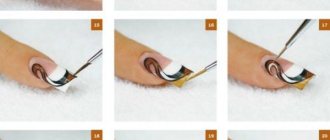
Stages of the procedure step by step
Step-by-step photo instructions for performing a classic manicure with gel polish
Preparation
Before applying gel polish or first you should prepare your nails. You need to carefully clean them of the previous coating, trim the cuticles along the edges, adjust the free edge and be sure to disinfect the nail plate!
Preparing for a manicure
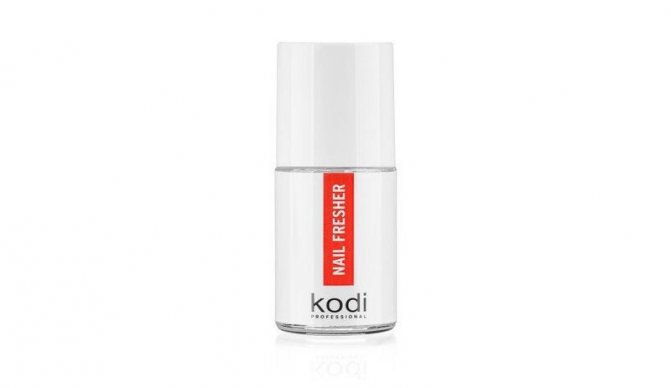
Disinfection is the prevention of fungal diseases under the varnish, since it removes fat, excess moisture and bacteria from the nail. Also, the disinfectant simply cleans the nail from dust and dirt so that the shellac adheres better.
Professional preparations that come in sets with gel polish can be used as disinfectants, but regular alcohol is suitable for manicure at home. Moreover, it is pure alcohol, and not vodka, not perfume or lotion! There are simply too many additional components in these products that prevent the varnish from fixing to the plates and can erase it. Plus, alcohol has a long period of activity and works even under shellac.
Before starting the procedure, you must once again make sure that the nail is cleaned of the previous varnish. To remove cuticles, you need to use a special product or oil, but you cannot steam your nails, as they can peel.
In fact, when preparing, you should do a regular soft hygienic manicure as a base, but do not immediately apply varnish. Moreover, you don’t have to shorten the nail too much; shellac usually strengthens the nail plate, but everything needs to be sanded, otherwise the gel base will lie unevenly. Polish the nails with a buff, holding it along the nail plate. Removing the top keratin layer of the nail helps the shellac to better adhere to the plate. You will have to remove it, although it seems that this causes great harm to the nail, but this is not so. Then the nail is degreased and a primer is applied.
As a little trick: the skin of your hands can be protected from the harmful effects of shellac by applying regular sunscreen or baby cream. Otherwise, the effect of ultraviolet radiation may dry it out ahead of time.
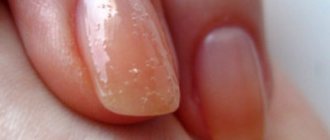
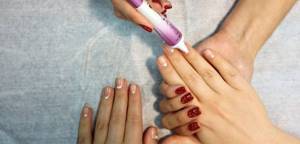
Applying base coat
A transparent shellac base is needed for better adhesion of the product to the nail plate. The weaker the nails, the worse the polish will adhere to them, so they are strengthened with a base coat. You can’t skimp on shellac base, even at home, because a bad base will ruin the entire manicure. The base shellac must be applied carefully and evenly to the nails in a thin layer and begin to dry in a UV lamp, then repeat the painting again, and apply the top coat immediately after the base.
Application of topcoat
The top coat of shellac is also called the topcoat because it seals the entire coating. It is done at the very end on fully prepared and treated nails. The brightness of the color and the neatness of the nails depend on the correct coating.
Immediately after application, you should use a dryer, and after two minutes, you should evenly lubricate the area around the nails with hand or lip balm so that the skin does not dry out or crack.
If you follow the classic concepts of gel polish, then nothing is glued or applied to the top. Exceptions may be large elements, for example, rhinestones, but if possible you should avoid this, since a manicure or pedicure will look untidy due to such sealing. This is one of the many secrets of manicure.
Final stage
After properly applying the top coat and drying it in a UV lamp, blot your nails with a napkin containing liquid to remove the liquid. After this, the hands are lubricated with moisturizing cuticle cream and the shellac coating procedure is considered complete.
Lifehacks for the perfect manicure
Useful tips that greatly simplify the process of applying gel polish and extend the life of your manicure. Share your life hacks in the comments.
To make the polish last longer
- Try to carefully apply both the base layer, the varnish layer and the TOP in a thin layer. Periodically blot the brush on the neck of the jar so that there are no dangling drops on it. Be sure to remove any excess.
- During the day, try not to come into contact with water.
Read: Fish diet for losing 10 kg. Menu for every day
Bubbles
To avoid the formation of bubbles, do not shake the varnish before painting.
Differences between primer, bondex, and clinser from each other
Shellac terminology is full of unfamiliar words, the meaning of which a novice manicurist can only guess. At least some of them should be considered. Below is a step-by-step comparison of three key shellac products.
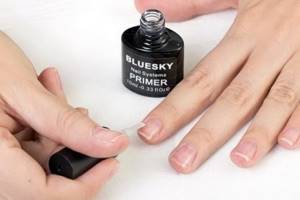
- The primer is used to prepare the nail for adhesion, but it does not adhere anything, but only removes everything unnecessary on the plate. It can be compared to priming walls for wallpaper. It restores the pH of the nail plate, cleans everything so that the product adheres as correctly and firmly as possible. The degreasing primer does not require additional drying under an ultraviolet lamp.
- Bondex is a gel-like substance used to increase adhesion between the nail plate and shellac. Thanks to this product, the nails do not peel off, and the artificial material stays on the nail plate for as long as possible. Its action can be compared to double-sided tape, when it tightens both the nail and the shellac. Bondex should not be applied to the skin or cuticles; if the product gets on your fingers, they should be washed with running water. These two products (bondex and primer) are often confused.
- Klinser is a water-alcohol solution with fragrances and oils. Removes the sticky layer at the very end of applying gel nail polish at home, a fixative, although it can replace the primer if necessary, since it is a good antiseptic.
These three different manicure products are a must-have for any woman who takes care of her nails and doesn't mindlessly try to grow them. If possible, you should purchase them from the same brand, for example, Ingarden, Bluesky, to avoid chemical incompatibility and deterioration of adhesion. Proper care guarantees healthy nails and a beautiful appearance of shellac.
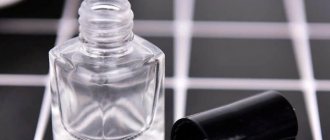
Life time
Often the indicator varies from 2 to 3 years. But you still need to check the date. If it is not found on the packaging, then it is better to choose another product. Information includes duration of use from date of manufacture. This is the period during which the components in the product do not change their characteristics.
But they also allocate a second time. It depends entirely on the storage method. The fact is that when the bottle is opened, the heavy ingredients push the solvent to the top, which is why it begins to evaporate.
The varnish thickens and eventually becomes unusable. Therefore, it must be left in a dark place, protected from direct sunlight.
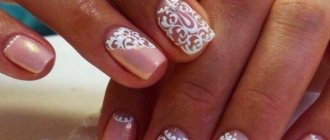
How to make designs on nails with gel polish?
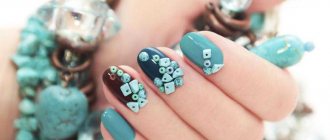
Nail art is a type of manicure in which, in addition to the standard classical treatment of nails, various designs are also reproduced on them according to the technique. Shellac quickly gives freedom to decor, which is why there are entire trends in nail design where images are applied to a ready-made coating. You can make absolutely unimaginable pictures on your nails, it all depends on the artist’s imagination, but you need to understand that individual bright patterns will look more impressive on long nails, and their use on short nails is unacceptable. Examples are shown below.

Nail painting techniques.
There are many techniques for painting with gel polish professionally, but only a few of them can be used at home:
- painting technique with a thin brush;
- dotting technique (a special tool with a small ball at the end);
- dot manicure technique (somewhat reminiscent of children's drawing using dots with the described order);
- “wet” technique: the varnish moves freely on the nail plate using a toothpick or needle;
- liner manicure technique.
Before starting to use any of the techniques, you should observe the master and his manicure sequence. If you can’t go to a salon, you can get the necessary tips from videos on manicure lessons on the Internet. But to gain experience, you still need to work and improve yourself.
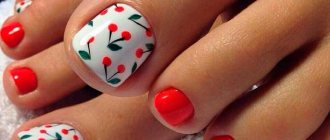
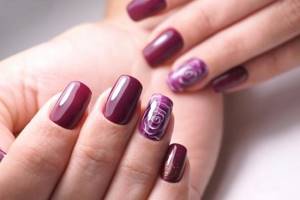
Rose gel polish: step-by-step instructions
Rose gel polish is one of the simplest designs, so it can be reproduced even by beginners. The entire procedure from scratch can be divided into several stages.
First you need to choose the right colors. Most often they choose white for the background and red and green for the flower, but this is not necessary. You can play with the colors and choose something unusual. For example, on a matte natural beige tone, a glossy rose is slightly visible. Or paint your nail with black polish and make the rose itself from rhinestones. It all depends on personal preferences and clothing range. And a colored matte manicure with a large abundance of small roses looks very beautiful. Then the nails are coated with the main color, and all at once, and not one by one, are dried in a UV lamp, this gives additional durability. The dryer allows you to seal the color for a long time.
When the varnish has dried, use the tip of a needle to make several dots on the nail with the colors you like and connect them to create the image of a rose.
Butterfly gel polish
Butterfly is a universal design, as it is suitable for both short and long nails. It looks most impressive on a classic French manicure or just white nails, when insect wings contrast with the background.
You can draw a butterfly yourself using a liner or a brush, or you can simply buy a sticker and attach it to your nail. This won't work with a rose. And this is an undeniable advantage of the butterfly.
If you still want to make a drawing yourself, then it should be applied to a good ready-made base. First, the outline of the insect is drawn, and then the wings and body of the butterfly are filled with color. If desired, the drawing can be left as a contour. But learning how to apply color inside the outline is a must.
Skull shellac
Sometimes you want to step away from something cute and decorate your nails with something like a skull. The application technology will differ little from the same butterfly; this is also an easy manicure, but the inside of the skull can be painted with shiny varnish or rhinestones. Looks impressive! But the manicure ideas don't end there.
Hieroglyph shellac
Hieroglyphs are the easiest to draw because they only use two colors. Usually choose black and white varnishes, but you can try a combination of black and red, blue and white, or yellow and green. But the most important thing here is not to miss the meaning of the symbol. Hieroglyphs are in fashion, but you shouldn’t wear meaningless lines or descriptions of public toilets on your hands, this is one of the mistakes beginners make when designing nails.
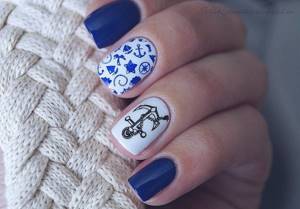
Pirate theme
Using gel polish, you can cover your nails with the profile of Jack Sparrow, the outline of his Black Pearl and the pirate's helm. Of course, such a design will take a lot of time, but the end result will be a stylish, unique design, and not a typical nail painting!
Shellac letters
You can also write your name on the manicure. Conveniently, if your name is Alexandra or Constance, you get one letter per finger. Others will have to come up with the arrangement of letters from the first and last names of relatives and children, but these are the subtleties of nail coating. In general, gel polish at home gives a huge flight of fancy if you remember the rules of application! The main mistakes in application: it is better to use the alphabet that has the most letters in the name. The Latin or Cyrillic alphabet is chosen according to your own preferences, otherwise you will want to quickly wash everything off later.
What is application?
This service can be found in all beauty salons, as well as from professionals working at home. Moreover, many women buy all the necessary tools to decorate their fingers themselves. We will definitely provide instructions for the step-by-step process, but for now let's figure out what it is - coating nails with gel polish.
This is the process of painting the nail plate with a product similar to traditional varnish products. But this option saves a lot of time. No more waiting for it to dry and being afraid of smearing the layer. The technology also allows you to grow your nails without any problems, as they are well protected.
Compound
The product has a fairly stable polymer structure. It also contains:
- photoinitiator - promotes drying under the influence of UV rays;
- film former - an ingredient that improves durability;
- thinner - determine lightness, density and texture;
- additives - strengthen nails;
- pigments are coloring elements.

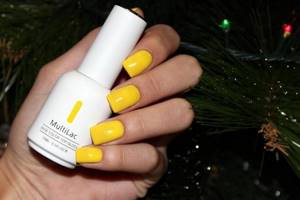
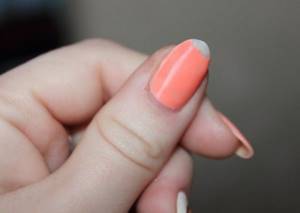
Shades
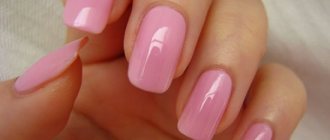
The color range of varnishes is very diverse. But according to fashion trends, preference is given to pastel colors, which make any girl’s hands incredibly feminine and delicate.
The so-called nude category is also in demand. These are powder and nude options. These include cream, pearl, peach, pink, etc.
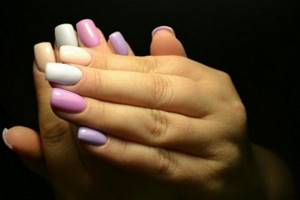
Among the rich colors, the priority is blue, chocolate, and turquoise. Many women have a matte manicure and a nail shape that is close to natural.
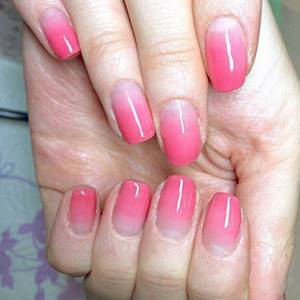
Ombre gel polish step by step at home
The gradient ombre manicure method looks simple in the pictures, but you shouldn’t start it as a self-taught person without practicing on other options, for example, roses. An ombre manicure is characterized by a smooth transition from bright and shiny to a matte pale shade of one color, but only a professional can accurately draw all stages of the coating.
And some more facts about shellac.
- Shellac is a resin secreted by certain insects in Asia. Then this resin is bought and used as a key component of gel polish. None of the mechanical devices make shellac.
- Gel polish promotes the growth of your natural nails; if desired, you can grow them under such a shell.
- Thanks to a special coating technology, shellac protects the plates from scratches and traumatic damage.
This product has a natural base, and therefore is harmless to the body and has nothing to do with destructive extended nails. With shellac, constant nail correction is not required.
How not to paint?
Gel polish is not an ordinary polish. It does not have a specific odor, which is so irritating to pregnant and nursing mothers. Proper drying is important for a quality manicure. If the initial layer has not dried completely, the second coat will turn out smeared and unsightly.
Another mistake that results in a poor-quality manicure is shaking the bottle. After such manipulations, bubbles appear and are safely transferred to the nail. The result is an uneven coating.
It is also important to properly prepare your nails for the procedure. Beginning craftswomen need to properly moisturize and move the cuticle, as well as polish and degrease the nail well. Otherwise, the coating will peel off within a week. If you do all the steps step by step, a beautiful manicure is guaranteed.
Photo examples
Types of gel nail coating
In the nail industry there is a wide range of materials and palettes. They allow you to perform manicures of any complexity. You can get high-quality results yourself if you know the features of working with different types of coating.
Types of gel materials:
- Gel polish . It has a durable coating, the correction of which should be done no more than 2 times a month. It is the best manicure option between simple varnish and extensions. To perform the procedure, a UV or LED lamp is required. As a result, the plate receives a long-term well-groomed appearance, strengthening and gloss. There is no need to file the material, the process is safer.
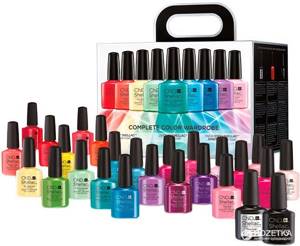
- Shellac . The concept was introduced by the CND company, creating the first gel polish. This took the salon experience to the next level. It has the same features as all other gel polishes.
- Acrylic coating . The use of acrylates involves modeling. I don’t use it for regular manicures or strengthening nails. The material allows you to correct the shape of the plate and make it visually narrower, increase the length or restore it if it breaks.
Necessary materials
When all the basic tools have been purchased, you should proceed to the purchase of materials. It is also important to consider different brands of manufacturers and read consumer reviews about the quality of materials. Next, we will tell you what materials are needed for a home manicure.
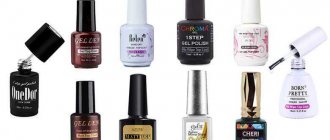
A set of colored gel polishes and glitter, including white, black and nude . You can consider domestic manufacturers of manicure products RuNail or Aurelia, but there is already a strong recommended list of inexpensive and high-quality gel polishes. These include: Kodi Professional, Laque RuNail, Pnb (Professional Nail Boutique), Canni, Bluesky, Nogtika and Red Carpet Manicure.
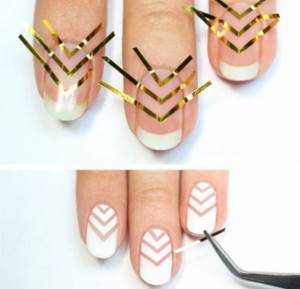
Scotch tape for creating geometric shapes and French tape, stamps, stencils, sparkles, rhinestones, etc. You will also need a set of brushes with natural bristles of various diameters for applying designs and attaching rhinestones.
A degreaser or dehydrator is needed to pre-treat nails and to remove the sticky layer after drying.
Primer is a product used to treat the nail plate to remove natural oils and dirt to improve adhesion. It softens the horn particles and the base coat adheres better. They are divided into acidic and non-acidic.
Base is a layer for leveling the nail plate. It is divided into regular, rubber (used for severe defects of the nail plate) and vitamin (for dry and brittle nails).

Remover is used to soften and remove cuticles and dead skin cells.
Finish coat (top coat) - applied as the final and fixing layer of manicure after all manipulations are completed.
Cuticle oil is necessary to protect the skin around the nail plate. It is applied after completing the manicure. Can be replaced with any other nourishing oils; A special softening liquid for removing gel polish and foil will also come in handy.
Main mistakes
You need to know that when preparing nails, the most important mistakes that affect the quality of the coating and the wear time of the gel polish. They are as follows:
- Not completely removed old coating prevents the new coating from lying flat;
- Formation of bubbles in the base layer due to poorly removed cuticle. Because of this, the new coating at the base will crack and peel off;
- Improper polishing with a buff can create a smooth nail plate instead of a rough surface that helps the polish adhere. Gel polish will not stick to a smooth surface;
- Gel polish will flake off or chip if the nail plate is poorly degreased or the primer application step is skipped;
- Sometimes nails suffer from overdrying due to the use of incorrectly selected treatment products before applying gel polish. On such nails it will immediately crack;
- If the nail plate is thin and bends strongly, either length correction or preliminary strengthening of the nail is required, otherwise chips and cracks cannot be avoided;
- If you hold your fingers at an angle while drying, polymerized sagging may appear;
- You cannot apply the coating in a layer that is too thick; it will not dry out, but instead, sagging and other defects will appear;
- Problems with the coating may also arise if the materials are not of the proper quality;
- If you do not seal each of the applied layers, peeling is inevitable.