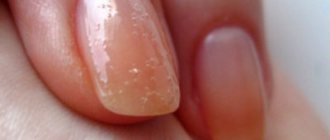
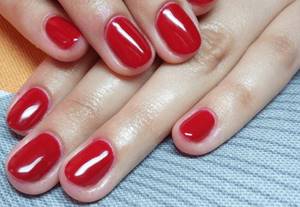
Hello, dear readers! Has it ever happened to you that you wanted to get a beautiful manicure, exactly like the one in the picture from the Internet? But what happened was an ugly coating, riddled with air bubbles? This can happen to anyone. Today I have prepared valuable information for you. You will learn why nail polish bubbles and how to avoid it. I will also share with you the secrets of professionals.
Application errors
Carefully read the instructions for each product and follow these rules.
Most often, defects appear if the reagents are handled incorrectly during application. One reason is to shake the bottle before applying. Some carry out this procedure by analogy with regular varnish. This disrupts the uniform consistency and introduces air bubbles into the liquid, which appear after drying.
It is correct to hold the bottle in a warm place or in your hands until the composition becomes uniform.
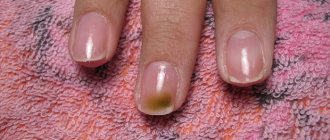
Pay special attention to degreasing the nail plates, since cream residues and other components interfere with uniform coverage of the base. When it dries, such places will swell
The base must be of high quality, because it is what protects your nails from the effects of harmful components in varnishes.
Any master knows that two layers of coloring varnish are enough to achieve color saturation. Some girls believe that the more layers, the better. This is not entirely true. It is known that the faster the coating dries, the longer it will last. The multi-layer design looks rough and has a good chance of becoming covered with bubbles during final drying or falling off in the first week of wearing.
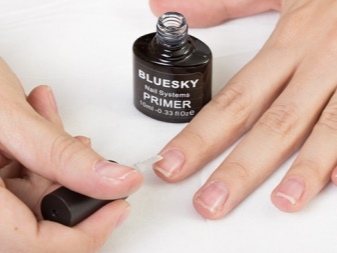
You risk ruining your manicure during application if there are droplets of moisture on the nail plates. To avoid such misunderstandings, it is worth using a special substance - a primer, which reliably degreases the surface. Make sure that all active ingredients are in closed packages, because a small drop of water is enough and the varnish will be damaged.
You should not apply gel polish to your nails immediately after a shower, bath, sauna or swimming pool. Nail plates absorb a lot of water, which even primer cannot displace. This gel will not last long and will swell in the first week.
To perform the job efficiently and achieve a decent final result, it is worth using a base, varnish, primer and other components from the same manufacturer. Products from different manufacturers may be incompatible with each other. You should not purchase cheap copies; their quality is questionable and can lead to breakage.
Store all components correctly. The jars should not be exposed to direct sunlight, the room should be cool.
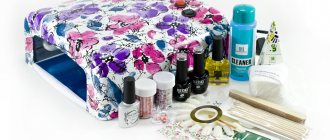
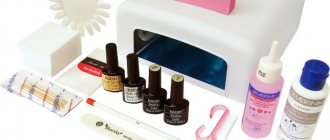
How to choose the right materials for foam design
- Selecting a top
.
The top used in this manicure should not be very thick, otherwise the design will turn out to be in the form of huge lunar craters, which are not comfortable to wear and tend to cling to everything. A top of medium consistency or liquid is better, but do not forget to apply the finish in a very thin layer. If you go too far with the thickness of the top layer, the resulting rough edges from drying the foam in the lamp will cause discomfort in life;
- Choosing color gel polish
.
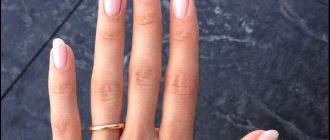
When choosing a color base, it is better to choose single-layer coatings, since the design ends up being multi-layered. The lighter the final look, the more comfortable and pleasant it is to wear;
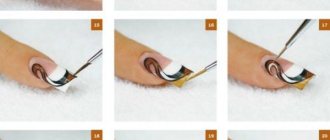
- Selecting foam bubble size
.
To obtain a pattern with small cells (bubbles), the foam base, diluted in water, must be shaken for a long time and vigorously until small, dense bubbles form.
If you shake lightly and briefly, large air bubbles will form. The most stable and uniform bubbles are obtained if they are diluted from water and ordinary ready-made soap bubbles. Photo by: @macanailart/Photo by: @maniilandia
How to deal with a dried-on lid
Due to the contact of varnish or gel on the neck, the cap is firmly glued to the bottle. There are several ways to solve this problem.
Soaking in water
If the options for opening the bottle do not produce results, soaking the nail polish in a high-temperature liquid will help open the nail polish:
- Pour hot water into a shallow container.
- Place the bottle cap down in the water.
- Leave for 5 minutes and remove the bottle from the water. Now the bottle will quickly unscrew.
Only the plastic part is placed in water, because upon contact with heat, the structure of the product changes, becomes sticky, and delaminates.
Dried particles of a cosmetic product under the lid soften using a simple method:
- Place the top of the bottle under running hot water (the higher the temperature, the better).
- The bubble should be rotated slowly.
- The procedure takes from 30 seconds to 2 minutes depending on the water temperature.
- Dry the lid from moisture so that it does not slip.
- Under the influence of water, the material of the cap expands, the dried particles soften, try to unscrew the jar.
Important! Part of the bottle with dye must be protected from the stream so as not to spoil the contents
Available means
Increasing the grip force will help unscrew the bubble. To increase retention, an ordinary elastic band is used.
If you don’t have it on hand, use tape or a fabric bandage. Take adhesive materials with a minimum width of 1 cm.
A rubber band is placed on the cap of the bottle. It will take more than 3 coats to eliminate slippage. This will help grip the cap and make it easier to turn.
Application of tools
None of the methods helped to unscrew the bubble? Use physical strength
The most powerful life hack if the cap is dry is to use special tools, but with caution, because there is a risk of stripping the thread and damaging the bottle
Algorithm of actions:
Wrap the cap in cloth. Take pliers and grab the lid tightly. Turn the pliers carefully before the first movement so that the contents do not leak out. You can rotate the jar.. Instead of pliers, use any metal tool with a clamp - pliers, tongs, wire cutters
Instead of pliers, use any metal tool with a clamp - pliers, tongs, wire cutters.
You need to act carefully, without damaging the jar and preventing the contents from spilling.
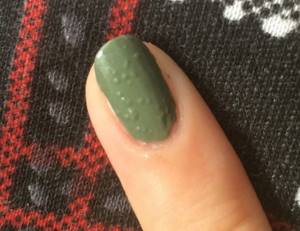
What else could be the cause of the bubbling?
- Bubbles may appear on old varnish.
It is better to get rid of thickened products immediately. Firstly, applying them requires more time and effort. Secondly, on the nail plate they look much rougher and unkempt. Thirdly, such cosmetics take much longer to dry and often smear.
- If a girl has varnish and a base for it from different manufacturers in her arsenal, then before using them you should consult a specialist.
The thing is that often cosmetic products from different companies react with each other. This can lead to such an unpleasant situation as the appearance of air bubbles on a fresh layer of varnish.
- Another reason may be excess moisture in the nails.
Almost everyone knows that the skin tends to absorb moisture, but only a few are aware that after a while they give back the excess. Nails are no exception. It is excess moisture that causes bubbles to appear on the varnish. Therefore, before you start painting, you need to very carefully dry not only your hands, but also your nails.
Another reason for bubbling nail polish is an uneven nail surface. A spoiled manicure can be easily avoided if you treat the nail plate with a special nail file before starting the procedure. Then the nail will become smooth and the varnish will lie in an even layer.
When painting their nails, some girls are not very careful and abruptly lower the brush into a jar of varnish. Very often this is what causes air to appear in a cosmetic product.
Therefore, you need to be extremely careful and patient. This is the only way to achieve a beautiful manicure
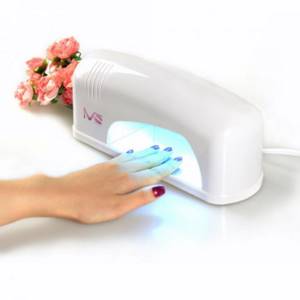
It should be noted that sometimes air bubbles appear due to the fact that many girls from childhood are accustomed to drying their nails by waving their hands in different directions. This is a very big mistake. Also, do not try to dry your nail plates with a hairdryer. After this procedure, 100% of any defects will appear on the varnish. If you don’t have the patience to wait for your nails to dry, then it’s better to purchase a special nail dryer. This type of drying is inexpensive, but the effect after it is simply amazing. Currently, there are dryers that can help cope with even the bubbles that have arisen.
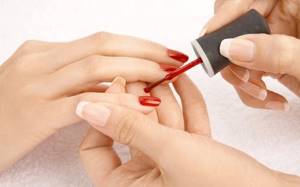
It is very important to apply the varnish correctly. Some, despite extensive experience, carry out this procedure incorrectly.
First you need to take the required amount of cosmetic product onto the brush. Excess varnish must be removed using the neck of the jar. It is necessary to move the brush parallel to the nail, while simultaneously pressing on it. During pressure, air escapes, which has a very positive effect on the quality of the manicure.
The consistency of the varnish is also of great importance. Experts warn that cream cosmetics are much more likely to develop air bubbles. This can be explained very simply - such varnishes have a thicker texture.
To prevent the product from bubbling, it should be applied very carefully. This requires patience and skill.
For beginners, it is better to start with metallic, pearlescent or jelly varnishes. All of these products have a more liquid consistency. In addition, they lay down easier and dry faster.
What to do
In order to prevent the formation of a bumpy surface on the nail, it is necessary to eliminate all the reasons mentioned above. Here are brief recommendations from experts:
- Choose only a trusted gel polish company. Also, if possible, use the base and coloring agent from the same manufacturer.
- Monitor the expiration date of the varnish and its proper storage.
- Before opening the bottle, roll the bottle between your palms.
- 2-3 hours before a manicure, do not apply cream or oils to your hands.
- Be sure to degrease the nail plate before the procedure. You can do this using a dehydrator or other special means (for example, a primer). It is allowed to use alcohol or nail polish remover (but no oils!).
- After applying the coloring pigment, do not rush to dry your nails with a hairdryer.
If you strictly follow the instructions, the likelihood of a lumpy manicure is minimized.
Little tricks
Have bubbles appeared despite expert advice? Is there very little time for a new coating? Do not despair! You can resort to some helpers. The following tricks will help correct bubbles on the nail plate:
- Nail decoration. Rhinestones, stickers, kamifubuki, and coarse (“sugar”) rubbing can veil unevenness. They will not only hide defects, but also add zest to your manicure.
- 3D drawing. If you are skilled in artistic painting, you can easily recreate a beautiful image on the nail surface.
- Special corrector. This substance is intended to eliminate defects in the top layer of coating. It dissolves the last layer and gives a chance to level the nail plate.
As you probably already understood, the first method will be the easiest and most accessible in eliminating air bubbles. With its help, even a beginner can cope with this small problem.
Secrets of the professionals
In order to achieve perfect coverage, you need to properly prepare for applying gel polish. Nail service experts give the following advice:
- A dry nail plate is the key to a successful manicure. Before you get serious about the beauty of your nails (about 3-4 hours in advance), exclude any water treatments: baths, saunas, baths, etc. The surface of the nail absorbs moisture well, but it takes a very long time to evaporate from there. Tiny droplets of water can cause lumpy spots.
- Degrease the nail well. Don't forget to use a dehydrator, degreaser, or primer (any one of these). Carefully treat the surface with this substance, preferably two or three times.
- Sand the nail plate using a buff. This manipulation will ensure good adhesion of the nail to the varnish.
- Level the surface with gel. This step is not required, but recommended. This way you are guaranteed to prevent the appearance of air bubbles after drying the nail.
- Apply thin layers of varnish to the surface (the best option is 2 layers). They dry faster. Distribute the polish from the base of the nail to the tip. Press the brush firmly onto the nail plate.
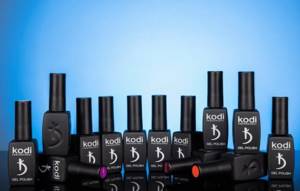
- Choose only proven brands of gel polish. These primarily include Kodi, Luxio, CND, Bluesky.
- Store your manicure products correctly. The bottles should not be exposed to sunlight; coolness and not very high humidity are also important for their storage.
Attention! If bubbles become noticeable after applying colored varnish, the easiest way is to pierce them with a thin needle. And the resulting unevenness can be smoothed out with one layer of transparent topcoat.
Secrets of a perfectly smooth manicure
The mistakes have been worked out, and now a little about how to prepare for applying nail polish so that the layer dries perfectly even.
- Nails must be completely dry. The porous structure of the nail absorbs water very well, but it takes much longer to evaporate. Therefore, there should be no long-term water procedures before a manicure: small droplets of water remain under the varnish and form bubbles.
You can’t neglect preparing the nail plate for a manicure.
Degreased nail plate. The varnish fits well only on a clean nail, without any microparticles on it.
Applying cuticle oil and hand cream is useful, but before manicure, be sure to wipe the nail plate with a special degreaser, nail polish remover, or just alcohol.
Grind the nail plate with special files. The lumpy surface of the nail itself looks unsightly, and if coated with varnish it can cause bubbles to appear.
Gently buff with the soft side of the buffer until the nail is smooth and shiny.
- Apply base varnish. The so-called “foundation” for a colored coating on nails will not only protect against air formations, but will also preserve the manicure longer.
- Wait until each layer, including the base, is completely dry. Even to the point of painting your nails in several passes, starting in the evening of the previous day. Moreover, there is no need to dry them with a hairdryer, running water or an artificially created draft. If you need to speed up the drying process of each layer, use a special dryer.
The varnish must be applied in thin layers
Apply thin layers, no more than three on each nail. To make the layer as thin as possible, remove any excess varnish from the brush. And, pressing the brush well against the nail surface, move it from the base of the nail to the tip. A thin layer also dries much faster. For a single-color manicure, use only one bottle of polish. If you have already applied a certain brand of varnish to your nail, you should not cover it with another brand of varnish; the effect may be completely unexpected and the formation of bubbles is the most harmless thing. Before using the brush, do not rinse it with running water or leave it outside the bottle.
If bubbles are already visible when applying color, then it is enough to pierce them with a needle and smooth out the resulting unevenness with a thin layer of transparent coating.
So, varnish can bubble for several reasons: improper storage or application of varnish and neglect of careful preparation for coating with a colored layer. This can be avoided by completely cleaning and leveling the nail plate, preventing air from entering the bottle and checking the expiration date on all jars.
Bubbles due to improper manicure technique
Modern manicure is technological: nails are processed step by step in strict sequence. Then why do bubbles appear when applying gel polish ? Problems must be looked for in manicure technology.
Coating Errors
Before coating, the nail is sanded with a buffer, filed, then treated with a degreaser and dehydrates. The entire manicure depends on the pre-treatment of the surface.
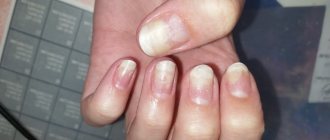
- Poor preparation of the nail plate. If the nail is poorly polished, unevenness and bumps will form. Air gets in here, and the gel polish bubbles when applied . Areas with residual fat or moisture prevent uniform adhesion of the plate to the gel and swell over time.
- Soaking nails before manicure. As you know, the stratum corneum absorbs water well. If your nails have been in water for a long time, they will swell. Even a primer cannot completely correct the situation. Before a manicure, postpone washing, cleaning, hand baths, as well as showering and going to the pool.
- Thick layer of gel. To obtain a glossy surface and rich color, two layers of coating are sufficient. Many ladies are not sure about this, so they spend 3-4 applications. In this case, the lower layers do not have time to dry and begin to swell. This is why nail polish bubbles after application .
- The pressure with the brush and the direction of the strokes matter. Air bubbles are formed due to the loose fit of the bristles during application. The brush should be held almost parallel to the plate, strokes should be made with smooth movements from the base of the nail to its tip. There is no need to dip the brush brush into the solution too much. Excess will get on the skin and open the way for air.
- Shake the gel bottle before application. Such manipulations disrupt the uniform consistency of the product. As soon as the bottle is opened, air and moisture enter. As a result, the gel polish bubbles after drying , and you frantically think about what to do with it.
In fact, improper drying of gel nails itself can lead to the formation of air bubbles.
Poor quality materials
This is the first thing the master thinks about when he notices that the gel polish is swollen. Why do manicure materials have different prices? Because they are of different quality. You should not expect that the budget series will not differ in application and wear from the luxury series.
Experts say that cheap gel polishes, especially from Asia, are the first step towards ruined nail health. They can cause allergies and even more serious conditions, such as onycholysis. Working with them is extremely inconvenient: the material “runs off the end”, streaks, and wrinkles when dried. Bubbles are common with low quality materials.
Here, experienced nail experts give their young colleagues only one piece of advice: it is better to purchase 2-3 high-quality products than 10 cheap ones. Don’t chase a low price, otherwise you won’t really learn anything and ruin your nails. Pay attention to reviews. And if you want to save money, monitor sales and catch promotions that are often offered by reputable stores with quality products.
Causes
There are several reasons why any, even the most expensive and branded, varnish can bubble:
- Shake the bottle vertically. When the bottle is shaken before applying varnish, air inevitably forms in it, which then causes bubbles on the surface of the nail. This does not always happen during application. Sometimes bubbles appear already during drying.
- Moisture. If water accidentally gets into the bottle, it can cause bubbles to appear on it after applying the varnish.
- Old varnish. It is advisable to dispose of a bottle that has been left unused for a long time. Firstly, the varnish has already lost its original properties. Secondly, it no longer has the desired consistency, which leads to the appearance of bubbles and unevenness on the surface of the nail when applied.
- Oily nail plate. The basis of any long-lasting and high-quality manicure is well-degreased nails. If you do not prepare and remove excess fat, there is a risk that the varnish will not only adhere poorly, but will also bubble during drying.
- Excessive moisture in nails. Before applying varnish, not only your hands, but also your nails must be thoroughly dried. The skin has the ability to absorb moisture, and after a while give the excess back. The same thing happens with nails. Excess moisture causes bubbles to appear on your manicure.
- Too many layers. An ideal manicure includes several stages: base, base color (one or two layers), top coat (finish). If there are more base layers and they are poorly dried, then the appearance of bubbles on the varnish is inevitable.
To degrease or not
The varnish will lie evenly only on a carefully prepared nail plate. It should be clean, smooth, well dried and free of grease. Otherwise, bubbles are very likely to appear. To remove excess fat, special compounds are suitable, as well as nail polish remover or ethanol (regular alcohol). Drying painted nails with a hairdryer or waving your hands is not an option
Varnish in the process of hardening is a dense substance. If you want to dry it faster and start actively waving your hands or pointing a hairdryer at them, an intense air flow will form. It may partially get into the varnish layer, mix with it and lead to the formation of bubbles.
How to solve a problem?
If defects appear, and there is sorely not enough time to redo everything, you can resort to some tricks.
- The most affordable way is to decorate your nails with special stickers, rhinestones, beads or other similar accessories. They will add zest and hide small flaws. A 3D applique in the form of flowers or butterflies will look impressive, depending on the original color.
- It will be more difficult to apply a relief pattern, which will help disguise problem areas.
- You can use special products that eliminate bubbles without removing all the varnish. Their operating principle is based on dissolving the upper damaged layer and leveling the subsequent lower ones. Such correctors can be purchased in specialized stores, following the advice of sales consultants.
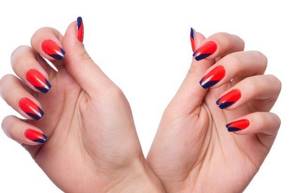
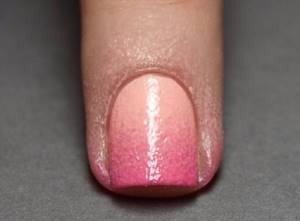
Gradient effect in nail design with bubbles
Gradient foam manicure with rubbing
A color transition or color stretching is always an interesting and unusual technique in nail art, which masters quite often resort to when creating a newfangled nail design with foam using the Bubbles technique. The same rubbing, or rather the use of several of its shades, will allow you to achieve a super cool gradient, creating a beautiful color transition on the nails, finally complementing them with a foam relief design. Looks solemn and stunning!
Reasons why nail polish bubbles
There are several reasons why nail polish will bubble on your nails. Let's highlight the main types: low-quality product, technical errors and polymerization time. On forums where girls discuss the main problems of working with gel polish, there is more and more talk that the formation of bubbles is influenced by the method of application. Indeed, if we look at the problem from this angle, we can identify several mistakes that beginners make when painting their nails.
Application errors
Lady magazine decided to independently study the question of why nail polish swells. After conducting several experiments, we realized that the first mistake was to stir up the substance in the vial.
Accordingly, after the material has been loosened incorrectly, the varnish begins to bubble. The next step is to apply a generous amount of varnish to the brush. This problem occurs with bright pigment, as a result of which bubbles appear on the brush.
Some girls make a mistake when dyeing. Application is accompanied by patting manipulations. They do this with sharp and jerky movements.
Main mistakes:
- Do not shake the bottle, use rolling the bottle in your palms to mix.
- Don't add too much material. Smearing a large amount of varnish causes the polymer to bubble.
- Do not slam the brush onto the plate; cover the nails smoothly, stretching the material from the root to the end.
Another reason why nail polish bubbles on the plate is when you paint your nails in several layers. The most common mistake is that a girl, when painting her nails, does not allow a certain amount of time for the first layer to dry.
Poor quality materials
A low-quality product is a fairly common problem, one might say, the scourge of our time. Even an experienced specialist can buy a fake, because he can also be deceived in a specialized store. However, in this paragraph I would like to talk about proper storage, and explain how the viscous consistency behaves and why it bubbles.
Even simple varnishes have two and three-phase systems. Manufacturers produce a base coat and recommend the comprehensive use of a top with a thick texture as a top layer, which promises to level the plate. However, in fact, the situation turns out to be completely different. The varnish lays unevenly on the nail, bubbles, and tubercles form.
Even the colored layer applied to the nail swells from finishing varnishes. Bubbling in the side areas. They often accumulate in places where there are ribbed stripes or other defects.
Poor quality composition occurs in different varnishes. Especially when the expiration date approaches and the material slowly begins to change consistency. The varnish bubbles in the bottle when it is diluted with acetone
If you paid attention, when you purchased the product, it has a very liquid texture. After six months, the substance in the bottle may change color slightly, become thick, and begin to bubble when applied
Don't rush to throw away gel polish. Take the bottle and try to warm it in your palms. Gently open the varnish and spread the material over the plate. If the movements are smooth, the shellac will not bubble.
Improper drying
Let's look at the next reason why nail polish bubbles after drying. If we talk about ordinary decorative products, they bubble if you apply a layer without waiting for the previous one to dry.
Well-pigmented products require two or even three layers of paint. Each subsequent layer begins to shrink a little from the previous one, tubercles and bubbles appear.
In order to eliminate such a defect, it will be necessary to completely repaint the nails, and to avoid such formations, you should wait until the previous layer dries.
Bubble Formation
Roughness forms during and after application if you vigorously shake the bottle with the product. This is done to thoroughly mix the liquid, even out its structure and color.
After intensive mixing, leave the varnish alone for 1-2 minutes, then begin the procedure.
Without proper preparation of the nail for painting, the coating may swell, so first the nails are degreased with a special liquid and polished with a fine-grained file. After such manipulations, the base fits perfectly on the nail.
If you wash your hands shortly before the procedure, moisture remains on the stratum corneum, and when applying layers, it does not allow the product to lie flat. It is necessary to dry your hands well shortly before applying the product .
The quality of the coating is also affected by the structure of the nail (unevenness, roughness, porosity).
The stratum corneum is deformed under the influence of the following factors:
- Hand and skin diseases (fungal diseases).
- Vitamin deficiency, deterioration of the skin and nail plate.
- Using aggressive detergents without gloves.
Under the influence of any chemical components, the nail becomes thinner, brittle and porous. The varnish coating is poorly applied and adheres to it, and bubbles appear after drying.
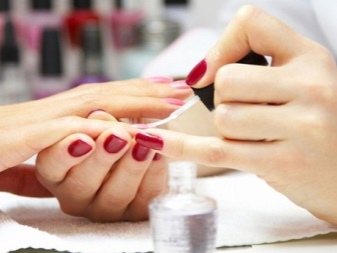
Coloring instructions
In order for the manicure to turn out beautiful, last a long time on the nails and have no flaws, it is necessary to perform it in a certain sequence.
In order not to be distracted during the work process by searching for the right tool, you should prepare everything you need in advance. Find a bowl that is the right size for your hands and fill it with warm water. You will also need a base for the varnish, the coating itself, a varnish fixer, cuticle tweezers, a file and a special degreaser for the nail plate.
Place your hands in a bowl of water one at a time for 7-10 minutes. Then the edges of the nails are carefully filed and given the desired shape. Using special tweezers, the cuticle near their base is removed. It is necessary to let the nails dry completely and only then degrease them. As such a special product, you can also use ordinary nail polish remover, the main thing is that the composition does not contain acetone.
After all the preparatory work is completed, you can begin the actual painting. To do this, take a colorless base and apply a thin layer, pressing the brush tightly to the nail plate, and let it dry completely. You can apply the varnish of the chosen shade only after the base has completely dried.
Select the varnish of the required shade and apply its first coat. It must be used in the same way as a base, that is, applied in small quantities and in a thin layer. Pressing the brush tightly against the nail allows you to get rid of bubbles and prevent further delamination of the coating. After the first coat of color has completely dried, you can apply another coat of varnish on top if necessary.
Particular attention should be paid to ensure that the coating is uniform and completely covers the nail bed, but does not touch the skin around it.
The final step is to coat the nails with a special fixative, although you can use regular colorless varnish or a base for it. This will enhance the color of the polish itself and increase its lifespan on the nails.
Each product has its own time for complete drying, on average it is about half an hour. But manicurists strongly recommend not to make sudden movements and avoid contact with water for at least an hour after completing this procedure. It is best to let the coating dry on its own, but if time is running out, you can use special sprays that speed up the drying process of the nail polish.

Pros and cons of Bubble manicure
Bubble Nails nail designs are simple and very elegant. Let's list its main advantages:
- speed of execution: no longer requires hours of painstaking work; it will take a couple of minutes to create such nail art;
- 3- or 4-dimensional solutions, as well as acrylic grains, can be replaced with regular gel polish;
- foam manicure goes well with gradient coating, foil finish, cat eye and other techniques;
- even the most modest “office” furniture in nude tones will look original upon closer examination;
- The bubble technique makes it easy to implement many ideas, and the manicure will be new and different from the previous one every time;
- looks great on nails of any length;
- If the instructions are carefully followed, the bubbles will become smooth and will not stick to clothing.
Soap manicure has several disadvantages:
- Despite the simplicity of the technique, it should be strictly followed; if you skip one of the phases, “spikes” may appear on your nails;
- you will need to apply several layers of gel polish;
- To prevent the bubbles from bursting prematurely, you will need to dry your nails one at a time.
How to preserve varnish for a long time
- Choose high-quality and durable varnishes. However, you should not rely only on the corresponding product characteristics from manufacturers. Marketers' promises will not always correspond to reality, so test varnishes for durability experimentally.
- Don't skimp on manicure materials. Of course, expensive varnish will not always be good, and cheap varnish will not always be bad. But in general, there is a dependence between quality and durability on the price of the product.
- Be sure to use a base and top coat. After 2-3 days after the first application, the top can be renewed - just add another thin layer.
- Apply colored varnish in no more than 2-3 layers and pause between them. The optimal result will be achieved if you don’t just let the previous portion of dye dry, but wait at least 10 minutes before applying the next one.
- Forget about quick-drying varnishes. The high speed of their hardening is due to the large amount of solvent in the composition. And its high concentration affects the durability of the varnish in an extremely negative way. It's better to wait a few extra minutes for your manicure to dry than to have to change it twice as often.
- To protect your nails in the bathroom or while cleaning, apply a thick cream or oil to the nail polish. They form a greasy film over the nails, which will protect the polish from chipping and peeling when your hands are in water for a long time.
- Follow the recommended application technology, which is specified in the instructions. Even if you change something as small as drying time, the result may be that the coating will not last.
- After applying the varnish, do not rush to switch to other tasks. If you want to immediately wash the dishes, go to the sauna or pool, or simply put stress on the coating while doing various things around the house, then be prepared for the fact that your nails will not retain the same attractiveness.
- Do not try to correct errors manually. For example, if you notice that there is a peel somewhere on the coating, you should not try to pick it off. This can cause damage to the nail plate. It is better to add a layer of clear polish or repaint the nail.
- Do not use hand cream or oil before painting your nails. Otherwise, the coating will be applied worse and will not last as well.
Delicate nail design using Bubbles technique
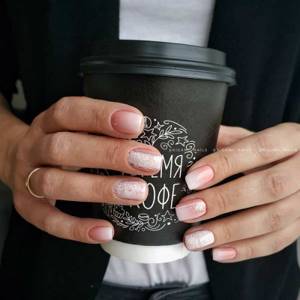
The most delicate foam manicure with a gradient and sparkles.
Romantic girls will be able to create on their hands a beautiful and delicate bubble manicure with foam in a light and pleasant shade of pale blue, pink, cream, beige, or a shade of powder. A French ombre manicure with foam will be especially elegant, which looks incomparable.
New and fresh nail design using the Bubbles technique - foam manicure 2022-2023! Look at the photo examples for the best manicure ideas with foam and choose your new nail design in the style of Bubbles Nails
Photo source: Instagram
What to do if the varnish starts to bubble?
So, we figured out the reasons. But what should you do if you've painted your nails and the polish starts to bubble? The only option is to wash off such coating and apply a new one. It is possible that during application you missed one of the aspects and when repeated, the manicure will be flawless. For example, you may not have dried and degreased your nails well enough or applied too many layers.
But there is an alternative option, it is good if you do not have time to renew the coating or have run out of varnish. Then stickers will save the situation - they can always be fixed exactly in those places where the varnish bubbles too intensely. If you don’t have such stickers on hand, then using a composition of a contrasting color you can depict a design, for example, chaotic abstract patterns with a wooden toothpick or a thin brush.
Preventive action
To ensure that your nails always look perfect and there are no problems with the varnish coating blistering, do not forget:
- keep the neck of the bottle clean after working with varnish;
- do not shake the tube, warm it between your palms;
- do not store the varnish in places exposed to sunlight, put the tubes in a dark and cool place;
- choose brands from trusted manufacturers and monitor the expiration date of products;
- If you have a varnish that has not expired, but it has been sitting for quite a long time without use, discard it. Better buy a new, fresh bottle;
- when performing a manicure, use products from the same manufacturer;
- apply the varnish, pressing the brush tightly against the nail plate, in several thin layers;
- degrease and dry nails well before the procedure;
- use a fixative.
If you listen to the recommendations of the article, then you are guaranteed a perfect manicure!
Opening a new varnish
If the bottle has not been opened before, and attempts to unscrew the cap ended in failure, it is recommended to take the following steps:
- Make sure that all protective and decorative covers have been removed from the bottle. Hold the cap with two fingers and pull upward with force.
- If the top is difficult to grip and your fingers slip off the surface, you need to tighten your grip. Wrap the lid in a towel or wear rubber gloves. Turn the cap firmly counterclockwise and try to unscrew it.
If the methods are unsuccessful, try methods for opening a dried-on lid. Most likely, the difficulties arose due to improper storage.
Why does the varnish bubble?
When you give yourself a manicure, you may encounter a situation where your nail polish suddenly becomes quite lumpy and rough to the touch. Incorrectly diluted varnish is not the only prerequisite for the formation of small balls of air. Such troubles are possible for many reasons:
Shake the bottle of varnish vigorously. When trying to stir it, girls usually overdo it, and the coating itself begins to become saturated with air bubbles.
The layers of varnish applied are too thick. After covering the first layer of varnish, you should leave it for a certain time, then apply the next one.
The plate on the nails is greasy. Before doing a manicure, it is necessary to carry out a set of cleansing procedures
Pay special attention to degreasing your nails for better adhesion of the varnish to the surface of the nail plate.
Formation of water in bubbles. Water may accidentally get into the bottle, so we give you a recommendation: you should not do a manicure immediately after taking a bath or shower.
Inconsistency of varnish coating. To paint your nails without any problems, you should choose the composition of the varnish from one company.
Incorrect drying. If you are trying to dry the polish faster, you don’t need to wave your hands, like many girls who just have a habit, this can damage your manicure. Do not dry your nails with a hairdryer; the coating may begin to bubble.
Not very smooth nail plate. Before applying varnish, you should sand your nails.
Ingredients of poor quality. The presence of small air bubbles may occur as a result of a manufacturing defect.
The expiration date has expired. After a certain period, varnishes begin to thicken, which can lead to bubbles and a smeared coating.
Feature of a certain brand. In this case, you will only have to adapt or change the company.
After drying
It happens that the coating procedure is not accompanied by the appearance of bubbles, but they form during drying. This article will tell you whether it is possible to anoint your hair with sunflower oil.
What is the reason for this and why does nail polish bubble after drying:
- Exposure to water and household chemicals. Shortly after the manicure there was contact with cold water and cleaning products. Hand washing and wet cleaning are prohibited for 1 hour after the varnish has completely dried. Otherwise, the manicure will be ruined.
- Exposure to hot air. A strong stream of hot air (for example, when using a hairdryer) can penetrate into under-dried deep layers, thereby causing blistering.
A proven remedy for shine and healthy curls is fir oil for hair.
To avoid troubles with manicure, you need to use base and varnish from the same line of cosmetics, or (at a minimum) purchase products from the same manufacturer.